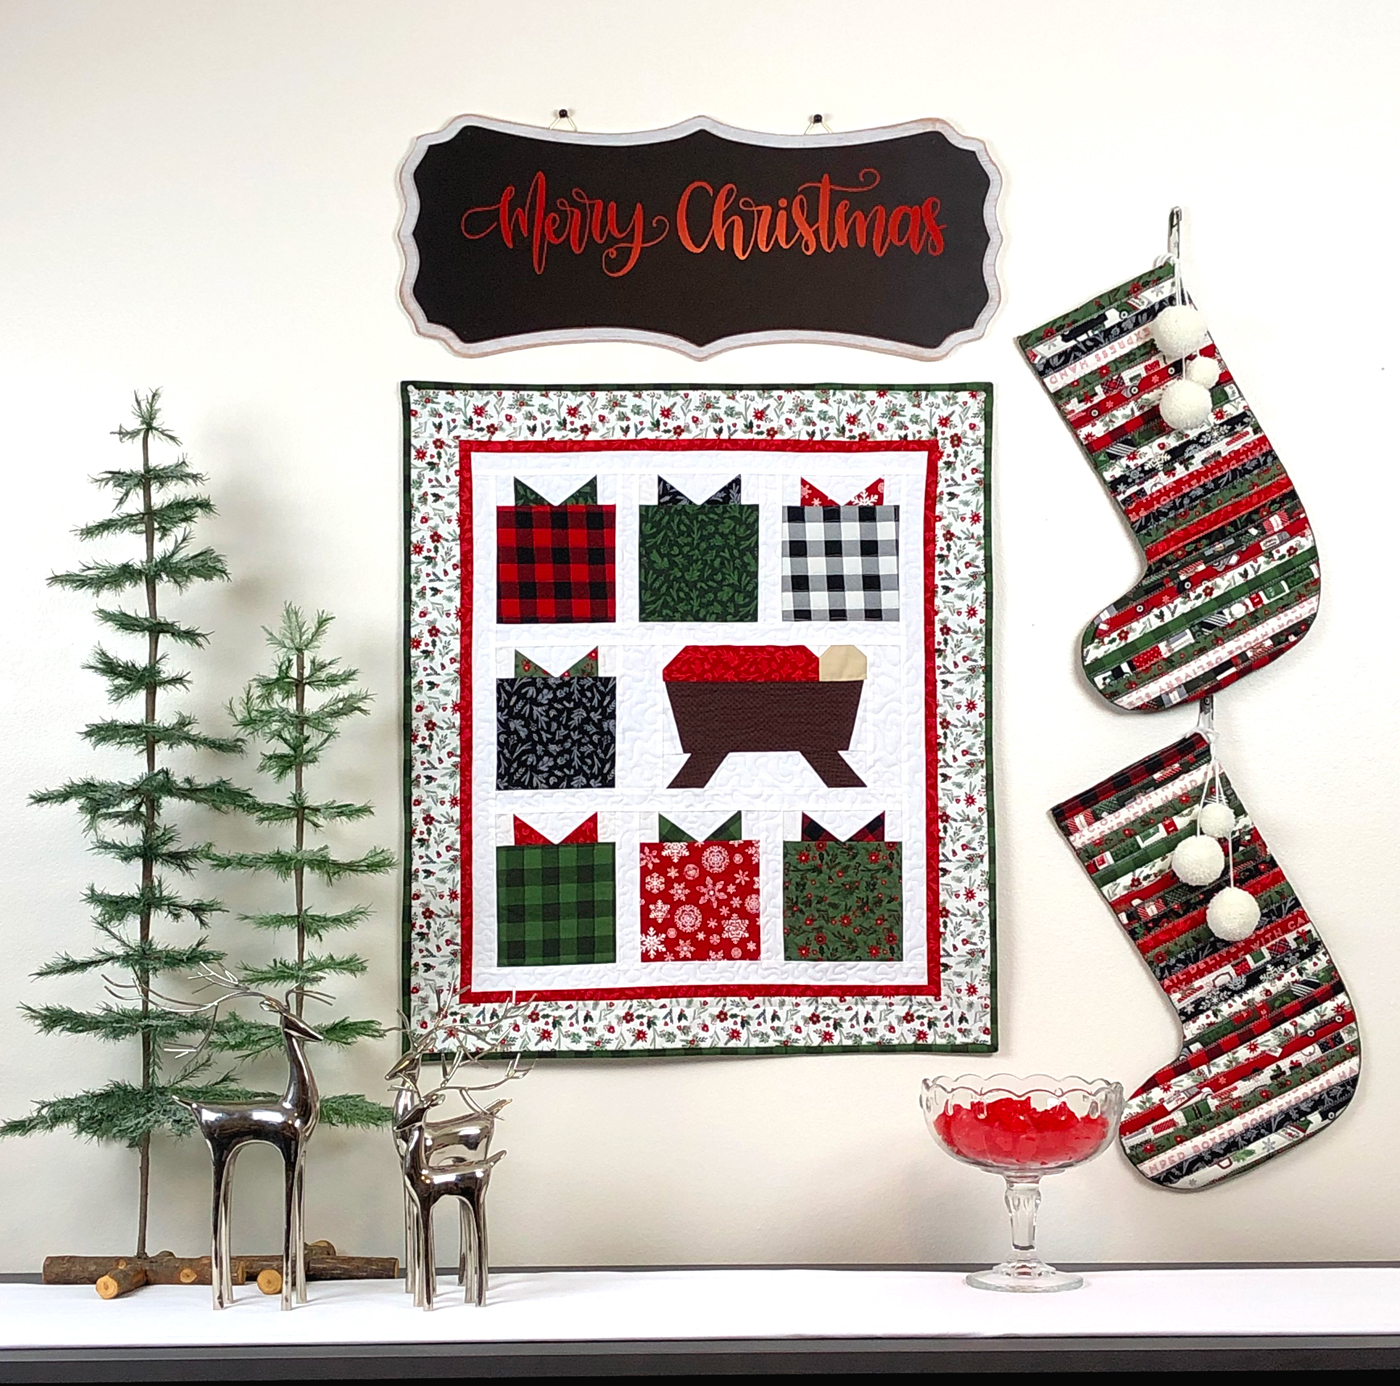
These Jelly Roll Stockings are so gorgeous and fun! They will surely become heirlooms in your family! This free tutorial shows you how to put them together. Once you start, they actually come together pretty quickly!

This post is sponsored by Nancy’s Notions. The project and tutorial is my own.
Let’s get sewing!
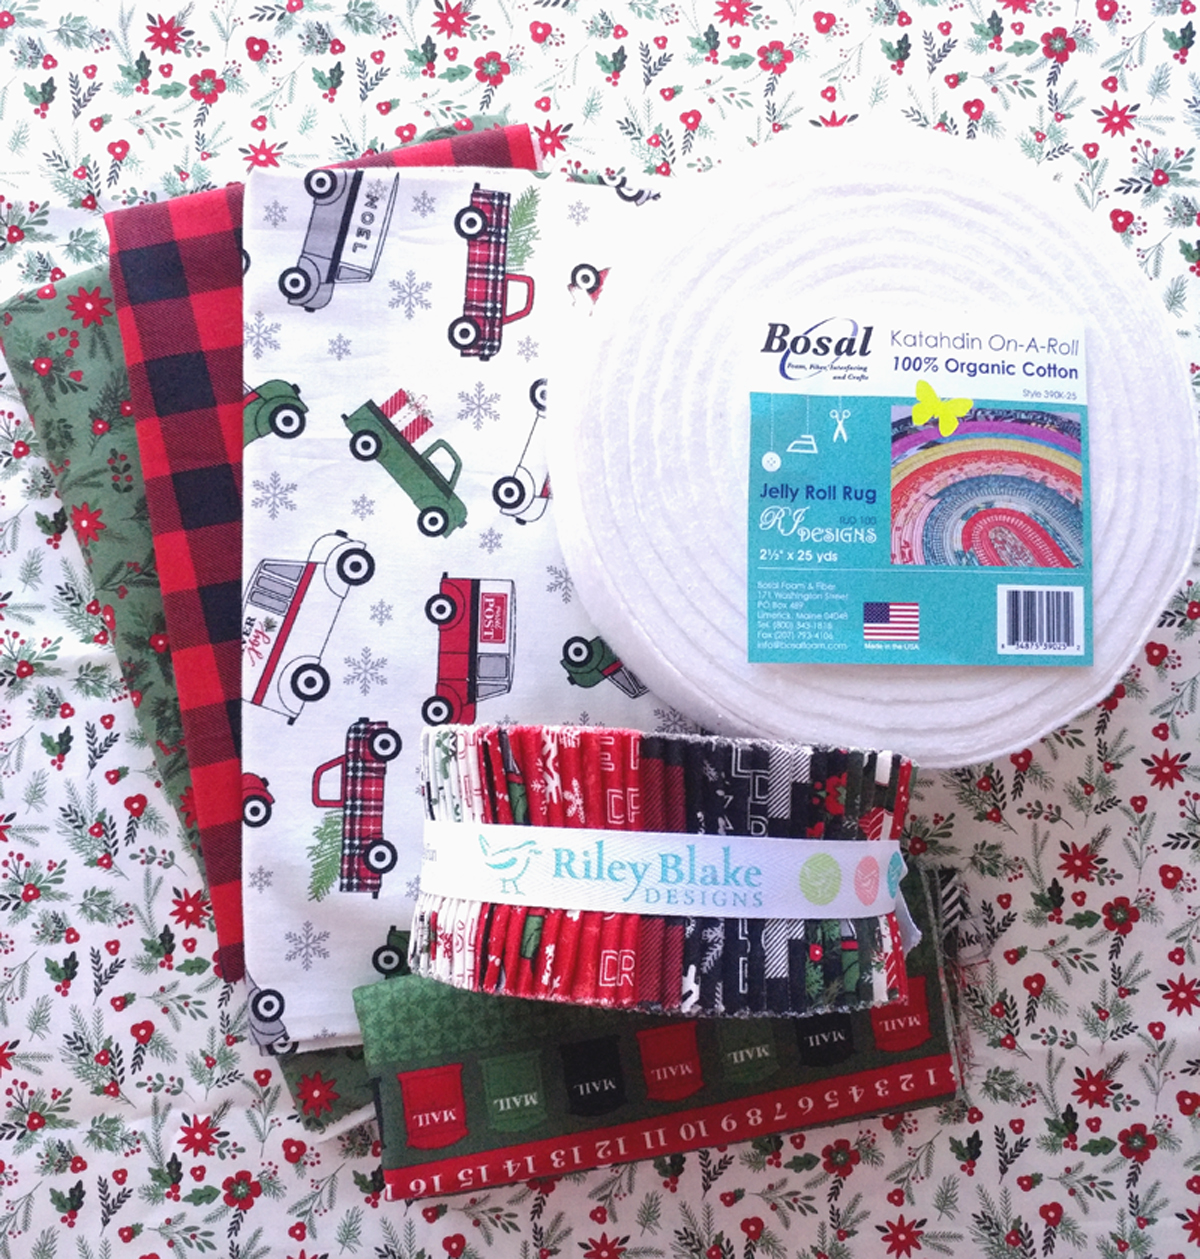
Supplies for your Quilted Christmas Stocking:
- Jelly Roll- I am using Christmas Delivery by Carta Bella by Riley Blake Designs
- batting- Bosal precut batting rolls are great for this project
- yardage- you will need about a 1/3 yard for each stocking- depending on what your stocking pattern is.
- Stocking Pattern- you can download the pattern I used for free here.
- sewing supplies and tools- including Wonder Clips if you have them- they are really handy with this project!
Cutting your Quilted Christmas Stocking:
- Determine how wide and tall your stocking is. I like to make 2 at a time, so I factor that in with these measurements.
- Add 1″ to the width measurement- this will be the length of your strips of Jelly Roll fabric and batting- My length for 2 stockings is 17″
- Take the height measurement and divide by .65, now add 3 or so- this will give you an approximate number of strips you will need. The exact number will be determined by how tightly you sew your strips together- so you may need a few more at the end. The height of my 2 stockings is 25″- divide that by .75 and I get 33.333- I rounded that up to 34 and added a few to 40. I ended up adding about 4 additional strips at the end.
- Cut the needed number of strips to your determined length.
Prepare the strips for your Quilted Christmas Stocking:

- Place one fabric strip wrong side up in front of you.
- Place a batting strip directly on top
- Fold the two long sides into the middle
- Fold the strip in half- the raw edges of the long sides of fabric should be in the middle
- I recommend using Wonder Clips here to hold the strips folded together, but if you don’t have them, pins work as well.
- Sew an edge stitch down the side with 2 folds
- Repeat for all of the strips
Sew strips together:
- Place two strips next to each other. I place the folded side of one against the sewn side of the other
- Change your stitch on your machine to a wide zig zag stitch
- Position your strips so that your sewing machine catches both strips in the stitching to hold them together.
- I usually start making groups of 2 strips and then add those groups together until all the strips are assembled to make one large piece.
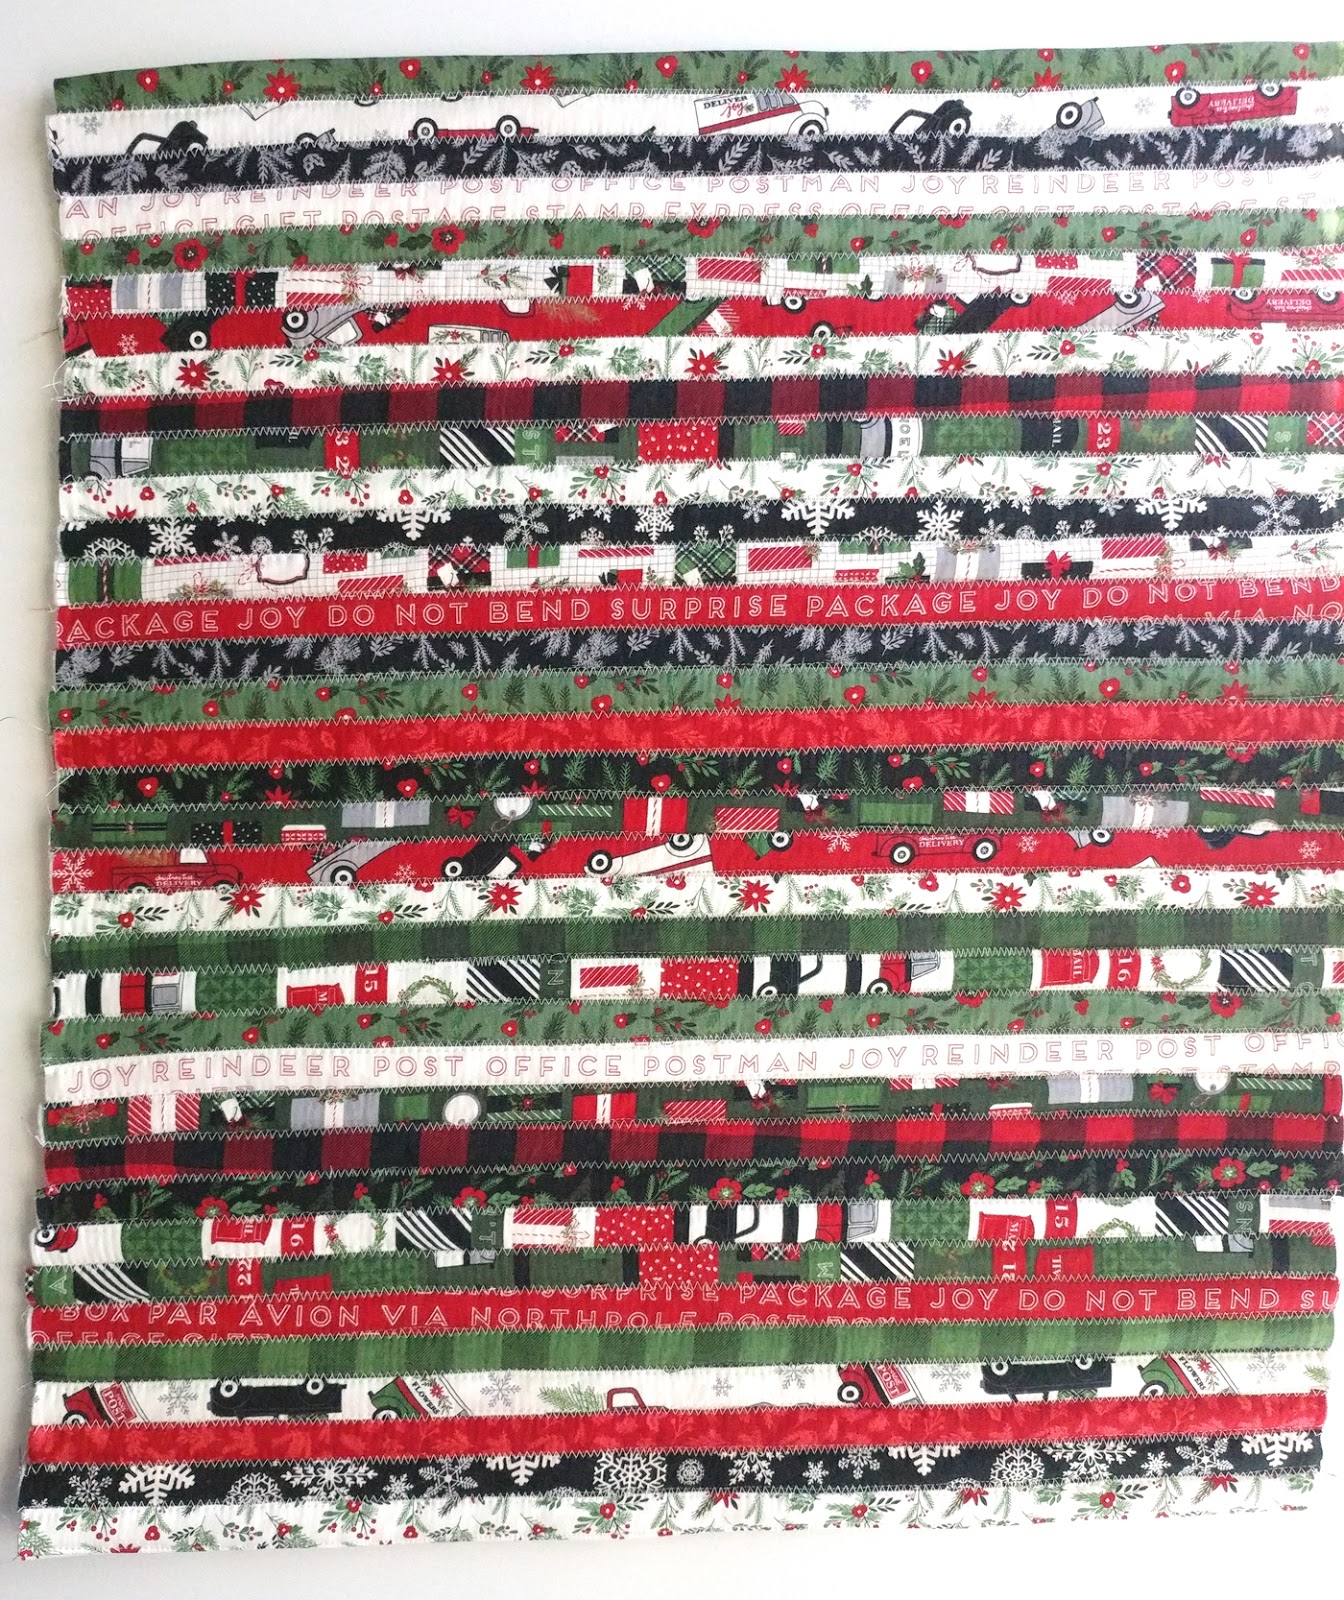
Some useful tips:
- I like to vary my fabrics, but you may also choose to create a pattern with your strips.
- if there are any obviously directional prints (like the text print in this line) you may need to pay attention to the direction you are attaching the strips together.
- You will notice that the edges of the final piece are a bit jagged- this is normal because of how many layers you are sewing through. This is why we added an extra 1″ to our strip length.
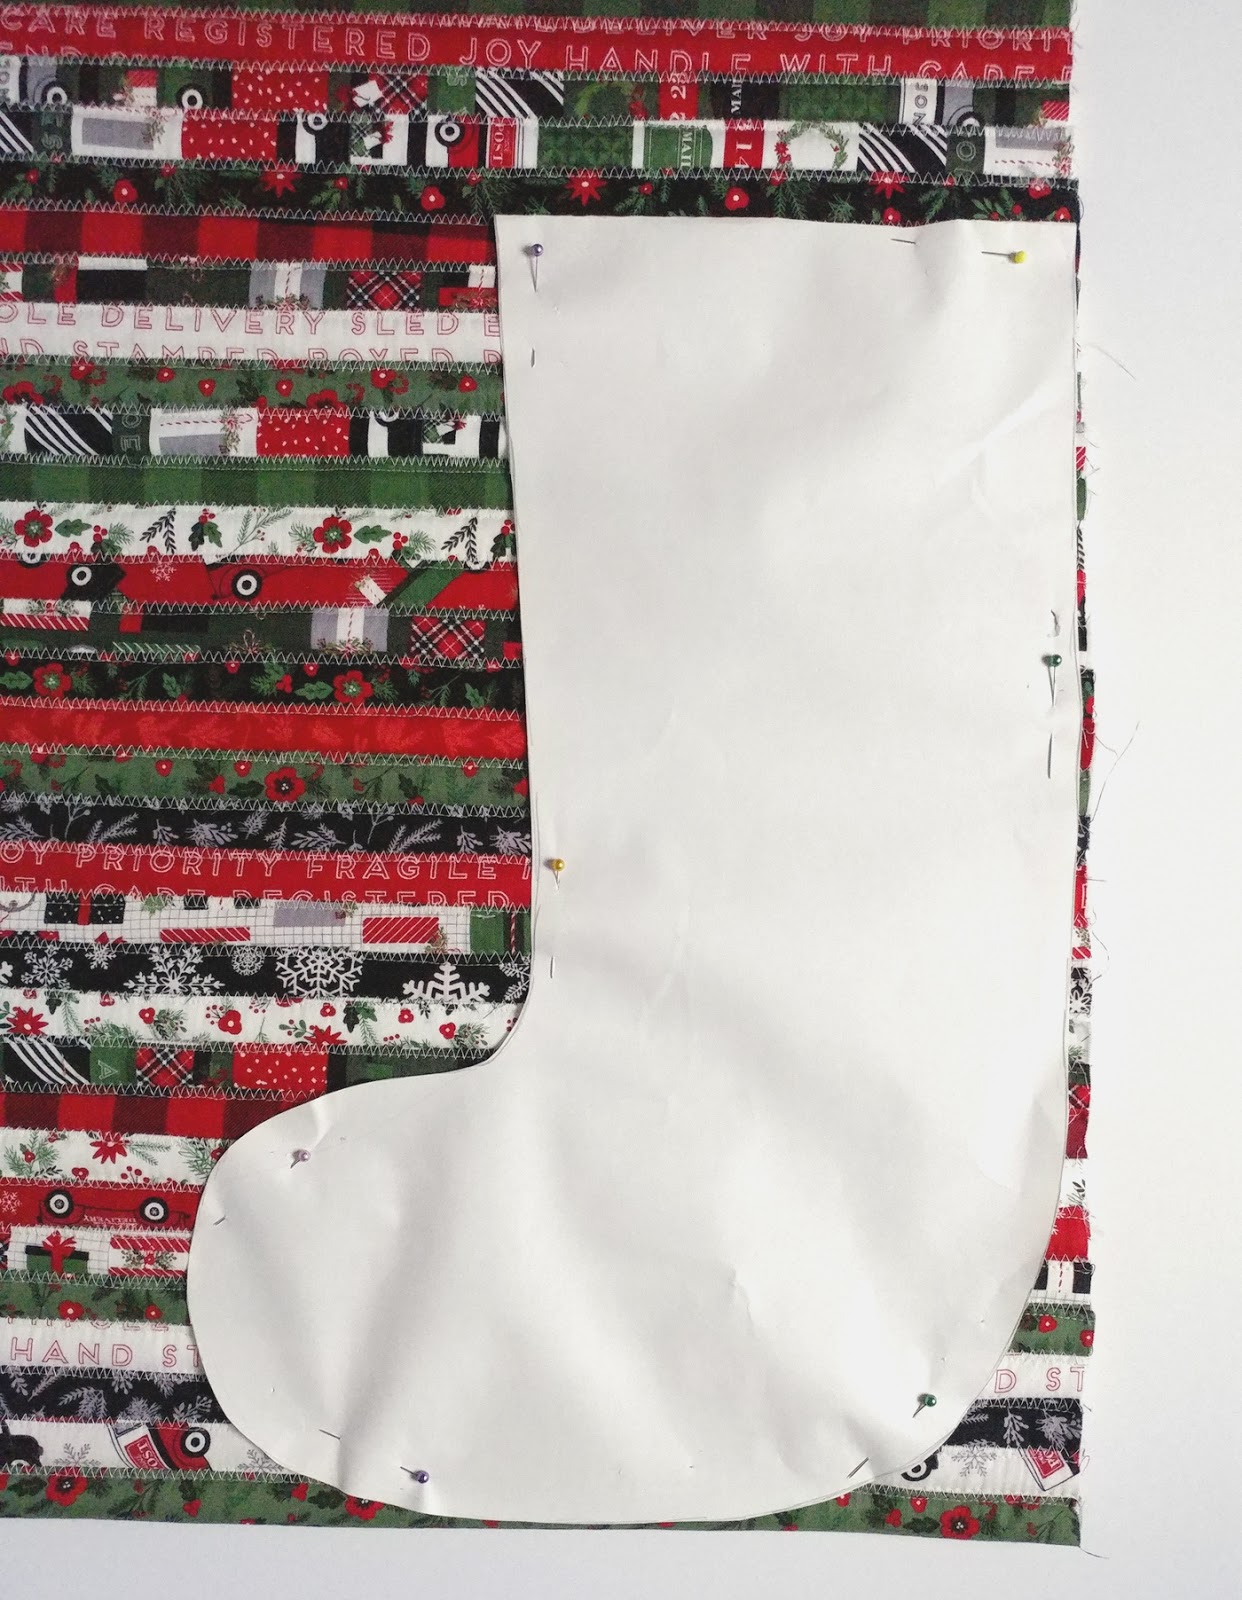
Cutting out your Quilted Christmas Stocking Pieces:
- Add 1/2″ to the height of your stocking pattern- if you are using the template from me- the 1/2″ has already been added.
- Cut out 2 stockings from your fabric yardage- making sure they are mirror images of each other.
- I find it easiest to do this by cutting them both out at once with the fabric folded in half.
- Trim the extra 1/2″ off of your stocking pattern, or fold it under.
- Place your stocking pattern on your jelly roll strip piece
- When placing your stocking pattern on the Jelly roll strip piece, make sure the top edge is lined up with a finished edge of a strip. We are not going to sew on the top of this piece, so it needs to be a full strip on the top. Use a seam ripper to detach the top strip from the next strip if it is not the top of your full piece (as in this picture- because I am making two stockings at once, my first stocking needs to be lined up with the bottom of the piece. I line up my pattern with the bottom of the stocking, and then adjust it up so that the top of the pattern lines up with the next closest seam between two strips)
- Cut out 1 stocking piece from your jelly roll piece
Quilted Christmas Stocking Assembly:
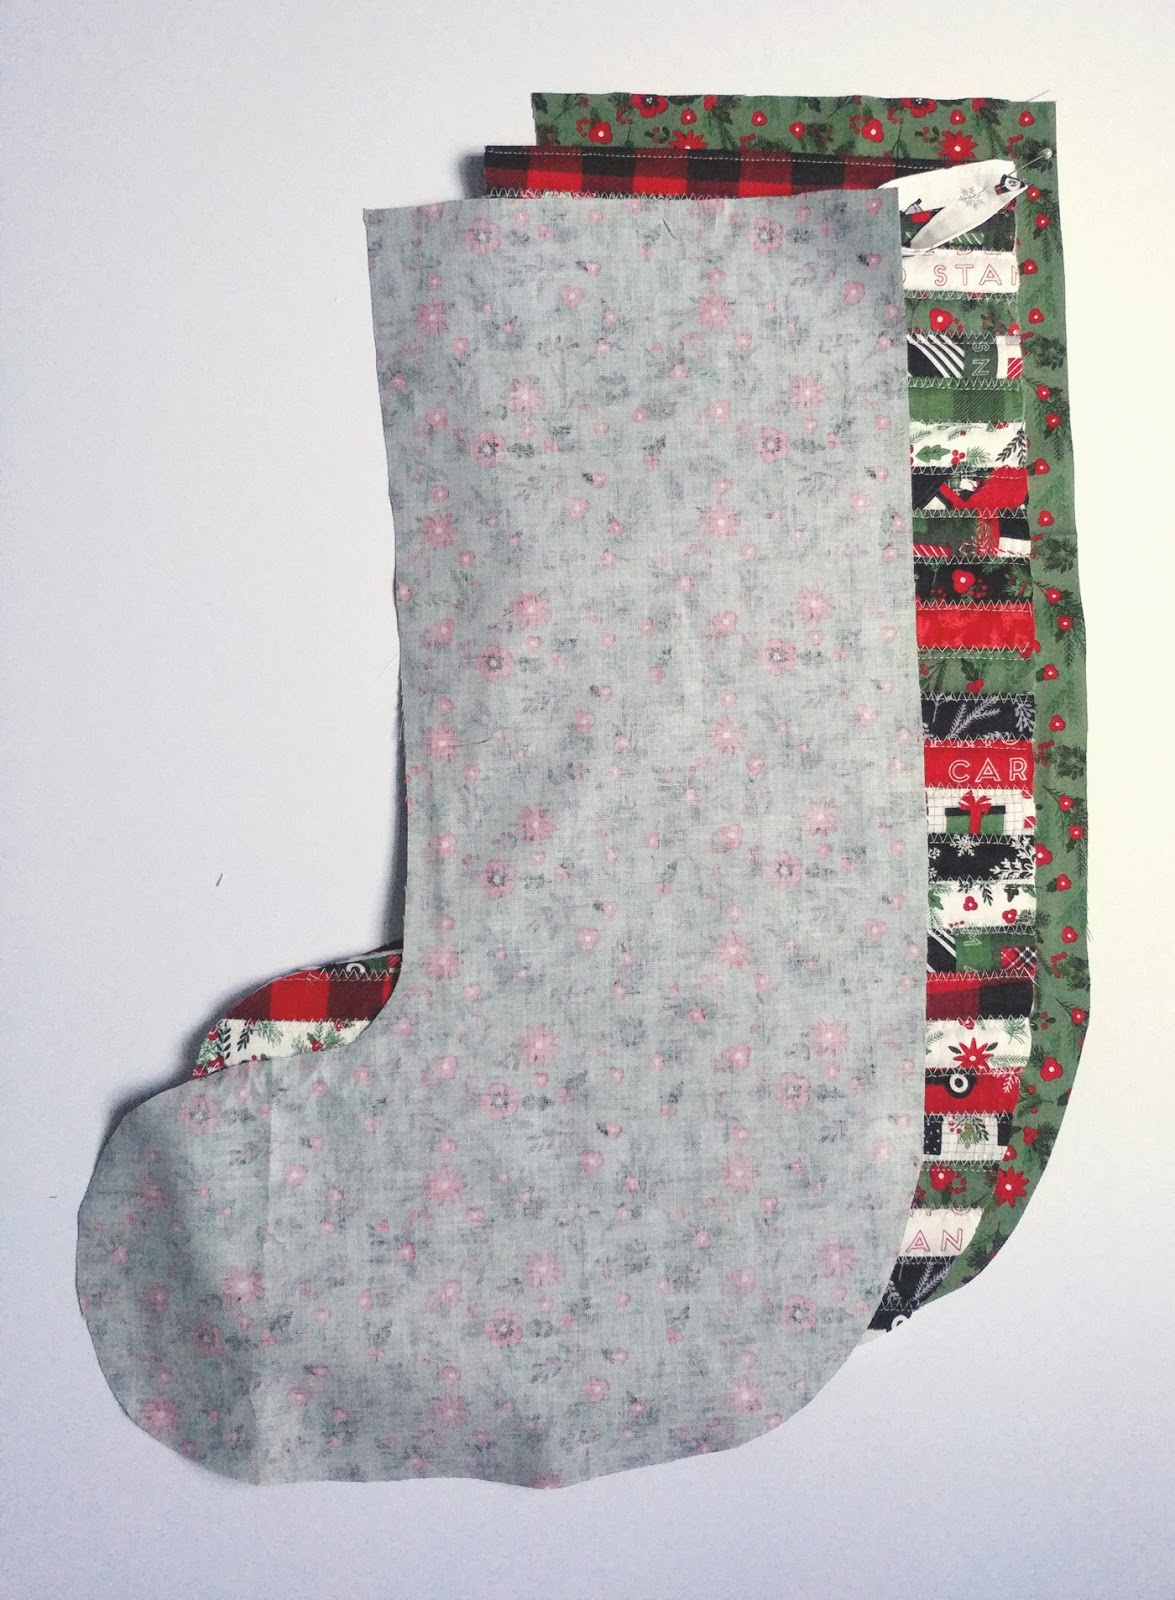
Sandwich your stocking pieces as shown, with the right sides of your back and lining pieces facing toward the jelly roll piece (the stocking front)

- Line up the pieces starting at the bottom and pin all the way around. There is quite a bit of bulk in this step- make sure you are not folding over any of the layers as you pin. Also, pins work better than the wonder clips at this step.
- Sew around the entire piece starting on one side of the stocking and then around to the other side. You WILL NOT sew across the top yet. Back stitch at both the beginning and the end of your stitching. Use a 1/4″ seam allowance.
- Check both sides of your stocking to make sure all layers have been sewn together. Again- with all of the bulk of so many layers, things tend to shift as you sew.
- You DO NOT need to clip curves. Just turn your stocking right side out. You should end with the jelly roll piece in front and the two yardage pieces wrong sides together on the back side of your stocking.
- Use your fingers to push out the seams as well as you can. Create creases in the sides using an iron and steam to set them. This will probably take some time and effort to get the seams even and flat.

- Once you are happy with your seams, turn the seam allowance of the top of the lining and back pieces in between the two pieces. Use the front seam as your guide for getting them even.
- Press the seams down and then pin in place.
- If you want to add a loop for hanging- I prefer to do it at this step, just place a 5″ length of ribbon folded in half against the outside seam, tucking the raw edges in between the two layers of fabric.
- If you would like to use a scrap of fabric to make your hanger- you can take a 1.5″ X 5″ piece of fabric and fold it in fourths, similarly to how you folded your jelly roll strips. Sew down both sides of your strip and then fold in half to use as your hanger.
- Sew an edge stitch across this back piece from one side seam to the other.

All that is left is to embellish and enjoy your Christmas craft! I like to add pom poms to mine, but you could also add name tags, tassels or anything else your heart desires!
I hope you enjoy making your quilted Christmas stocking as much as I did! Please tag me if you share them on social media @amerooniedesigns on both Instagram and Facebook and use the hashtag #jellyrollstockings if you do!!
Happy Holidays friends!
xoxo,
Amy