Are you ready to party? Ready to get some ideas for celebrating the end of the school year, or to say “Thank You” to a wonderful teacher? Let’s get this party started.

So many fun ideas: For details click the links below-
Gwen- Gwenny Penny
Leanne- Organize and Decorate Everything
Amy- keep reading!
Jonie- Just Between Friends
Ashlee- I’m Topsy Turvy
And now for my project:
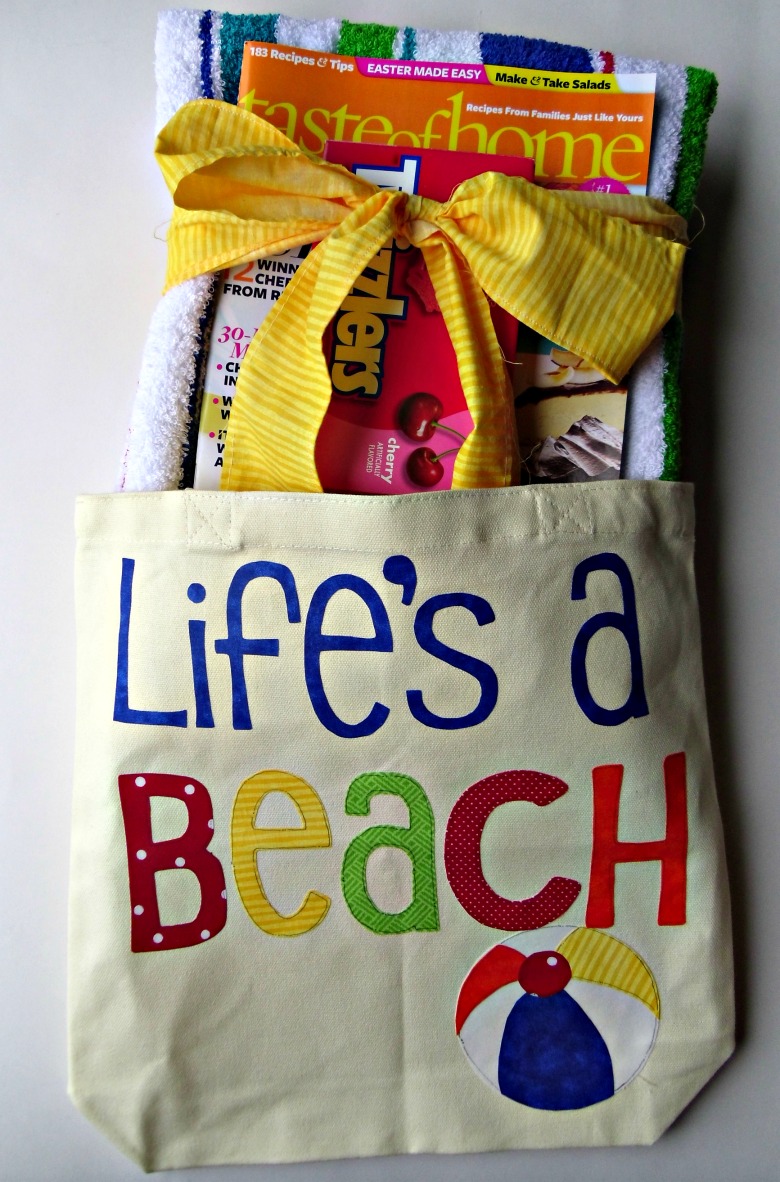
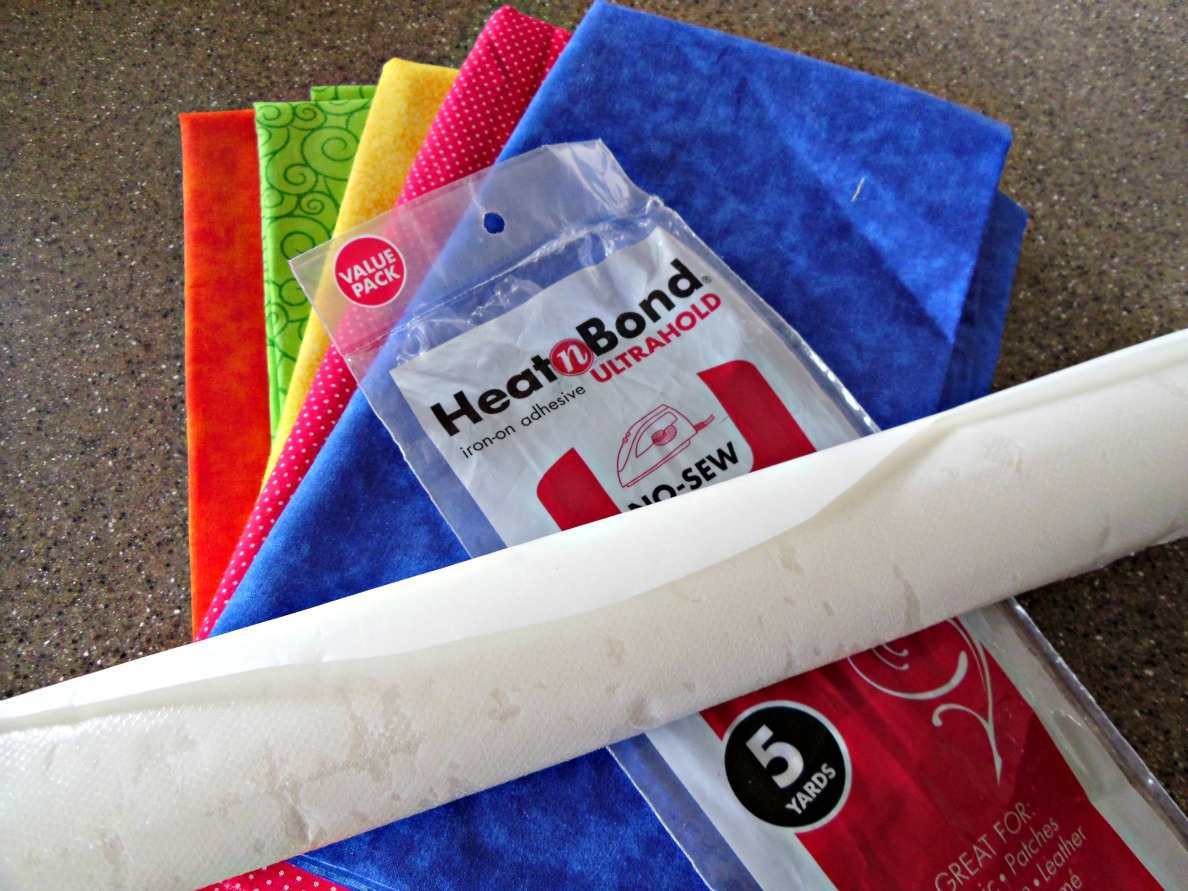
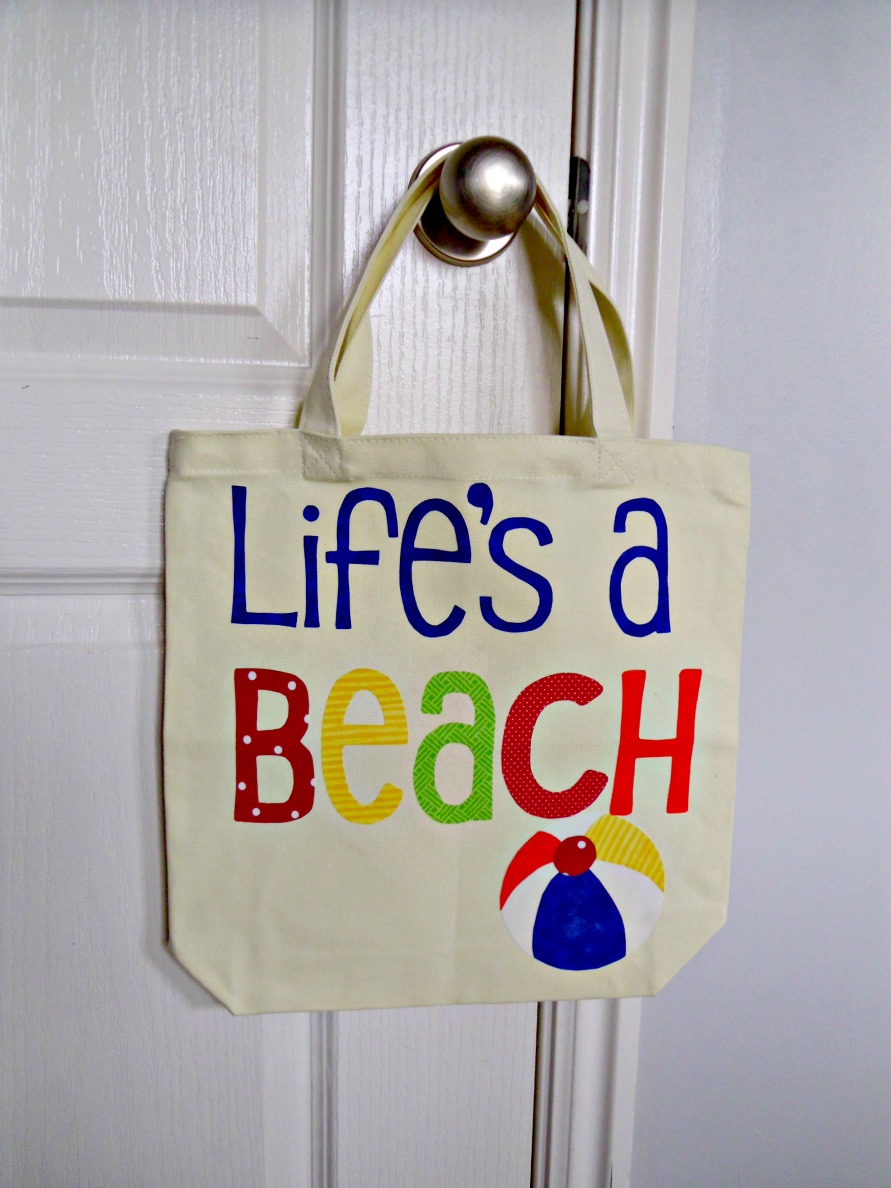
Teachers have a hard job. Anyone who is willing to spend their days working with/for other people’s kids for little pay and no recognition really is someone special. I have been lucky with my children that we have always had wonderful teachers, and finding a way to tell them how much their hard work means to me has become pretty important- I mean everyone wants to be told they’re doing a good job and their efforts are noticed and appreciated, right? When summer comes around- I think teachers deserve a nice break- hopefully with lots of relaxation and low stress. So to encourage that thought, I decided to make a “Life’s a Beach” tote bag. This bag is made pretty simply by using a premade canvas tote (you can find them at Wal-mart) and by including Heat n’ Bond, there’s no sewing involved.

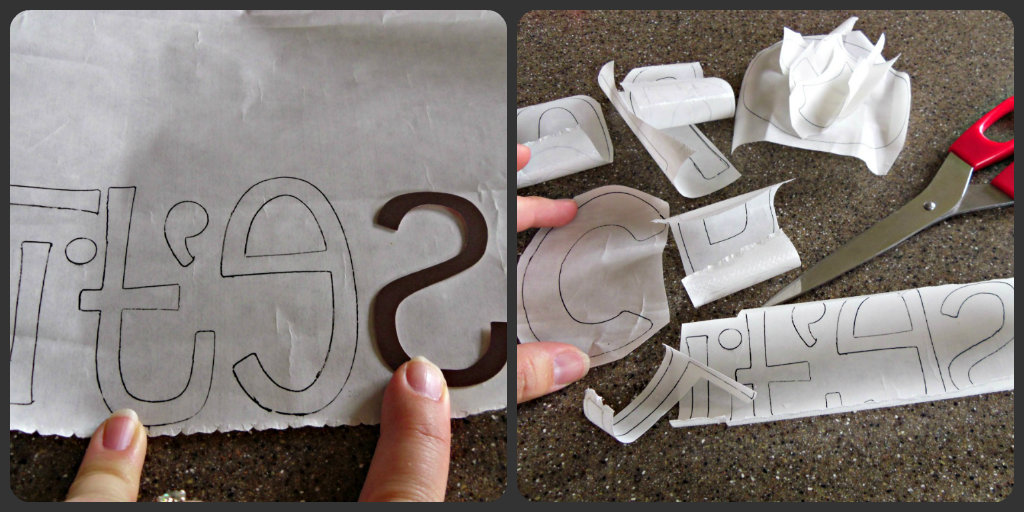

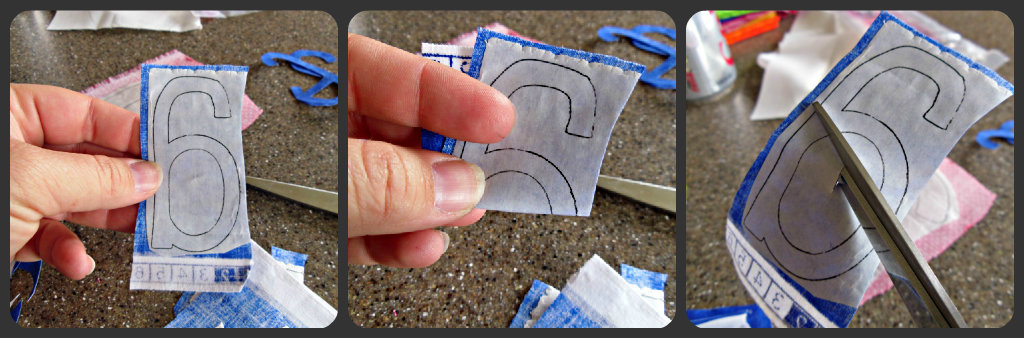
This collage is just a tip for how I cut out the inside portion of the letters. Take your letter, fold the area where the portion to be cut is, in half. Snip a small hole on the fold- it just needs to be big enough for the scissors to fit through. Then slide your scissors through the opening and start cutting down toward the traced edge.
The last step is to place and fuse the pieces to the tote. Remove the paper liner from the letter and again following the directions on the package fuse them down to the canvas. Your tote is ready. 🙂

One final step I did was to take a Sharpie pen and line the word “Beach” and the ball with a fine black line. I think it just gives it a bit more definition. Now, a tote is a nice gift in and of itself, but let’s see what kind of fun things we can find to fill it with, shall we?
The first idea I had was to create a fun “beach” bag for the teacher. A new towel, a magazine and a treat- to inspire relaxation and fun. The little tag I made (you can see it in the previous pic) said- “Teacher- hope your whole summer feels just like this:”
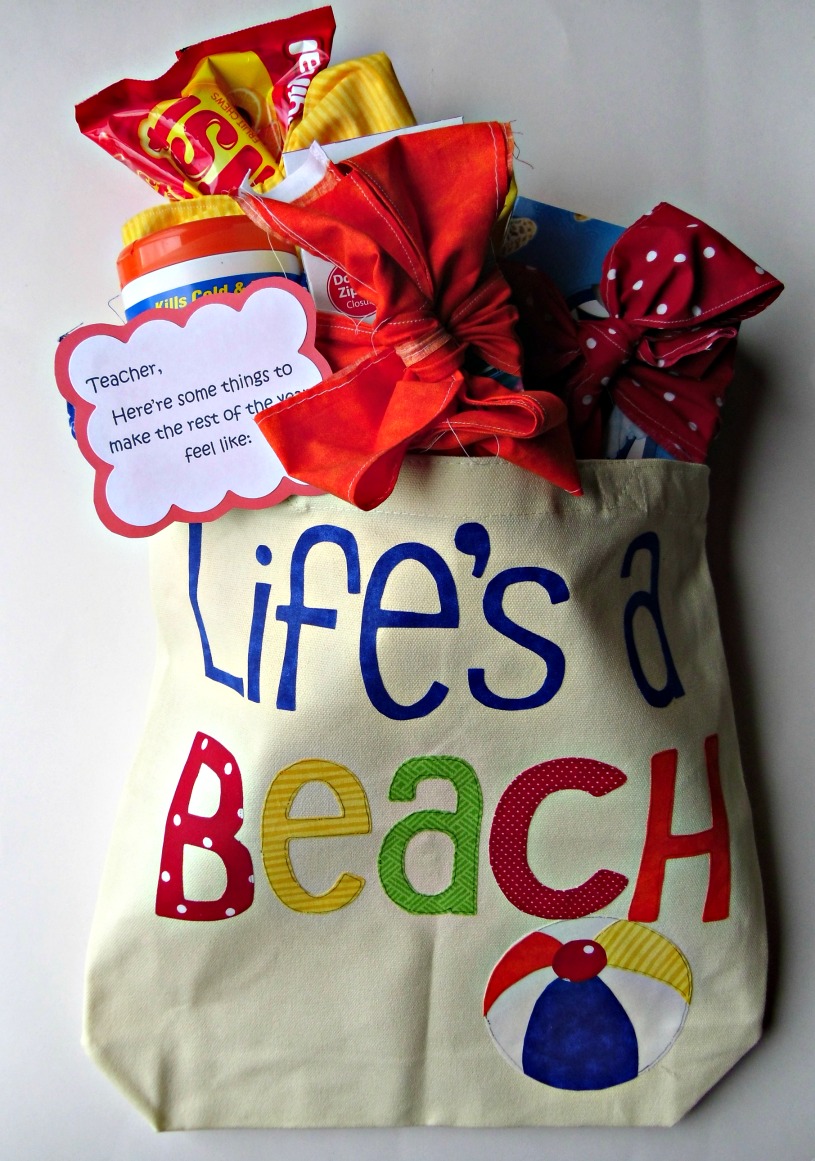
The second tote doesn’t need to wait for break time to be enjoyed. The tag reads: “Teacher- Here are some tings to make the rest of the year feel like:” It’s filled with things teachers seem to run out of near the end of the year- cleaning wipes, treats for the class, baggies and kleenex. You could add any kind of supplies your teacher needs or wants.
Either way you are helping to make their lives easier- and we all know teachers need a break every once in a while. 🙂
Thanks for joining us for this months’ Point of View, we are so glad you are here.
Now it’s your turn to share: how do you say “Thank You” to your favorite teachers? Or what ways do you celebrate the end of the school year? Link up your point of view and share your ideas here:
Linking up to Friday Flair at Whipperberry, also linked up to Market Yourself Monday at Sumo’s Sweet Stuff.


Tonia L
April 27, 2012 at 12:58 pmThanks for the party! I added a link for book page pillow boxes that can be used for Teachers, Mothers, Fathers for even Graduates!
Michele Pacey
April 27, 2012 at 1:19 pmThat's a tote-ally great idea (…sorry…)! And a lovely way to show appreciation to people who do some of the most important work around (imo).
Jonie Marie
April 27, 2012 at 2:33 pmThis is so cute! I bet any yeacher would feel spoiled to get it from their students. LOVE IT!
Lorene (just Lu)
April 27, 2012 at 4:59 pmLove it, Amy!
Gwen @ Gwenny Penny
April 27, 2012 at 5:03 pmThese totes are such a great idea, Amy! I love how colorful they are, too. These would work for lots of different gift recipients.
Steph @ Crafting in the Rain
April 28, 2012 at 4:19 amWhat a cute bag Amy! I'm thinking even my kids would love these as a start of summer surprise! Great to meet you at SNAP too 😉
Leanne
April 28, 2012 at 5:37 amI love the idea of a tote and yours turned out awesome. Your kids teachers are so lucky. This is an awesome gift.
Lindsey M. Petersen
April 29, 2012 at 1:44 pmI'm pretty sure you can never have too many teacher appreciation ideas. What a great post, thanks! Looking forward to connecting at Breathing Space
Kaysi @ Keeping it Simple
April 30, 2012 at 2:06 amThat is super cute Amy!!!