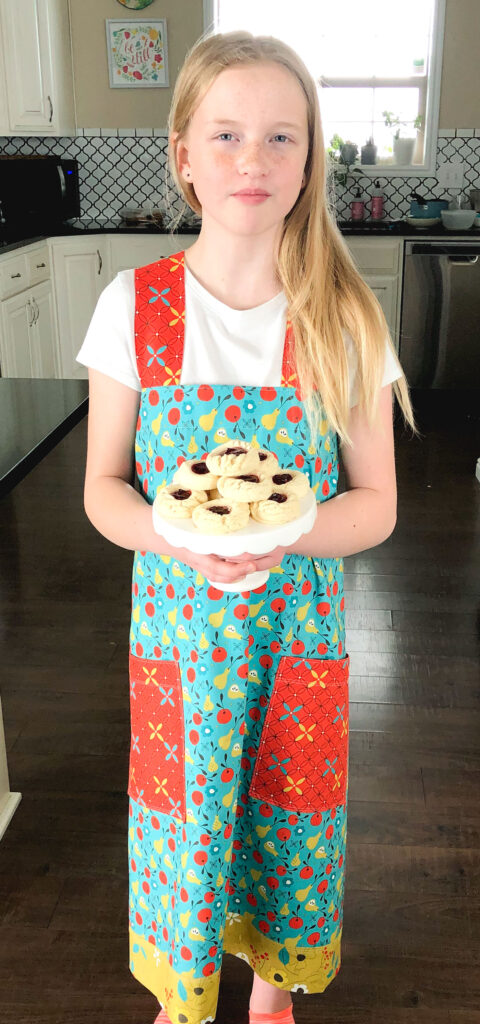
These aprons first made their debut years ago on the Riley Blake Design blog. My girls have absolutely loved them and I have loved that they are so easy to put on and wear. So, I decided it was time to share this Cross back Apron Tutorial on my blog with some updated pictures and clarified steps to help you make your own. The first inspiration for this project was on the blog Brown Eyes + Blue and I loved her gorgeous linen versions. As I made my own version there were enough changes that simply linking to her tutorial would require lots of clicking back and forth so I am just writing my own version here. Although if you want a woman’s version, she shares her measurements over on the blog.
Cross back Apron Tutorial
Please read through all directions carefully before beginning your apron. Check to make sure all measurements are clear before cutting your fabric.
Fabric Requirements
- 1 yard fabric for Apron body and facing
- 1/3 yard fabric for hem and straps
- 1 fat quarter for pockets
- *note: you can add more or less fabric selections, which will require adjustments in your fabric requirements.
Sizing and Cutting
For the measurements: Measure around the bust and add 9″ to get the width. Measure how long you want the apron to be then subtract 2″ to get the length of the apron body piece. I prefer a longer looking apron for coverage as I like to use these not only for baking, but for art and gardening. Feel free to make your apron as long or as short as desired. I will share the measurements I used below, Size 4 in regular font and the Size 8 will be bolded, followed by size 12 (shown).
- Straps for all sizes- 42″ X 6″ (this will be adjusted in the future.)
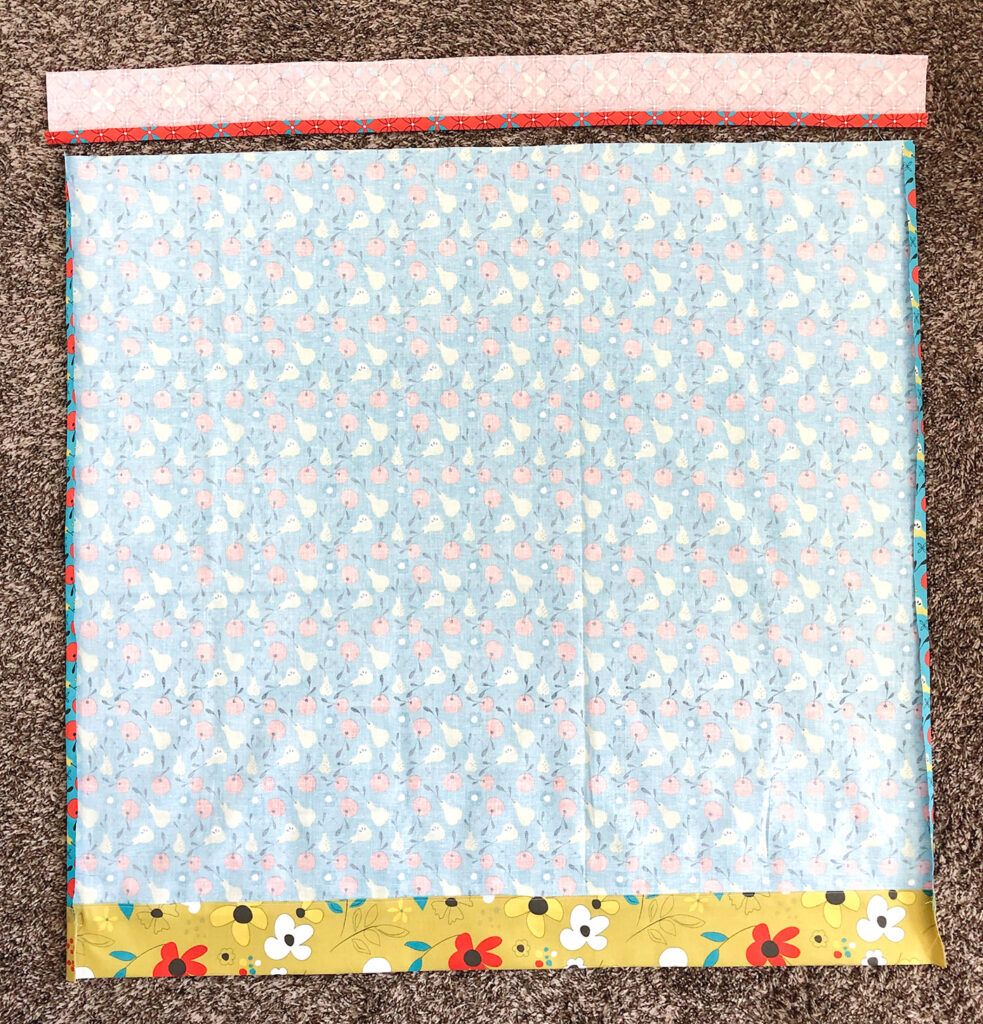
- Facing- 29″ X 3 1/2″, 33″ X 3 1/2″, 36″ X 3 1/2″
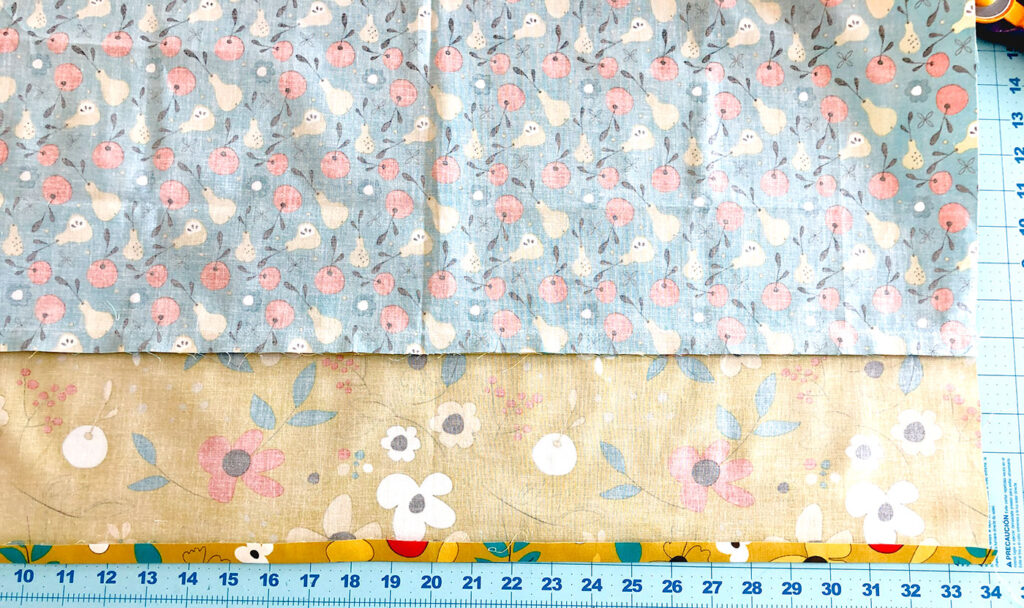
- Apron Body- 29″ X 18″, 33″ X 25″, 36″ X 31″
- Accent hem- 29″ X 6″, 33″ X 7″ , 36″ X 7″
- Pockets (cut 2) 8″ X 11″
Prepare Straps and Pockets
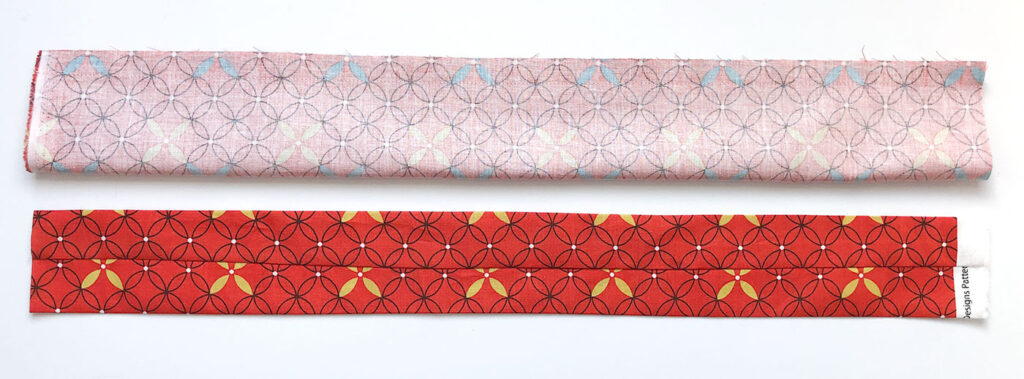
- Cut your strip for your straps in half along the length.
- Fold along the long side and sew down the raw edges, using a 1/2″ seam allowance.
- Turn the fabric tube right side out and press flat. I like to have the seam in the middle, but it would also work at one side. Set aside straps.
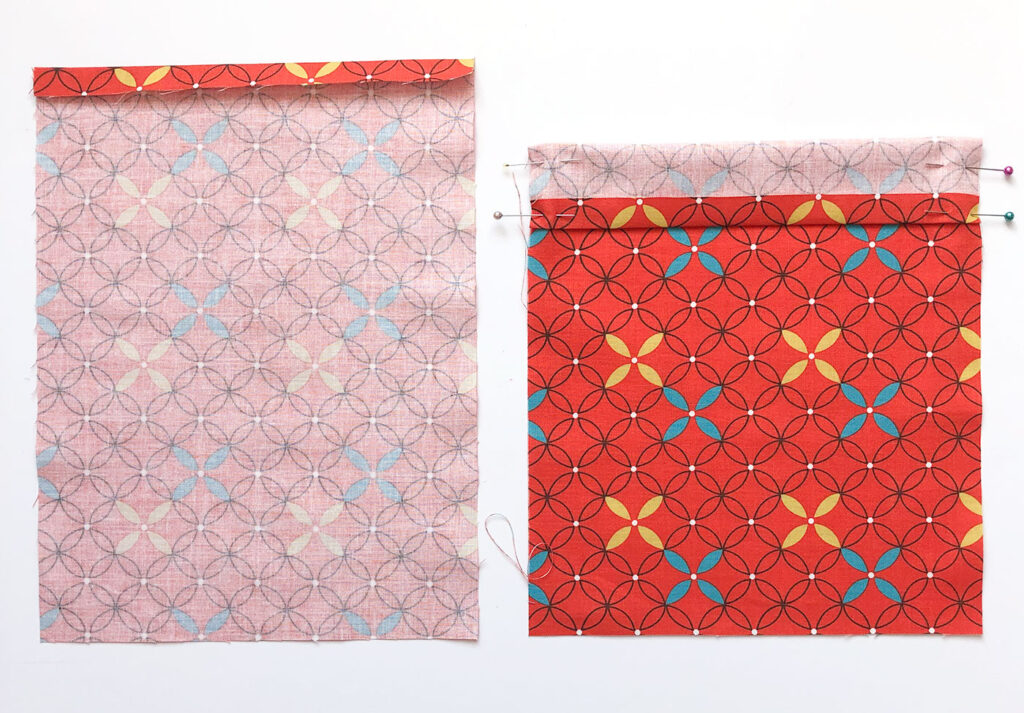
- Fold over top of pocket 1/2″.
- Turn pocket over and fold down the top toward the right side of pocket 1 1/2″.
- Sew down both sides of your folded hem 1 1/2″ using a 1/2″ seam allowance. Clip the top corners and turn the top hem right side out.
- Press in both sides 1/2″.
- Press up bottom hem 1/2″
- Top stitch the top pocket hem as desired, but minimally at 1 1/4″ to finish the hem.
- Set aside pockets.
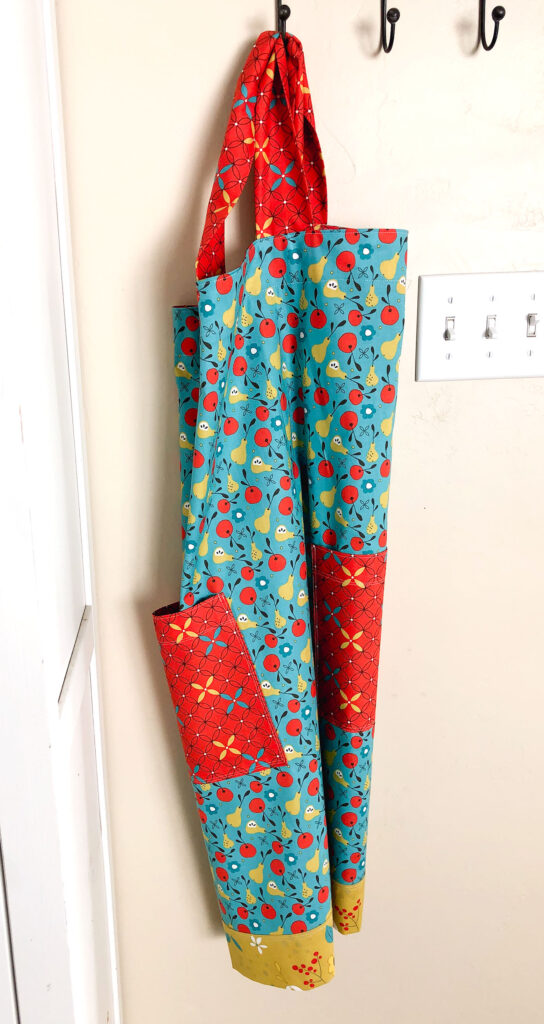
Cross back Apron Assembly
All Seam Allowances are 1/2″
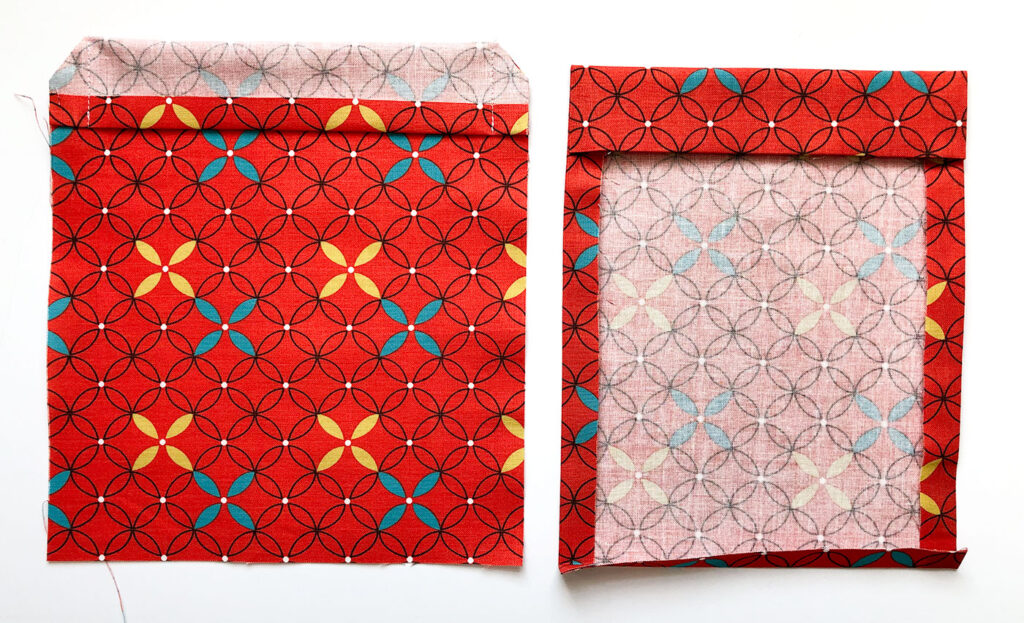
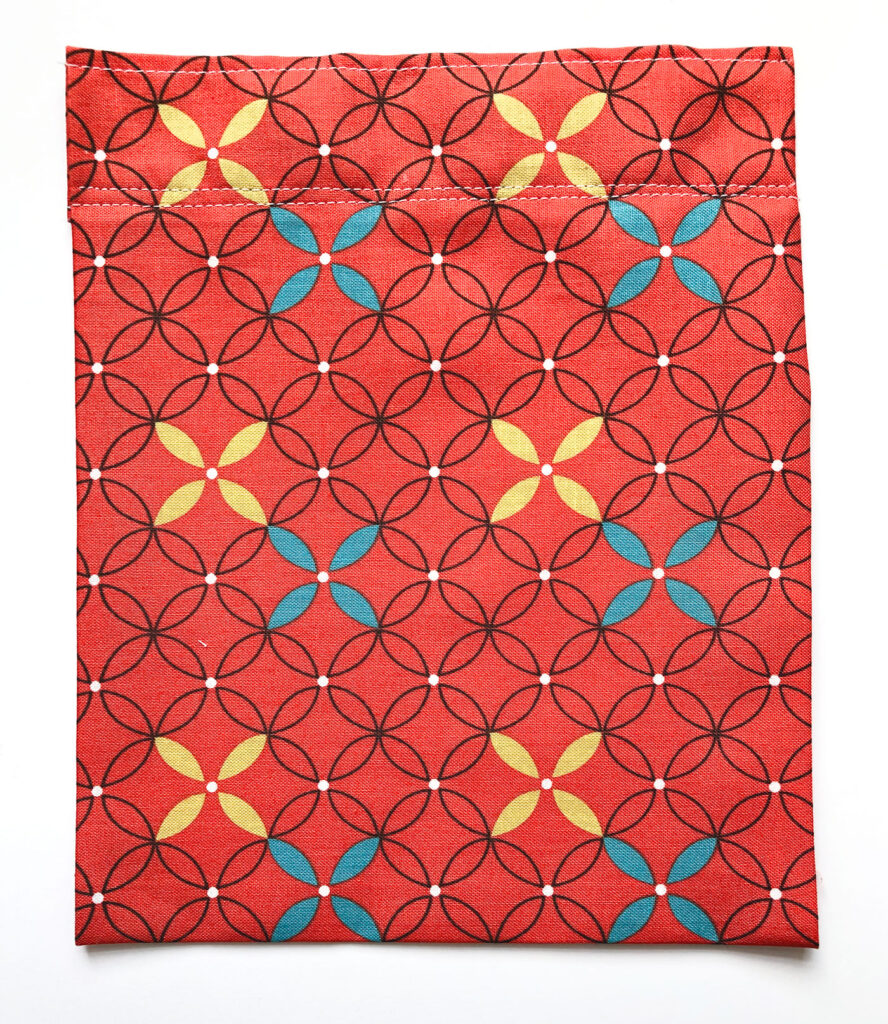
- Sew apron hem to bottom of apron body piece. Press seam allowance toward the hem.
- Press up the bottom of hem 1/2″.
- Fold up the bottom hem to line up with the sewn seam. Press.
- Sew hem together across the top. It may be helpful to use washi tape to mark your stitch line so you can top stitch from the front of the apron, or you may decide to sew a scant 1/4″ from the original seam attaching the hem to the apron body.
- Press in the side seams of apron body 1/2″.
- Fold up the bottom of the Apron facing piece 1/2″ and press.
Attach Straps to Apron
Attach first side of Apron straps
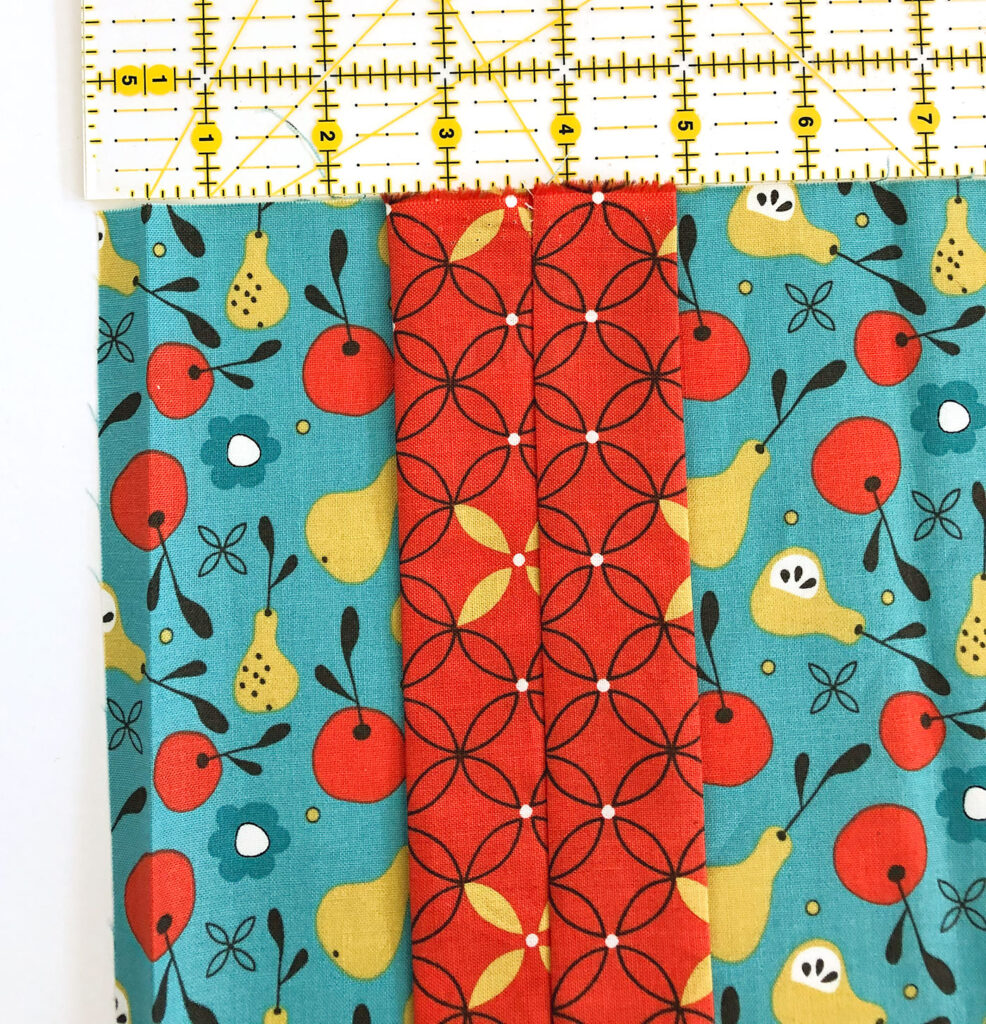
- Unfold your side hem on the apron body and measure in 2 1/2″ on each side with the right side of the apron body facing up.
- Line up one raw edge of each strap at this mark.
- Line up the raw edge of your facing piece with the top of the apron body piece. *note: in this picture, the pressed side hem of the apron body has folded under, the facing should line up with the raw edges of your apron body on the top as well as the sides.
- Pin strap, body and facing together.
- Mark a line just to the outside edge of your strap.
- Sew an “L” shape along this marked side and across the strap using a 1/2″ seam allowance away from the top raw edge. Be sure to back stitch at the beginning and ending of your stitching.
Fit apron to determine length and position of second side of straps

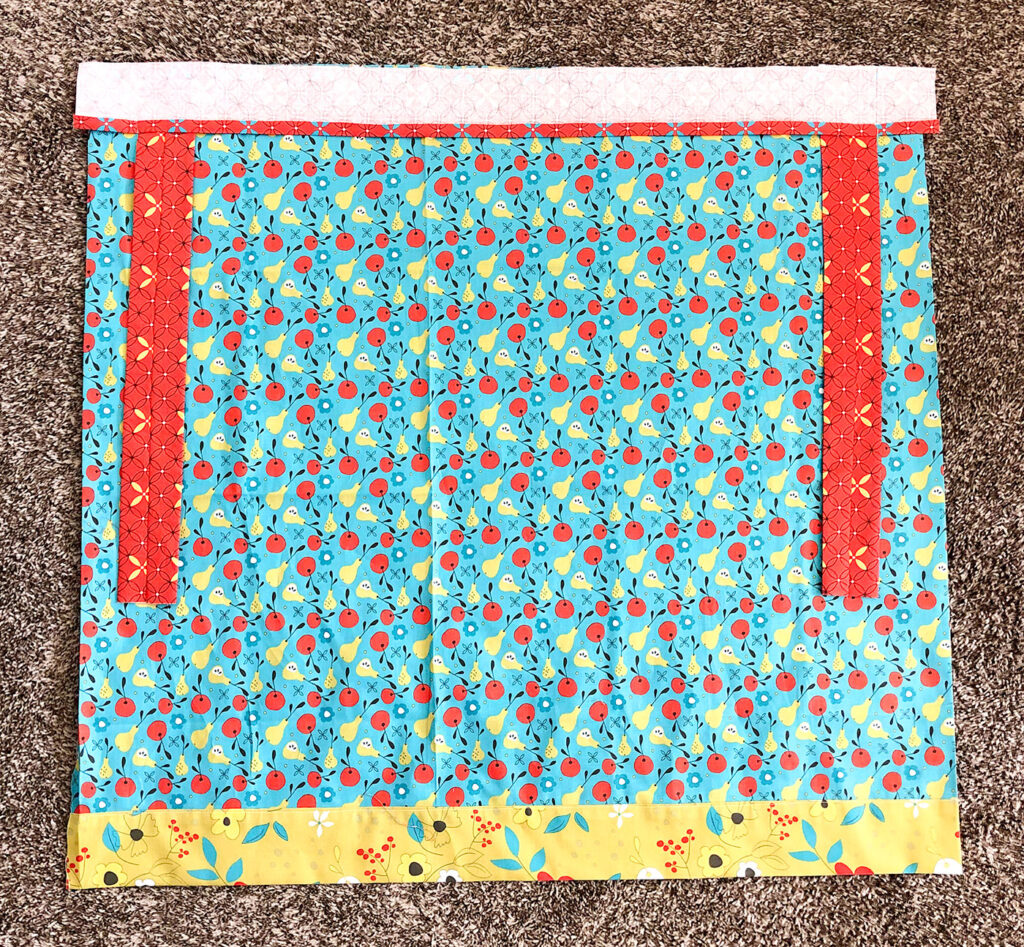
If possible, fit the apron on the wearer to get a more custom fit for spacing the straps. Slide the apron body under the armpits and around to the back. Cross the straps, making sure they are not twisted. Lay the straps on the front and pin where they most naturally lie. This will help you determine how much of the strap to cut off *note: make sure to account for a 1/2″ seam allowance. I like to add 1″ to allow for growth. As well as placement of the straps to allow the apron to hang as desired.
The size 12 apron shown here required cutting 3 1/2″ off of the strap. I did not document the length of strap that I removed on the size 8 or 4 apron, I apologize for that.
The second measurement, for the placement of the straps, was 8″ from the inside edge of the sewn down strap for the size 12 apron. On the size 8 apron the measurement was 5 1/2″ from the side of the strap. For the size 4 apron on my daughter it was 4 1/2″ from the strap.
You will line up the loose raw edge of the strap at this measurement. Note that the straps should cross over, so the strap on the right side of the apron will line up with the marked position on the left side of the apron. Make sure the straps are not twisted as you do this.
Attach second side of strap to Apron
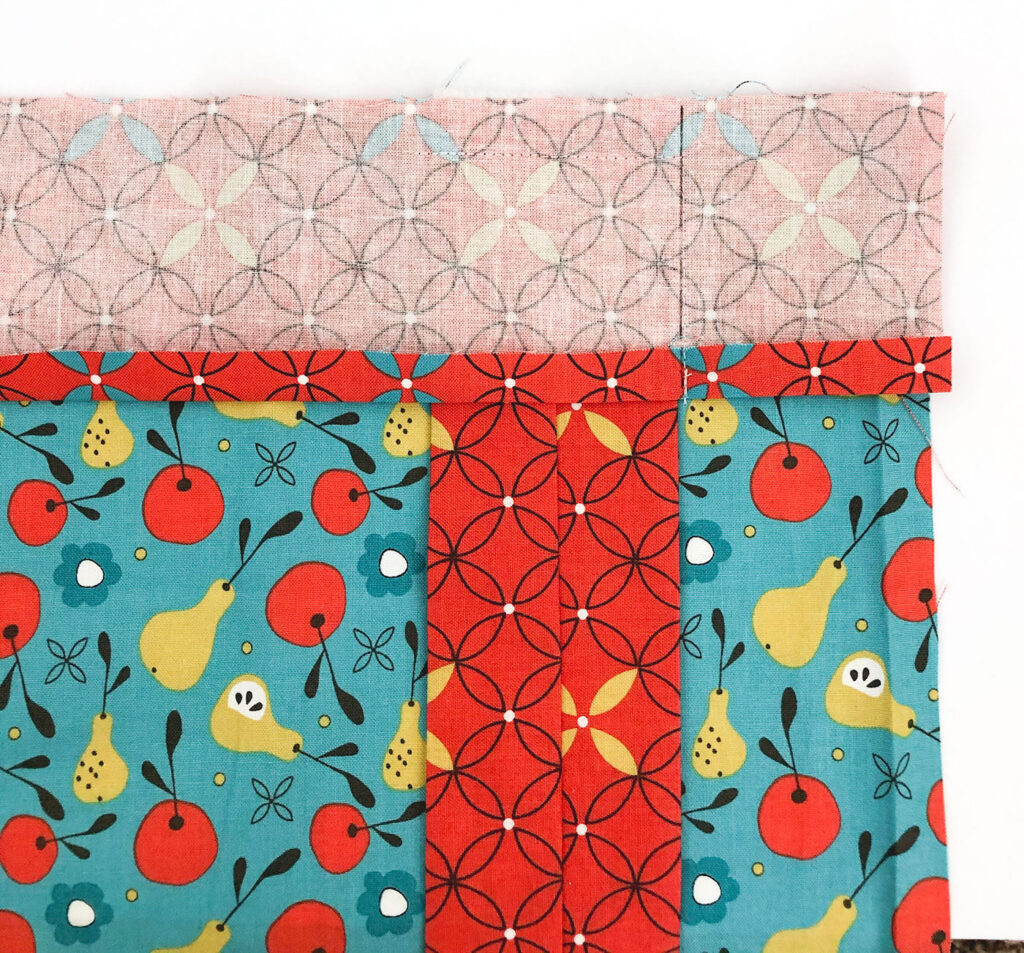
Pin the facing in place across the top of the apron and sew across the entire top of the apron using a 1/2″ seam allowance.
Finish Apron
- Turn the facing right side out, be sure to fold the corners under so they lay nicely.
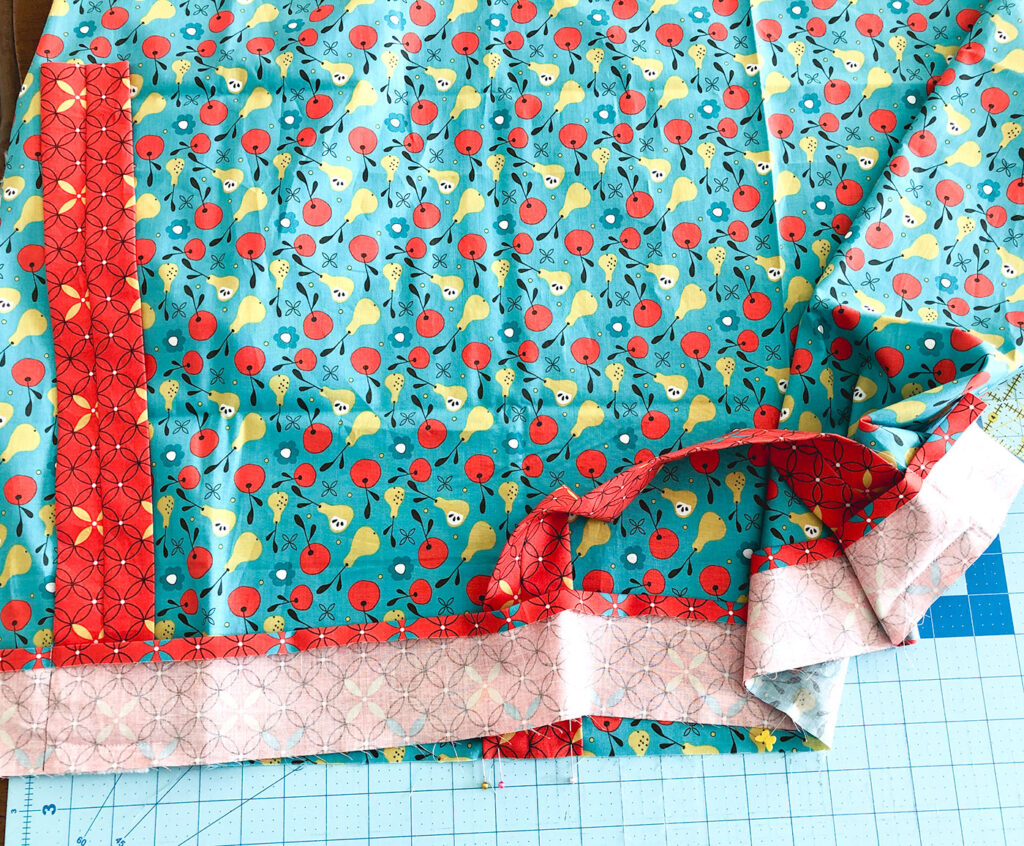
- Re-fold the side hem of the apron body, then fold over again 2″ to create a finished side hem that lines up with the facing.
- Sew down the two side hems and across the bottom of the facing at 2 1/4″.
- Top stitch around the edges of the entire apron if desired.
- Position pockets as desired on apron front. I found it easiest to have the child try on the apron again so they fit well.
- For the size 12 apron the pockets were 11″ up from the bottom of the hem and 5″ in from the sides.
- On the size 8 apron, I placed them 6″ in from the sides and 10″ down from the top.
- I do not have measurements for the size 4 apron as the pockets I originally made were smaller and I didn’t end up liking them.
- Sew around the sides and bottom of the pockets. Be sure to back stitch a couple of times at the beginning and ending of your stitching to secure the pocket onto the apron.
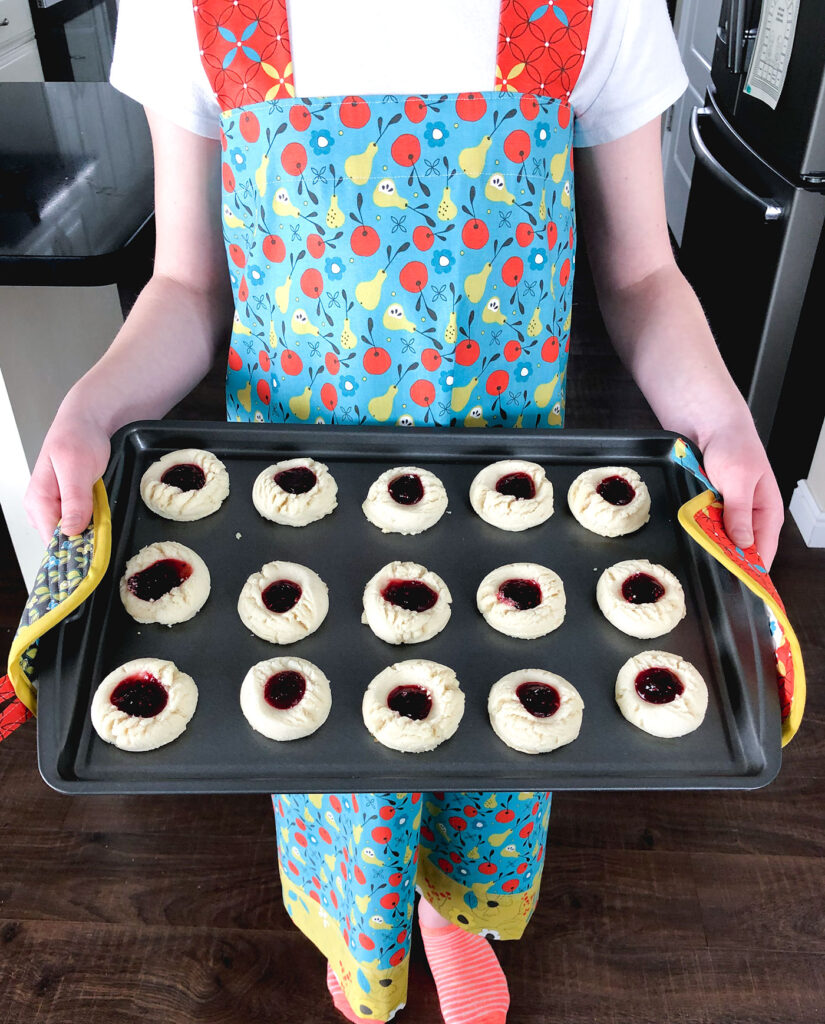
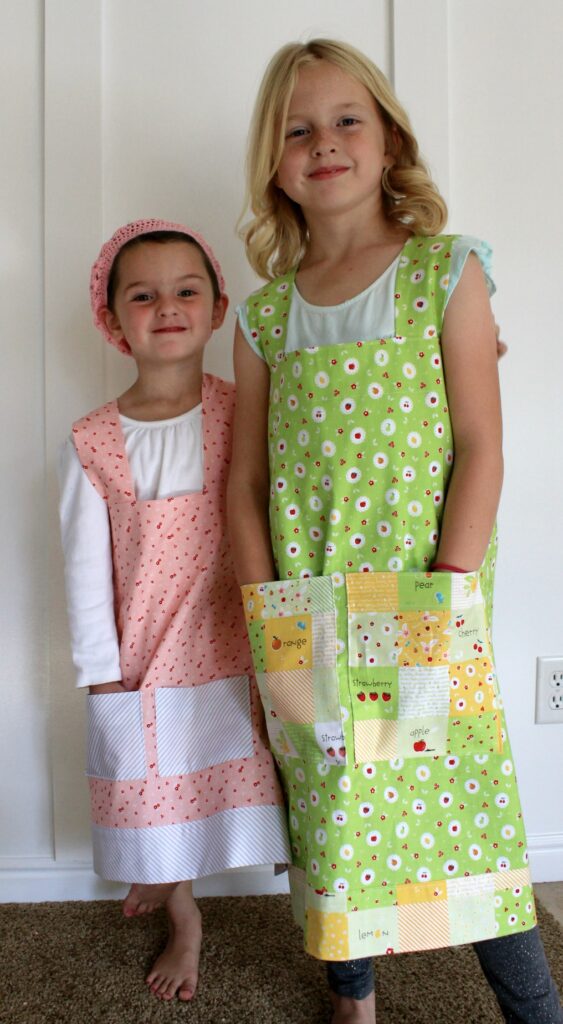
These are the original aprons I made using Sweet Orchard fabric. You can see how the older one has grown!!
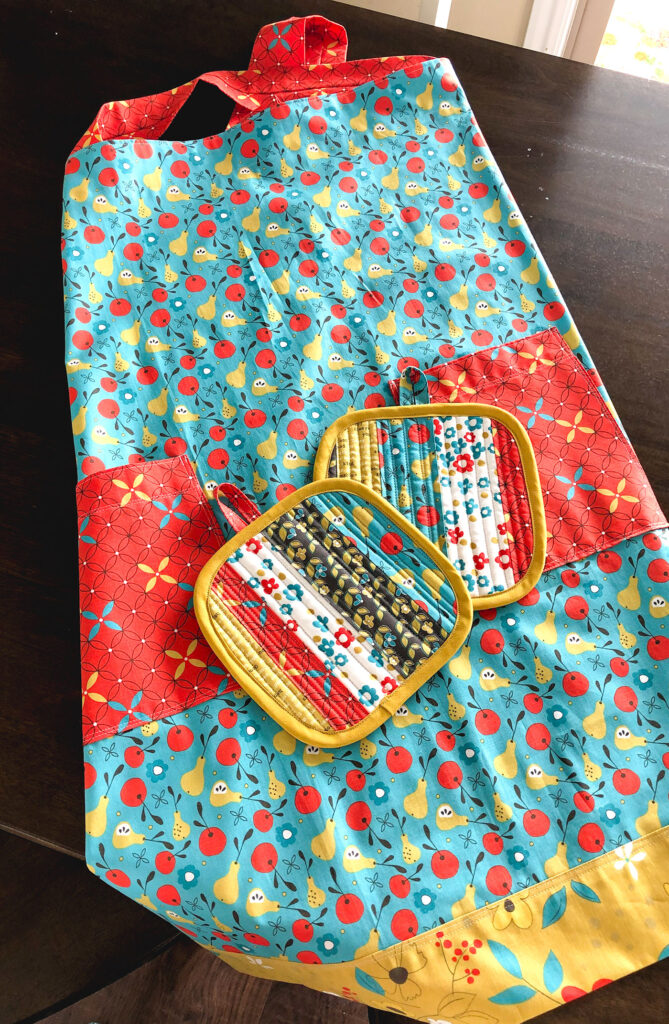
If you want to create a coordinating baking set, you can find the tutorial for hot pads and a trivet here.
Or, if you want a different project to sew for your cute girl, this scalloped skirt is one of my very favorite projects!
Happy Sewing my friends! xoxo, Amy


On the Bright Side – Cross Back Apron + TUTORIAL! – Riley Blake Designs
March 10, 2020 at 10:10 am[…] stop on our On the Bright Side Project Tour takes us to AMEROONIE DESIGNS, where Amy is sharing her time-tested and much loved Cross Back Apron Tutorial, featuring fabric […]
On The Bright Side fabric tour | Ameroonie Designs
March 10, 2020 at 8:34 pm[…] I revisited my Cross back Apron tutorial and clarified some instructions and updated the tutorial […]