This is a sponsored conversation written by me on behalf of Cricut. The opinions and text are all mine.
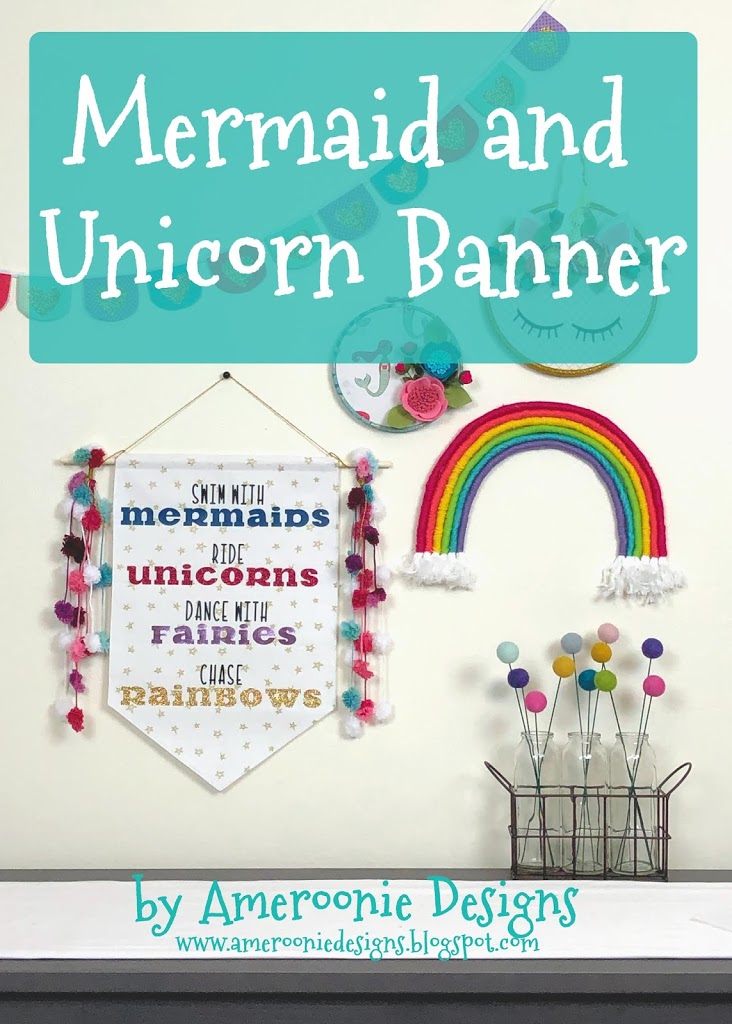
I have a six year old who is super in love with unicorns and mermaids- Most six year olds are, right? When I was challenged to create a project using Cricut Iron-on material and the EasyPress 2, I thought it would be fun to make her a new set of decor pieces to go in her room. I searched Pinterest and was inspired by this fun quote- “Swim with Mermaids, Ride Unicorns, Dance with Fairies, Chase Rainbows.” Last week I shared my opinions on the EasyPress 2 and this week I get to share with you a project where the EasyPress 2 and all the different Iron on materials available through Cricut shine.
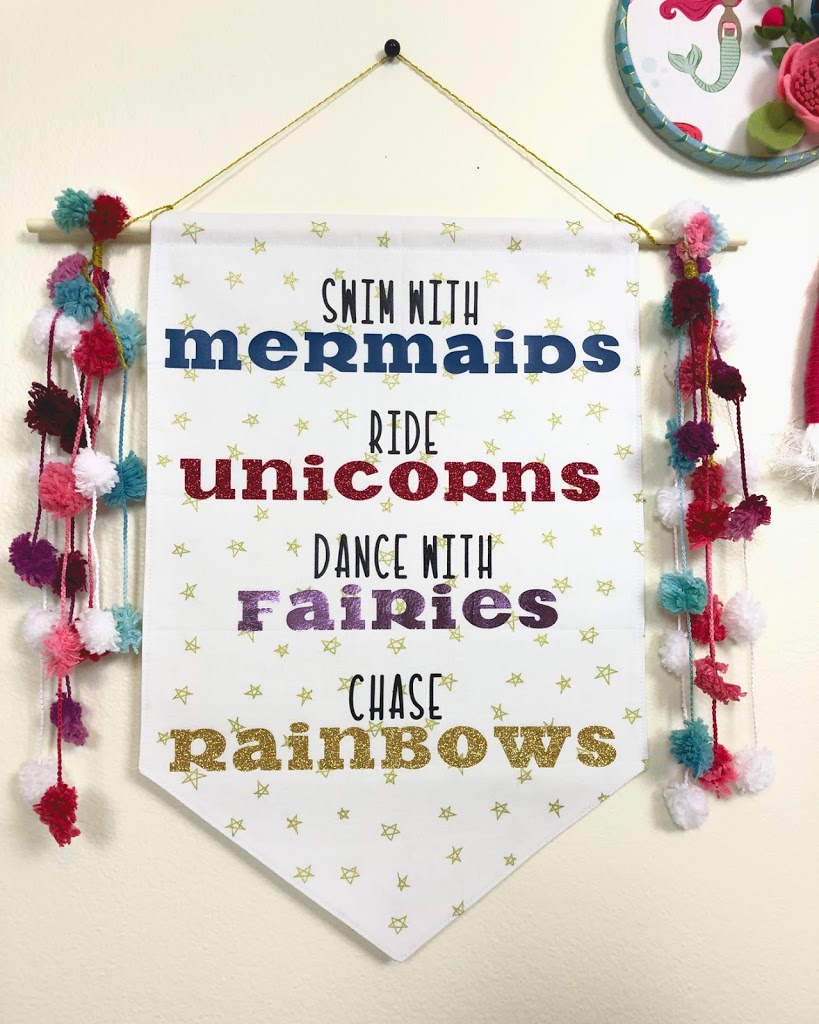
This project uses pink and gold glitter iron on, purple foil iron-on, and black and teal
Every day iron-on. You could definitely use fewer colors/ styles of iron-on, but why? 😉
We are also going to walk through sewing your own banner, but if you want to use a premade one, absolutely feel free- you may just need to adjust the size of the fonts to fit your chosen banner.
Supplies:
- iron-on- glitter, foil and every day OR style and colors of your choice
- fabric for banner (1/2 yard) or premade banner
- optional: interfacing for banner
- dowel for holding banner- 14″ or so
- Cricut Maker or Cricut Explore (if only cutting out the Iron on vinyl)
- EasyPress 2 or other heat source for adhering Iron on
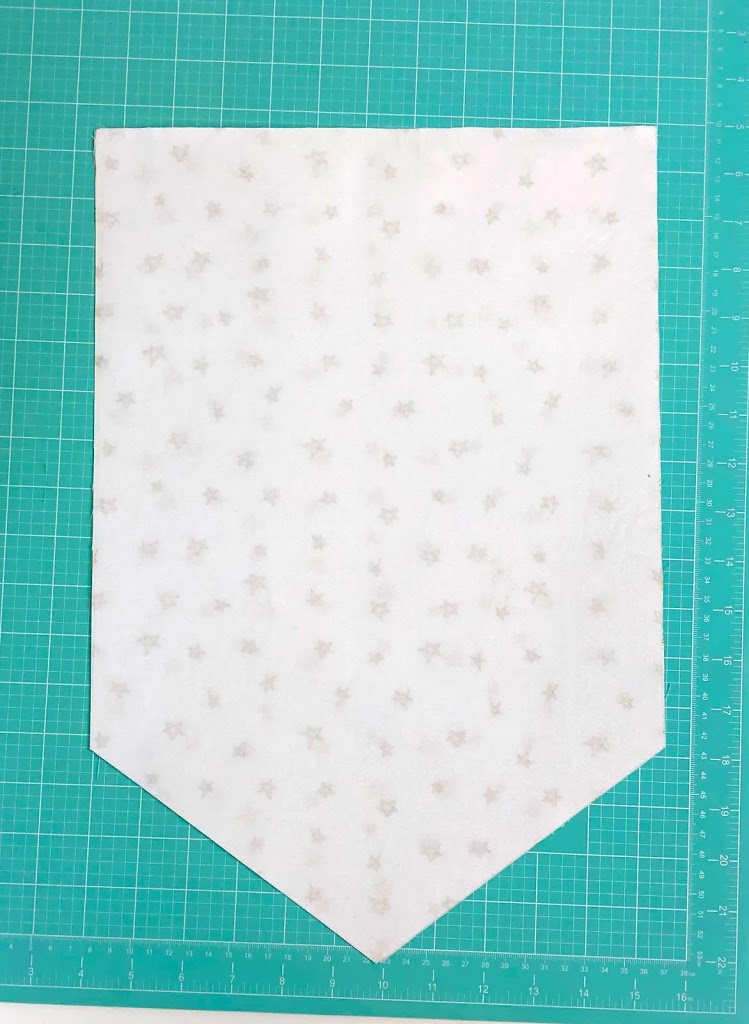
The Design Space file has the pieces for this banner, but if you don’t have a Maker, you can still do this project, you will just need to cut your own fabric by hand. Begin by cutting two rectangles 11 1/2″ X 17″ (if you are cutting the fabric on the maker cut the fabric to 12″ X 17 1/2″). I like to add light fusible interfacing to one piece of the banner fabric to add some weight and stability to the banner, but it’s not necessary (fuse before cutting the point on the banner). Fold the banner pieces in half to create a piece that is 17″ tall and 5 3/4″ wide. Cut a diagonal line from the center folded corner, to a point 4 1/4″ up from the other corner.
Cut out all your Iron On using your Cricut machine. Make sure to mirror all of the text.

Sewing the banner:
- place the banner pieces right sides together
- Place a pin 1″ down from the top on both long sides (the red pins in the photo)
- Mark an opening of 3-4 inches on one of the long sides (the yellow butterfly pins)
- Sew across the top of the banner using a 1/4″ seam allowance (back stitch when starting and stopping)
- Start at one of the red pins and begin sewing around the banner. Again back stitch when starting and stopping and use a 1/4″ seam allowance. When you get to the pins marking the opening for turning, stop stitching and back stitch, then resume stitching at the other side of the opening until you reach the final pin.
- Clip the seam allowance at each of the corners.
- Turn the banner right side out and push out the seams.
- Press well, making sure to turn under the seam allowance of the opening where the banner was turned right side out.
- Sew a line across the top of the banner 3/4″ down from the top seam (this should be at the bottom of the opening that was left when you started sewing at the red pin, it will create the channel for holding the dowel) when you reach the end of the top seam, sew around the rest of the banner with a top stitch (a stitch close to the edge of the fabric) until you reach the beginning of your stitching. This will give your banner a finished look as well as close the opening we left for turning.

Once your banner is sewn, fold in half to find the center and lightly crease. This will help you lay out your quote.

Position all your vinyl and arrange it how you like it. I cut away as much of the carrier sheet on each separate piece as I could so I could just adhere all the vinyl at once.
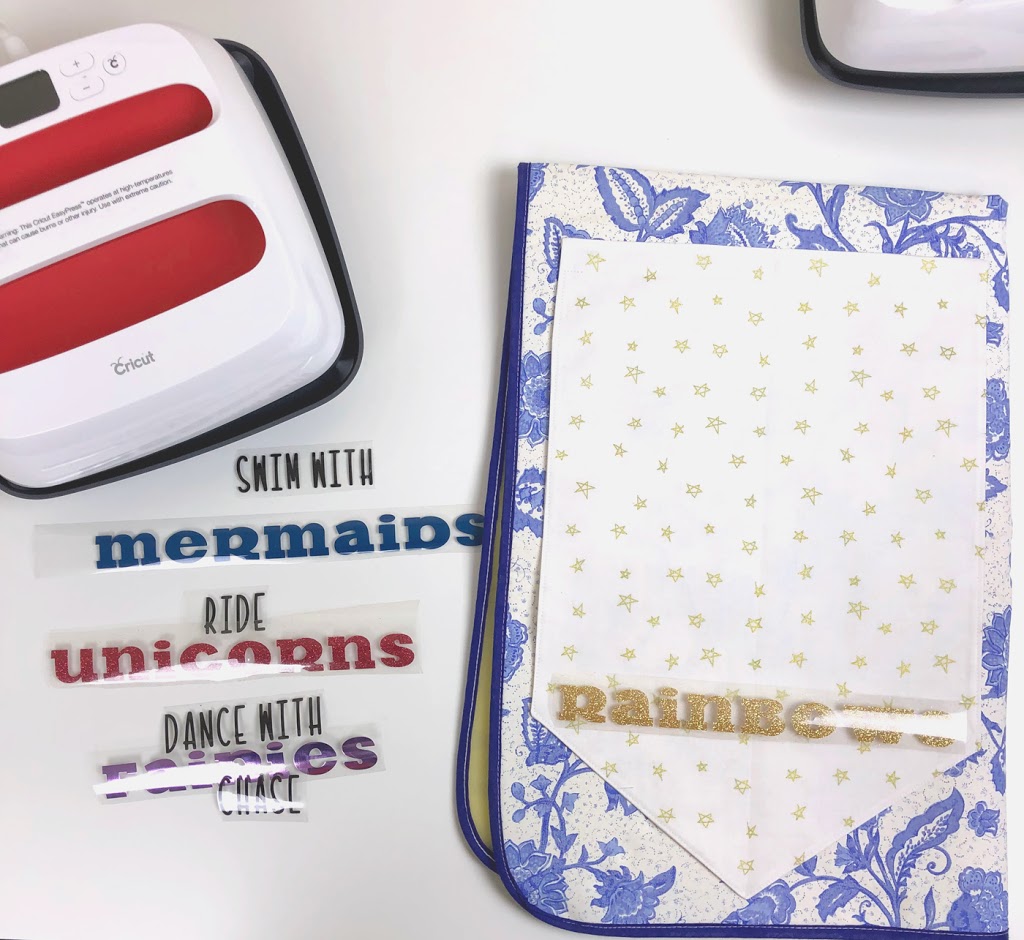
Set up your banner on your EasyPress mat or whatever surface you are working on- making sure it’s protected from the heat with a towel or other mat.
Position all of your vinyl where you want it. I found it helpful to press additional creases into the banner to give me guide lines to place the words, but you can also use a heat or water soluble ink to mark the lines, or just use a ruler and tack your vinyl in place as you go.
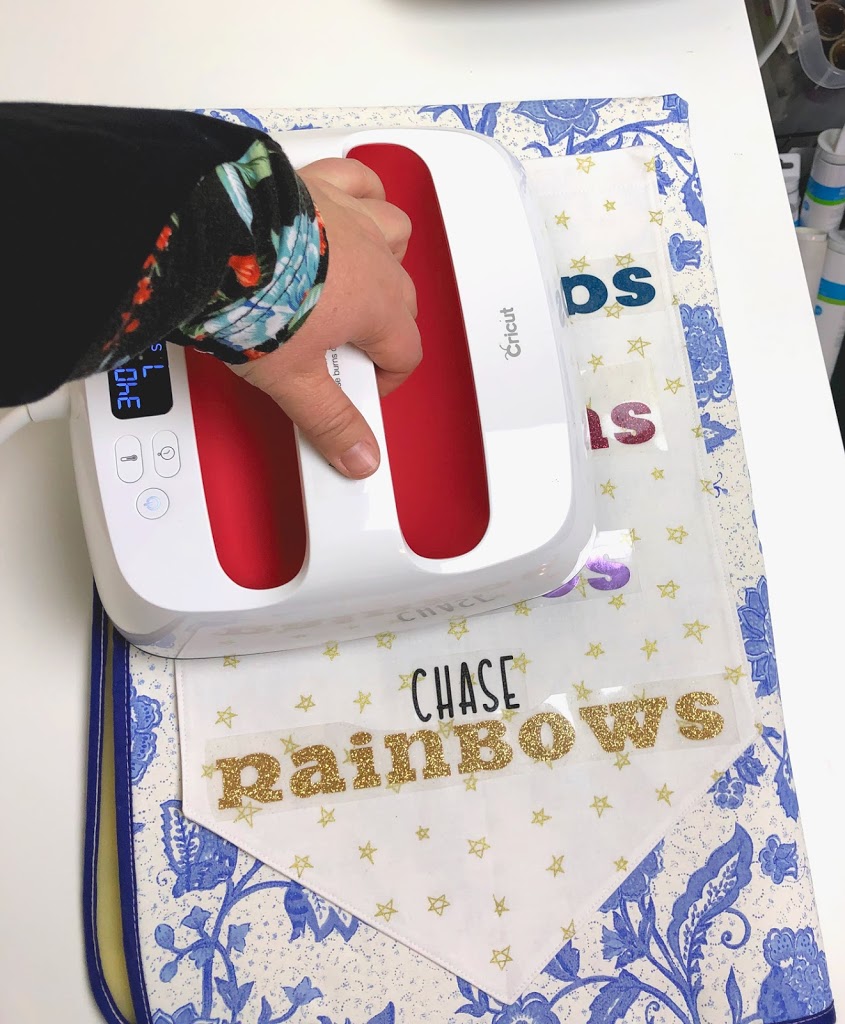
Once all your vinyl is placed, use your EasyPress 2 to adhere all of the vinyl. I used the setting for the glitter vinyl because it required the highest temperature for the longest time and I wanted to make sure all of the vinyl was properly attached. This project would be a perfect time to use the largest size of EasyPress 2, but since I didn’t have one, I just made sure to slightly overlap the areas I was attaching as I worked my way down the banner.
All that is left is to remove the carrier sheets and embellish your banner. Make sure to check the different types of iron on to see if they are warm or cool peel- meaning if the carrier sheet should be removed while the iron on is still warm or if it needs to be cooled off. The foil Iron on was the only one that required a cool peel, so I made sure to wait before removing that carrier sheet.
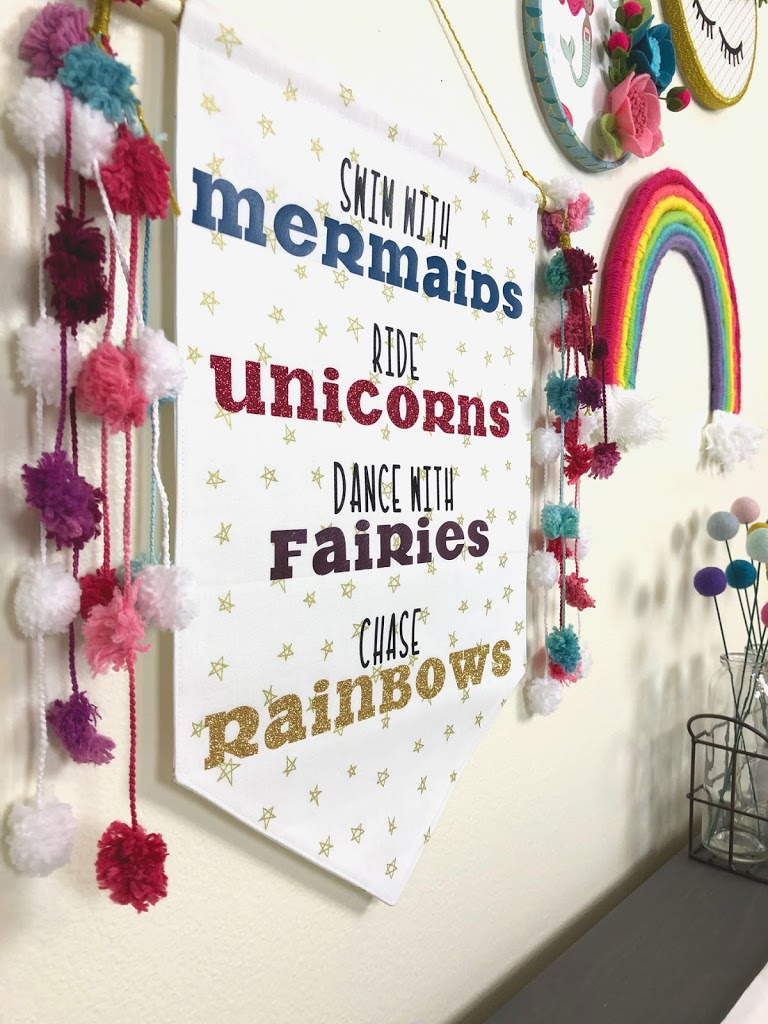
I just LOVE all the different textures on this banner. The sparkle from the glitter and the shine of the foil add so much magic to this fun decor piece. My daughters all love it which is what really matters.
Have fun and as always, if you have any questions, please don’t hesitate to ask!
xoxo,
Amy
For more Project inspiration:
These fabric carrots can be cut by hand, OR with your Cricut Maker


This holiday room makeover.
Or Valentine projects you can make.