This post was originally posted on The Ribbon Retreat blog. All of the fabric used was supplied by The Ribbon Retreat but the tutorial is my own. I have provided links to the materials used as a help and courtesy, there is no compensation on my part for purchases made through those links. Now that the disclosures are out of the way, let’s make a bag!
I have a 12 year old daughter and she’s amazing. I wanted to make a bag for her that is big enough to hold her essentials, but that’s still fun and youthful. I hate that they grow up so fast! 🙂
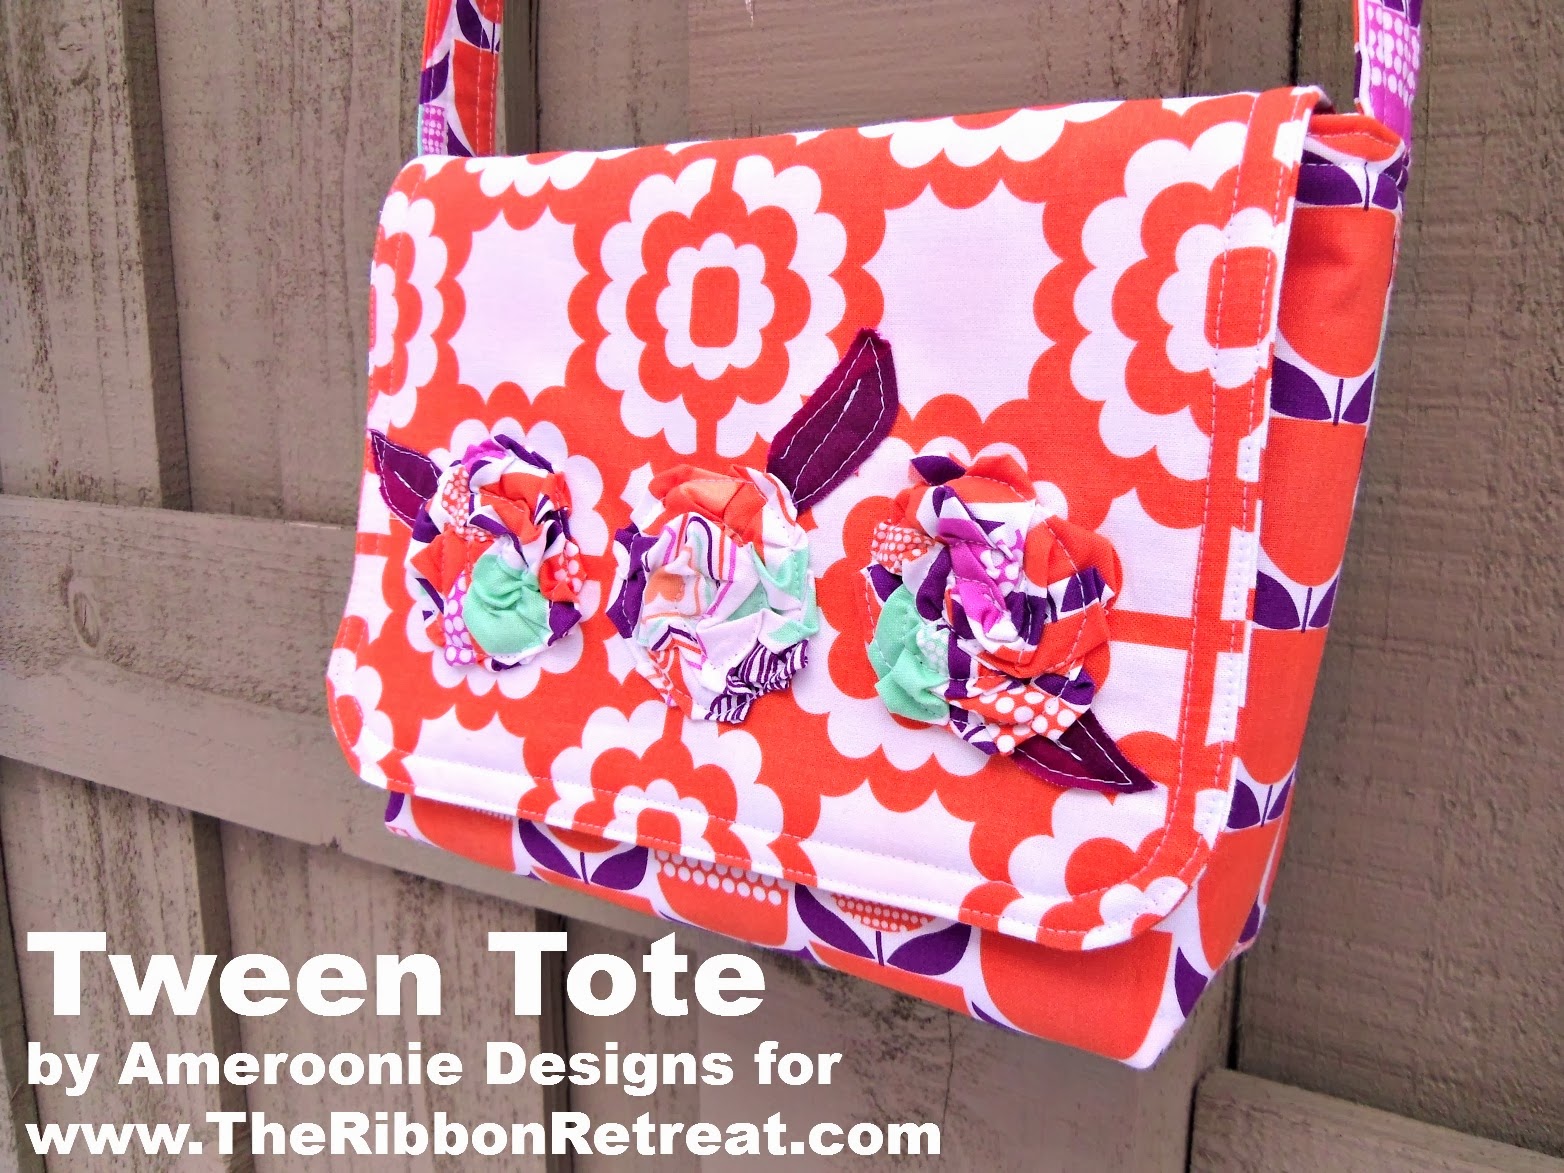
So, here’s my tutorial for the Tween Tote. A fun bag that’s easy to personalize so even though it’s small, it packs a big punch of style.
The first step is always choosing fabrics. 🙂 For me it’s the most fun AND most challenging part.
Some tips to keep in mind:
This bag will be used frequently. Choose fabrics for the outside of the bag that don’t have a lot of white space so the dirt and wear doesn’t show as much.
If you choose a directional fabric, like the floral in my bag, you’ll have to add in a couple of steps, if you don’t want to have to worry about it, choose fabrics that don’t have an obvious direction.
You will need 3/4 total yards of fabric (I used Moxie by FreeSpirit). If you are using multiple prints, make sure you purchase fat quarters or half yards so you have the width you will need. If you are using a directional fabric, you may wish to purchase extra fabric to make sure you have enough to adjust for the directionality.
You will also need 1/2 yard each of fusible fleece and a medium weight fusible interfacing. I have used Craft Fuse by Pellon.
Depending on how you want to embellish the flap, you may also need additional notions, like ribbon or felt.
The finished bag measures approx. 9″ wide X 7″ tall X 2″ deep and is intended to be worn across the body as a messenger bag. All seams are 1/2″ unless otherwise noted.
Now let’s cut some fabric.
You will notice that the fusible fleece is cut smaller than the fabric pieces, this will reduce bulk in the seams and help the pieces come together a bit easier.
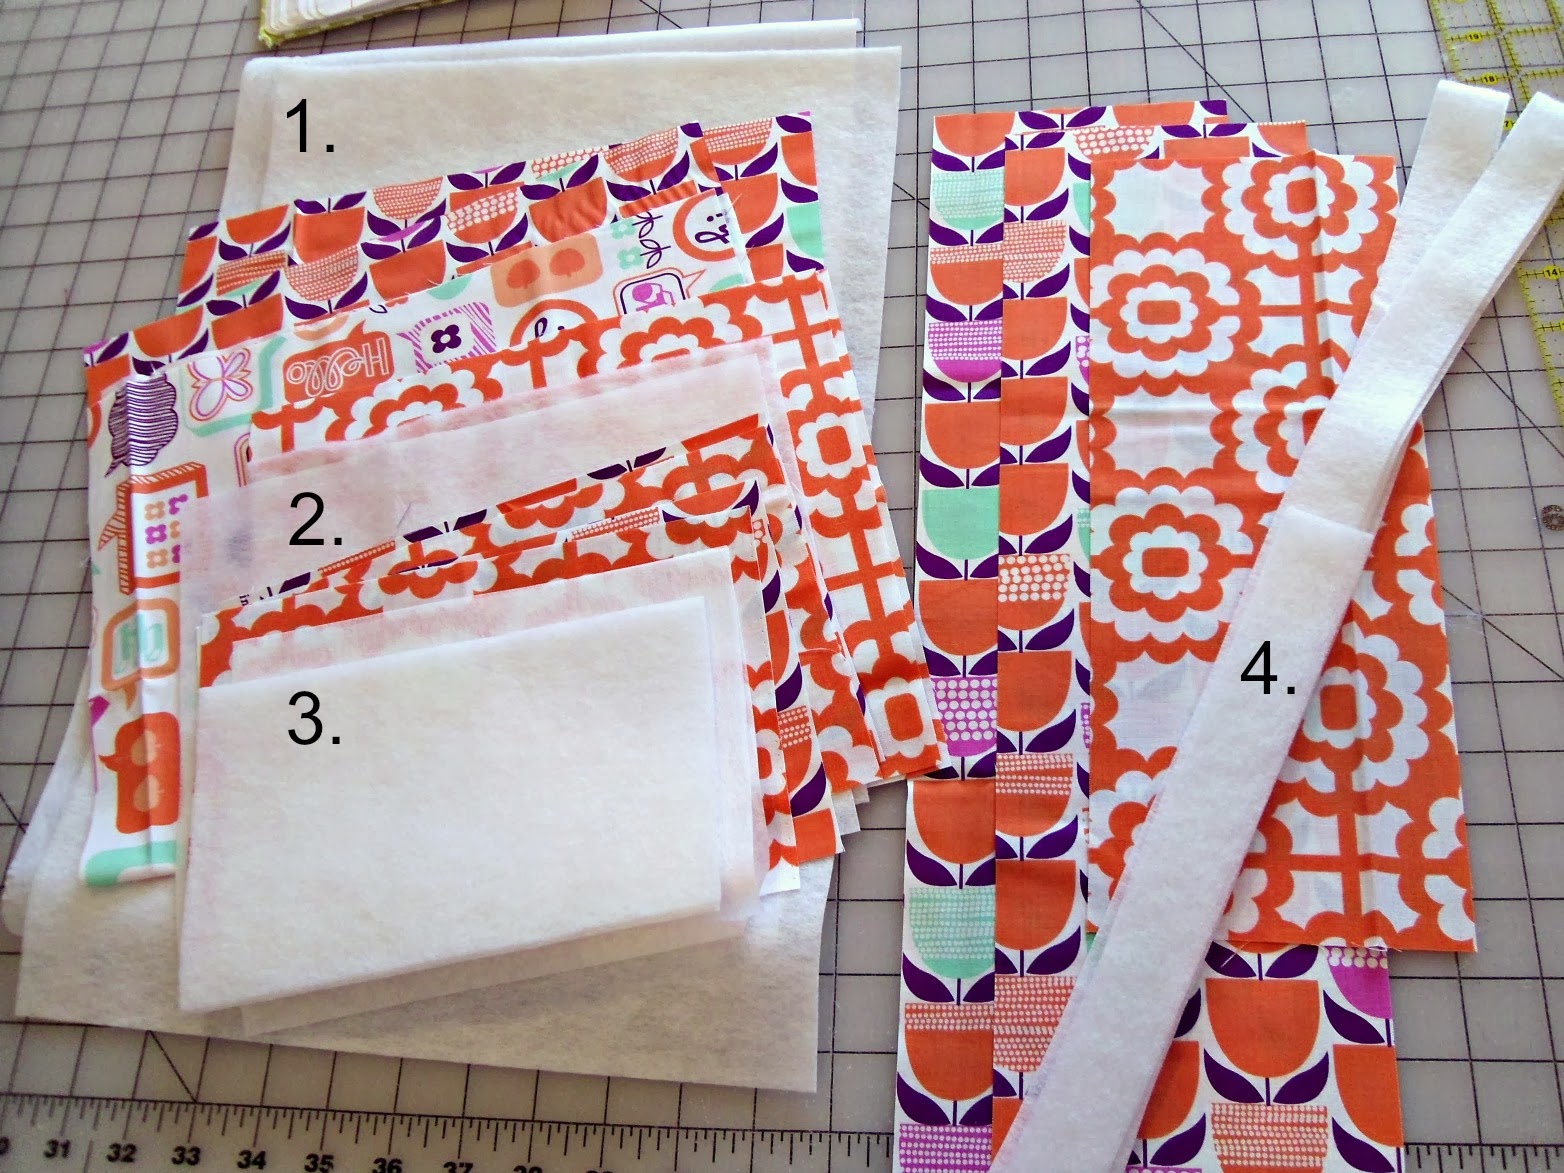
1. Main Body of Bag:
3- 12″ wide X 18″ tall pieces- one each of exterior and interior fabrics and interfacing*
1- 11″ X 17″ piece of fusible fleece
* if you are using directional fabric, you will need 2- 12″ wide by 9 1/2″ tall pieces of fabric
2. Bag Flap
3- 10″ wide X 9″ tall pieces- one each of exterior and interior fabrics and interfacing
1- 9″ X 8″ piece of fusible fleece
3. Pocket Pieces
4- 9″ wide X 6″ tall pieces of fabric- 2 for outside pocket and 2 for inside pocket
2- 9″ wide X 6″ tall pieces of interfacing
2- 8″ X 5″ pieces of fusible fleece
4. Strap
2- 5″ wide by 18″ tall pieces of fabric
1- 5″ wide by 13″ tall piece of fabric*
*You may wish to adjust the length of the strap to suit the person it’s intended for, just make sure to add 1″ for every seam to the over all measured length. My daughter is fairly tall. If your tween is smaller, you may want to shorten it, if you’re making it for yourself (and who could blame you?) you may want to add some length.
2- 1 1/8″ wide by 38″ long pieces of fusible fleece and interfacing*
*if you need to use multiple pieces to get the length correct (which you probably will) add a couple extra inches to the total length so you can overlap the pieces when you fuse them to the strap. Also, you will need to adjust this length if you have adjusted the length of the strap.
Prep Work
I promise that the prep work takes longer than the actual assembly of the bag, but the interfacing and fleece will give the bag body and shape. Hang in there with me. 🙂
- Fuse the fleece to the outside pieces of the bag and pockets- the pocket piece that will show. (don’t fuse the fleece to the strap or flap yet)*
*If using directional fabric for the body of the bag, sew the two pieces together first, matching up the “bottom” of each piece and sewing that seam. Press the seam open.
- Fuse the interfacing to the inside pieces of the bag, pockets and flap. (you’ll just have the strap pieces left)
Strap
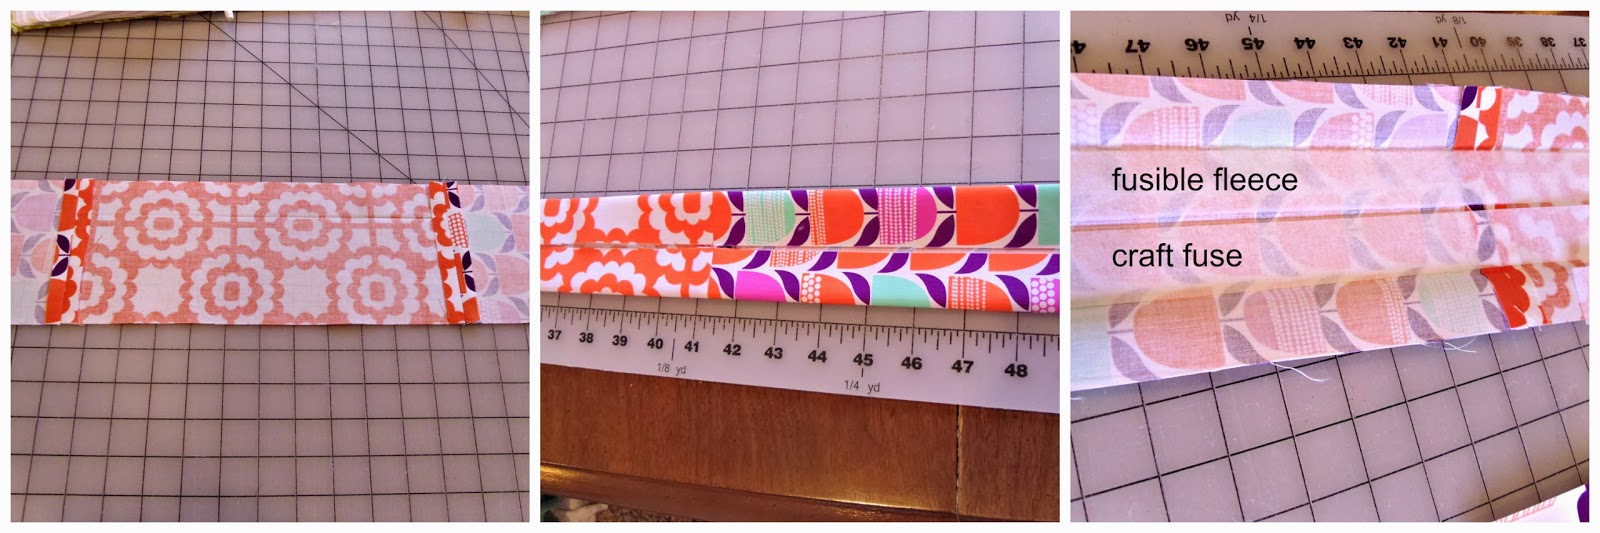
- Sew the fabric pieces together, putting the shorter piece in the center of the strap.* Press seams open.
*if using a directional fabric, make sure the “top” of the print is sewn to the center piece.
- Press the strap in half, then open the strap and press each half in toward the center fold.
- Open the strap and place the fusible fleece on one of the center quarters and the interfacing on the other center quarter, with the fusible side toward the fabric.
- Re-fold the creases and press to fuse. Top stitch
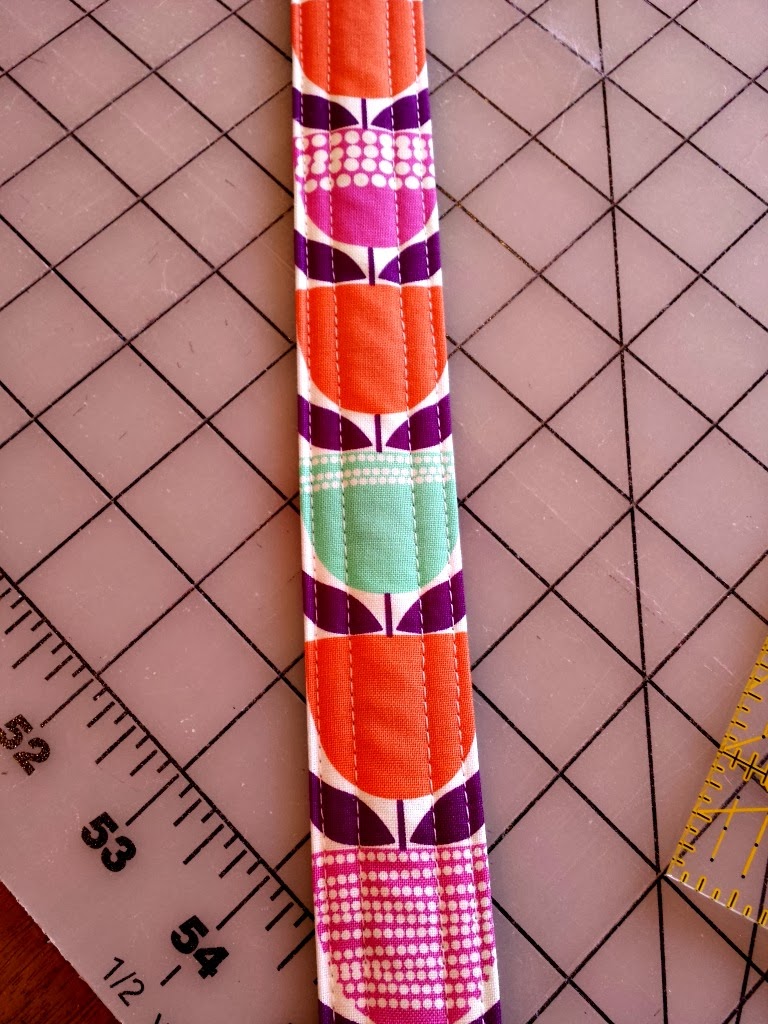
- Add a second row of stitching if you like.
Flap and Pocket
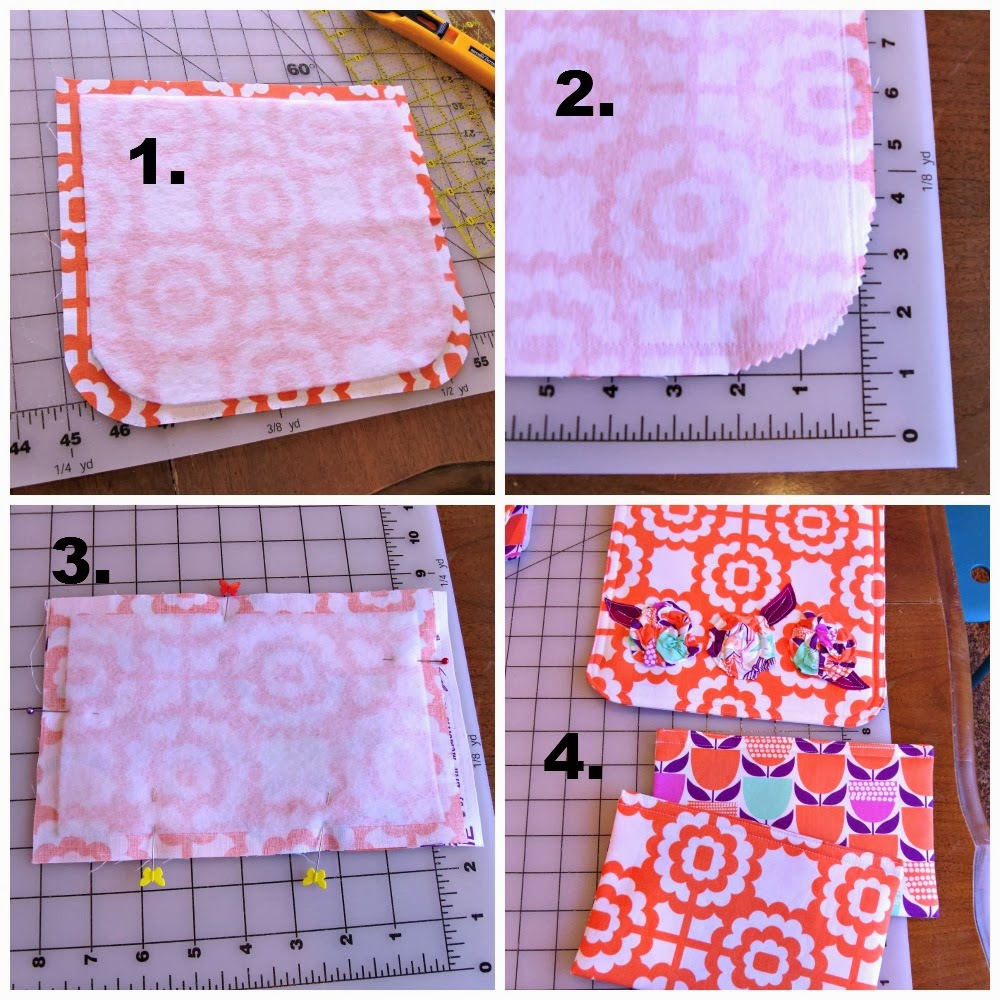
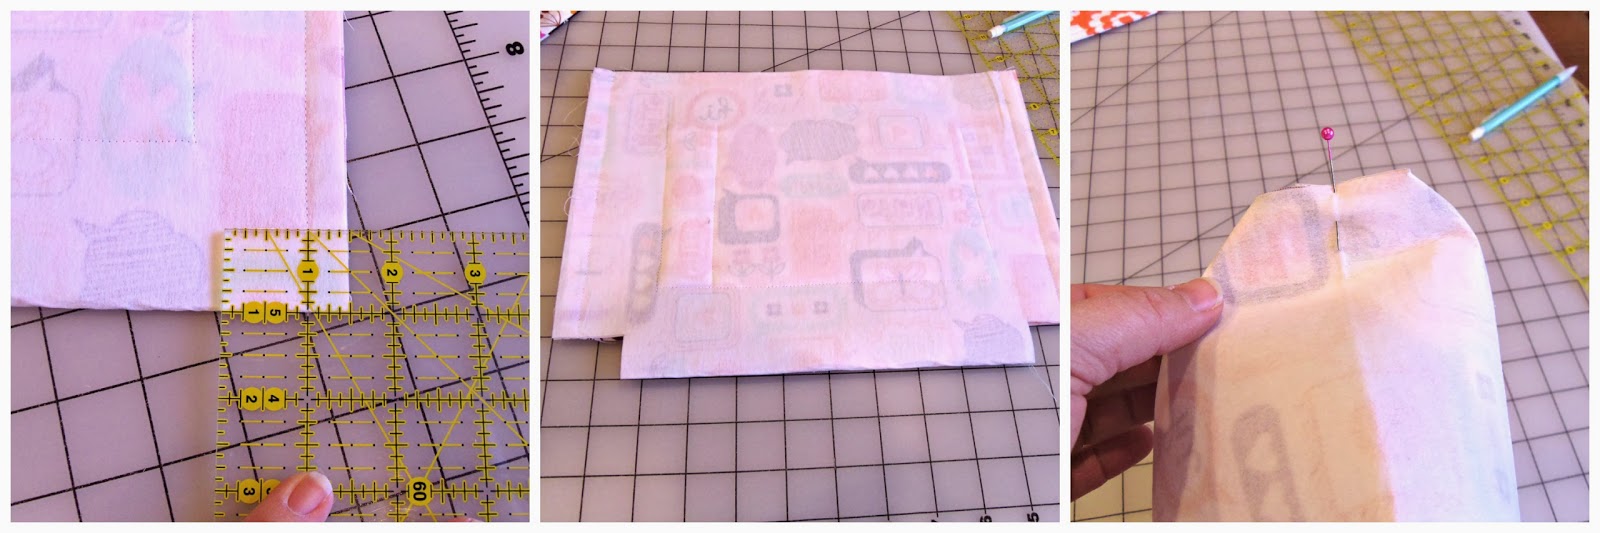
1. Using a mug or other round object, round the bottom corners of the outside, inside and fleece flap pieces. Center the fleece on the outside flap piece and fuse. If sewing embellishments on the flap, do it now. (Keep in mind the 1/2″ seam allowance when placing embellishments.) Place the flap pieces right sides together and sew around sides and bottom, leave the top open.
2. Clip the rounded corners of flap. I use pinking shears to do this, but you can just cut notches into the seam allowance of the curves. Be careful not to clip your stitching. Turn flap right side out and press seams.
3. Pair up your pocket pieces- one should have fleece and the other should have interfacing- and pin. Sew around all 4 sides leaving an opening for turning. (the space between the yellow pins in the picture, on the bottom of the pocket. Pay attention if your fabric has direction) Clip corners, turn right side out and press.
4. Top stitch the sides and bottom of the flap and the top of the pockets. I added an additional stitch line for decorative purposes on both.
Bag Assembly
Now that all our pieces are together we are ready to build a bag. This is where it gets exciting!
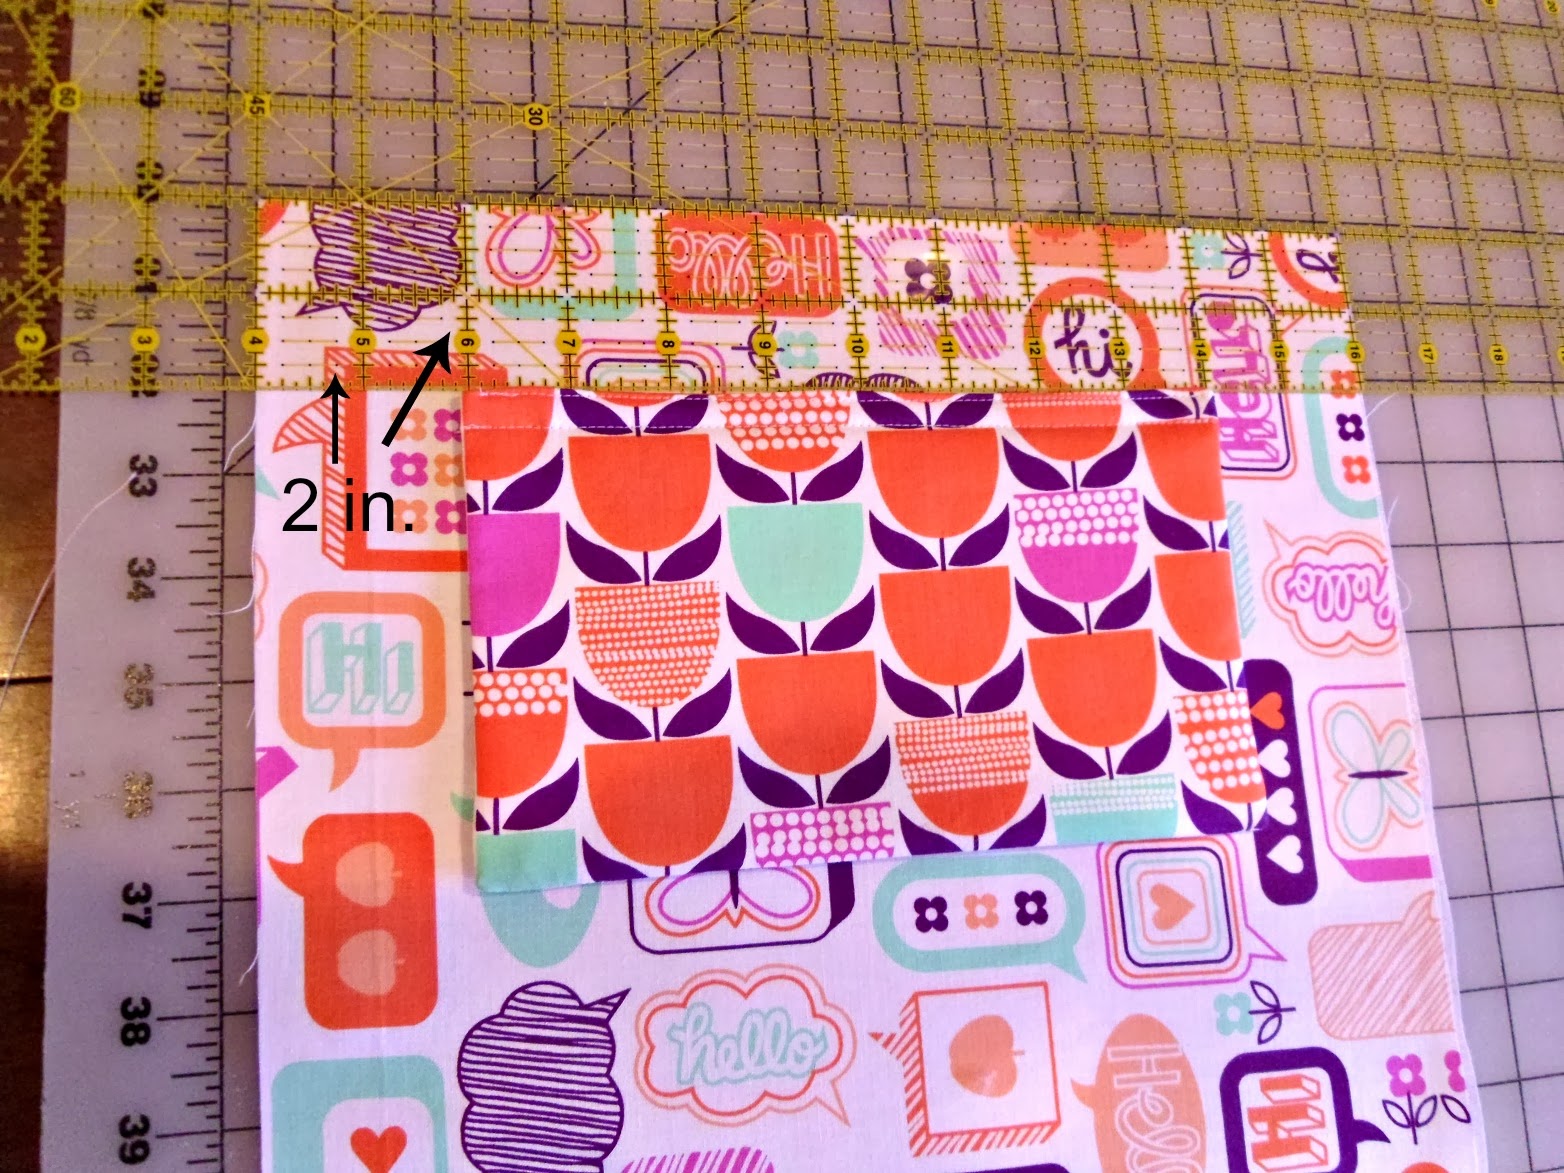
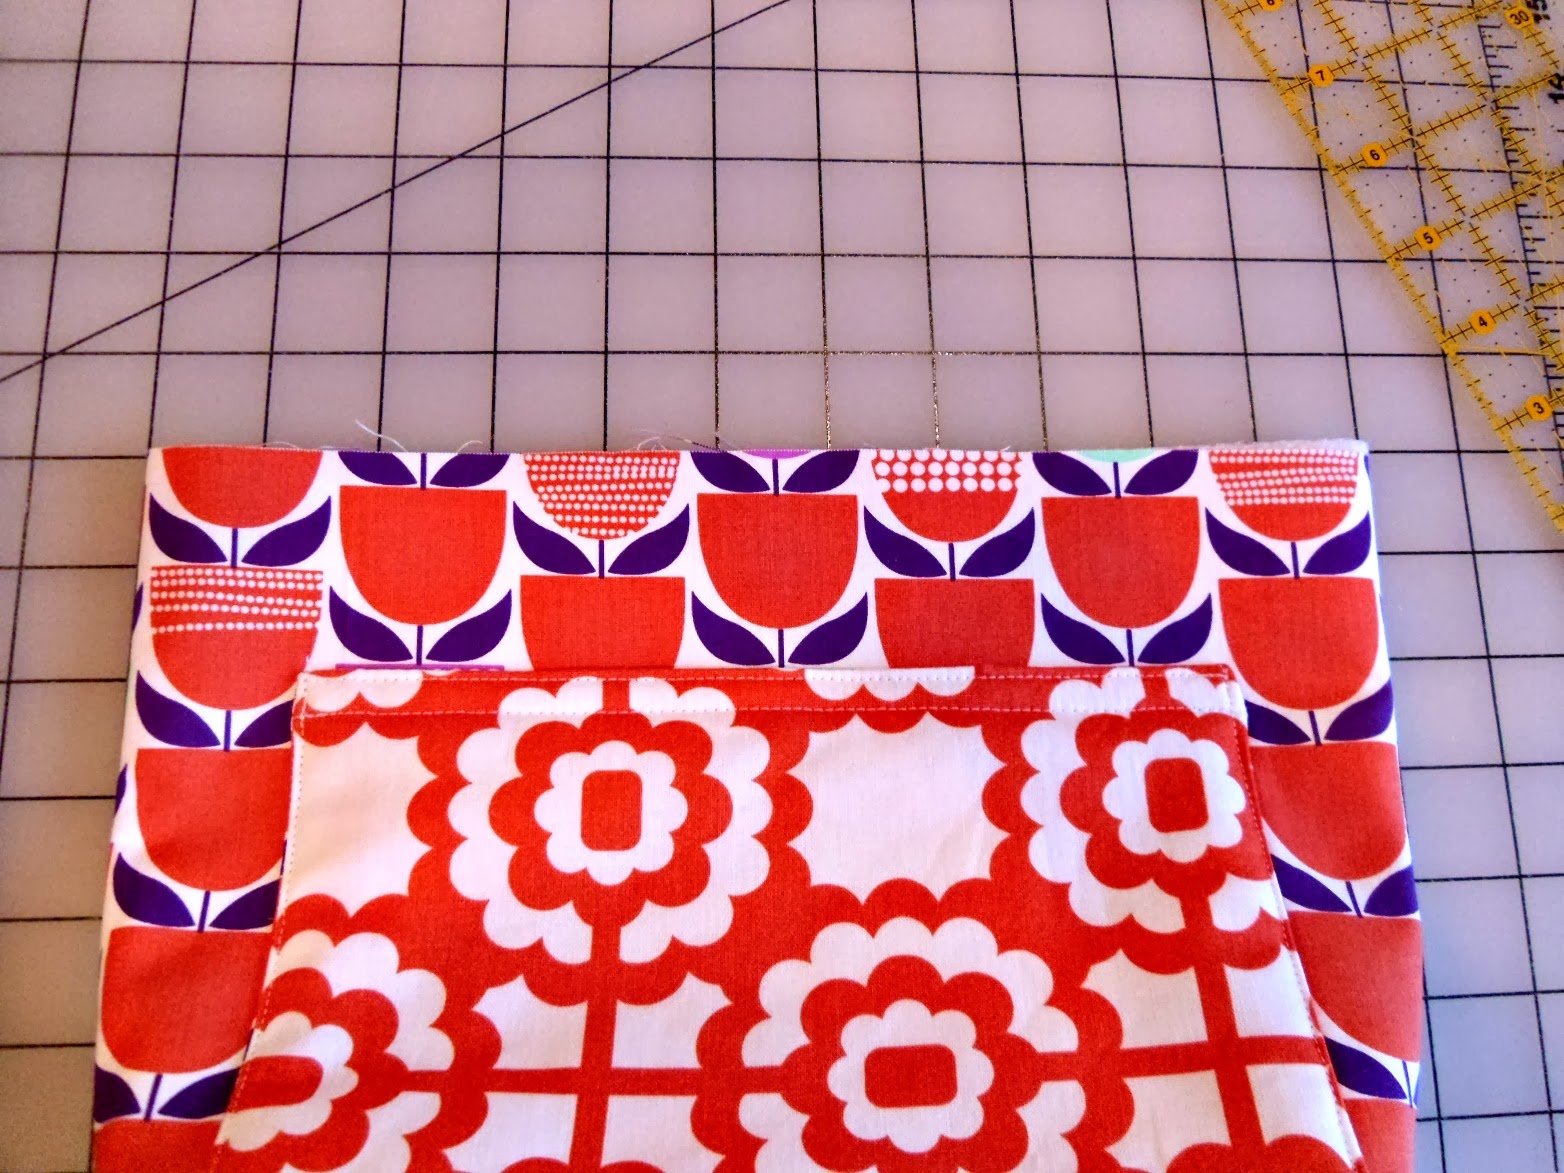
- Take your inside bag piece and the interior pocket. On one short end of the bag piece, position the pocket 2″ down and 2″ in from the side. It should be centered across the width, if not adjust the position slightly.
- Pin pocket in place.
- Repeat for outside bag piece and outside pocket.
- Sew around sides and bottom of pockets, closing the opening left for turning. Back stitch at the top of both sides to reinforce stitching.
- If you want to add a pen pocket to the inside of the bag, add an additional line of stitching 1 1/4″ from one of the sides of the pocket toward the center.
- Take both the inside and outside bag pieces and fold them in half, bringing the short ends together.
- Pin the sides.
- Sew both side seams on each piece.
Create the boxed bottom of bag
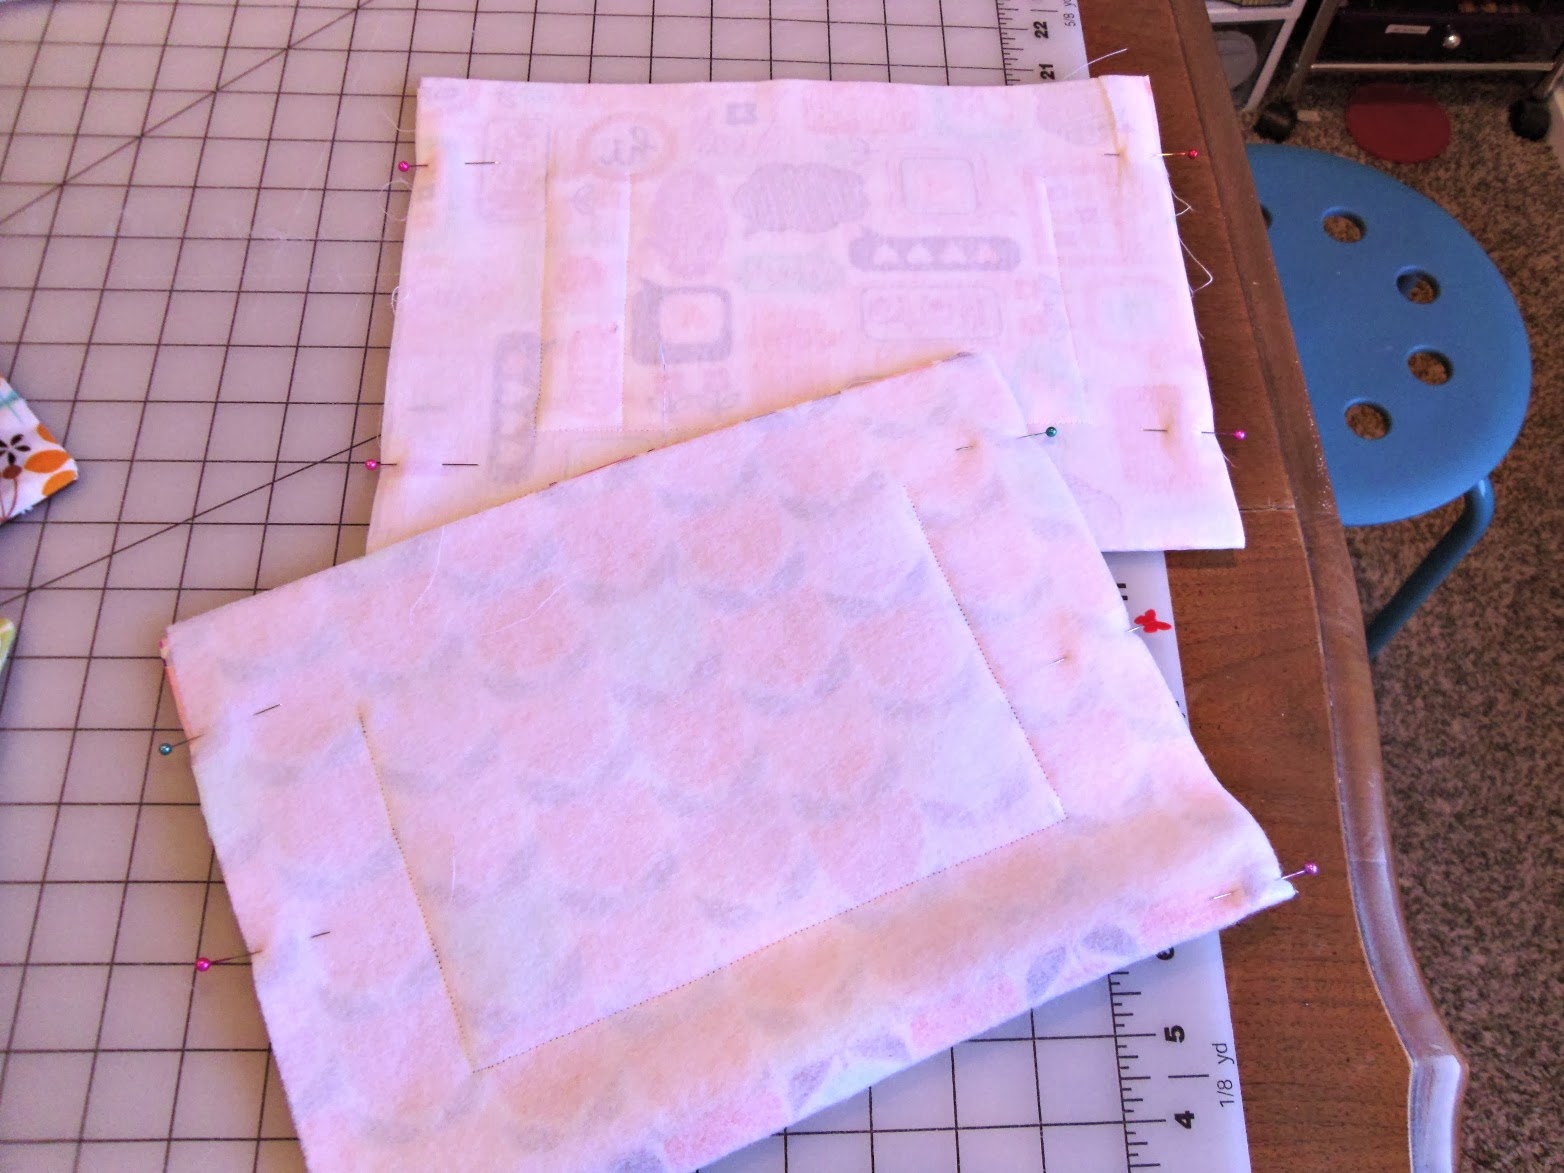
- Mark a rectangle on the bottom corners of the bag interior 1″ up and 1 1/2″ in from the side.
- Repeat for bag exterior.
- Cut out rectangles from interior and exterior of the bag. (4 total)
- Flatten out the rectangles by pulling from the corners to create a straight line.
- Pin.*
*Pin the seam allowance toward the pocket on the bag exterior and away from the pocket on the bag interior.
- Sew along all 4 corners.
- Open the side seams and press flat. You will want to press on the fabric side as the iron will melt the fleece and interfacing.
Adding flap and strap
Take the exterior bag piece and turn it right side out.
Press the bottom corner seams.
Flatten the top of the bag so the side seams are at the sides, with the pocket facing up.

Center the flap along the top seam of the bag with the inside fabric facing up, it should be approx. 1″ in from each side. Pin in place.
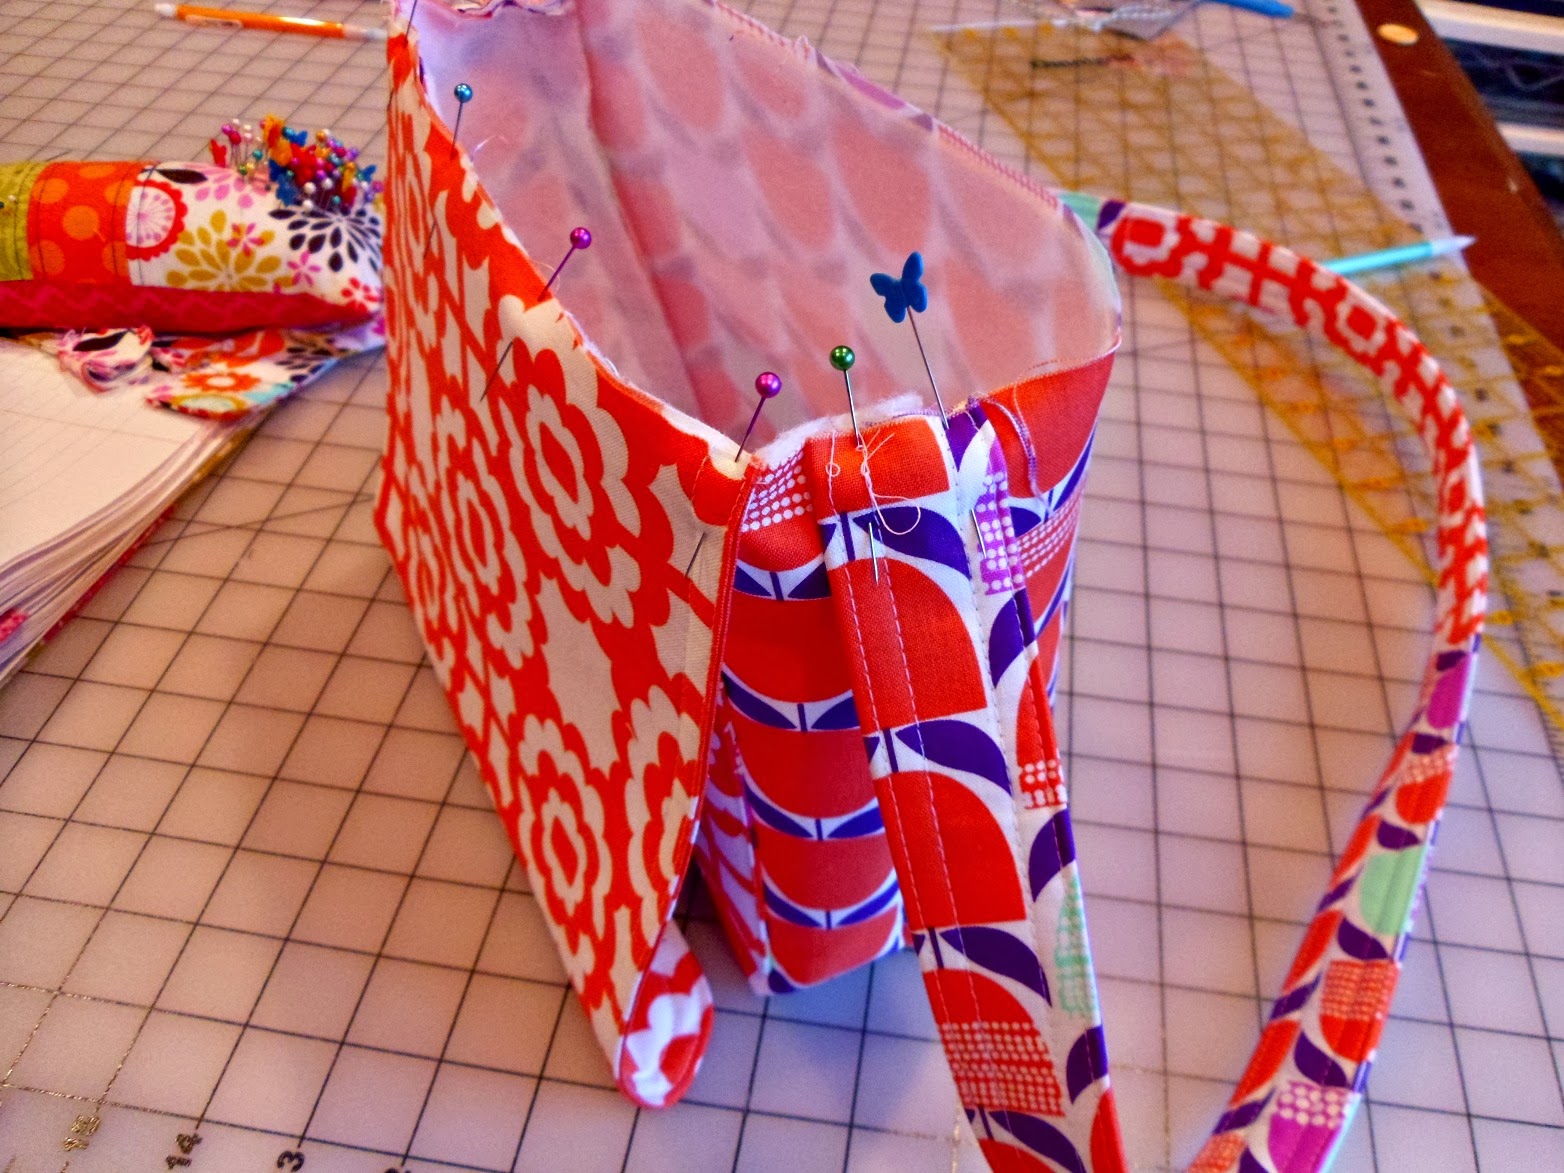
Center the ends of the strap on each of the side seams. The side of the strap with the fusible fleece should be away from the bag. Pin in place.
Baste the strap and flap to the outside of the bag using a 1/4″ seam allowance.

- Take the outside of the bag and put it inside the interior of the bag.
- Make sure the flap is toward the pocket of the interior.
- Line up the side seams and pin.
- Then go around the rest of the bag and line up the top edges and pin. Use a lot of pins.
- Sew around the top of the bag, leaving an opening for turning. It’s easier if the opening is on the side of the bag opposite the flap.
- Turn the bag right side out.
- Push the interior of the bag inside the exterior of the bag.
- Press along the top seam.
- Top stitch the top seam of the bag, closing the opening left for turning. Again, I added an additional row of stitching for decoration.
Some detail shots:

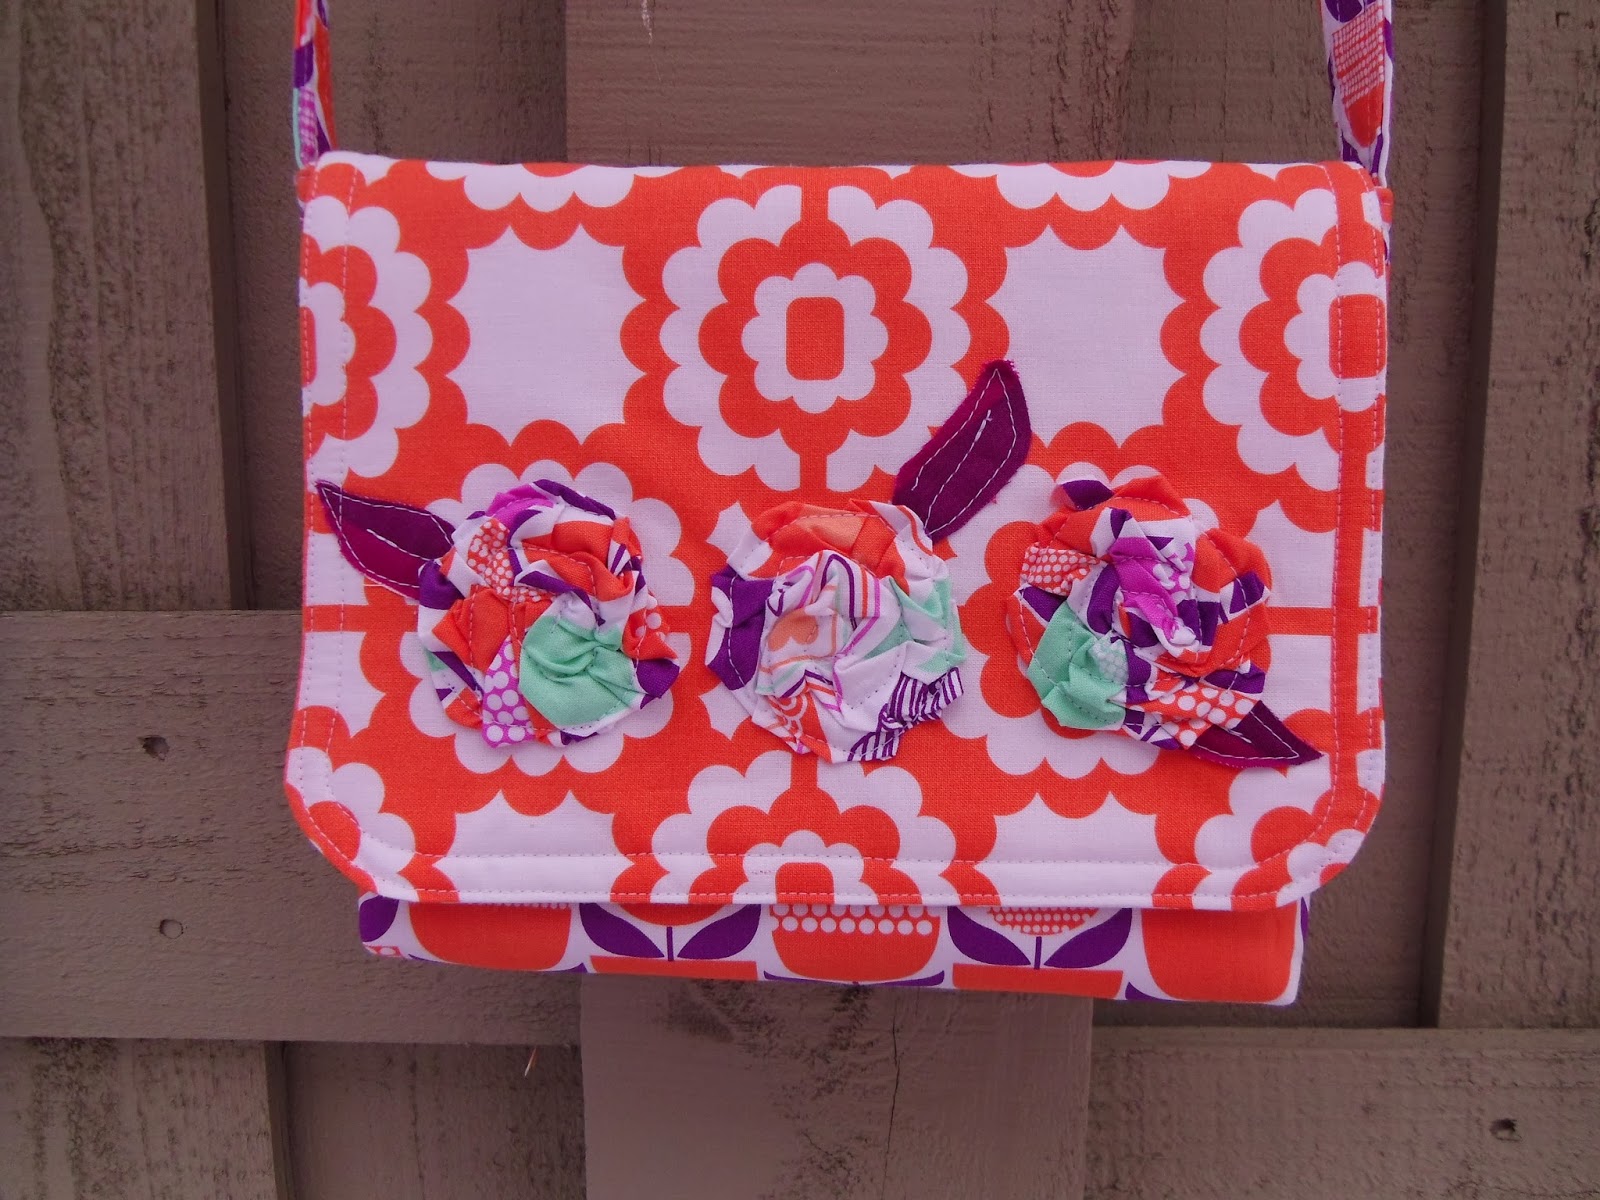
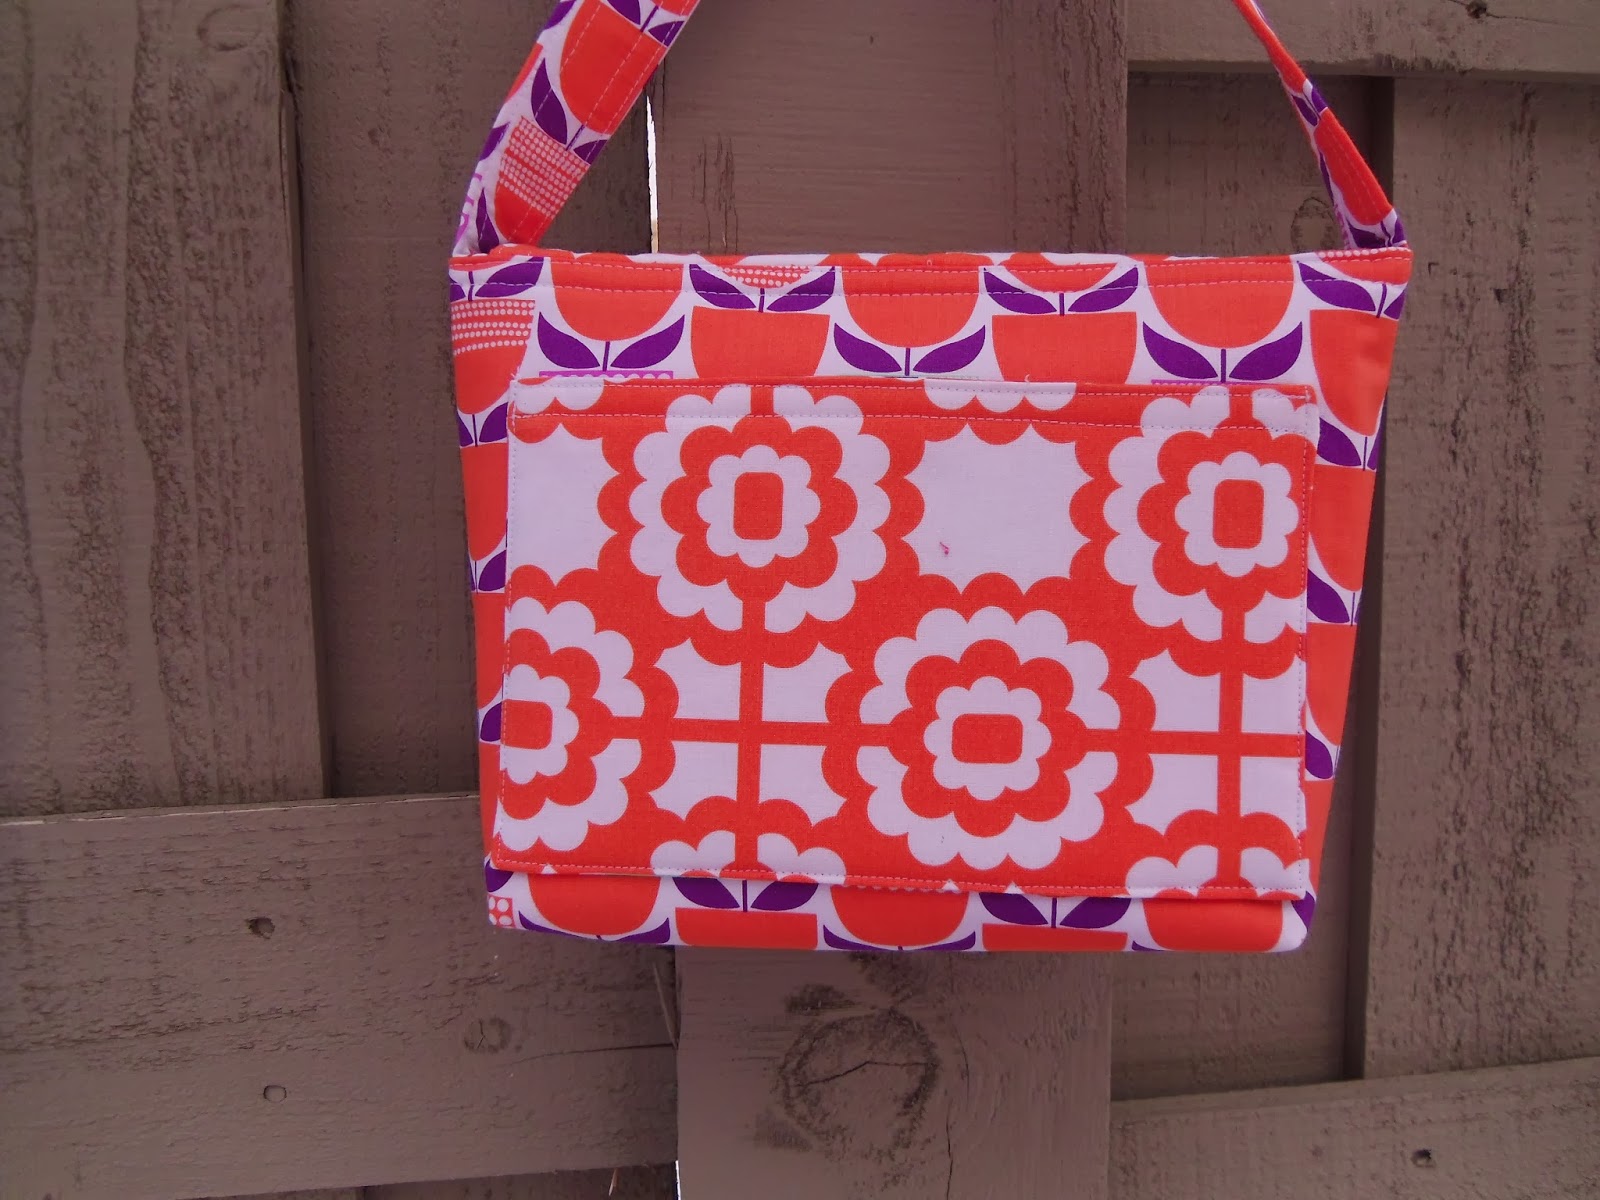
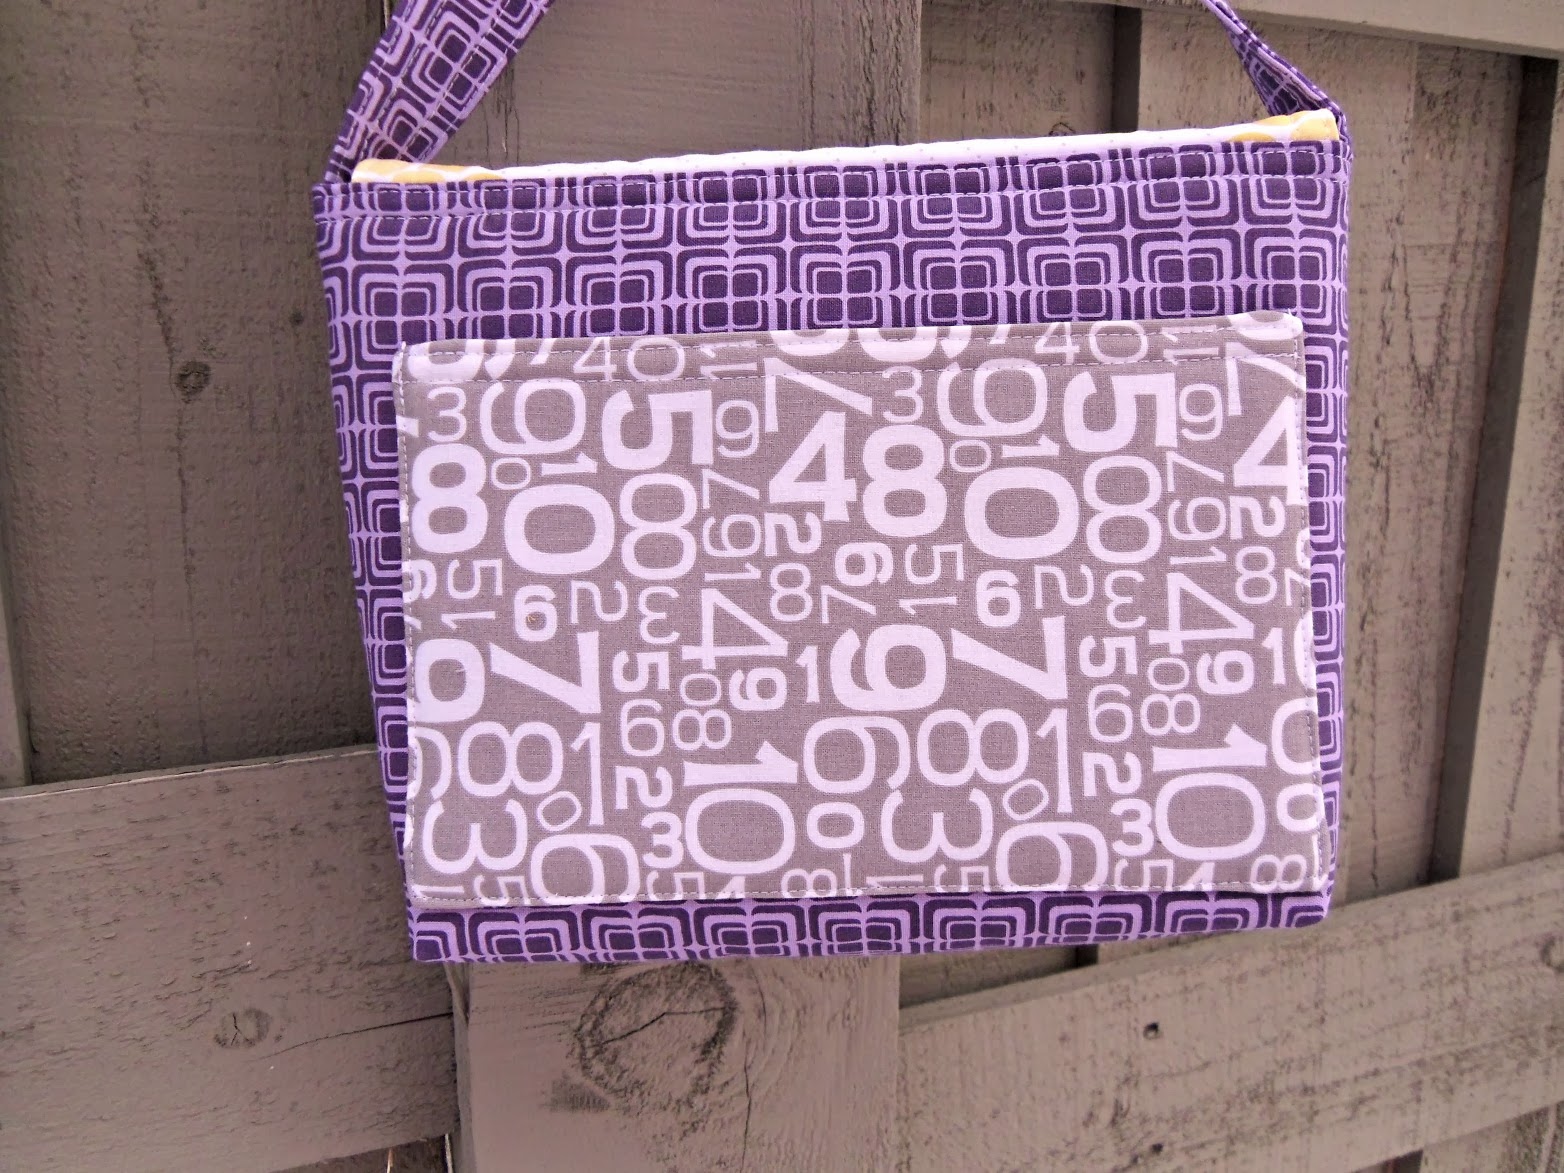
I wanted to show how the fabric selection can completely change the feel of the tote. This tote was made up in Ashbury Heights by Doohikey Designs for Riley Blake, with just a hint of Gracie Girl on the back pocket.
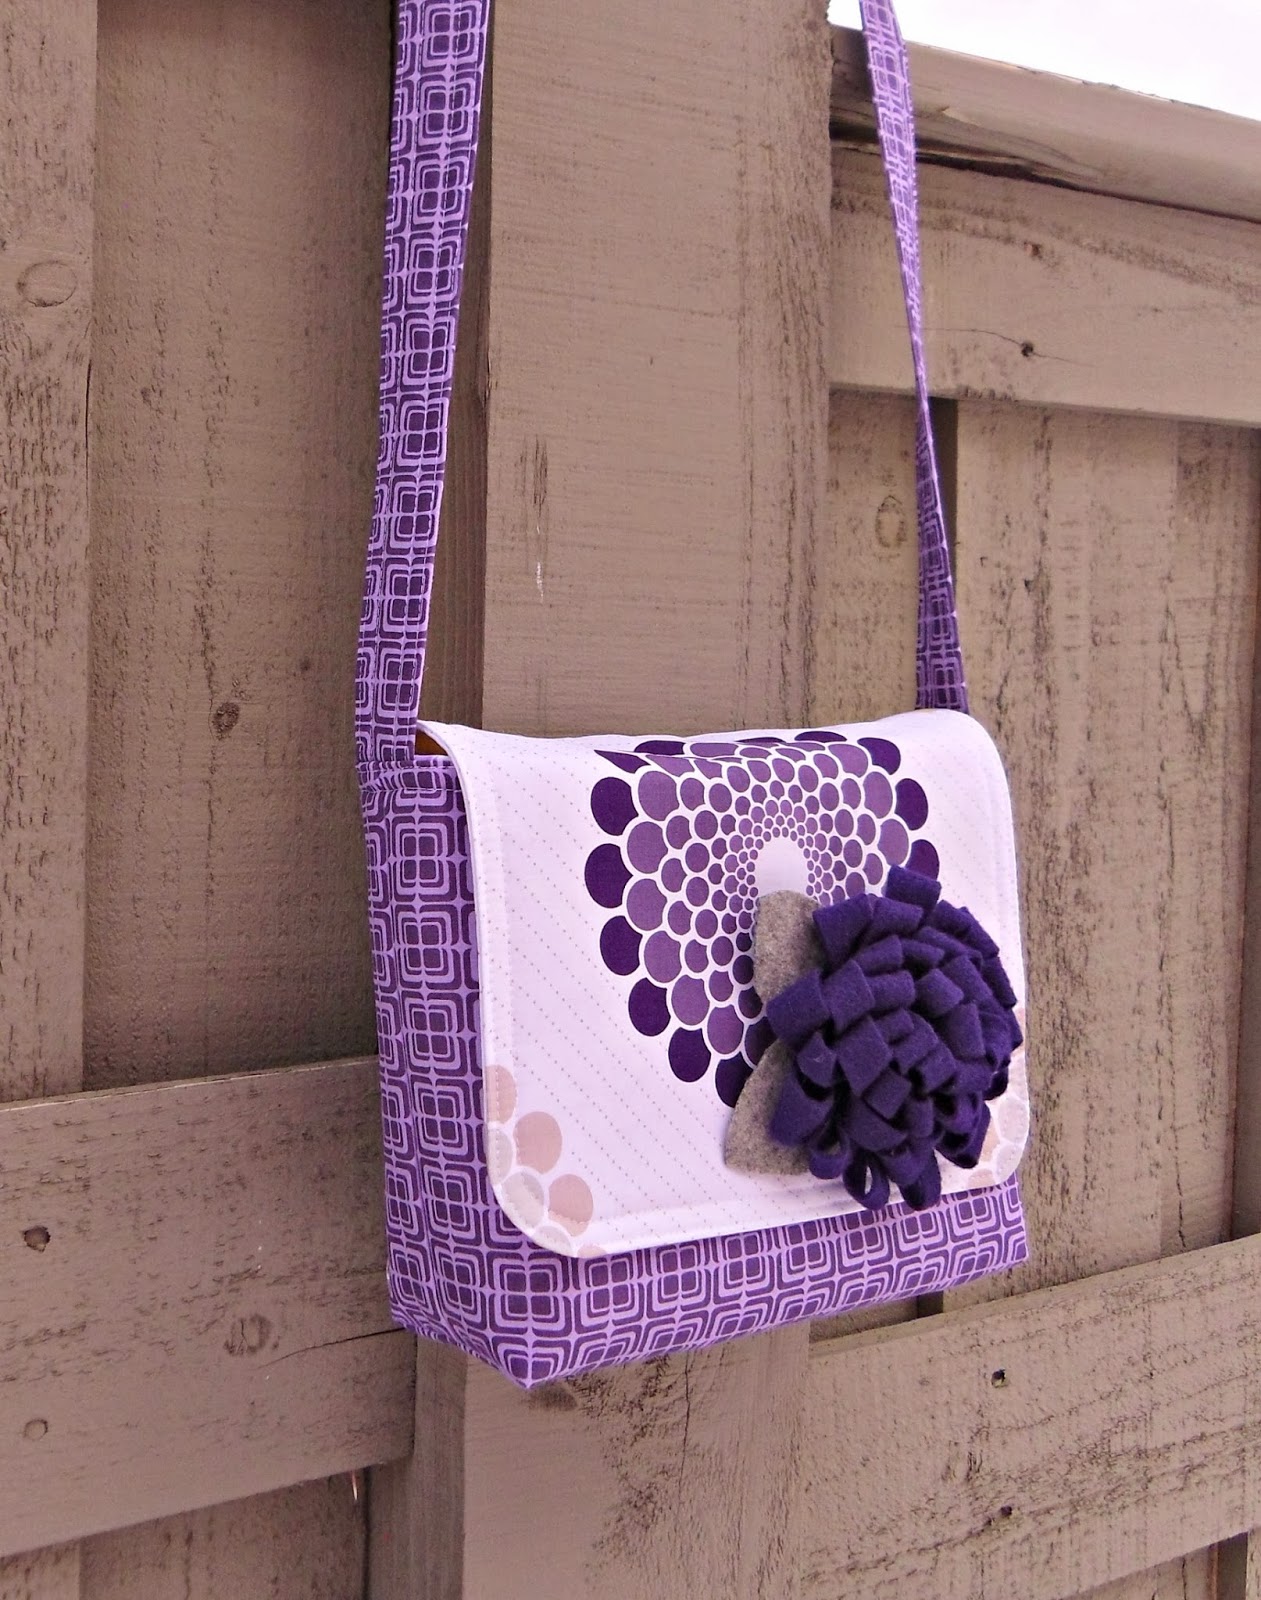
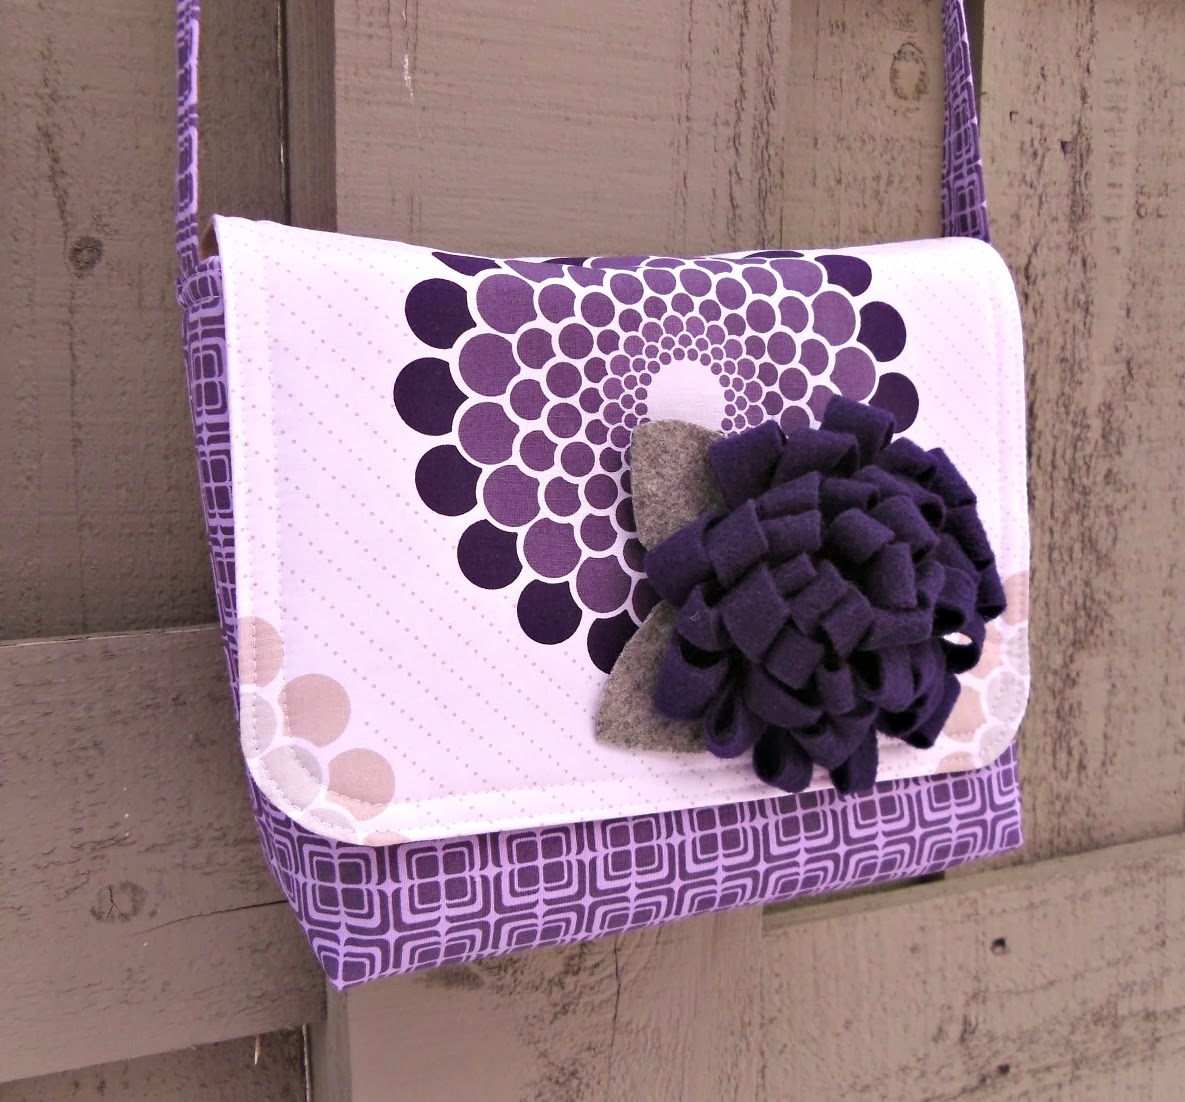
I also have a tutorial for the pom pom flower. For this one I used strips of felt 2 1/2″ wide.
I hope you enjoy making this small but style packed tote!
xoxo,
Amy
Linked up to Too Cute tuesday at Funky Polkadot Giraffe