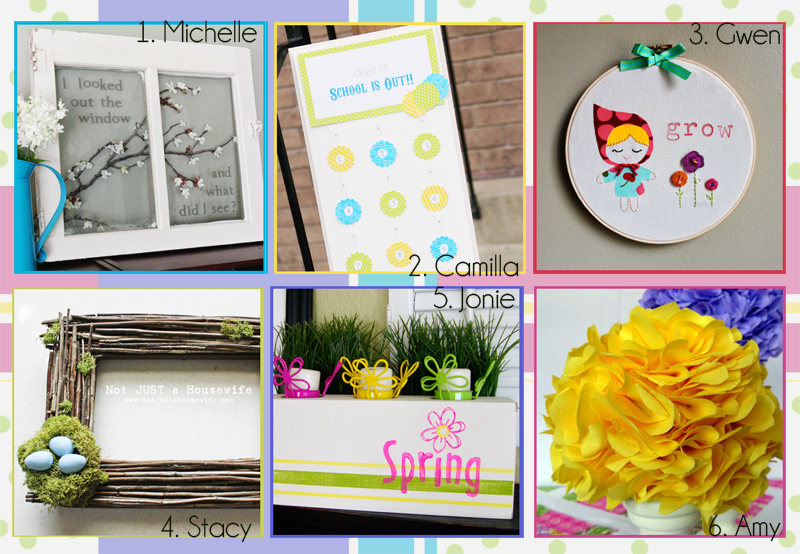
It’s here! Our April Point of View! I am so excited about these projects. Aren’t they amazing? I hope you’ll take a few minutes and go check out your favorites. To make it easy, here are all the links:
1. Michelle at A Little Tipsy
2. Camilla from Rosy Red Buttons
3. Gwen from Gwenny Penny
4. Stacy who is Not Just a Housewife
5. Jonie from Just Between Friends
6. Me- and well, you’re already here! 🙂
The link party this month is over at Michelle’s blog, so when you’re finished reading my tute- go over and link up your own spring projects!
Now, on to the tute for these gorgeous flower balls:
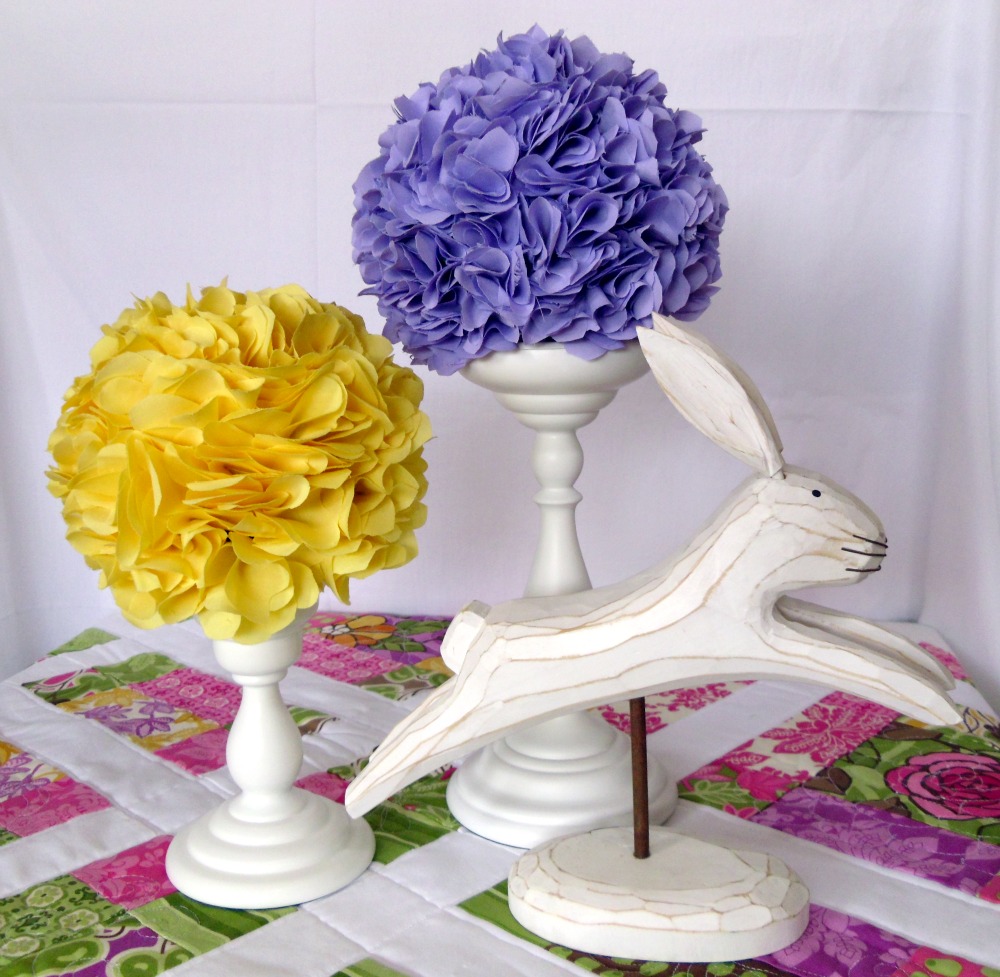
I’ll admit that for some reason the theme of “Spring” was REALLY hard for me. Maybe it was too broad, maybe it was because I was trying to come up with an idea that WASN’T a pillow, maybe it was just a plain old slump. Whatever it was, I was struggling. I had finally purchased these candlesticks from IKEA- (been waiting forever!!) and I knew I didn’t want candles on them- go figure. I had the styrofoam balls from another (failed) project and knew I wanted to cover them somehow. First I started making paper roses. Well, if you follow me on Facebook, you’ll know how that turned out. (not well) So, I pulled the flowers off and started over. It was my sister’s suggestion to use this method for covering the flowers- so Thank you, Karen! Love you!
Ready to cover your own? Here’s what you’ll need.
A Styrofoam ball- I used a 3″ and a 4″ (approx. I’ve had them a while so I’m not sure exactly)- you will want them approx 1-2″ smaller than your desired finished ball. You will also need pins (lots and lots of them) and fabric- I used about 1 yard per flower. It’s a lot.

The next thing you will want to do is cut your fabric into flowers. For the yellow ball, I cut the fabric into 4″ strips (I was not really exact) folded it over and over until it was approx. square and cut out a five petal flower from all the layers at once. For the purple flower the strips were about 2″- the repeat the same process. You don’t need them to be exact or perfectly cut, this flower is really forgiving. Repeat for ALL the fabric- yes, it’s a lot.
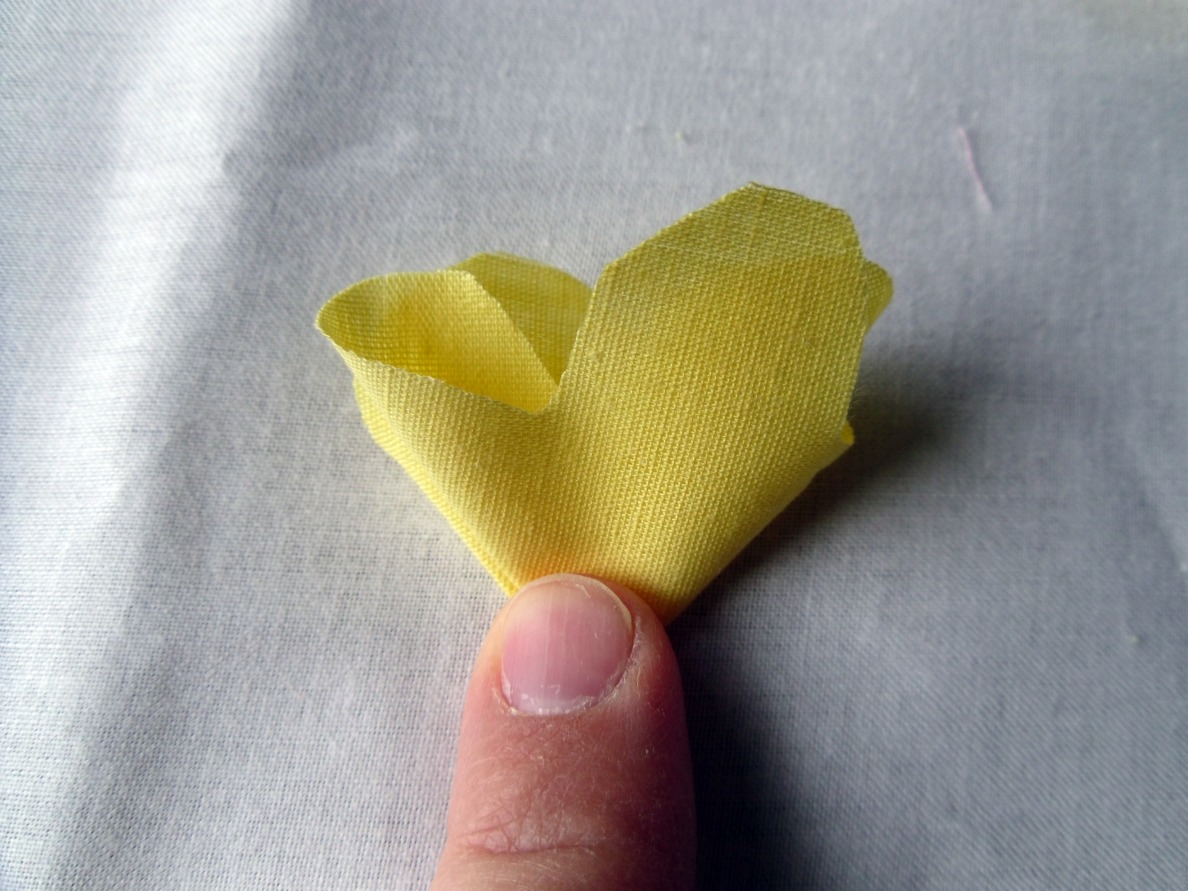
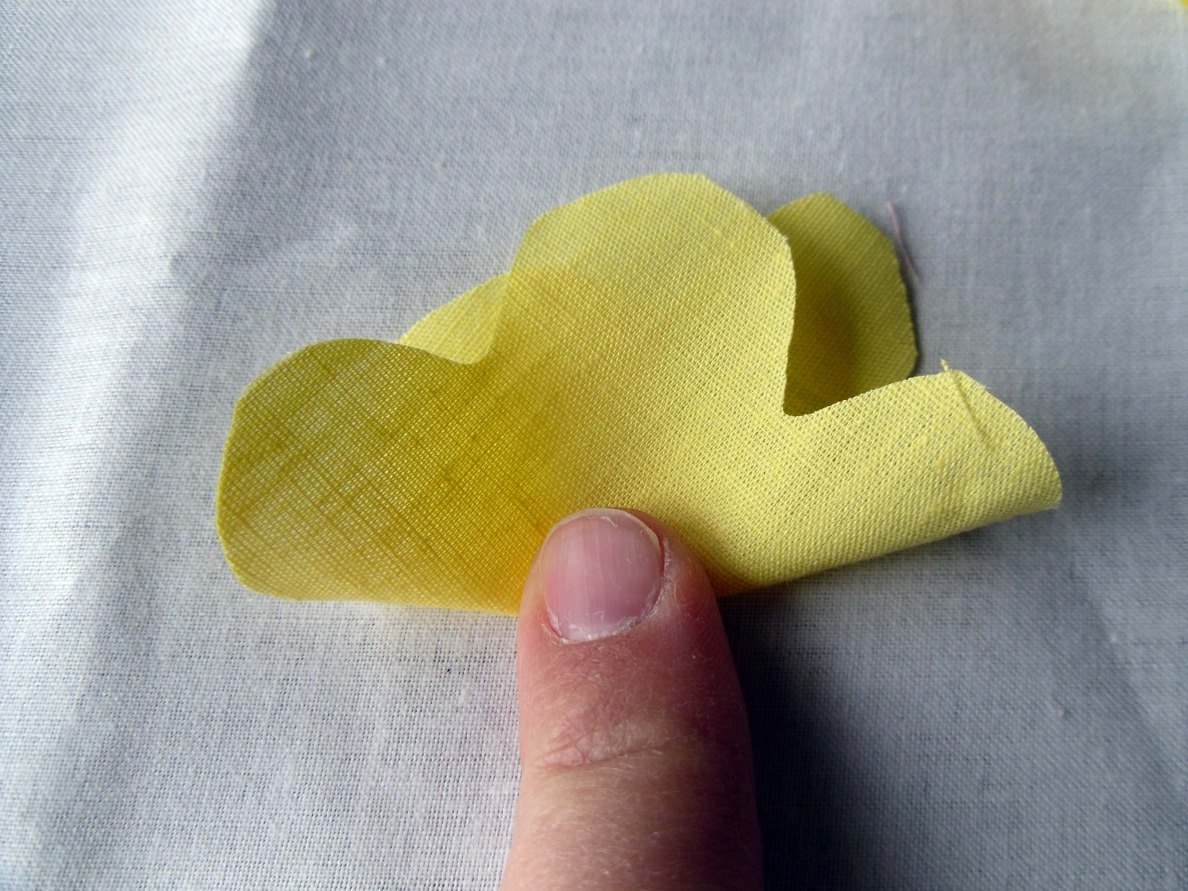
Now, take one flower, fold it in half, then in half again.
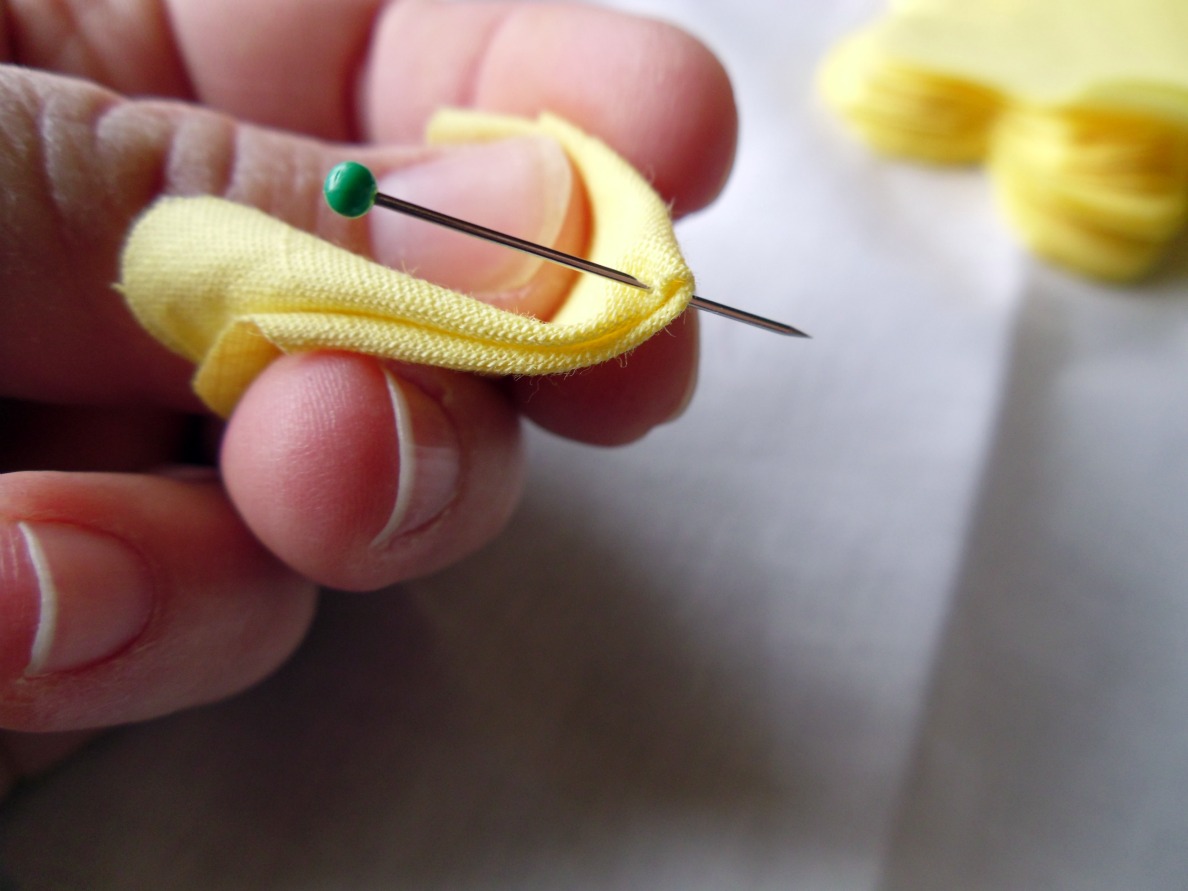
Now take a pin and push it through the end of the flower at the point. Make sure to grab all four layers of fabric as you do this. (It won’t matter what kind of pins you use since they won’t be seen, but I would suggest using the plain silver pins, just because they hide easier)

Push the pin into the styrofoam ball. Alternate the direction the flower is going to give the flower more lift and fullness. (And obviously I would recommend NOT using a black styrofoam ball.)
Repeat a million times (it will feel like it) until the ball is as full as you would like. You will probably not need to pin them as close as you will be tempted to. Space them as far apart as you can, while still maintaining the desired fullness you want. I thought it would only take me an hour or so to finish these, and I probably spent 3 1/2- 4 hours on the pair. But, as you can see, it was Oh, so Worth It!!
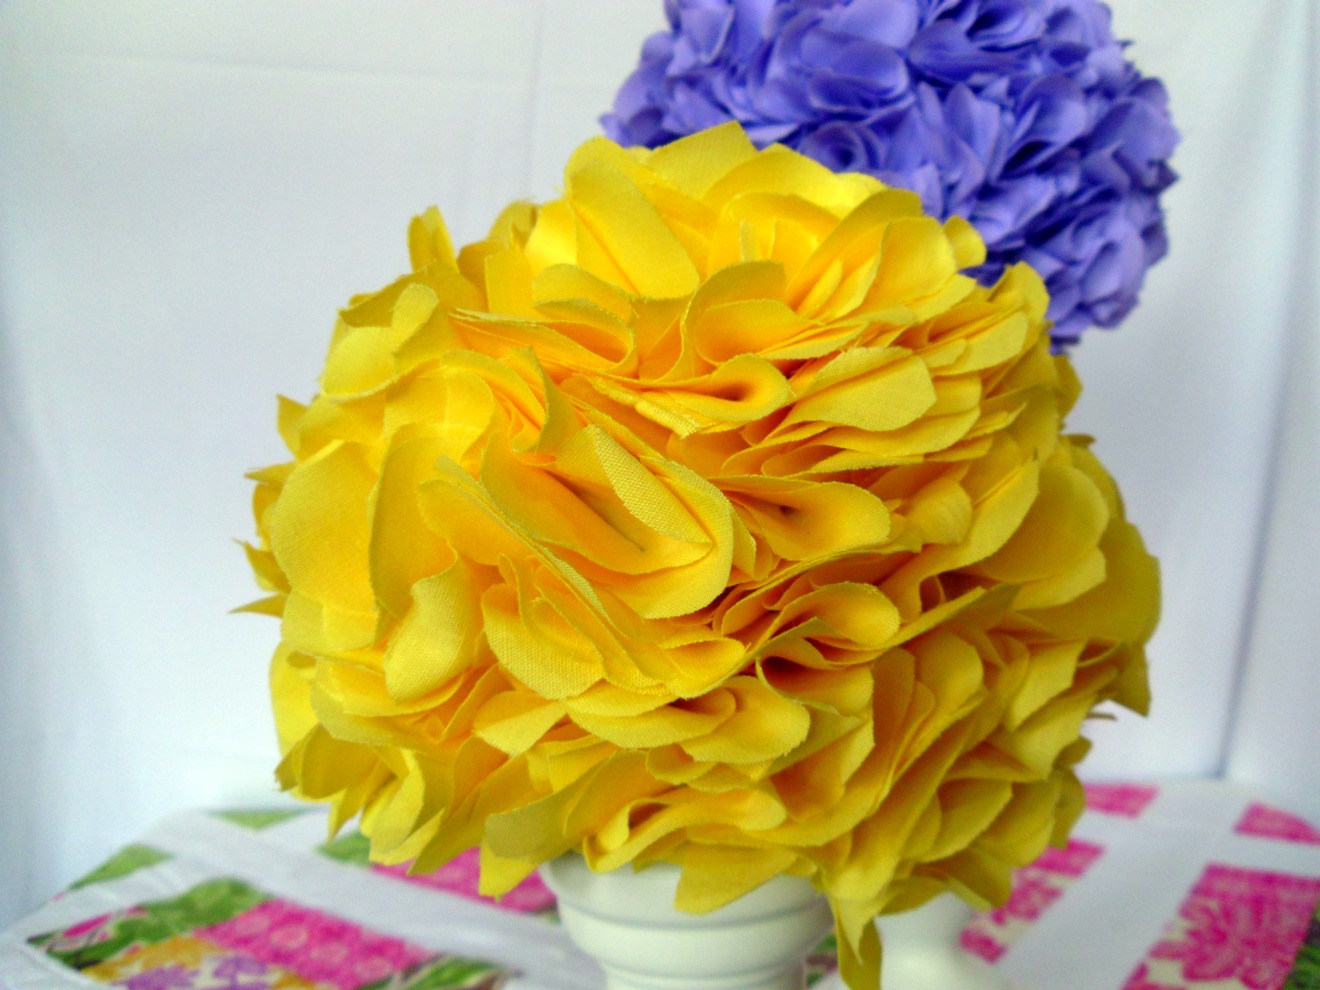
Isn’t that gorgeous? Yum! I smile every time I walk by these.
So, what’s your point of view on spring? Do you like bright and fluffy, or calm and nature-y, or soft and pastel? Come link up and let your point of view be heard!
xoxo,
Amy
Linked up to Tatertots and Jello Weekend Wrap up party and to 504 Main’s Tickled Pink Party
And to Today’s Creative Blog Get your Craft on!
Linked up to Tatertots and Jello Weekend Wrap up party and to 504 Main’s Tickled Pink Party
And to Today’s Creative Blog Get your Craft on!


Shana
April 22, 2011 at 12:40 pmLovely! They remind me of Hydrangeas 🙂
Gwen @ Gwenny Penny
April 22, 2011 at 1:30 pmI LOVE these, Amy! They are so full and beautiful. That's a lot of fabric (And a lot of time invested :), but SO worth it.
Camilla Jones (CioCo Photography)
April 22, 2011 at 2:39 pmSo pretty amy! The colors are so great and it's such a great idea!
Stacy
April 22, 2011 at 2:41 pmI LOVE how you have them displayed! Beautiful!
Leanne
April 22, 2011 at 2:53 pmThey turned out great. I love those Ikea candlesticks too.
Jonie Marie
April 22, 2011 at 4:00 pmWhat fun bright colors! I love the display. It would make me smile every time I passed it too!
Michelle
April 22, 2011 at 4:28 pmThey turned out REALLY pretty. Too bad I don't have 4 hrs of patience. I might have the patience to do one if cadbury mini eggs were involved. Too bad everyone is sold out.
Lu
April 22, 2011 at 7:34 pmOoh, I love how full they are! So gorgeous.
Amy @ Increasingly Domestic
April 22, 2011 at 8:14 pmSuper cute Amy! I am a fan of the bright colors for Spring…okay, for always, but especially for Spring;)
donatella
April 23, 2011 at 12:37 ami have some 2" balls and will require less fabric… i'll make these!
lovely
Nicole {Home for Hire}
April 23, 2011 at 1:33 amI love these! I might just have to whip out some fabric and make some myself 🙂
Chelsea @ {twotwentyone}
April 23, 2011 at 2:52 amAbsolutely lovely! Thanks for the tutorial!
lauren@warmandfuzzy
April 23, 2011 at 3:20 amI have the PERFECT yellow fabric for this is my closet!! Flowers are screaming to be made. Thanks so much for this idea.
lauren
http://www.warmfuzzypurpleandgold.blogspot.com
Crafty Girls
April 23, 2011 at 3:44 amLOVE IT!
michelle ellis
April 24, 2011 at 2:16 pmBeautiful! I just love them!
Debbie @ OtRD
April 25, 2011 at 7:03 pmLovely!
Red, Blonde and Burlap
April 25, 2011 at 7:28 pmSo cute, can't wait to try my own!
Abby
April 25, 2011 at 7:39 pmGorgeous! Going to have to try this!
Beverly @ FlamingoToes.com
April 26, 2011 at 1:34 amThese are soooo pretty Amy!! I love them – they are just perfect for those candlesticks!
Thanks so much for linking them up to Think Pink Sundays – I'm sharing them on my Facebook page!!
Kara
April 26, 2011 at 2:16 amThese are gorgeous Amy! Love the idea of using the pins. So much easier than hot glue. Duh, why didn't I think of that?
{nifty thrifty things}
April 26, 2011 at 7:07 amThese are beautiful!
I would love it if you joined my linky party @ {nifty thrifty sunday}!
xoxo, Vanessa
Heather
May 13, 2011 at 8:00 pmThose are definitely gorgeous! Thanks for showing us how it's done!
Lulu Lane Designs
May 14, 2011 at 1:31 pmI LOVE these and I need something on my fireplace mantle beside our tv and I think that these would look fabulous and a great pop of color! New follower. And if I ever actually get these done as I have a million things that I am working on right now I will post a picture! 🙂
Charlotte Parker
March 19, 2012 at 8:09 pmThese are sooo cute! I cannot wait to make my own! Thanks for sharing them!
The Tablescaper
March 25, 2013 at 2:56 amLove these.
I'd love to have you link this to Seasonal Sundays. The link goes up at 7:00 on Saturday evening.
– The Tablescaper