When preparing for SNAP this past spring, I thought about what I might need to help keep myself organized. I remembered from the past conference I attended how hard it was to keep track of everyone I met and whether or not I had received their business card. I wanted a way to keep the cards visible, but I didn’t want it to be really bulky. So, I came up with this business card holder. I got so many compliments and requests for a tutorial I immediately put it on my list, I even received this awesome fabric from Riley Blake to use to create the tutorial (don’t you just love the bright colors of Apple of My Eye by The Quilted Fish?) I wasn’t expecting it to take me this long, but now, after much anticipation I finally have a tutorial for you.
Business Card Portfolio Tutorial
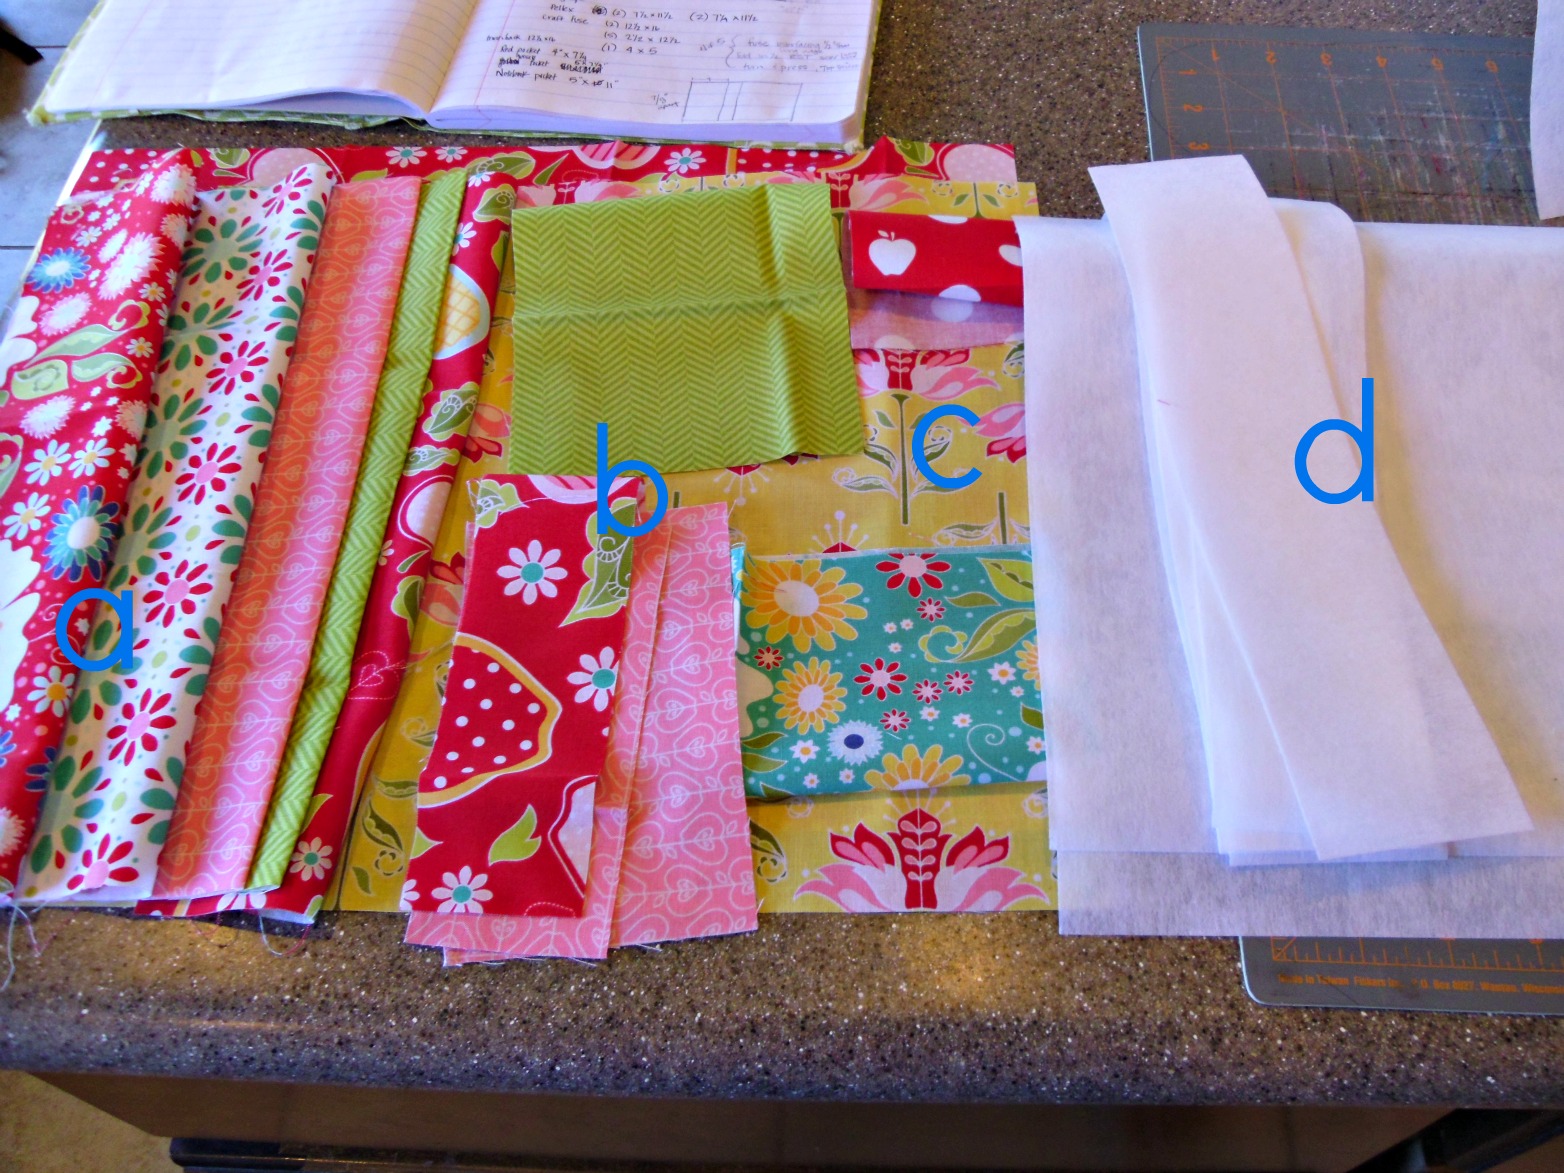
Supplies:
fabric- 1 fat quarter will make the front and back + scraps for pockets and embellishments
interfacing- I use craft fuse- you will need 2/3 to 1 yard
Peltex- or other material to add body to the portfolio- cardboard or chipboard would also work
Cutting:
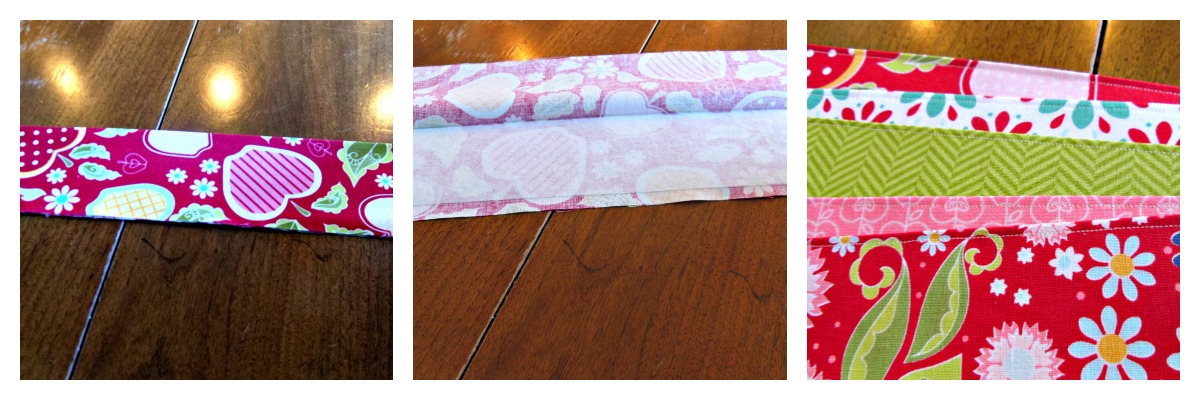
a. Cut 5 pieces 6″X12″ for card holder pockets
b. 3 pocket pieces: (1) 4″X 7 1/4″, (1) 5″X 7 1/4″, (1) 5″X11″, and pen holder 3″X 5″
c. 2 pieces for front and back: 12 1/2″ X 16″
d. Craft fuse: (5) 2 1/4″ X 11 1/2″, (2) 11 1/2″ X 15″
Preparation:
First fuse the craft fuse to the front and back panel pieces, centering them on the wrong side of the fabric. Follow manufacturers instructions for proper fusing.
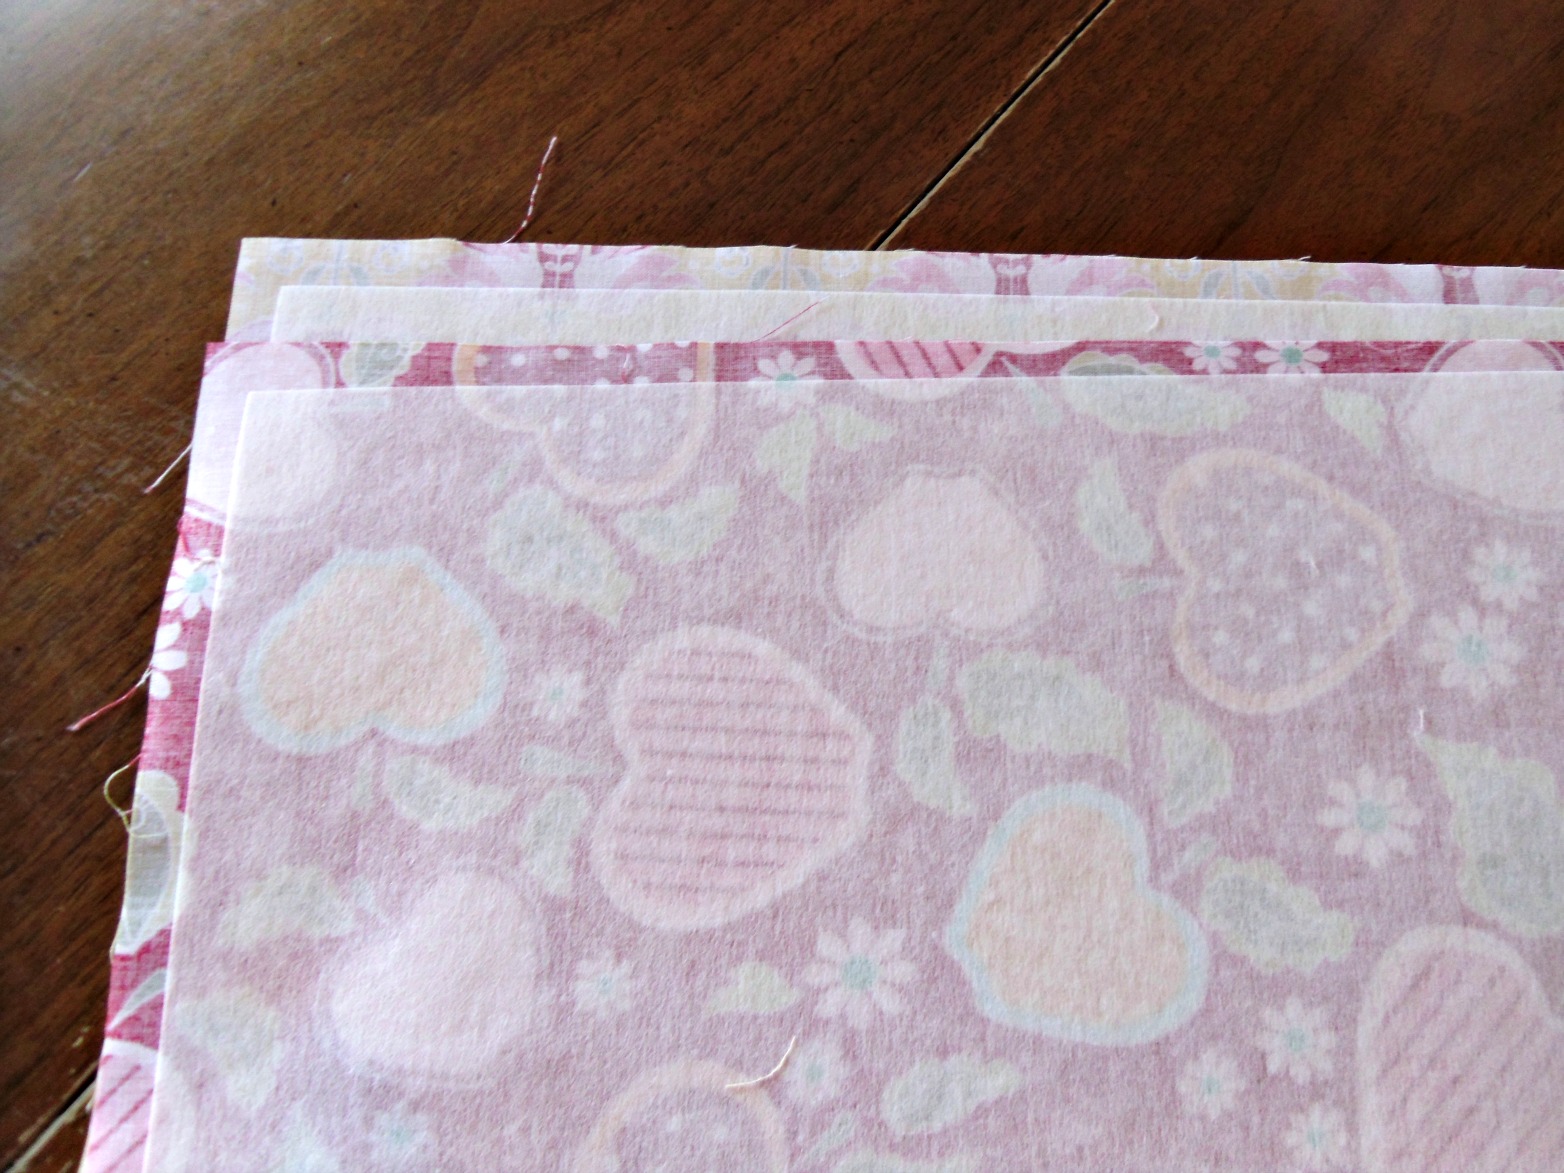
Take the pocket pieces (there are 3 of them) fold in half (right sides together- rst) matching up the short sides. Sew around 3 sides leaving an opening for turning. Clip corners, turn right side out and press.
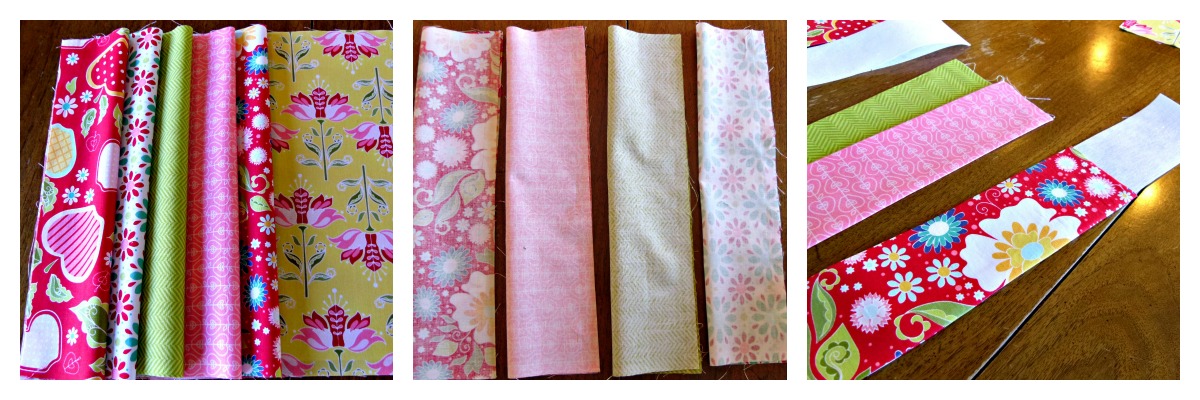
Lay out the 5 card holder pieces and determine the positioning on the portfolio. Take all but the outermost piece, fold in half rst and sew down the long edge. Turn right side out and press. Slide the craft fuse into each piece and fuse.
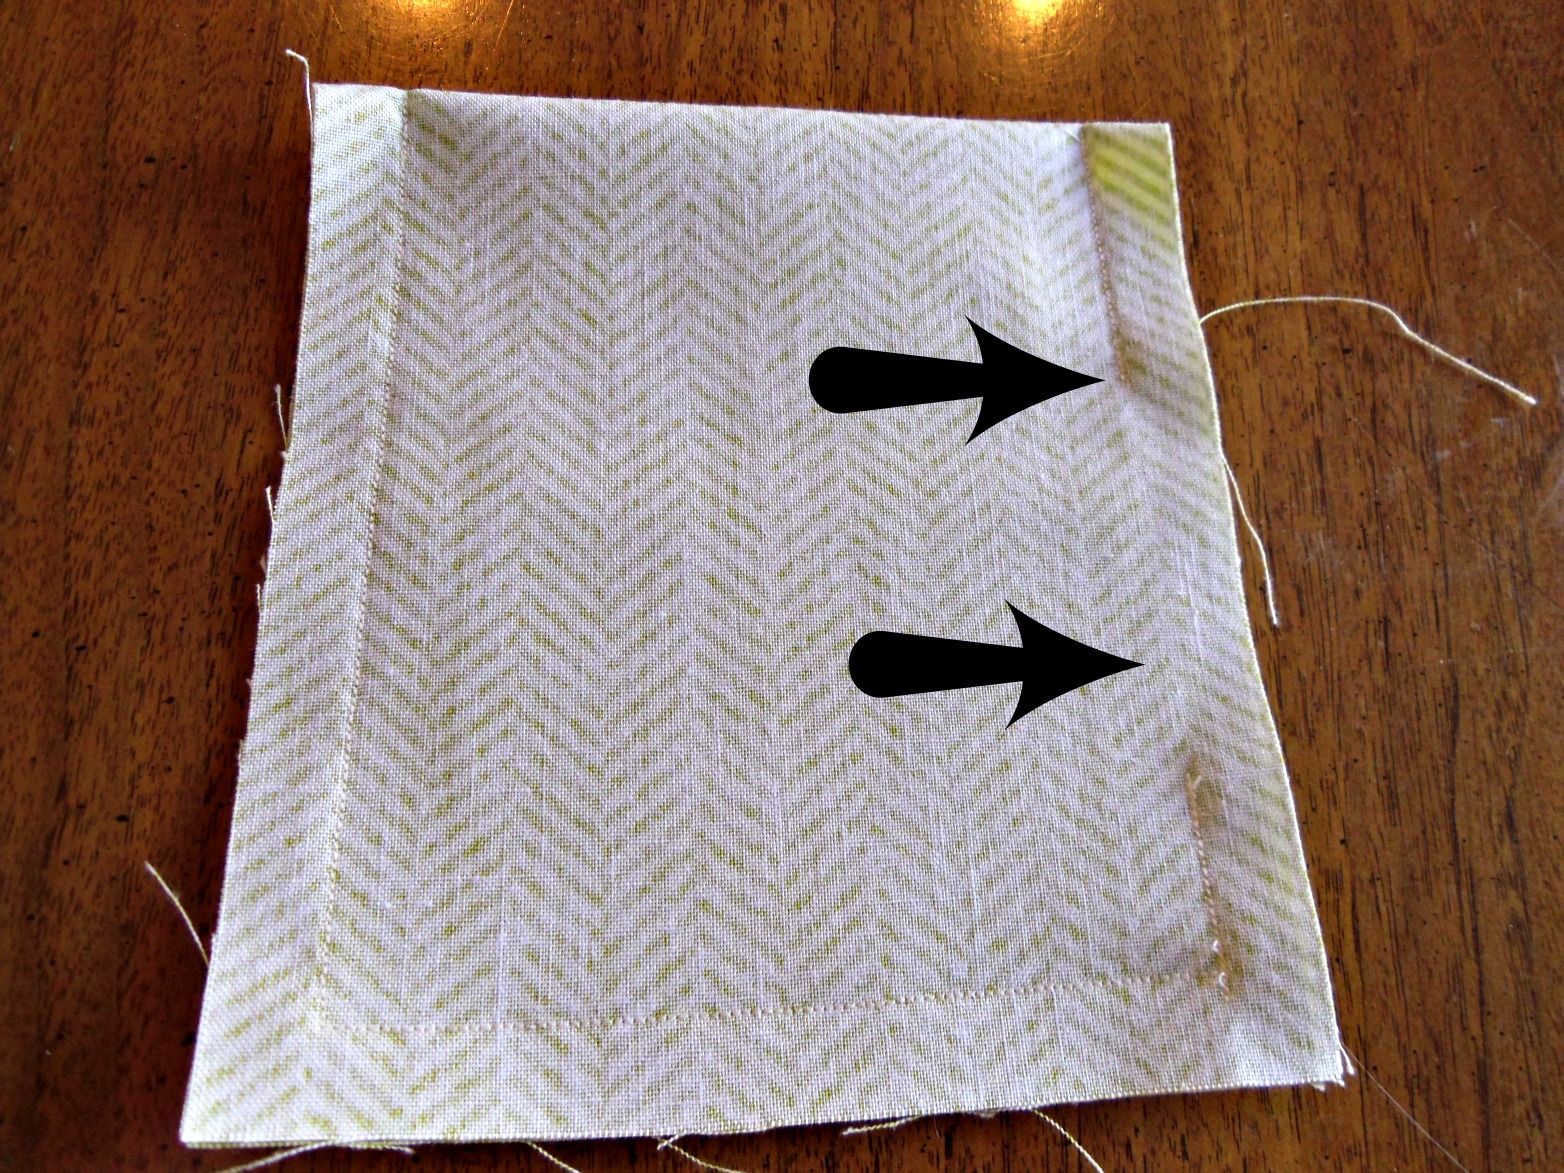
Take the outermost piece and fold in half wrong side together, press. Open up the piece and place the craft fuse along the fold, fuse into place. Take all 5 card holder pieces and top stitch.
Finally, take your pen holder piece and fold and press as you would bias tape. (in half along the length, press. Open up, bring edges into center fold, press) (sorry, I don’t have pics of this)
Assembly:
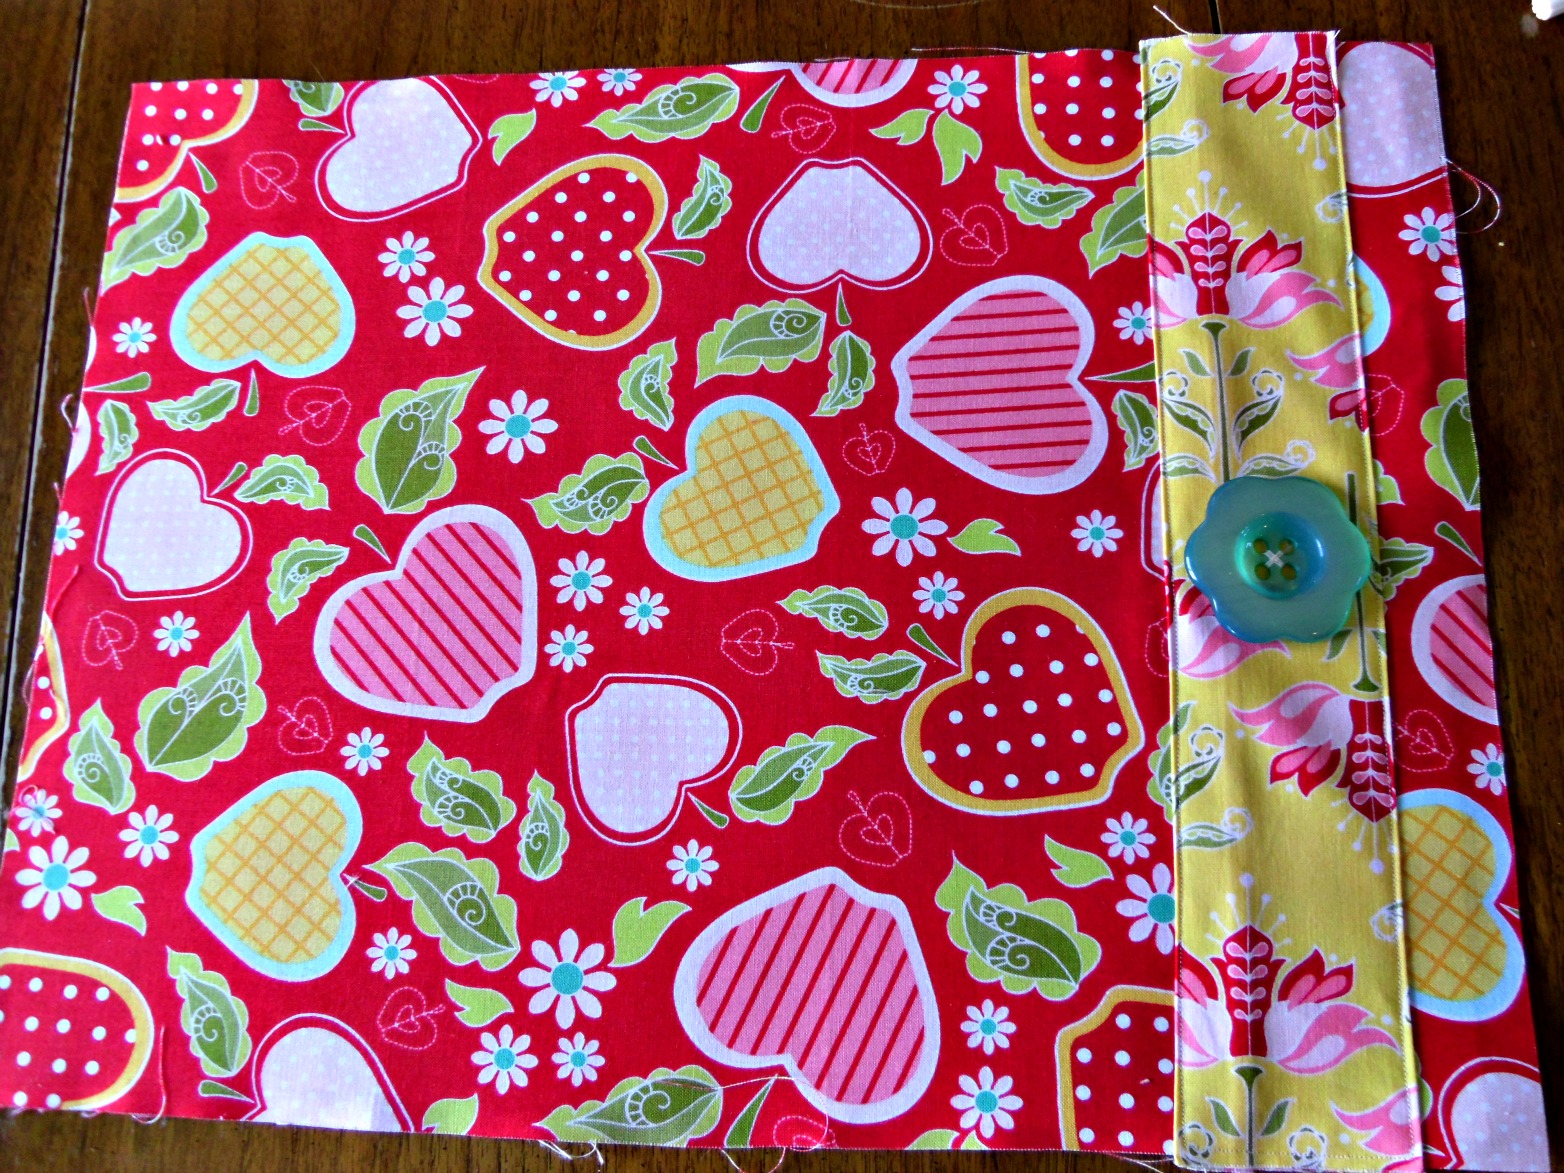
Prepare embellishments for the front cover and sew into place. Determine the closure you would like and put pieces in place. I am using an elastic piece and button as my closure. The button I used in this project is from Riley Blake as well.
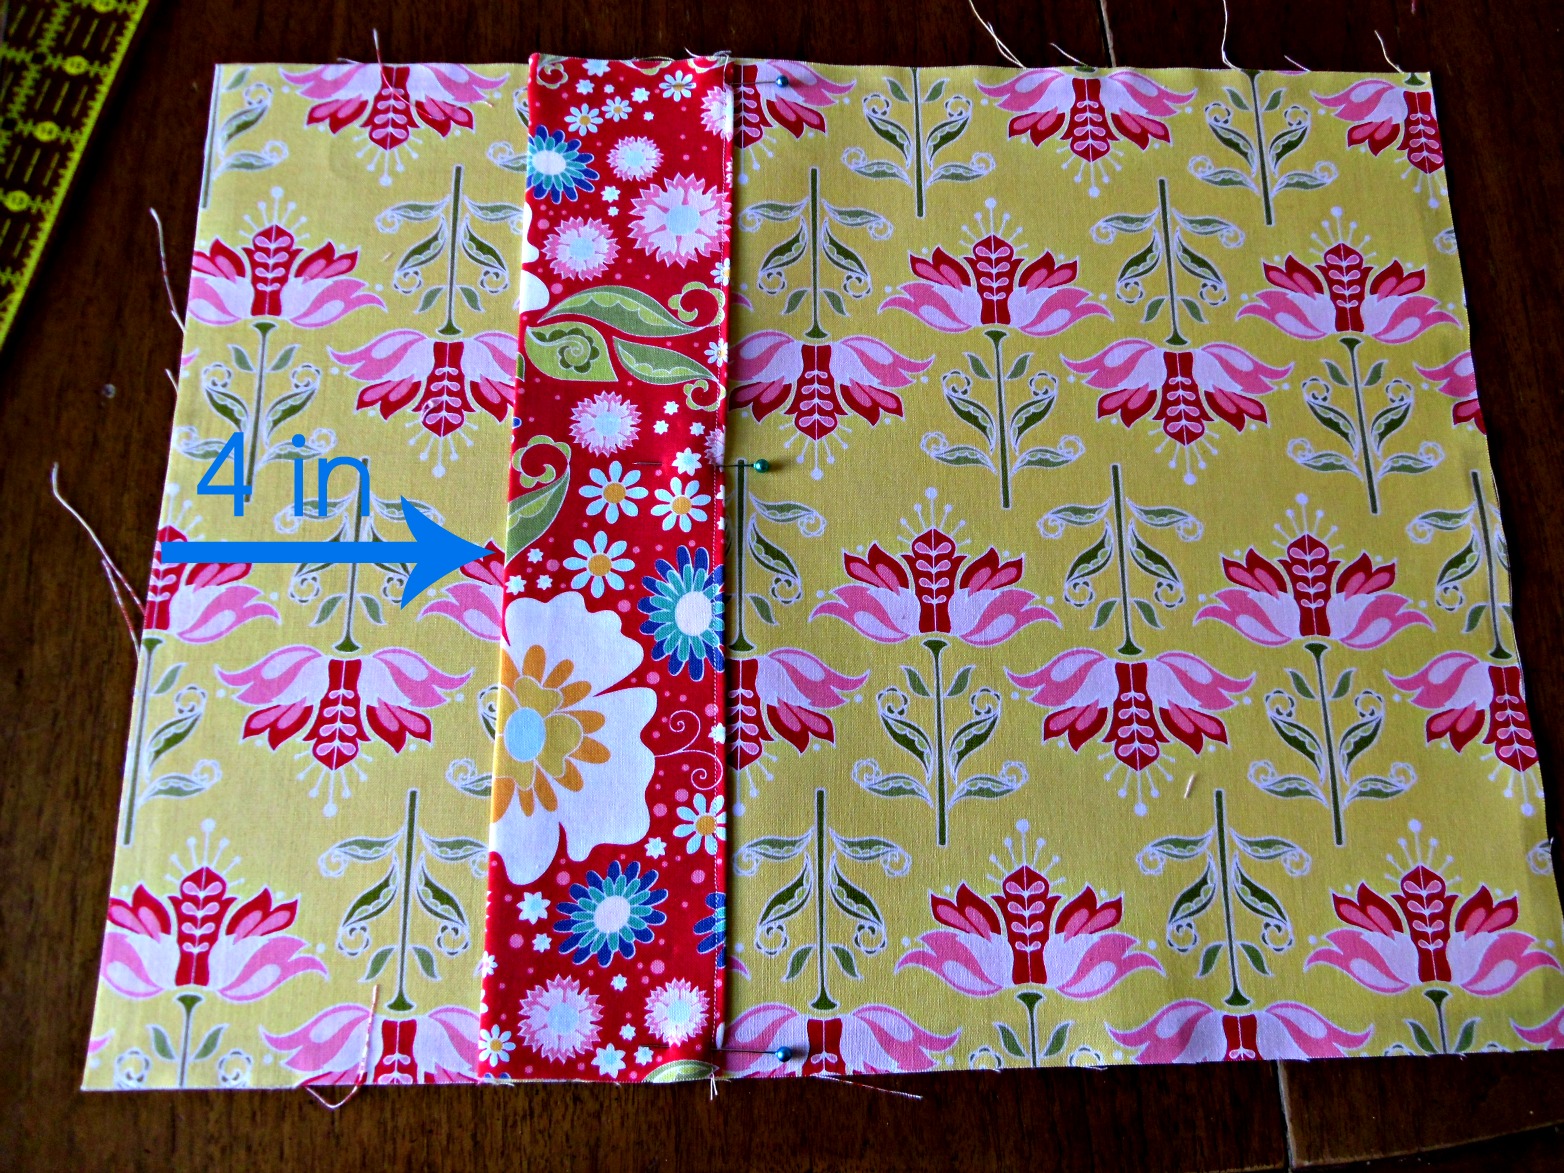
Take your innermost card holder piece and place it 4″ from one short edge of the inside cover, edge stitch in place.
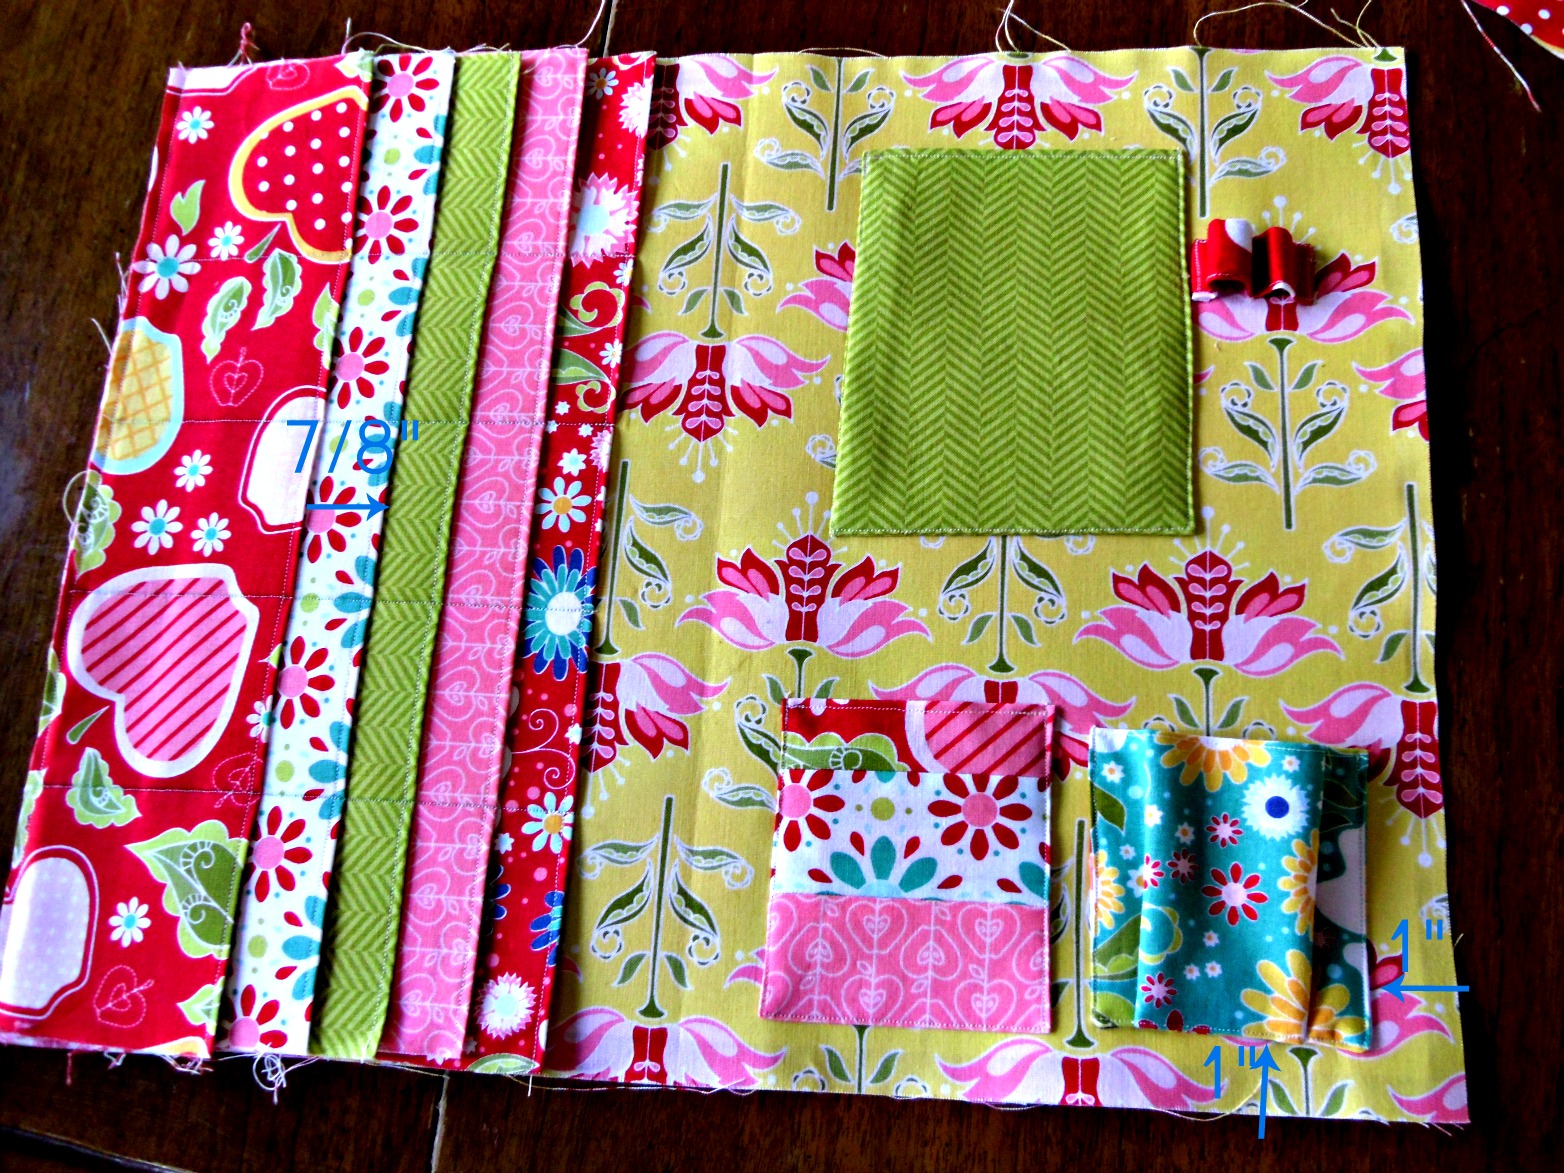
Repeat with the rest of the card holder pieces, placing them 7/8″ apart- measuring from the top of the previous piece.
Place pockets on the inside cover positioning them as needed. Place the pockets 1″ from edges to allow for seam allowances. The pocket with the gussets is made by sewing down one edge, turning the corner, folding over the bottom edge approx 1/4″ in each direction (use picture as guide) and sewing down the remaining two sides, making sure to close the hole previously left for turning. Use the notepad you are using as a guide for placement of the notebook pocket, making sure to account for seam allowances. Fold one short edge of the pen holder down and sew in place, use pens to create loops for holding the pens in place. On final edge, fold raw edge under and sew down.
Now we’re ready to put them together. Take the front and back pieces and place them right sides together.
1. Make sure you add your closure- in this case and elastic loop.
2. Sew around all 4 sides making sure you leave a fairly large opening for turning and putting in the stabilizer (should be at least 7 1/4″ wide) Clip corners and turn. Press edges flat. Cut your stabilizer or cardboard- you will need (4) 7 1/4″ X 11 1/4″ pieces if you’re using peltex. Slide 2 pieces in the left size, then add the last 2 pieces in the right side. You may need to trim the Peltex to compensate for the bulk of the seams. Once you’re satisfied with the placement, sew the opening closed.
3. Sew down the center of the portfolio between the two sides of Peltex. This will create a binding- make sure before you sew you fold the portfolio in half and press the fold so the seam will create two equal halves.
aaaannnnndddd….you’re done!
You now have your own gorgeous business card portfolio to keep track of all your new friends and contacts.
Enjoy!
XOXO,
Creator, sewist and mom of 6. Making and sewing keeps me sane and happy. I'm here to share my love of creating with you. Free patterns, tips and tricks and videos to help you discover your own creative passions.


Summer
July 19, 2012 at 7:13 pmI'm still in awe of this. I can't believe you made it – and not only that, stopped to take pictures along the way! You are amazing!
Michele Pacey
July 19, 2012 at 8:57 pmWhat a handy little concoction! I could certainly use one of those. Thanks so much for the detailed how-to Amy!
Beverly {Flamingo Toes}
July 20, 2012 at 4:48 amYay Amy!! I love this!! I was so impressed with it at Snap and I love the fabrics you used for this one! Thanks for the tutorial!
Gwen @ Gwenny Penny
July 23, 2012 at 12:58 pmThis was a huge hit at SNAP! Great tutorial. Love the fabrics on this one, too.
Rogers Family
August 21, 2012 at 9:18 pmThis Tutorial came just in time. I just ordered some new cards for my chicken business and for our Farm/ horse rescue and wanted something different to put them in other than your typical card holder. This is perect. I can do chicken fabs for the chicken business and horses or farm scenes for the other cards. I found your tutorial threw Nadines blog.
Ana Lopes
August 12, 2013 at 2:00 pmGreat project!The fabrics are gorgeous!Thanks so much for sharing the great tutorial! Would love to have you visit me sometime.
Have a fabulous day!
Hugs from Portugal,
Ana Love Craft
http://www.lovecraft2012.blogspot.com
smarika awal
September 19, 2014 at 6:53 pmGot to know some thing new. I really love the fabric technique and the colors.
business card maker
business card
Romilda Gareth
August 4, 2018 at 4:52 pmthanks