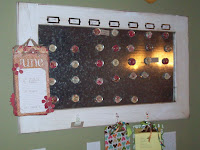
BEFORE

I wasn’t happy with the way the numbers looked, and I was kind of over the colors in my earlier version of the calendar, so I decided to re-do the magnets to lighten it up a little bit.
I found these awesome glass tiles on
etsy (I don’t remember where, but if you really want me to find out I’m sure I can.)

(sorry about the pics, it’s hard to get rid of the glare on the metal)
I love how much more open and crisp the tiles look since they are uniform. It’s also a lot easier to see the numbers since I tried to choose lighter papers this time.

This is the finished calendar. I screwed some cup hooks in the side and bottom to hold the clipboards/ event calendar (which doubles as a month marker). I plan on re-doing the event calendar to look like the clipboard below, which I made for my mom’s birthday.

She has it sitting on a shelf with a small easel and it looks great. I need to get going on mine so everything will go together.
(the papers I used on the calendar are American Crafts Blue Skies, the Happy Birthday paper is from Joann’s)
Creator, sewist and mom of 6. Making and sewing keeps me sane and happy. I'm here to share my love of creating with you. Free patterns, tips and tricks and videos to help you discover your own creative passions.

 (sorry about the pics, it’s hard to get rid of the glare on the metal)
 This is the finished calendar. I screwed some cup hooks in the side and bottom to hold the clipboards/ event calendar (which doubles as a month marker). I plan on re-doing the event calendar to look like the clipboard below, which I made for my mom’s birthday.
 She has it sitting on a shelf with a small easel and it looks great. I need to get going on mine so everything will go together.


Karina
February 25, 2013 at 5:31 pmHello, Do you have any step by step (material description) DIY post on this calendar? It looks awesome. 🙂 Thanks for the post.