

I love sewing notebook covers from fabric. You can customize them to match your style and add to the function by adding a pocket for pens and an elastic to keep the pages closed. This is not the first notebook cover tutorial I have posted (you can see them HERE and HERE), but I realized that I didn’t have one for a composition notebook that added a pen pocket, so I thought I would correct that.
You could make this from two fat quarters, but if you want to have the variety, you will need small pieces of other fabrics as well. I used fabric provided by Riley Blake Designs for participation in the Game Day blog tour.
fusible fleece
You will also need elastic and piping (optional)
Sewing supplies are a given. 😉
You will probably also want a composition notebook

- Attach piping to the main front piece (the 10″X11″ piece)
- Place the front accent piece (7″X11″) right side down on the main piece and sew
- press the accent piece to the side
- fuse the fleece to the back of the front piece, following manufacturer instructions
- Trim the front piece to 10 1/2″ X 16″
- Top stitch the front accent piece where the piping is attached
- Take pocket pieces and place right sides together, sew around all sides, leaving an opening for turning.
- Clip corners of pocket piece and turn right side out.
- press and top stitch the top of the pocket
- position the pocket on the front of the cover- 1″ to the right of the piping and 1 1/2″ up from the bottom.
- Stitch around the two sides and bottom of the pocket.

- place the front cover piece face up on your work surface
- Position the elastic 2″ in from the left side- pin in place (this pic shows it on top of the flap, but that’s just so you can see the positioning, it should be UNDER the flap)
- Press the flap pieces (5″ X 10 1/2″) in half along the length to create 2- 2 1/2″ X 10 1/2″ pieces
- Line the raw edges of the flaps with the two sides of the front cover
- place the lining of the notebook cover right side DOWN on top of the cover, pin in place
- sew around all the edges of the cover, leaving an opening in the bottom for turning
- clip the corners and turn the cover right side out and press
- stitch the opening in the bottom closed.
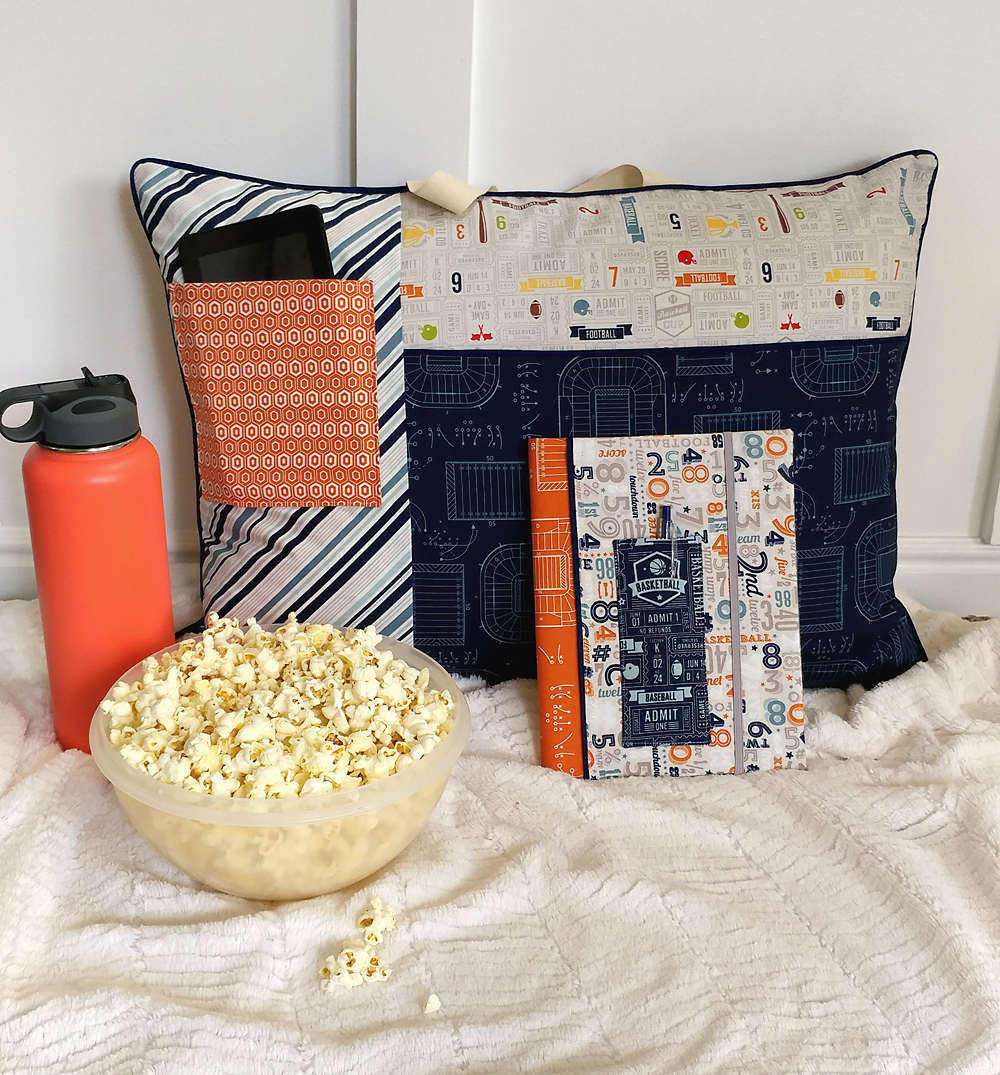
Slide in your composition notebook and enjoy!
These would be great for teacher appreciation or for keeping notes on your projects. I plan on making them for each of my children for our summer activities so they have a place to keep writing over the school break.
As always, if there are any questions, don’t hesitate to ask!
XOXO,
Amy


Deonn @ Quiltscapes
April 26, 2017 at 9:32 pmOh, I love these, Amy! I can see making a bunch of them for gifts. Thanks for the link to your notebook cover too – terrific idea. I think the fabrics are perfect.
Anne
April 28, 2017 at 1:01 amLove these!! I've got a Craft Gossip post scheduled for tomorrow that features your tutorial: http://sewing.craftgossip.com/?p=92584 –Anne