
Even though this tutorial uses Christmas colors, you could simply change the colors of your felt and you’ll get totally different results! I have used these flowers on tote bags as well as ornaments. Let your imagination and creativity run wild with them!
 The first thing you will need to do is cut your strip of felt. I cut mine 4″ X 32″ for a solid colored flower. (cut two strips 4″ X 16″ if you’re doing a two tone flower).
Fold the strip in half and cut slits down the folded edge. They should be between 1/4″ and 1/2″ apart, and try to end the cut approx. 1/2″ from the edge (so the strip doesn’t tear).
 (repeat with the second color- if you choose) The finished strips should look like these.
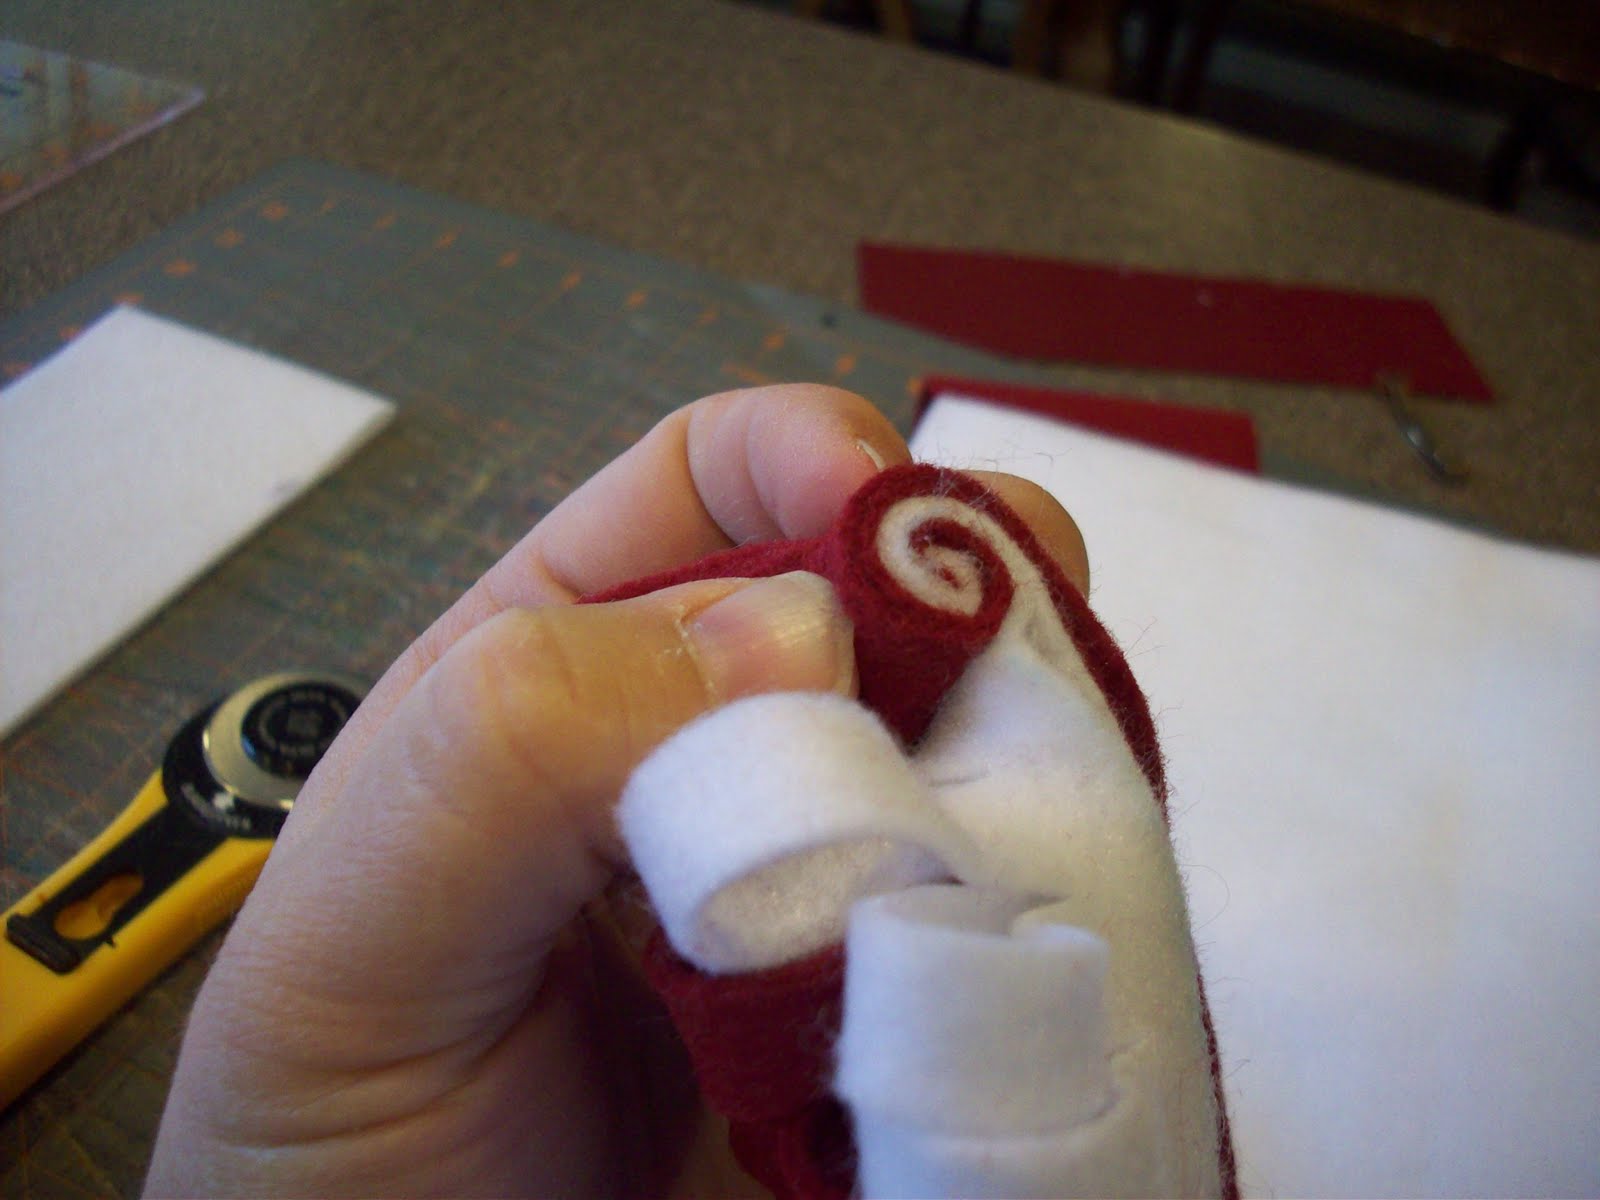 Line up all the straight, uncut edges (if you’re doing one color- there are 2, if you’re doing 2 colors, there will be 4) and begin rolling at one end. Take your hot glue gun and dab some glue as you roll up the flower. I glued the layers together in some places, in others I just glued the bottom layer. Continue up the entire length of the cut strip, keeping the edges even as much as possible.
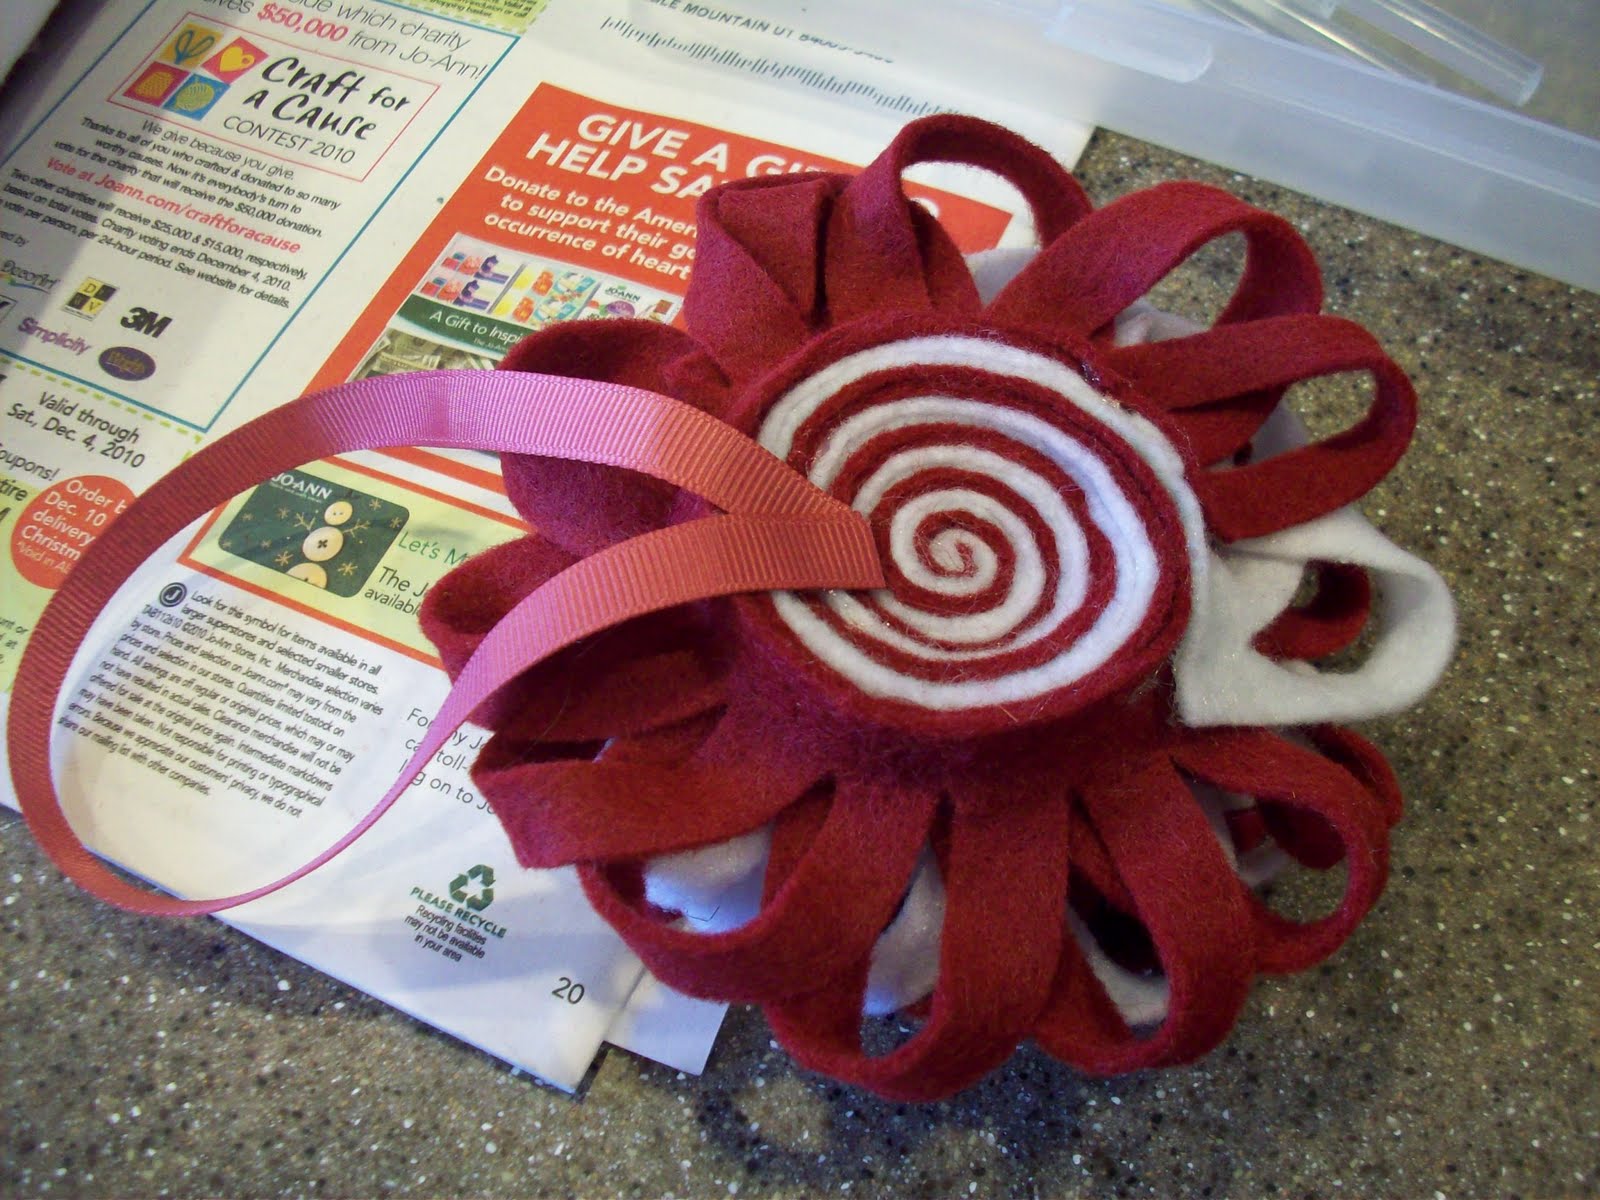 If you’re making a flower, you’re done, I just cut a circle of felt to cover the bottom and put a generous layer of glue on the bottom. If you’re making an ornament, you will need to make a second “flower”. Then, take a ribbon and glue the ends to one half. Put a bunch of glue and press the two halves together. Fluff the “petals” and you’re finished.

This is a side view, you can’t even see where the two pieces are! These would be fun in a garland, or hanging from a light fixture. You could add some embellishments- like holly sprays, or beads or even bells and hang them from a door knob. Run with them and have fun!


Swensgirl
November 24, 2010 at 2:54 pmAmy, these are SO cute!! Love them!!
Camilla Jones (CioCo Photography)
November 24, 2010 at 7:17 pmthese are so fun! and thanks for the comment over at rosyredbuttons.blogspot.com, that is a GREAT idea for the letters.
Ashlee @ I'm Topsy Turvy
December 18, 2010 at 11:25 pmLove these!!! The one on your purse at the cookie exchange was gorgeous! I have already made half a dozen of these and will be linking up to yours when I post about them!
Jenna
January 8, 2011 at 8:07 pmI am follower #100 for you 🙂
Jenna
January 8, 2011 at 8:07 pmHow cool!! Going to give it a try one of these days!
I am a new follower!
simplyjenna.blogspot.com
Kim @ Cheap Chic Home
October 19, 2011 at 11:29 pmThis is so cute Amy. I really like how you used it on your mini totes. Thanks for directing me over here.