Although there are lots of ways to finish throw pillow covers, this one is the BEST pillow back tutorial! I love using zipper closures on pillows because it lets me overfill the pillow. My favorite way for a pillow to look- soft, squishy and ready to be snuggled. The fabric band that covers the zipper acts as a design element, in addition to protecting the zipper. I have lots of kids who love to use my pillows for everything from forts to fights and covering the zipper helps prevent injury when pillows are thrown at an annoying sister, as well as keeping your hair safe from getting stuck if using pillows for movie night.
You can finish the pillow cover by using a turned edge or a binding edge. This Shark Teeth pillow is a great example of a pillow cover with a bound edge.
If you prefer to watch videos- I have this full tutorial on my YouTube channel.
Hidden Zipper Pillow Back tutorial:

Supplies:
- To make a Pillow Back with a Hidden Zipper you will need one piece of fabric cut to the same dimensions as the pillow front. (in this example it is an 18″ square), then cut into two pieces where you want your zipper to go. I typically like the zipper to sit just above the center of the pillow, but you can choose what suits you best.
- One strip of fabric 2 1/2″ X the width of your pillow front- (18″ in this example)
- 2- 1″X2″ strips of fabric for the tabs on the zipper
- a zipper that measures at least the width of the zipper- 2″ (in this example the zipper should be at least 18″-2= or 16″) you can have a zipper that is longer than the minimum, but not shorter.

Prepare Zipper for the pillow back:
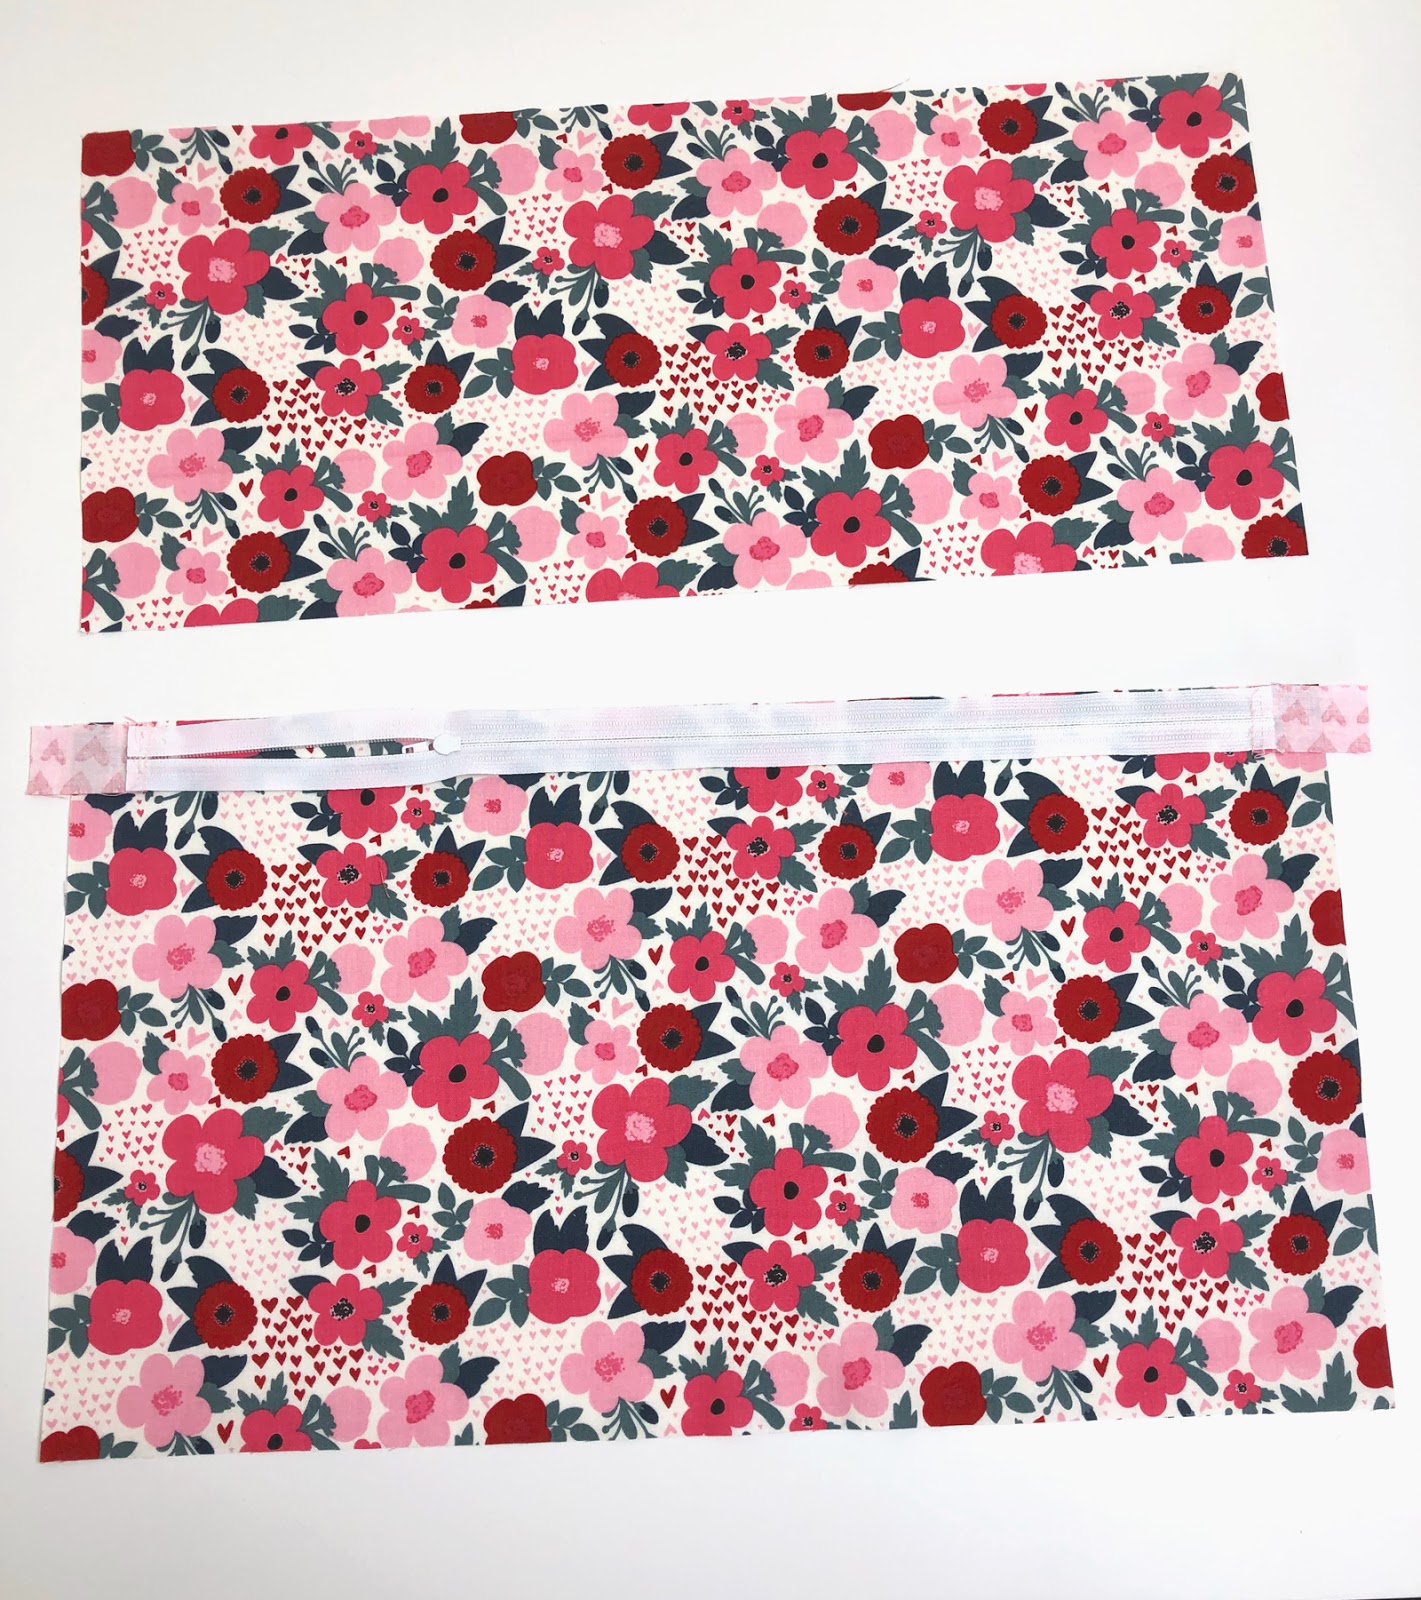
- Start by sewing the tabs on the two ends of your zipper. We are doing this for two reasons- 1- we don’t want the zipper in the seam allowance, it makes the pillow bulge funny. 2- we want to make sure we don’t run the risk of sewing through any of the metal pieces of the zipper. Make sure that the exposed portion of the zipper will measure 1 1/2″ – 2″ less than the width of the pillow. (in this example the zipper should be 15 1/2″- 16″ with the fabric tabs bringing the full length to 18″+)
- Next, sew the tabs down using a 1/4″ seam allowance, back stitch a couple of times when sewing across the zipper teeth.
- Press the fabric away from the right side of the zipper and top stitch.
- Finish by trimming off the excess zipper tape.
Sew Panels to zipper to create pillow back:
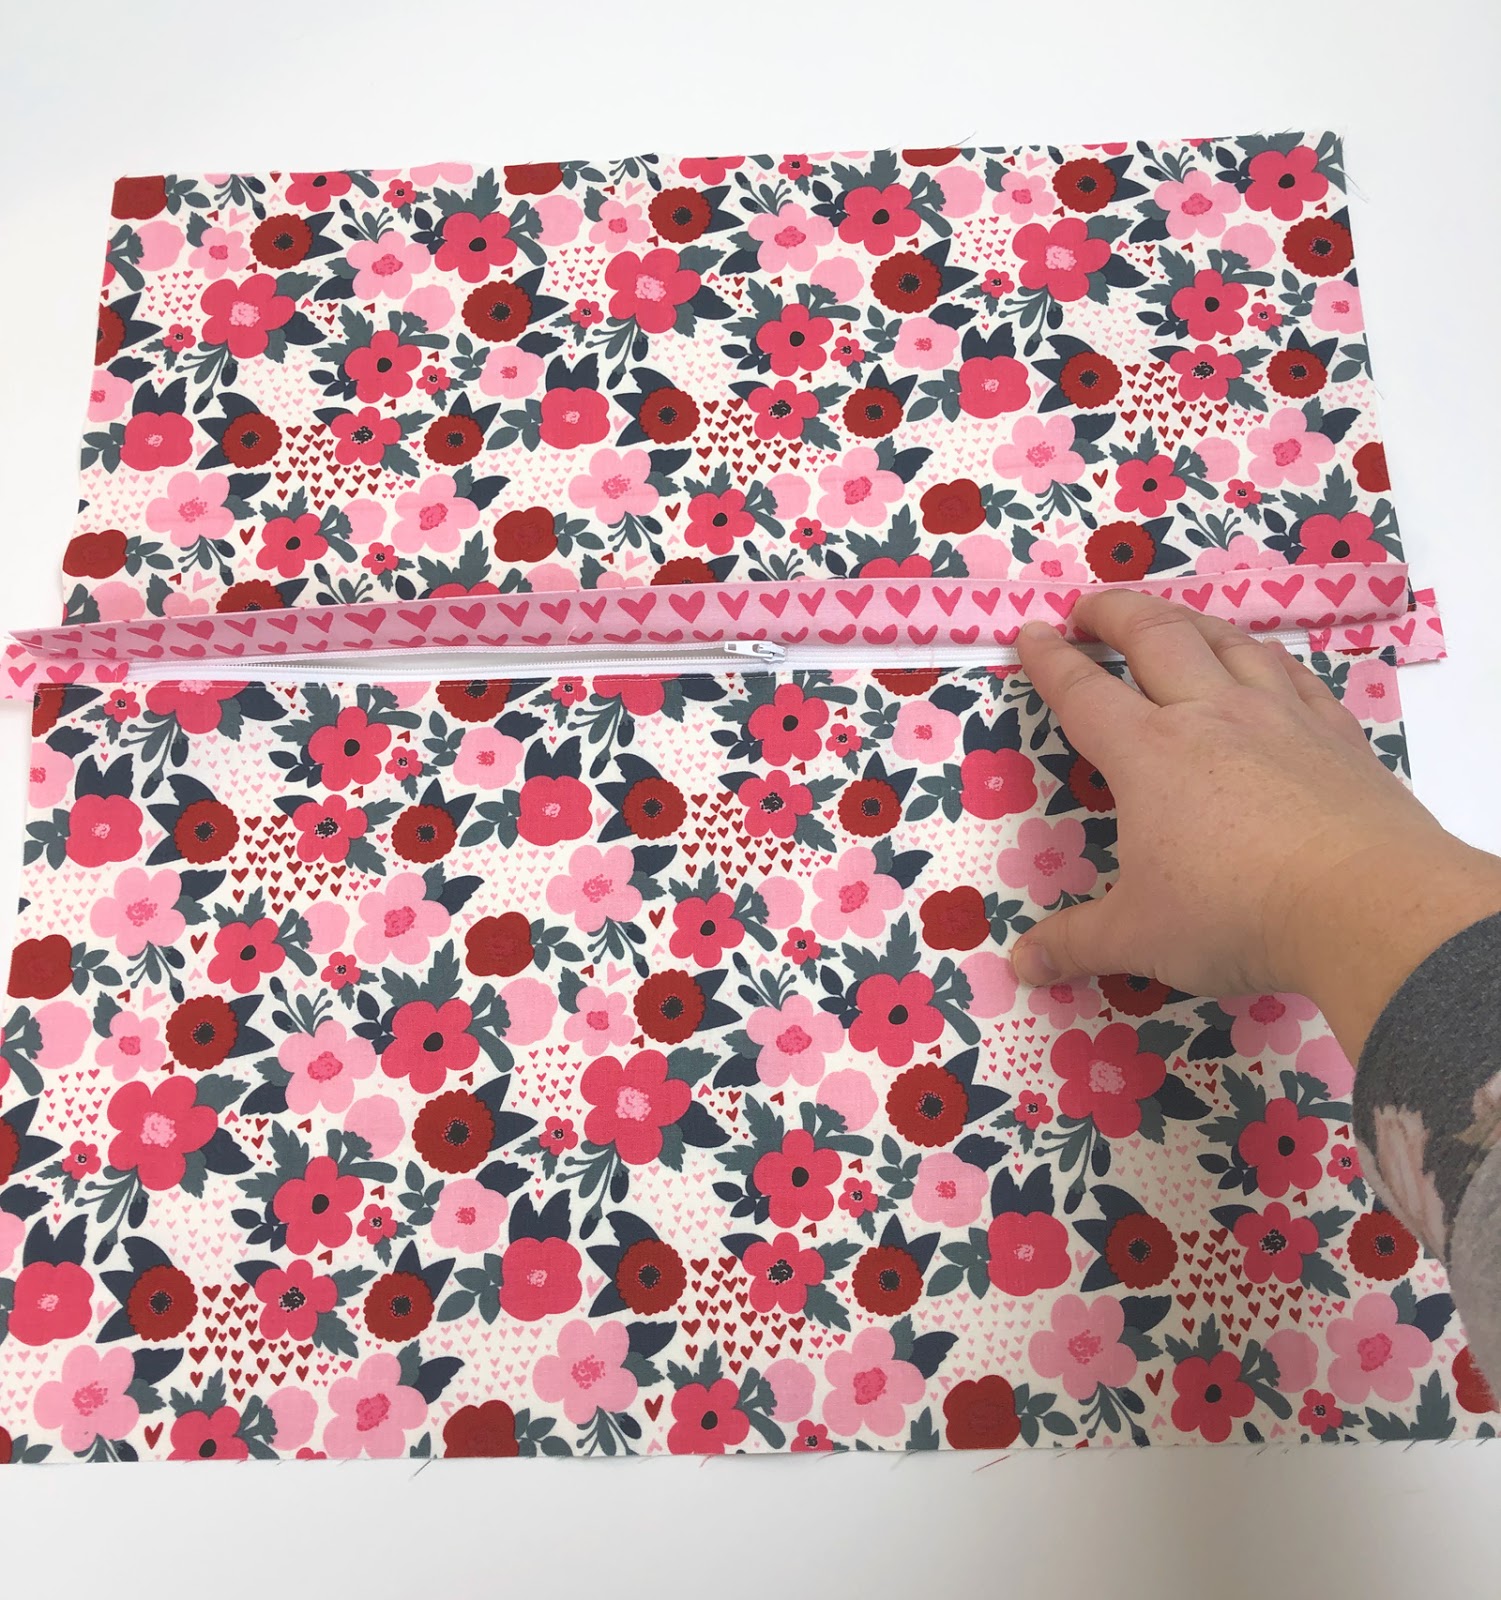
- To begin, place the zipper right sides together on the top of the bottom piece of your pillow back. Pay attention to the direction of the print of your fabric. Center your zipper on the fabric piece, you may have fabric from the tabs hanging over the edge, this is totally fine.
- Then, sew along the top seam using a 1/4″ seam allowance. You may find it helpful to use a zipper foot.
- Next, press the fabric away from the zipper.
- Top stitch along the edge of the fabric.
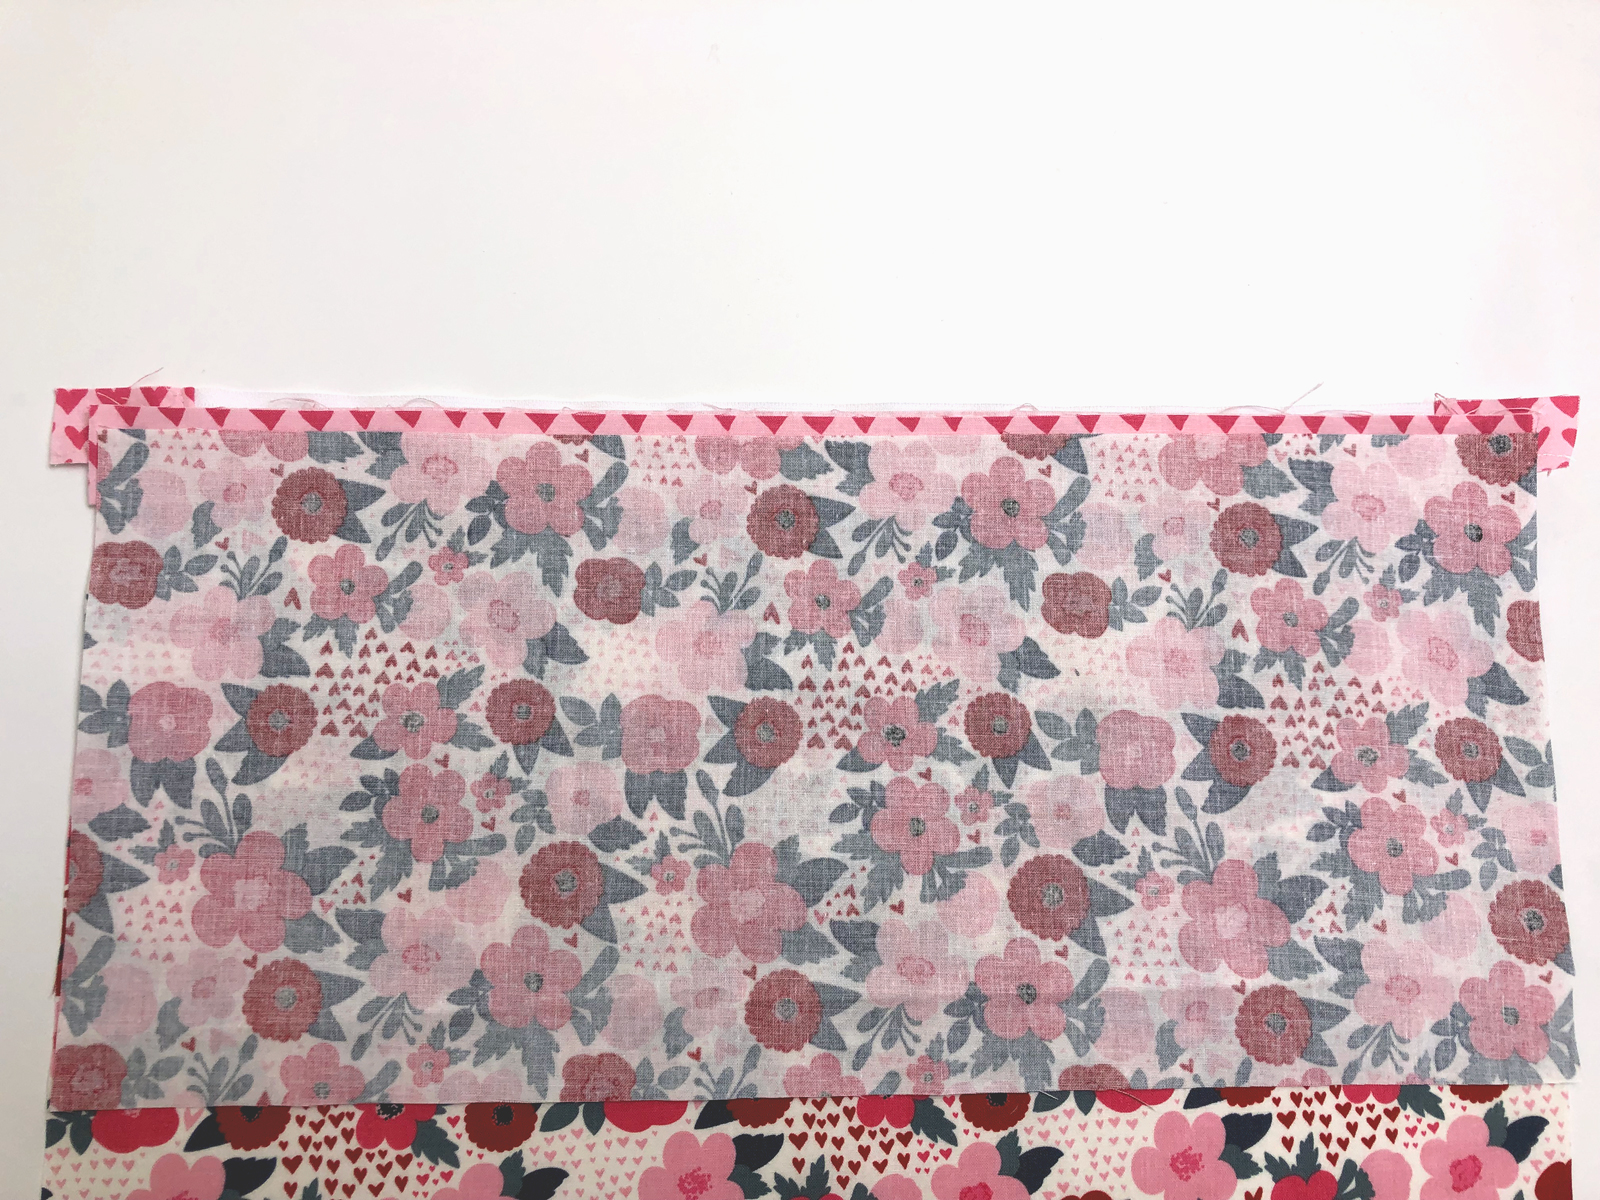
- Press the 2 1/2″ strip of fabric in half.
- Line up the raw edges of the folded strip with the top of the zipper, right sides up on both pieces.
- Place the top piece of the pillow back right side down on top of the bottom piece. Make sure you line up the BOTTOM of the top piece with the top edge of the zipper.
- Sew along the seam with a 1/4″ seam allowance.
- Press just the TOP fabric away from the zipper and folded strip.
- Top stitch along the edge of the top fabric.
Finish the pillow cover WITHOUT binding:
- Open your zipper at least half way.
- Place the pillow front right sides together on the pillow back.
- Sew around all four sides of the pillow using a 1/2″ seam allowance. It may be helpful to use a walking foot if your pillow front is quilted.
- If you plan on frequently washing the pillow cover, or if you will be changing the pillow cover on and off often, you may want to sew around all the raw edges with a zig zag stitch or with a serger to keep the fabric from fraying as much.
- Turn right side out through the zipper.

Finish Pillow cover WITH binding:
- Place pillow front and back WRONG sides together.
- Baste around all four sides. Again, if your pillow front is quilted a walking foot is very helpful to avoid shifting.
- Add your binding using your favorite method.
All that is left for you to do is stuff in your pillow form and enjoy your new pillow! If you would like to see more information about the front of the pillow- you will find it all in this blog post.
xoxo,
Amy