*I wrote this post last year as a guest post for The Wood Connection blog. The wood letters and papers were provided to me by The Wood Connection- however the project and opinions are my own.
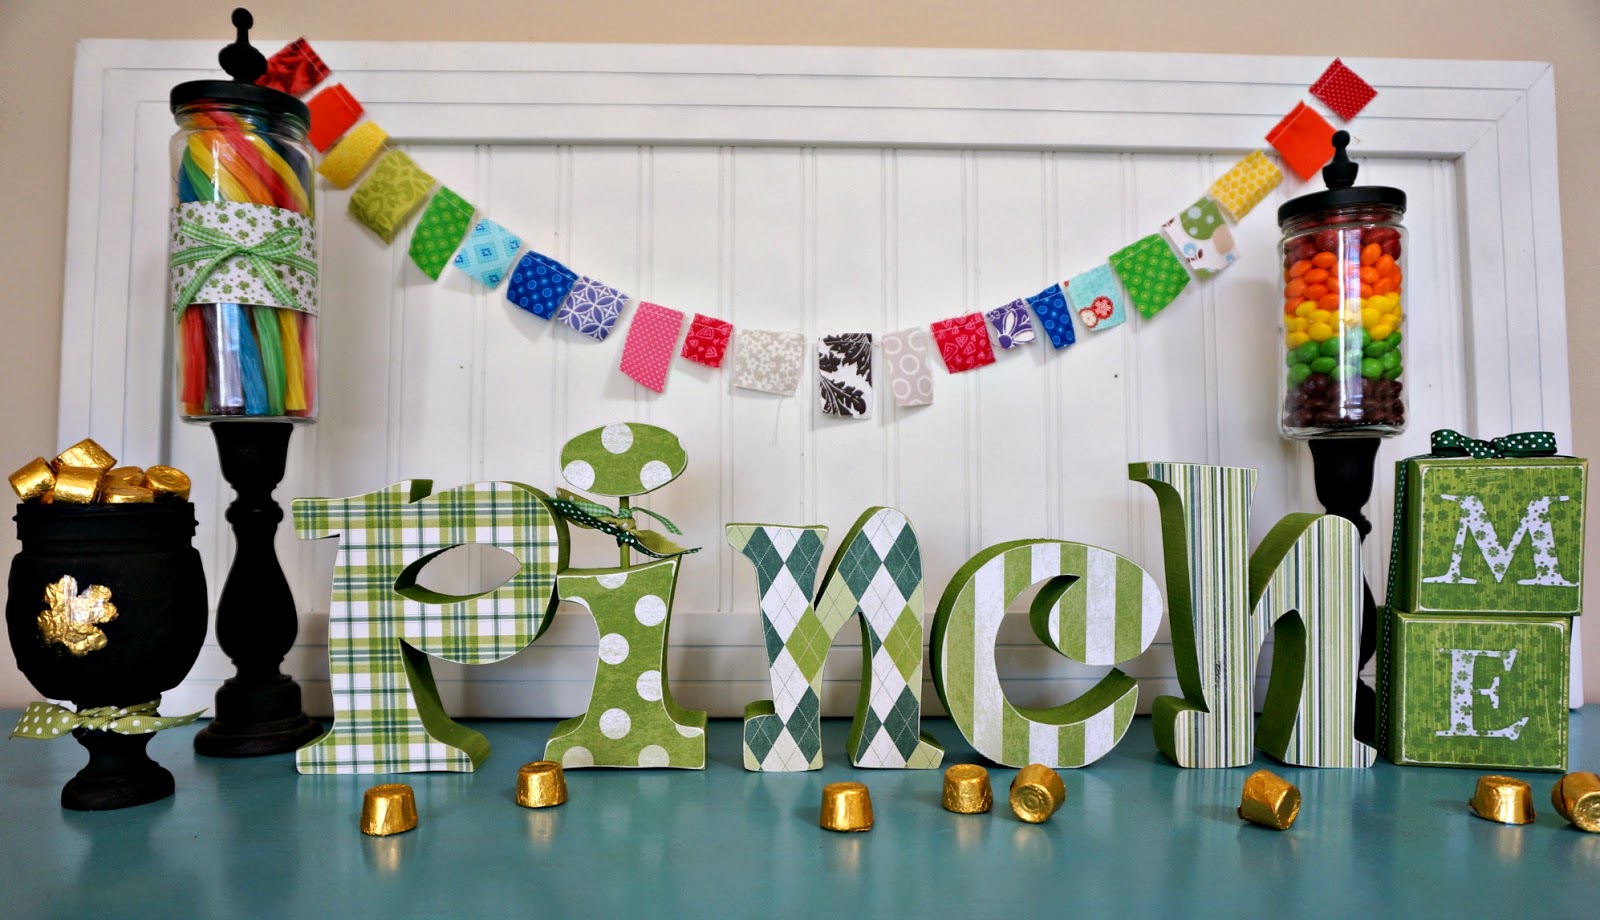
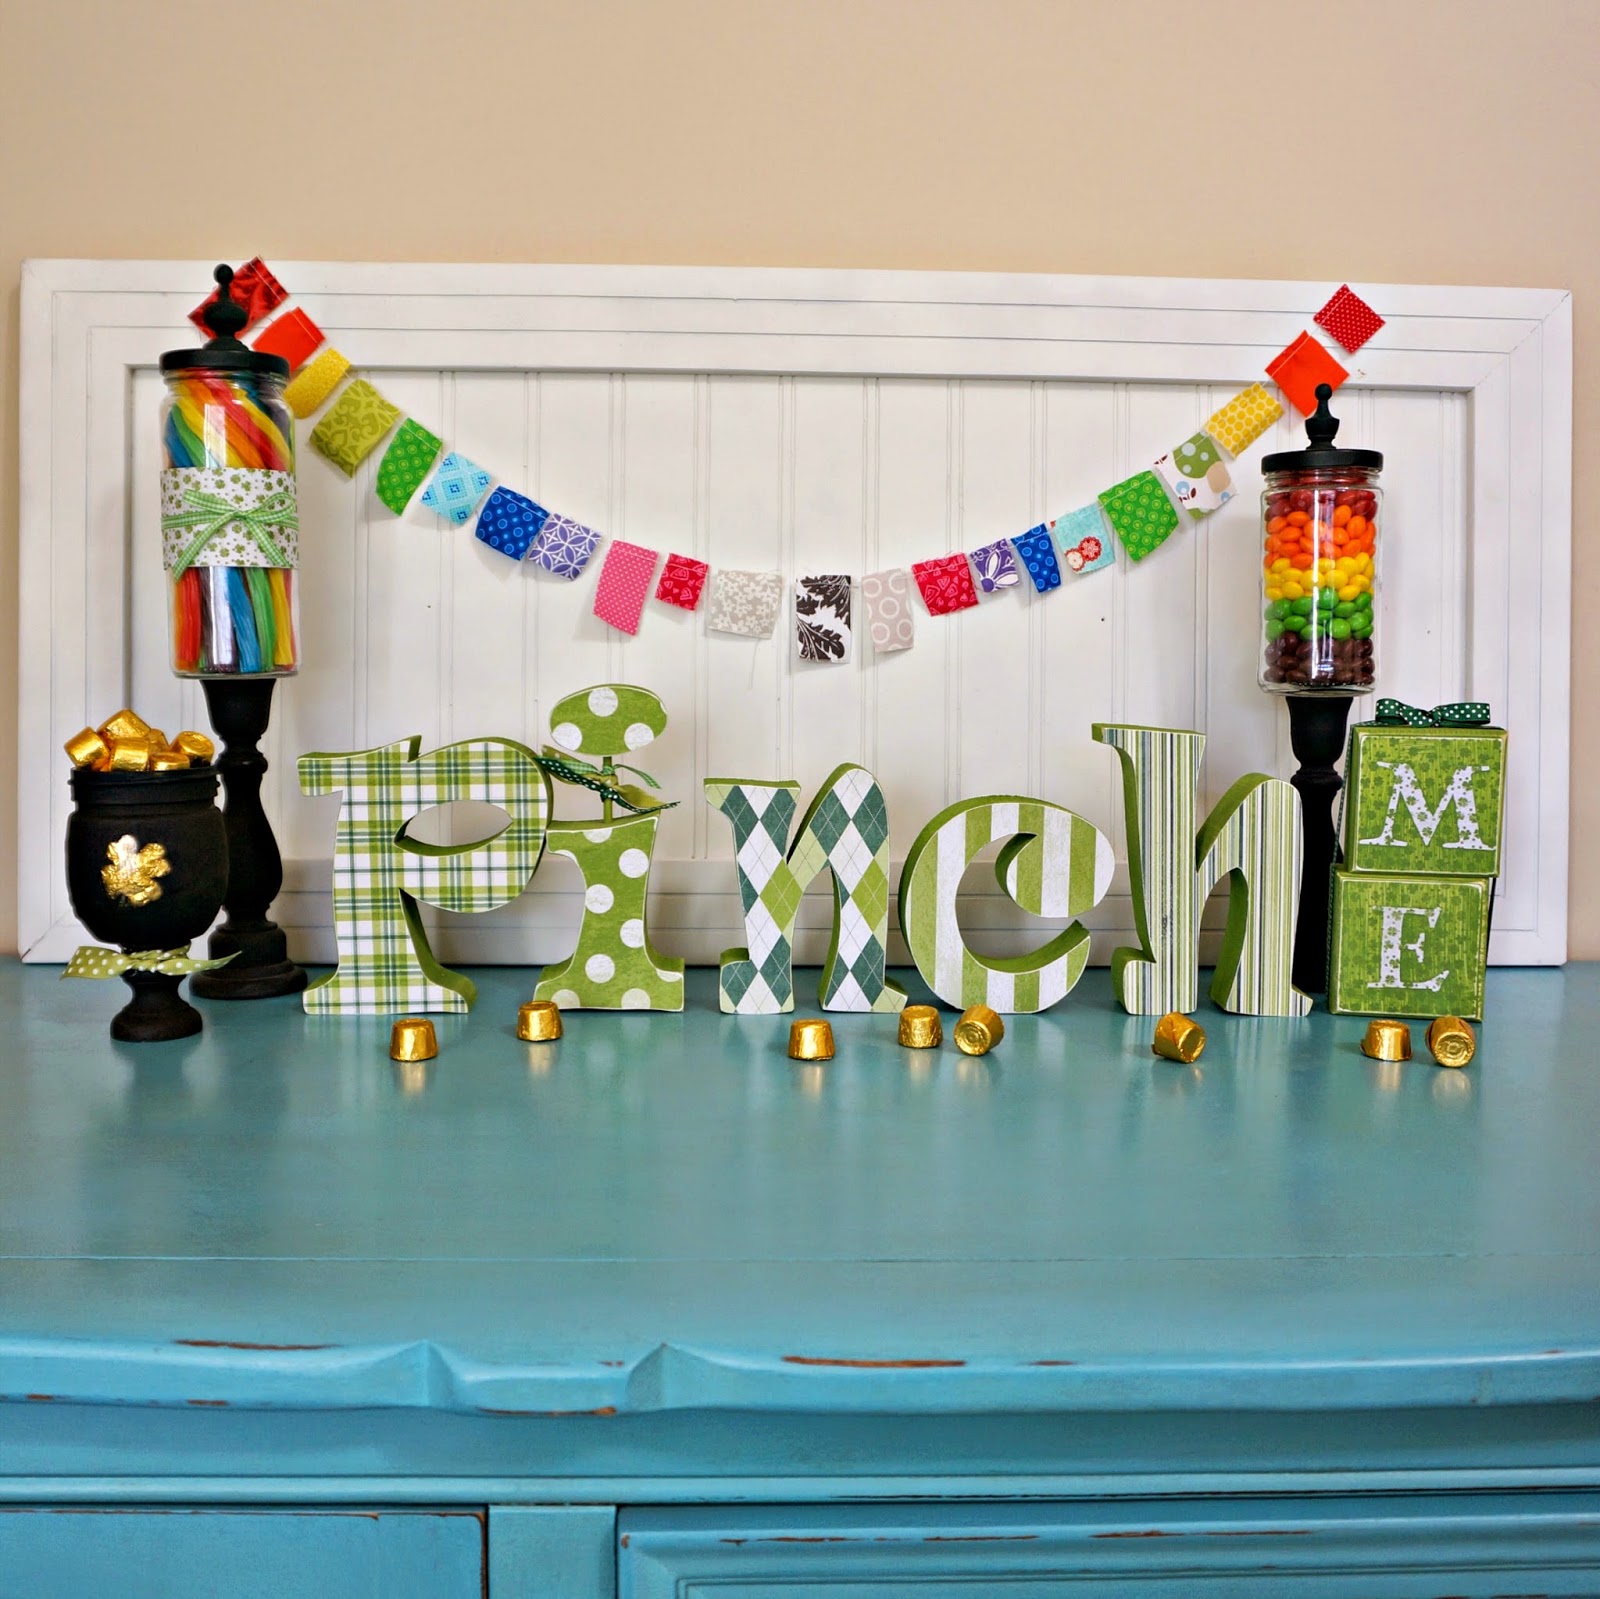
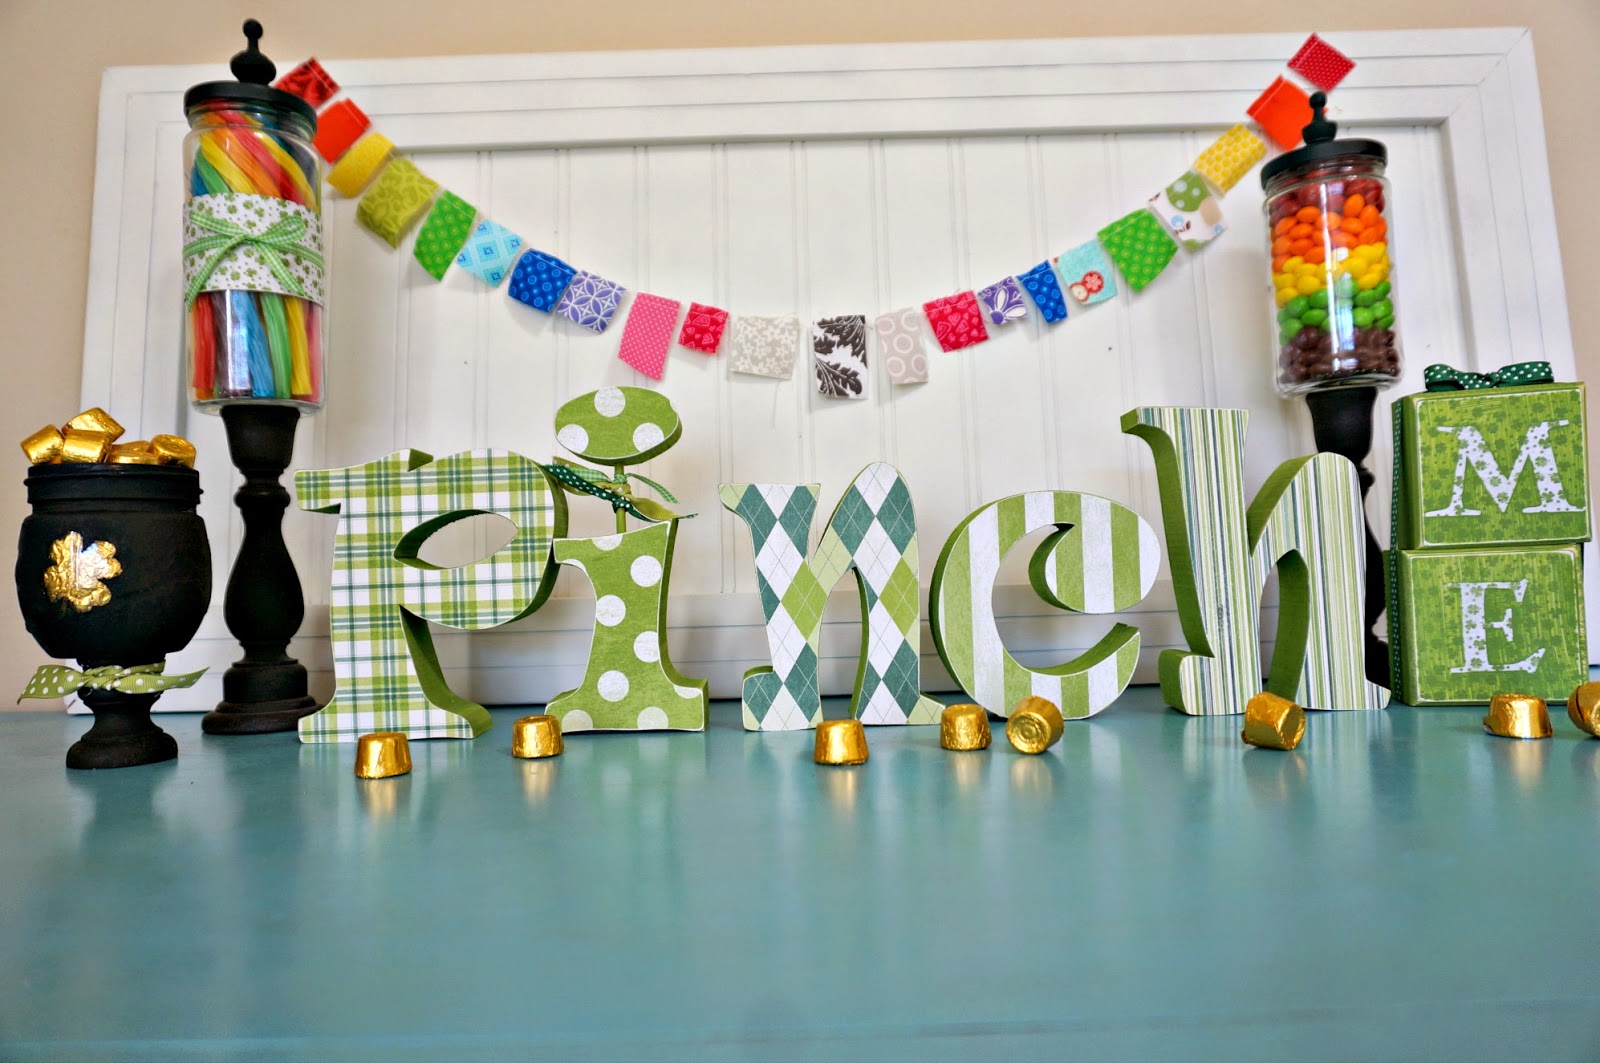
I don’t have many decorations for St.Patrick’s Day but this one makes me super happy. I love the letters and wood, but the small mason jar pot of gold just might be my favorite. That or the rainbow order jars of candy. 😉
Here’s the How To:
 Materials:
Pinch me letters and vinyl from The Wood Connection
coordinating scrapbook papers- I used papers from Authentique- found at The Wood Connection
paint that coordinates with your papers
ribbon
sand paper
foam brushes
small mason jar
small candle cup
black paint
shamrock vinyl (optional)
Putting the letters together was pretty simple. You can find a great tutorial for putting scrapbook paper on wood in the tutorials section of their blog here. I just sanded the letters and left the edges white after I glued the paper on.
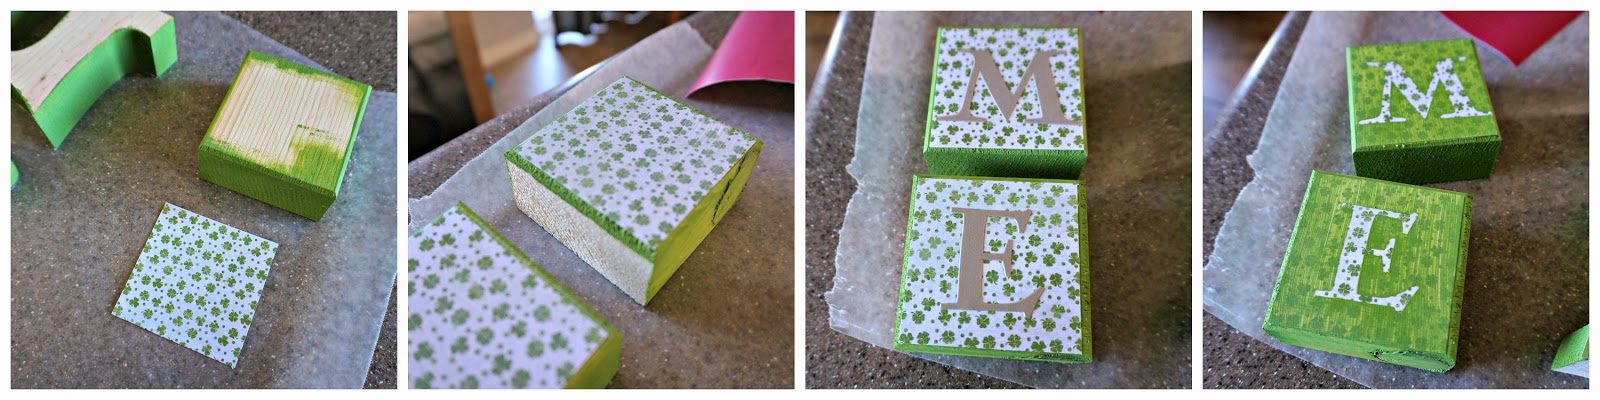
For the “ME” part of “Pinch ME”, I used a reverse stenciling technique.
– paint the block edges and cut your scrapbook paper to fit on the front
-glue the paper on the block using wood glue, then use a light coat of decopauge glue to seal the front of the scrapbook paper
-place your letters on the blocks- I am using a masking stencil here, but you can just use vinyl as well
-paint over your stencil and paper, I used a thin coat so the paper would still show up a little.
While the paint is WET, carefully pull off your stencil. Allow the paint to dry. Lightly sand the block edges.
To finish off the blocks, I simply tied them together with a length of ribbon.
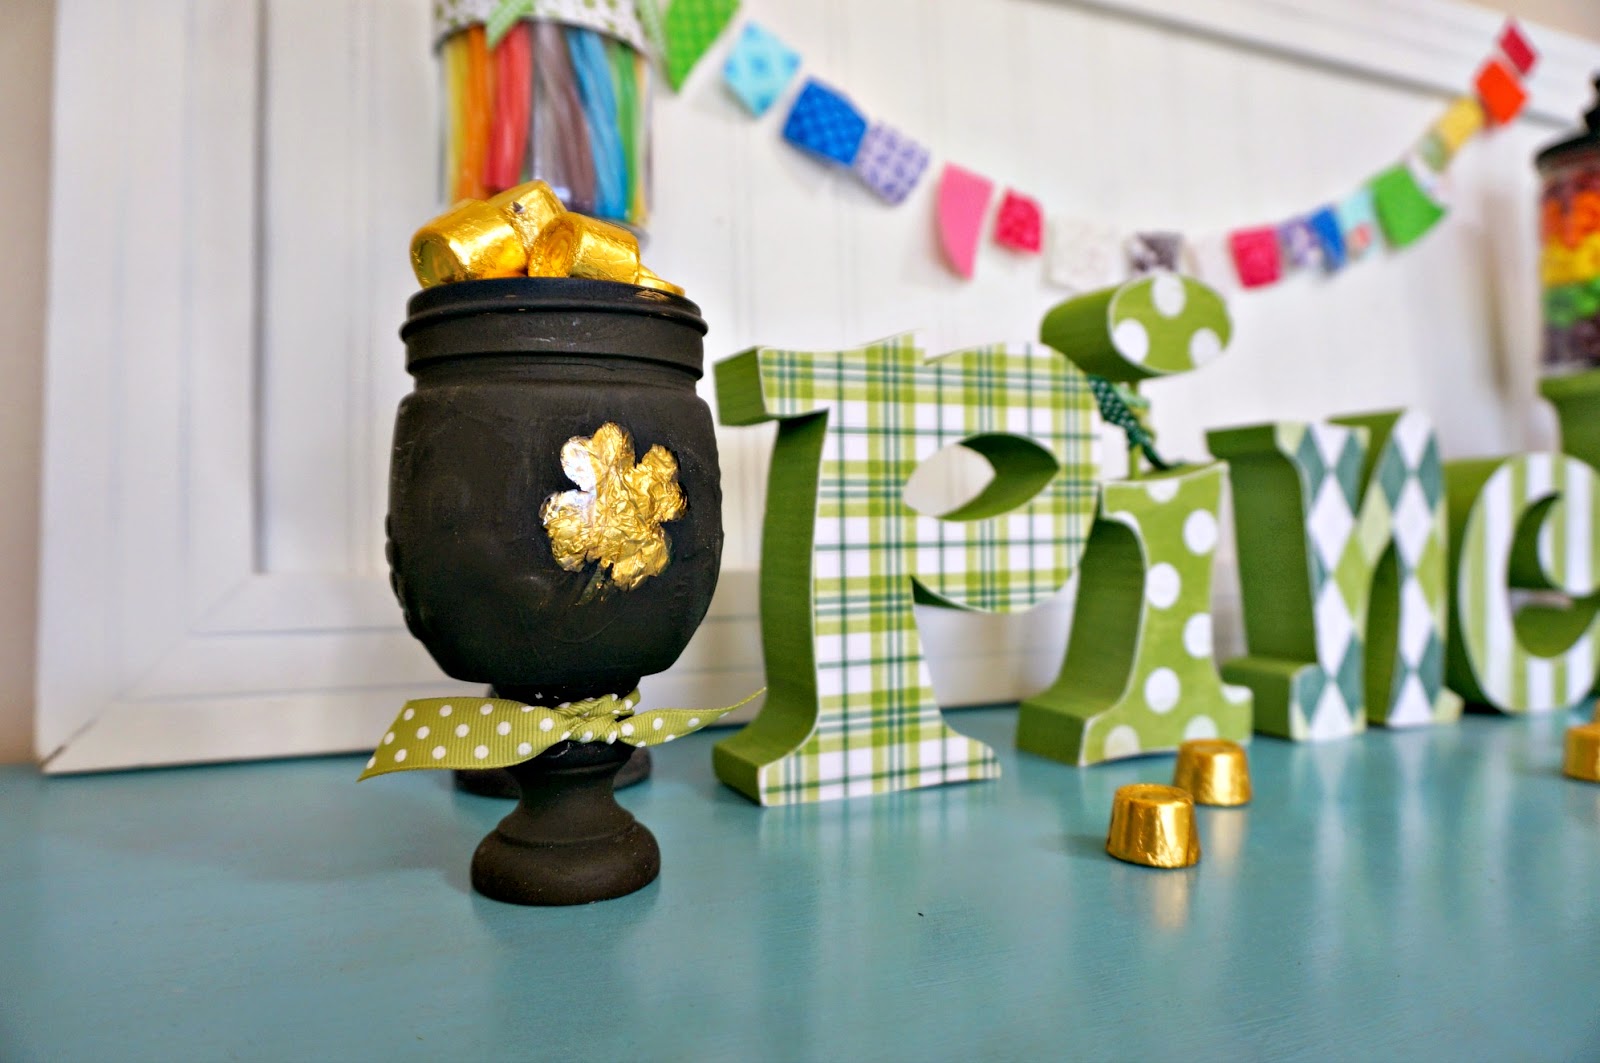

For the pot of gold mason jar I first added a shamrock vinyl stencil to the jar. It’s a jelly jar and has a bunch of texture on it, but I thought it was the perfect shape so I couldn’t pass it up.
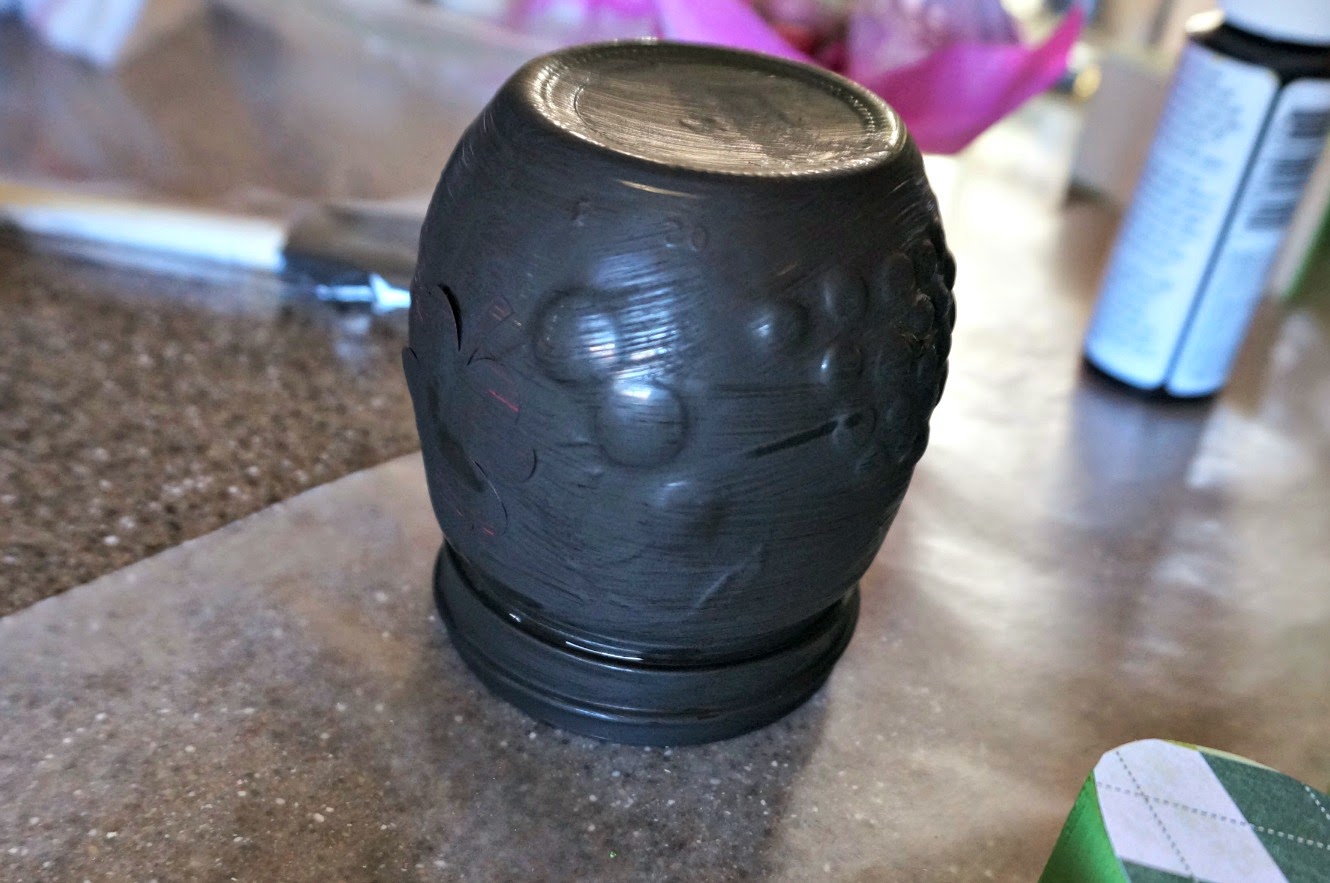
Then I just used acrylic paint and a foam brush to paint the jar black. It took two coats of paint to get decent coverage. Wait until the paint is DRY before removing the stencil on this project. I know that you can use other types of paint for glass, but this is what I had on hand and it worked great. I might take it out and seal it with a clear acrylic spray when the weather warms up as this paint has a tendency to scratch easily. While I had the paint out I painted the small candle cup black also, to use as a base for the Pot of Gold.
To fill the stencil opening in the jar better, I unwrapped one of the candies and just placed the wrapper against the side of the jar. I love the hint of gold popping through the black. I tied a ribbon on the bottom of the candle cup and glued the whole thing to the bottom of the jar to finish off the pot of gold.
Now I’m ready for leprechauns to come calling!
xoxo,
Amy

