I was given a Cricut Maker to review and this post contains affiliate links.
You have probably realized by now that my current crafting mostly involves fabric. I love all the new fabric prints and the fun things you can sew. I love that things last longer when made with fabric than with paper. What I don’t love is all the prep work that goes into getting ready to sew. Preparing your fabric, cutting out the pattern pieces- it’s a lot of effort that goes into getting ready to do the thing I really want to do, which is sew. That’s where my love for the Cricut Maker runs deep! All the steps of printing or cutting out the pattern, pinning or tracing the pattern and then cutting out the fabric- they are all gone with this awesome machine! When I started looking for a pattern to try out this fun feature with, I couldn’t resist these darling bunnies- and the best part is that the pattern is free if you have a Cricut Access membership!
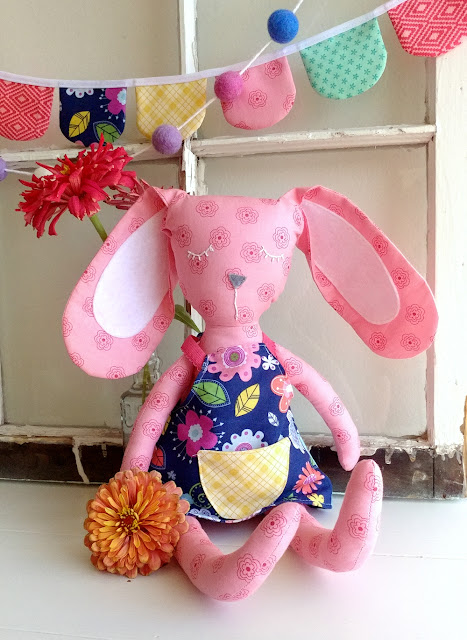
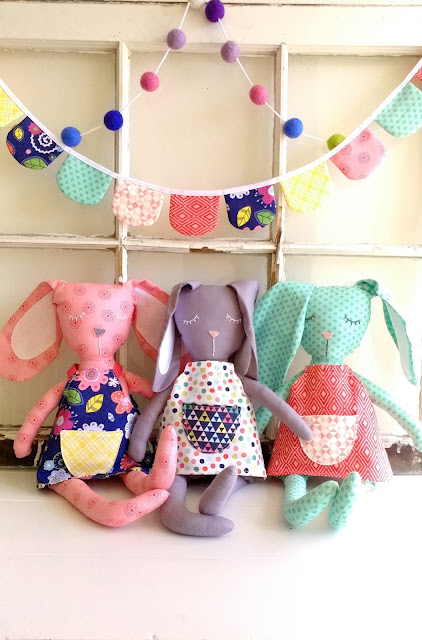
Once I made one, my girls all decided they needed their own, so I ended up making three! I have a few tips for you if you decide to make this pattern that will hopefully help you out! Read all the directions for the project first- they will give you all the steps for assembly, but here are some of the things that worked for me:
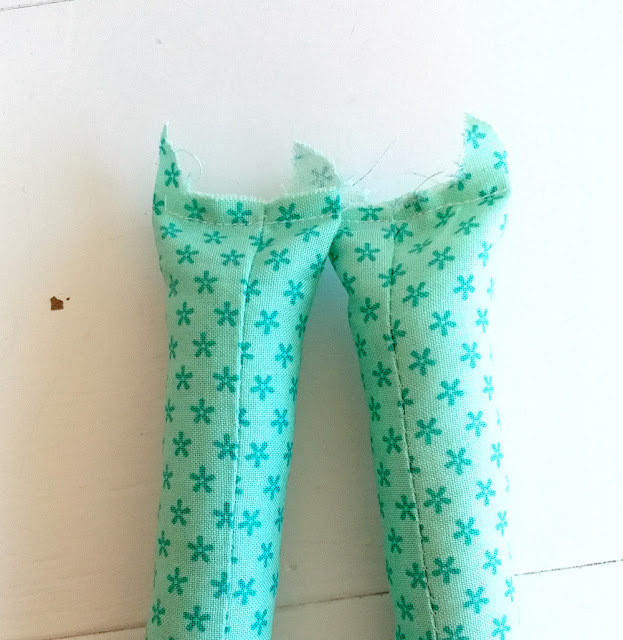
The first tip is to baste the limbs closed before attaching them to the body. I like my softies nice and firm since the batting tends to break down over time and I want them to have a nice feel for a long time. But, firm limbs are hard to attach since they don’t have a lot of room for seam allowances. If you are new to sewing, I would leave a bit more space at the top of each limb so you have more room to work with. Basting will hold the sides of the limbs together and make them easier to attach.
The second tip is to baste the limbs to the body before adding the back. You can see that once you add arms, legs and ears, it’s a bit crazy looking. Trying to keep everything pinned neatly in place can be tough, so go ahead and use a long stitch, and a scant (just smaller than) 1/4″ seam allowance to stitch them all in place. Also, note the position of the ears on this bunny. I like them a bit to the sides so they don’t always hang over the bunnies’ face.
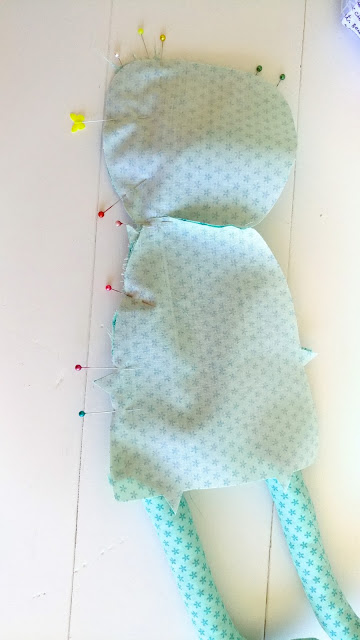
Once you have the limbs sewn down, start at one of the notches on the body and line up the back. Normally when you pin two pieces together, you like them to be flat and even, but with so much bulk in the middle, you have to rely on the notches, and the seams to guide you when pinning. I start just below the notch on one side and pin that side in place, you can see that I leave the legs out of the bunny for now. It makes it much easier to sew the neck if you do the bottom last. Pin up the side and make sure the neck seams line up. Go around the head, pinning more than you normally do and down the other side. Again, check to make sure the neck and notch seams line up. Sew around the bunny where you have pinned- *tip: I like to back stitch a couple of times on places that will get a lot of stress- if your bunny will be loved (and if you give it to a child- it will!!) the limbs and ears will all get pulled on, so, I back stitch whenever I get to the beginning or end of a limb as I go around.
Now it’s time to do the bottom. Feed your legs up and into the body of the bunny. It might take a bit of manipulation to get the feet through the neck. Get the bottom as neat as you can and pin from the inside of each leg and around the corner to where your stitching stops. Sew the two legs in, leaving the space between the legs open for stuffing. Make sure to back stitch when starting and stopping- especially the opening where you will turn the softie right side out and stuff it!!
**The biggest tip I have is to go slow and watch your seams. You want to make sure you are catching the front, back and both sides of each limb and ear so they are securely stitched into the bunny. Use a smallish stitch length and lift your presser foot often through the curves.
** Before you turn your softie right side out use pinking shears or sharp scissors to notch your curves. You will get a much smoother shape to your softie if you do!
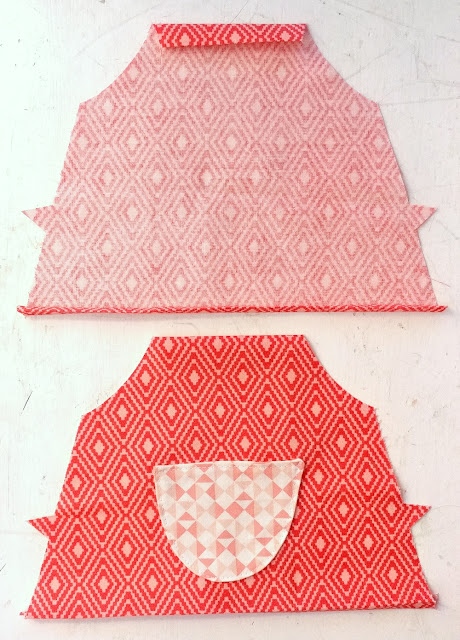
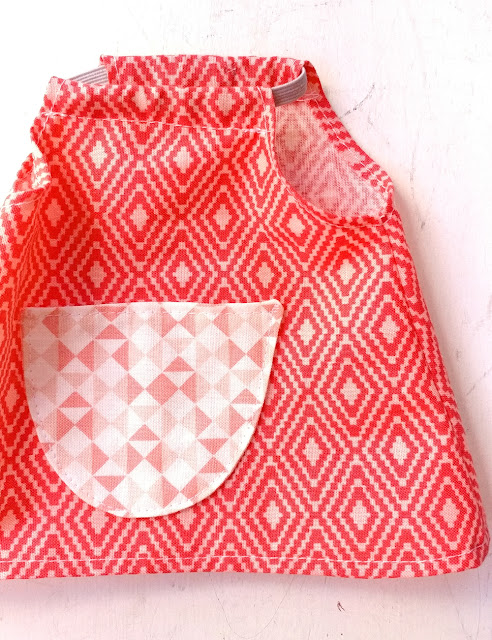
This is how I ended up making the dress. Cut out the pocket pieces and the dress pieces- skip the straps.
- Sew the pocket pieces right sides together, leaving 1-2″ on the top straight edge for turning.
- Clip seam on curves and turn right side out, press.
- Edge stitch along the top of pocket to close the hole.
- Center the pocket on the front dress piece and sew around the bottom curve, back stitch at the beginning and end of pocket to secure.
- Press the top of each dress piece down 1/4″, then again 1/2″. Press the bottom of each dress piece up 1/4″ then again 1/4″.
- Unfold the pressed hem pieces and put the two dress pieces right sides together. Sew down both sides of dress (with notches)
- Fold hems back up and top stitch down.
- turn arm curves under 1/4″ and top stitch
- fold top hems back down and stitch at just under 1/2″ to create a channel for the elastic.
- Take a 7″ piece of decorative elastic and thread it through the front and back channel of top of dress. Sew ends together and turn the elastic so the seam of the elastic is in the casing.
The elastic allows the dress to easily come off and on.
I had so much fun making these bunnies. My three youngest girls have all claimed their favorites and are having so much fun playing with them.
I even used scraps and my Cricut Maker to create the little bunting in the background. I can’t wait to use my Maker machine for all the crafting I want to do!
As always, let me know if you have any questions- I’m happy to help!
xoxo,
Amy
This is a sponsored conversation written by me on behalf of Cricut. The opinions and text are all mine.







Márcia Carvalho de Souza
April 28, 2019 at 3:18 pmSo cute!