
I have been drooling over the laminated cotton in my local quilt shop for a while, but was never able to justify spending the money on it to experiment with it. When I had the opportunity to meet Cindy with Riley Blake fabric and she offered to get me some to try I jumped at the chance. I originally thought I would use it to make one of my regular tote bags, but when I got my hands on it I realized that the weight wouldn’t be right for the size I usually make. On to plan B.
I mentioned yesterday in the tutorial for making this bag that I was inspired by this tote by Jessica at Me Sew Crazy. In her post she linked to a great post on laminated cotton by Pink Chalk Studios here. She really experimented with her cotton and discovered all sorts of cool things- and since she already did the work I didn’t have to.
I decided that since I already had a walking foot for my sewing machine that’s what I would use to combat the sticky problem- (Jessica has another tip for that in her post as well.) The other tip I have read for that is using a Teflon coated foot- but I didn’t want to fork over the $. I didn’t have any problem using the walking foot with the cotton, but when I came to some thicker seams I did need to use both hands to “feed” it through. (a gentle tug from behind helped)
I would say that the biggest hurdle in sewing with Laminated Cotton is the iron factor. (I just coined that phrase. 😉 ) You really don’t want to take your hot iron to any of the seams, especially on the laminated side. So keep that in mind when deciding what you’d like to make with it. Having said that, though, I did find that finger pressing worked pretty well since the laminate coating held the crease until I could get the top stitching done.
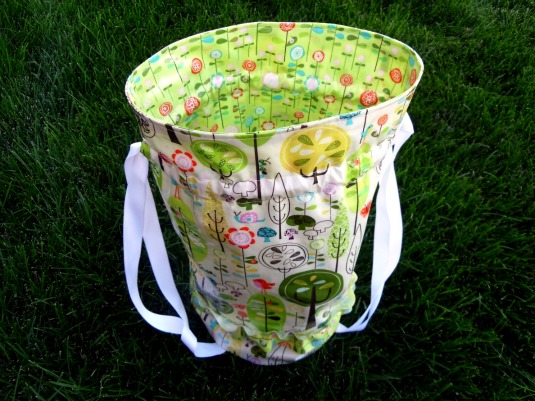
And let’s talk for a minute about one of the benefits of laminated cotton- the cuteness factor!
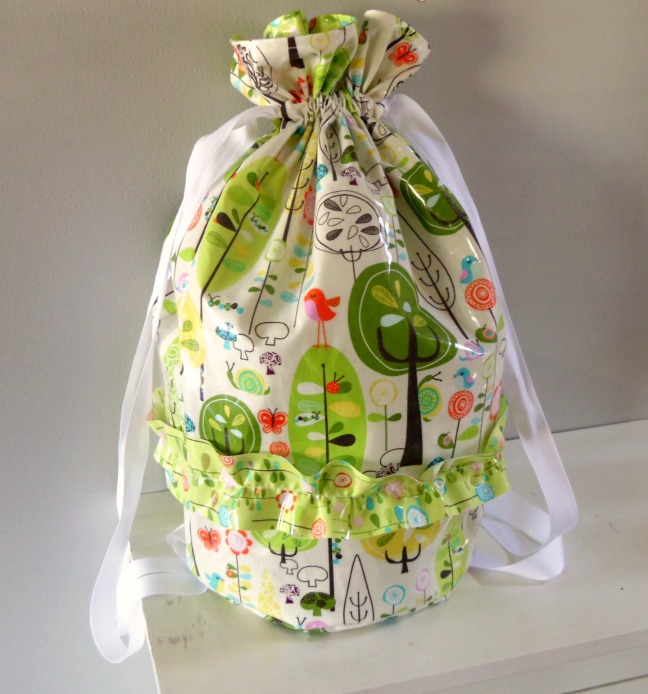
Not only are the fabrics darling, modern and current prints (many fabric designers are including laminates in their new fabric lines), but with the base of the fabric being quilting cotton, the fabric is light weight and flexible. (especially in comparison to vinyl and oilcloth.) Which makes it perfect for adding embellishments (like my awesome ruffle. 😉 ) to your projects.
I am going to try adding some interfacing to the next project I do. I prefer fusible interfacing, so we’ll see if that will work with this fabric.
A few last notes: The sweet girl who cut the fabric for me said she has made a few bibs for her grand babies with it- they get washed in the washing machine often and have held up well. Repeated washing may dull the sheen on the laminate- so be aware of that.
As we’ve discussed- the laminate holds a crease well- so if you’re going to store it, you will probably want to roll it up and not fold it.
And finally- if you get addicted to Laminated cotton, and start buying it up in bulk- don’t say I didn’t warn you. 🙂
xoxo,
Amy


Rebecca
August 27, 2011 at 3:55 pmGreat bag! I have some laminate coming to me in the mail and can't wait to work with it ~ I'm hearing so many great reviews on it lately!
Tonia @ TheGunnySack.com
August 27, 2011 at 6:30 pmThanks for all the tips! I've made a couple of bibs with laminate cotton but that's it!
Naturally Carol
August 28, 2011 at 7:49 amSo summery and pretty, I love the little frill around the bag too!
Anonymous
August 29, 2011 at 4:55 amThat looks fabulous! I'm a newbie seamstress so the thought of tackling something like that is way to scary for me but someday, especially after seeing your done project. Way to GO!
Natalie
http://www.projectdowhatyoulove.wordpress.com
Gwen @ Gwenny Penny
September 7, 2011 at 1:15 amI really want to try this. Great tips, Amy, and thanks for the links to even more tips… these are going to come in handy.
Jes
November 7, 2011 at 2:23 amIt can be kind of a pain, but you can use your iron on interesting materials like this. You just need a couple of layers of tissue paper in between the material and the iron. The seams don't press open quite as crisply, but it is better than not pressing them.
That tip came in very handy when I was making boot covers for Halloween costumes this year!