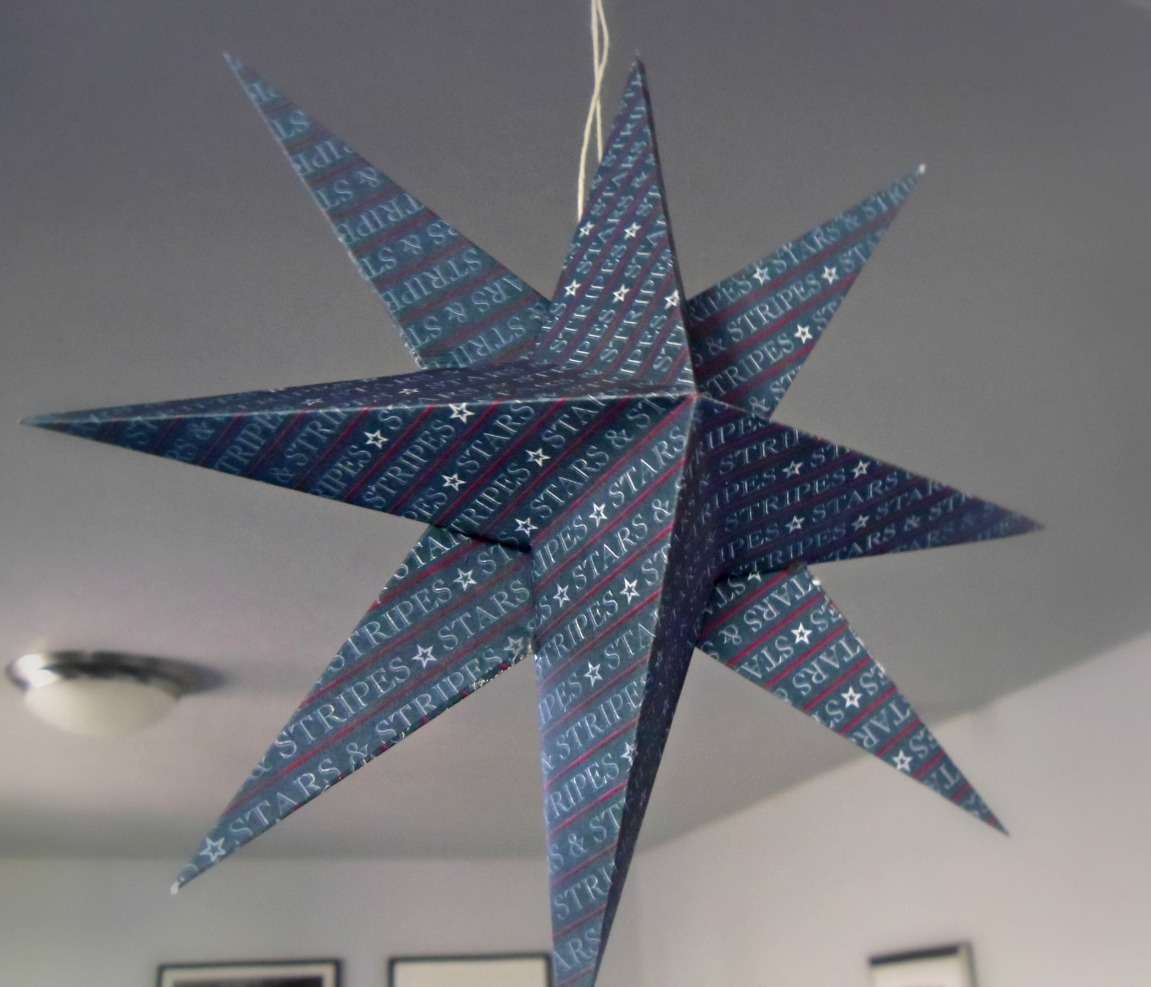
With the summer holiday season upon us, what could be more handy than some inexpensive, cute decorations?
I am here to help. I saw this idea in a magazine while waiting for a Dr. appointment. I’m really sorry that I don’t remember which one, but I was sitting there for over an hour, so I saw a lot of magazines. 🙂 My best guess is a Family Fun magazine or a Parents magazine, but I couldn’t find anything online that showed this craft. If you know where it can be found, please let me know.
However, the pictures in the magazine left a little to be desired, so in true blogger fashion, I have my own tutorial complete with LOADS of pictures.
You will need 2 pieces of paper, cut in squares that are the same size. For this star I used the full 12X12 sheet. The smaller ones were cut down to 6X6 squares.
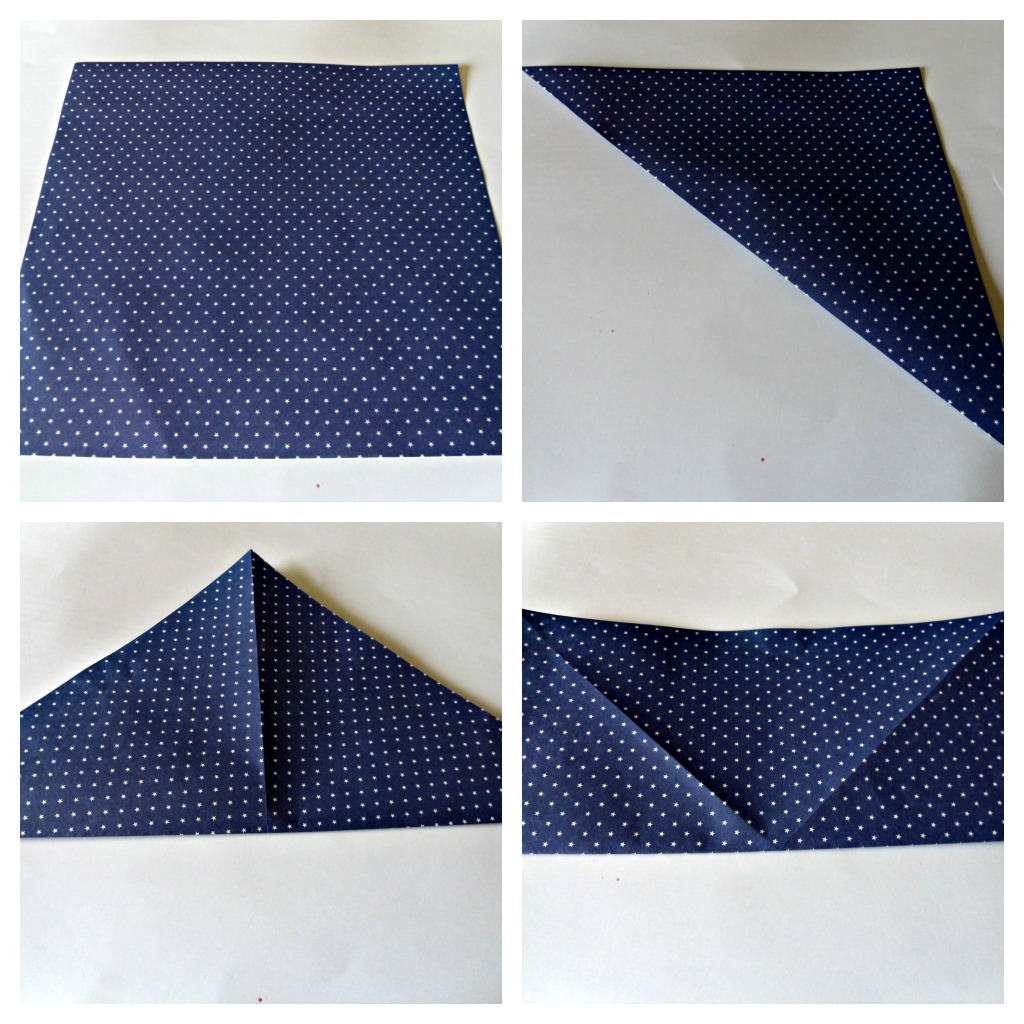
First we are going to start by folding our paper. We need to make 4 folds, 2 on the diagonal and the other 2 creating quarters of the paper. Are you with me so far?

The first picture shows where all your folds are. Ready to move on? Make a cut on each of the quarter lines, just under half way to the center. (in this example I would cut about 2 1/2 inches along the fold) Do this on all 4 sides. Fold the cut sides into the center, lining up the paper with the diagonal fold we created at first to create four points. Using a glue stick, put glue on one side of the point. Bring the other side over, lining up the cut line with the outer folded edge- overlapping the two sides. Repeat for the other 3 points. You may need to push the creases back down in the center on the “outside” of the star to create the sharp edges.
Do all the steps again for the second piece of paper.
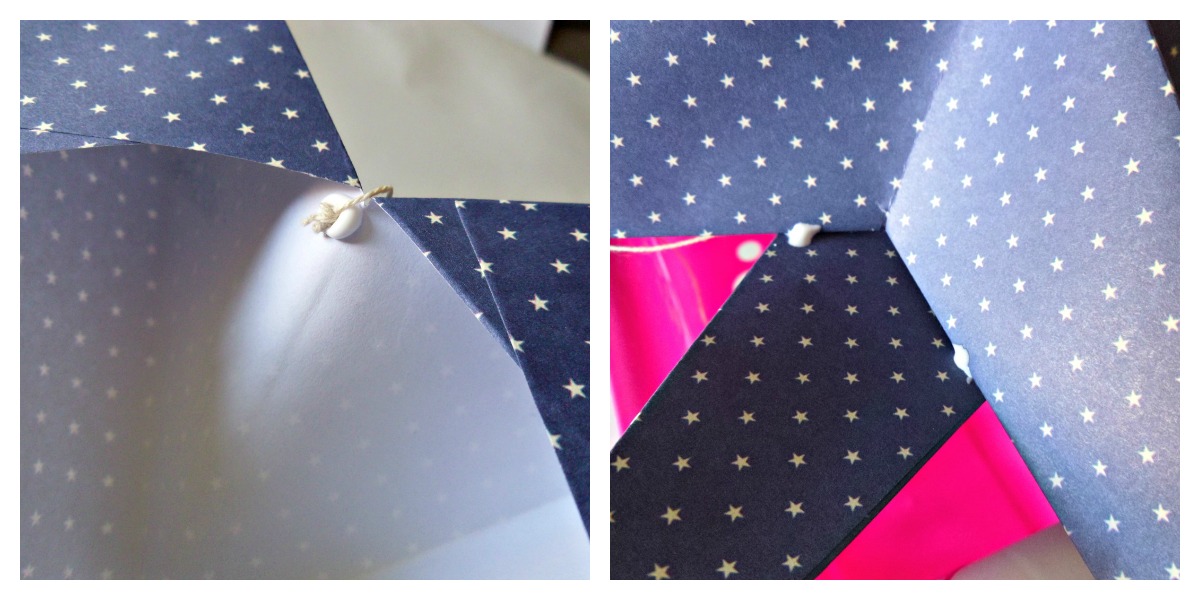
We’re almost done. Now to take the 2 halves to make an awesome 3D whole. First you will want to put a drop of tacky glue just inside one of the stars, where two points meet. Put your ribbon, string or whatever you’re going to use to hang it here. Now place the two stars flat sides together. You may need to borrow another set of hands, or find something (like the pink bucket I used) to hold the bottom star flat so you can see where the two stars meet. Use tacky glue to hold them together at these points. Now the hard part- waiting for the glue to dry before you hang them up. 🙂
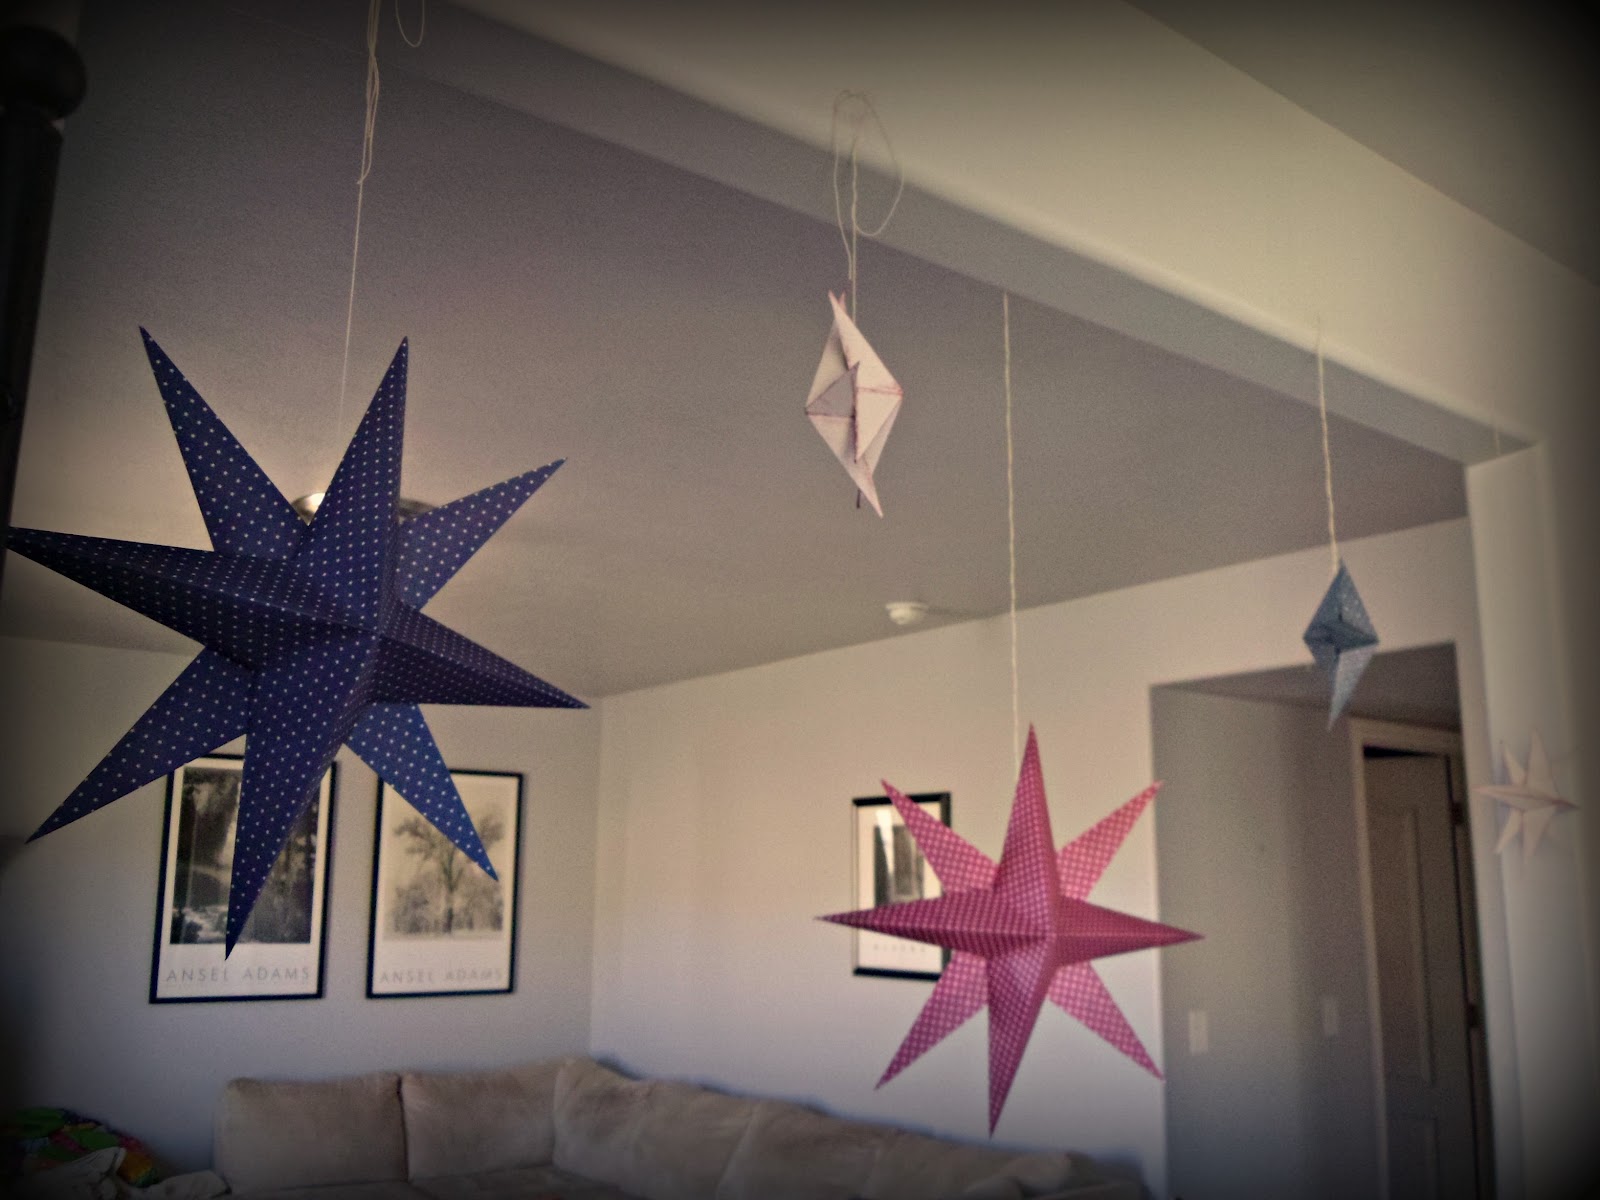
I am loving how they dress up the opening between my kitchen and family room.
Let me know if you have any questions- I’d love to help.
XOXO,
Amy


Jonie Marie
June 22, 2012 at 1:29 pmI love how they look all hung up together. What a great idea! Plus the paper you chose is really fun too.
Carol, The Answer Is Chocolate
June 22, 2012 at 2:11 pmThese are awesome Amy and thanks for all the pics of the how tos!
Debra
June 22, 2012 at 2:40 pmLove these! We made them a ton this last Christmas because my husband's students were really into origami!
Lorene (just Lu)
June 22, 2012 at 7:51 pmAwesome! Way to show up whatever magazine by making an awesome tutorial 🙂
Thinking of you today with all the fires your direction… hope you are safe and at home!