This is a sponsored conversation written by me on behalf of Cricut. The opinions and text are all mine.
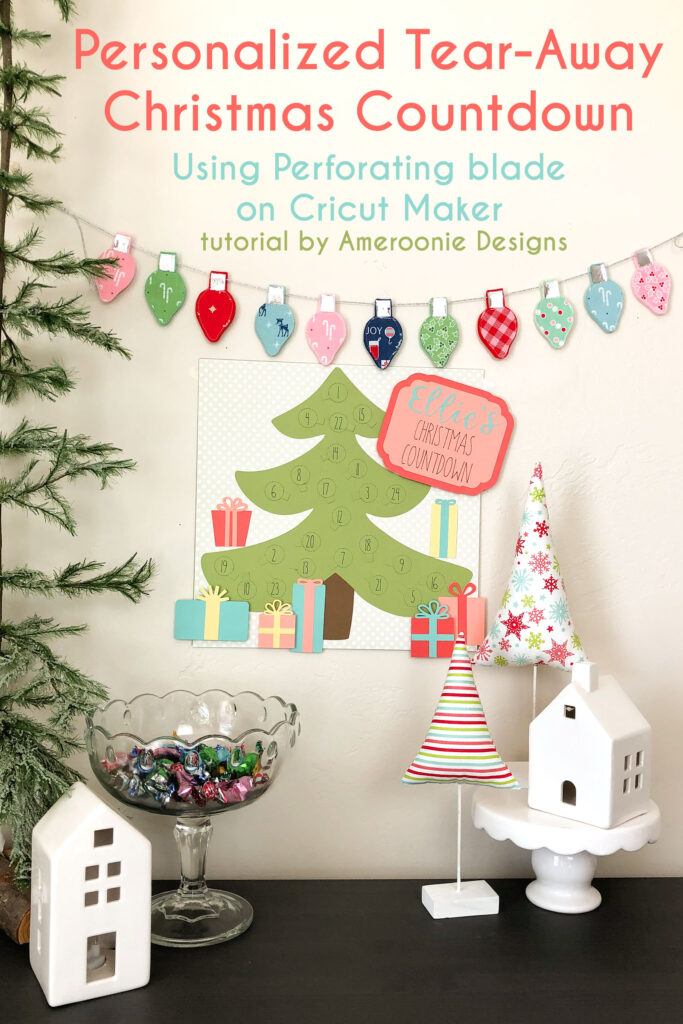
From the time my first daughter was born, I have loved having countdowns to Christmas for them. I love watching their excitement as they anticipate this special time of year. Now that I have 6 children, it is harder to remember who’s turn it is to switch the calendar, or who got to open the last gift. This year, I have decided to create each child their own countdown. Every child will have their own special countdown in their room. They are so excited! These personalized Christmas Countdowns come together quickly once they are cut out. And you can make multiples of them rather easily. It would be so fun to make them for a class, grandchildren, or if you have multiple children like me who just want a turn every day!
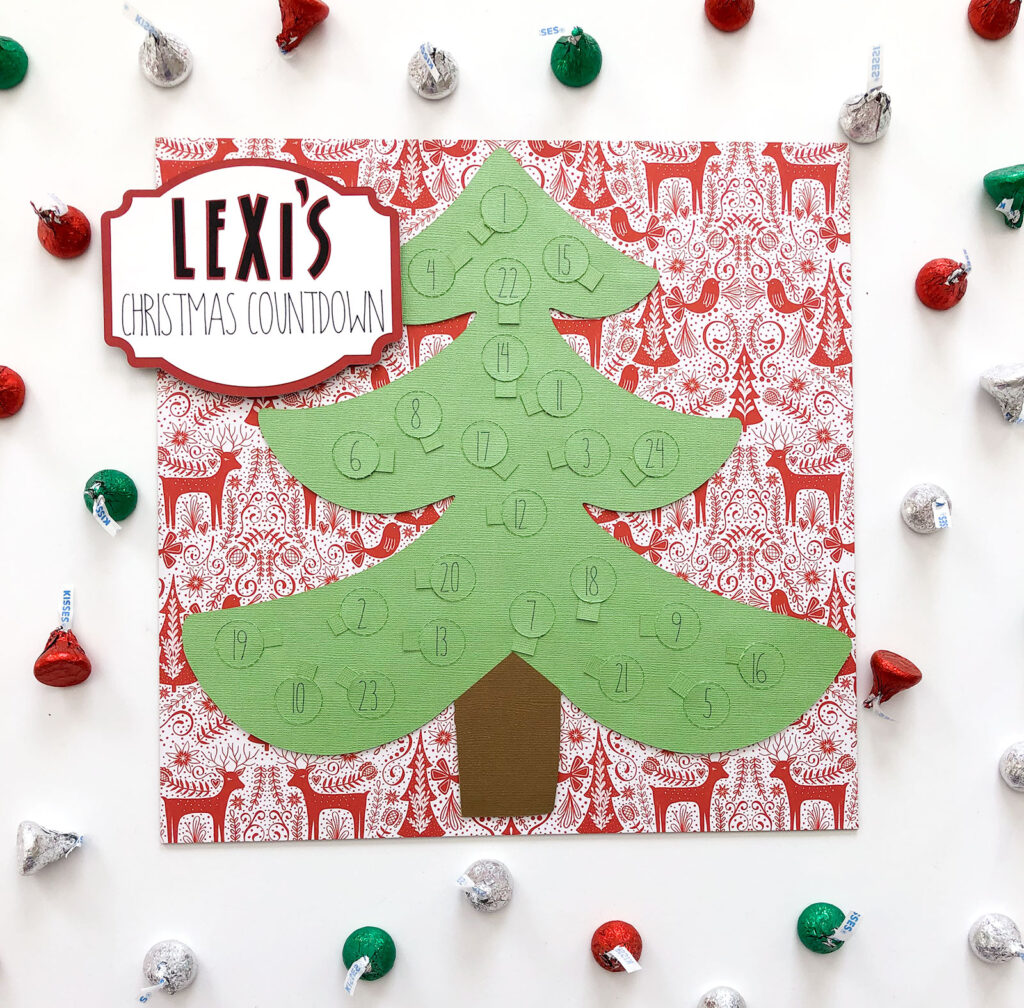
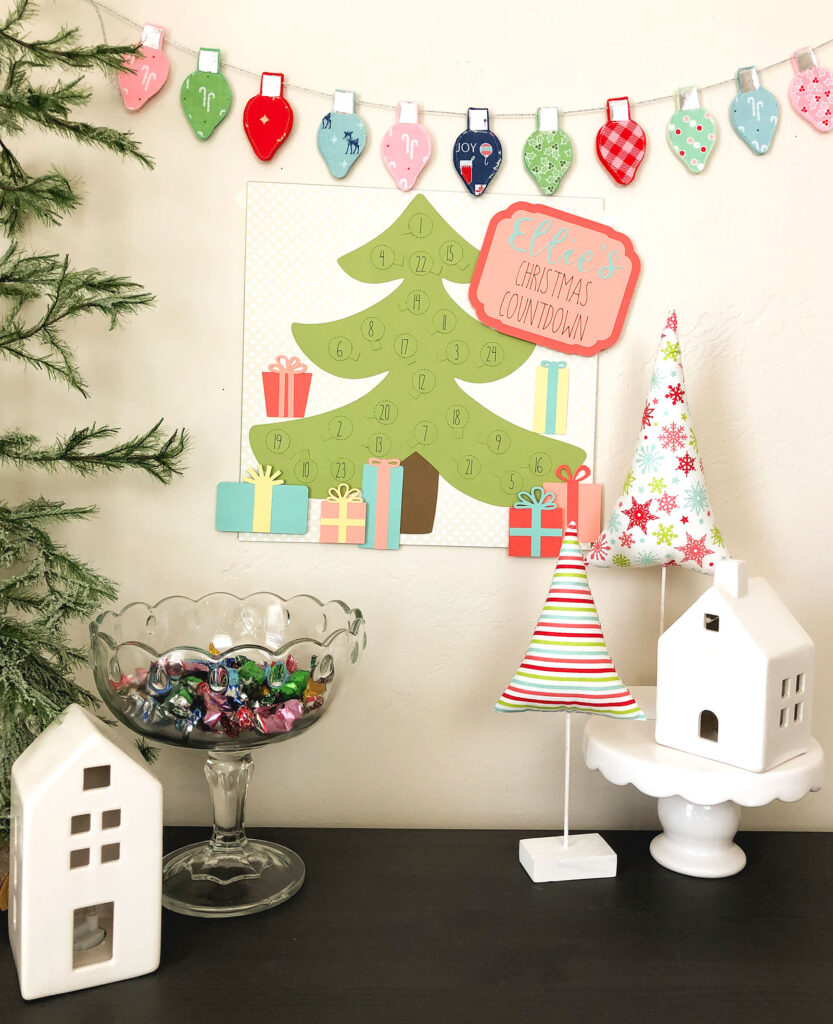
I have created two different versions of this tree countdown. A simple one where all the ornaments once revealed are the same color (in this case a shiny sparkly silver) or a more complicated one where there are multiple ornament colors and gifts to adorn the tree. Each one will require customization on the name, but other than that they are sized to fit a 12″ X 12″ paper or frame and they are ready to go.
Make a Personalized Paper Christmas Countdown
Supplies:
- Paper- 12″ X 12″ background paper, cardstock for tree, trunk, ornaments, gifts and title
- chipboard or other backing for countdown
- Perforating Blade
- Cricut Maker
- Cutting blade
- fine tipped glue
- Cricut Pen – .4 tip in black
Assembling the Paper Christmas Countdown
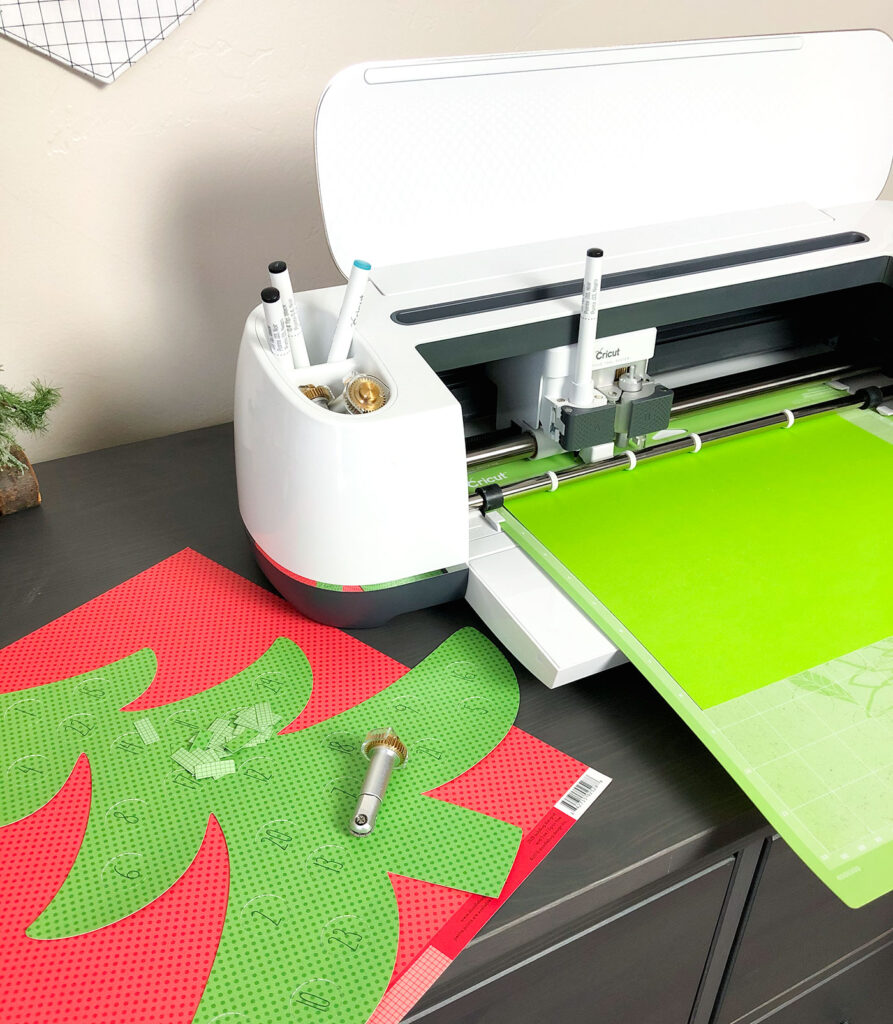
Begin by cutting out all of your design elements using the papers and cardstock you have selected. Most of these elements are straightforward and could be cut using any Cricut machine. What sets this project apart, is the perforated circles using the Perforating blade, which is part of the adaptive tool system exclusive to the Cricut Maker. You guys know I love working with fabric, and the rotary blade of the Maker made all my sewing dreams come true. But, this new blade, along with the wavy blade, debossing and engraving tips show that there are many more creative dreams to explore.
Create Pull Tabs for ornaments
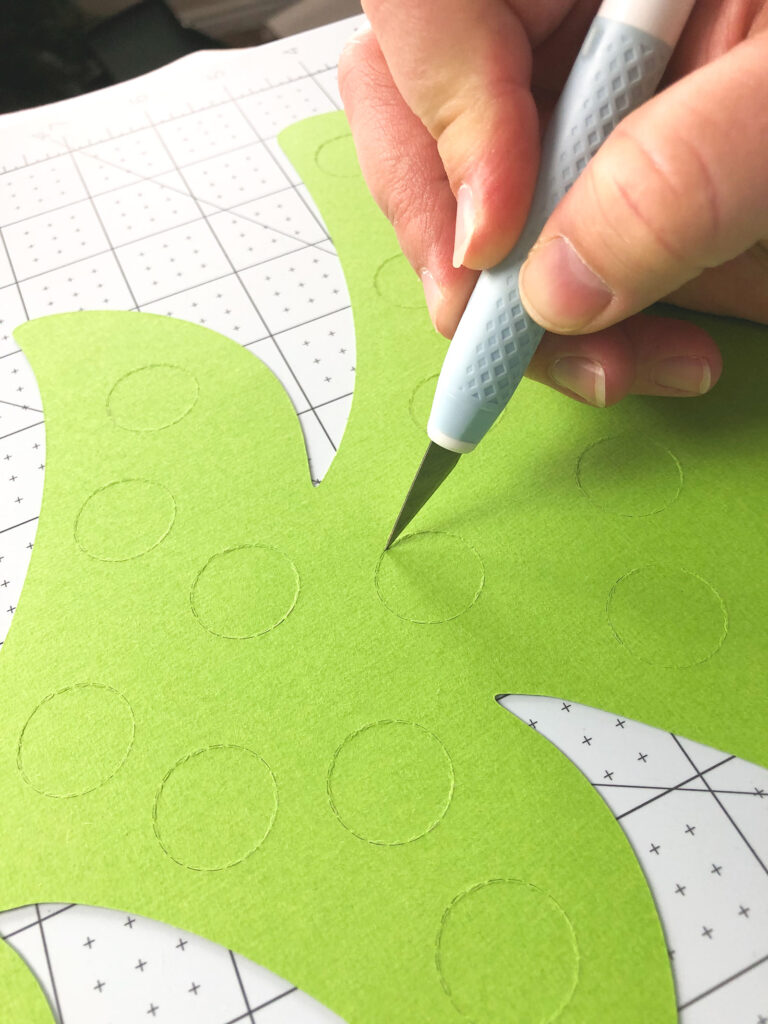
To create a pull tab you will start by taking your Cricut blade and cutting through 3 or so perforations of an ornament. Go slowly so you stay in the line created by the perforating blade.
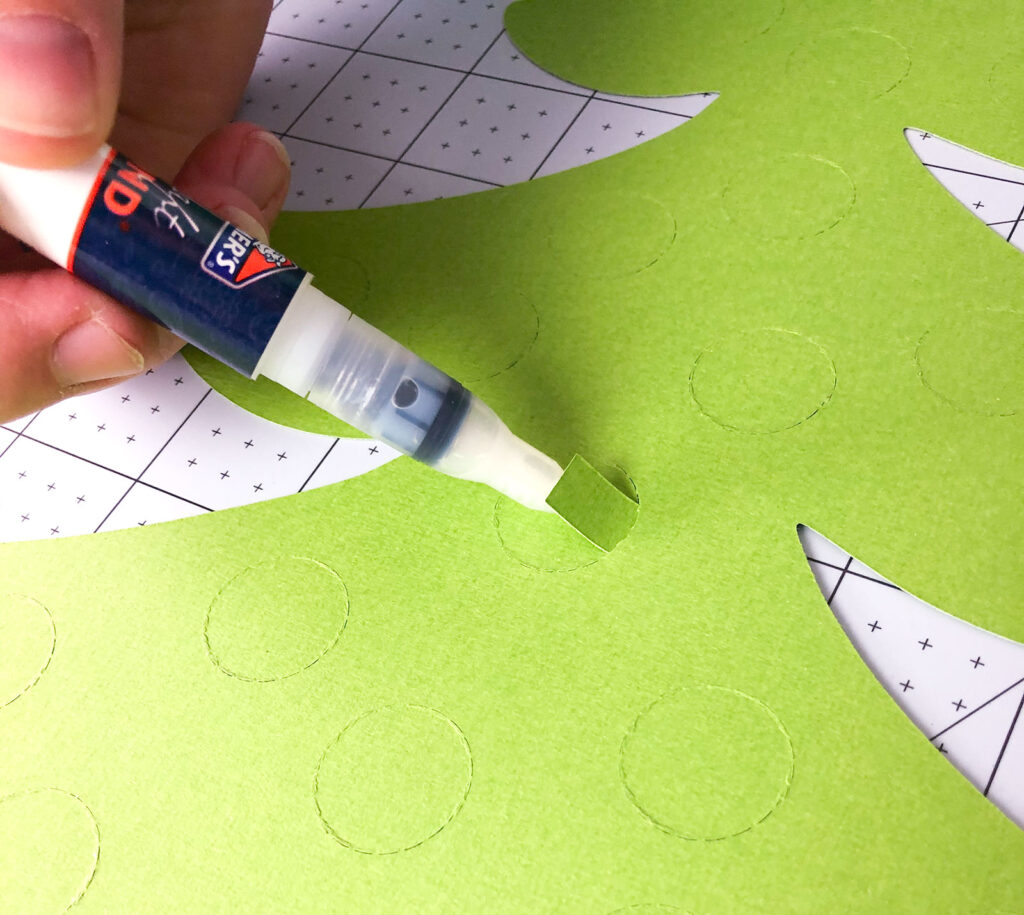
Second, you will slide one of the tree colored tabs into the slit you just created. Make sure it sitcks out far enough on the front of the tree to be easily pulled. Finally, use your thin glue pen to glue the tab to the back of the perforated circle. Repeat for each circle then set aside to allow any exposed glue to dry.
Add ornament colors to Paper Christmas Countdown
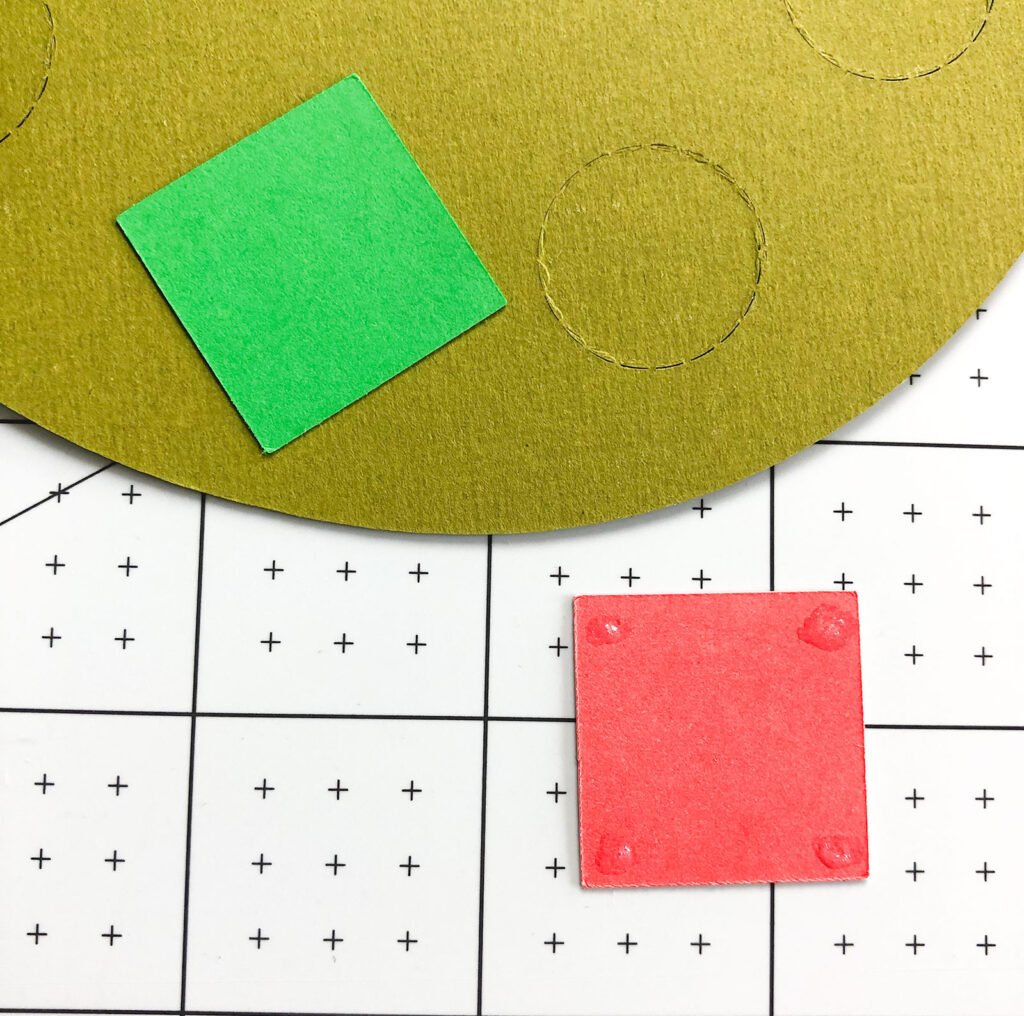
If you are using the design where the ornament colors are all different, take one colored square and put a small dot of glue on each corner. Place the square over the perforated circle (make sure it has the pull tab already in place). Be sure to avoid getting any glue on the perforated circle.
Cover all of the circles with your colored squares.
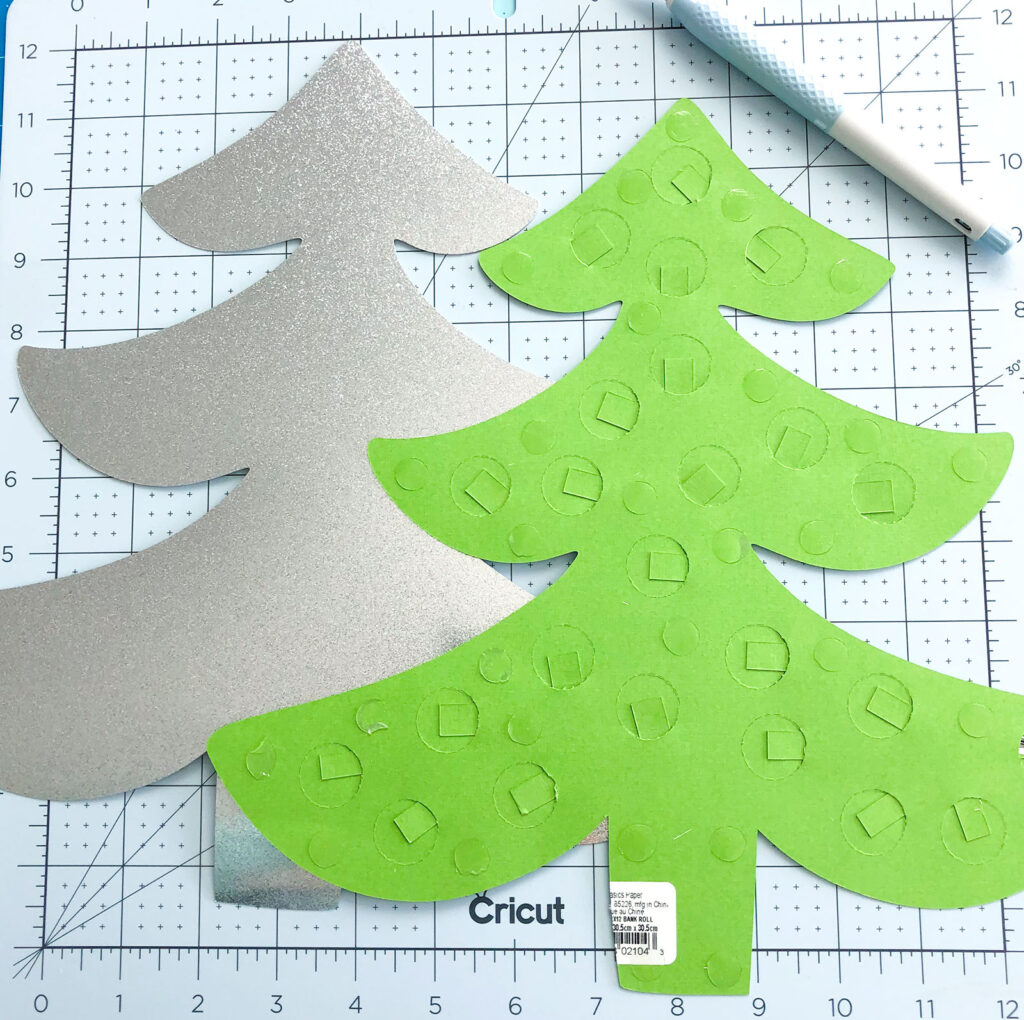
If you are creating the simpler version of the Personalized Countdown, you will simply glue the perforated tree (that has all pull tabs glued on) to your background tree. Make sure to avoid getting any glue on or around the perforated circles. I used glue dots so I could control my glue placement.
Finishing the Paper Christmas Countdown

I mounted my personalized paper Christmas countdown onto a 12″ X 12″ piece of chipboard to give it stability. If you don’t have chipboard, you could also use cardboard or foam board to back your project. I used a spray glue to evenly coat the back of my background paper, you could use a glue stick as well.
Next, place your tree in the center of your paper. Glue the entire back of your tree down at this point, you do not have to worry about the perforated circles getting glued down.
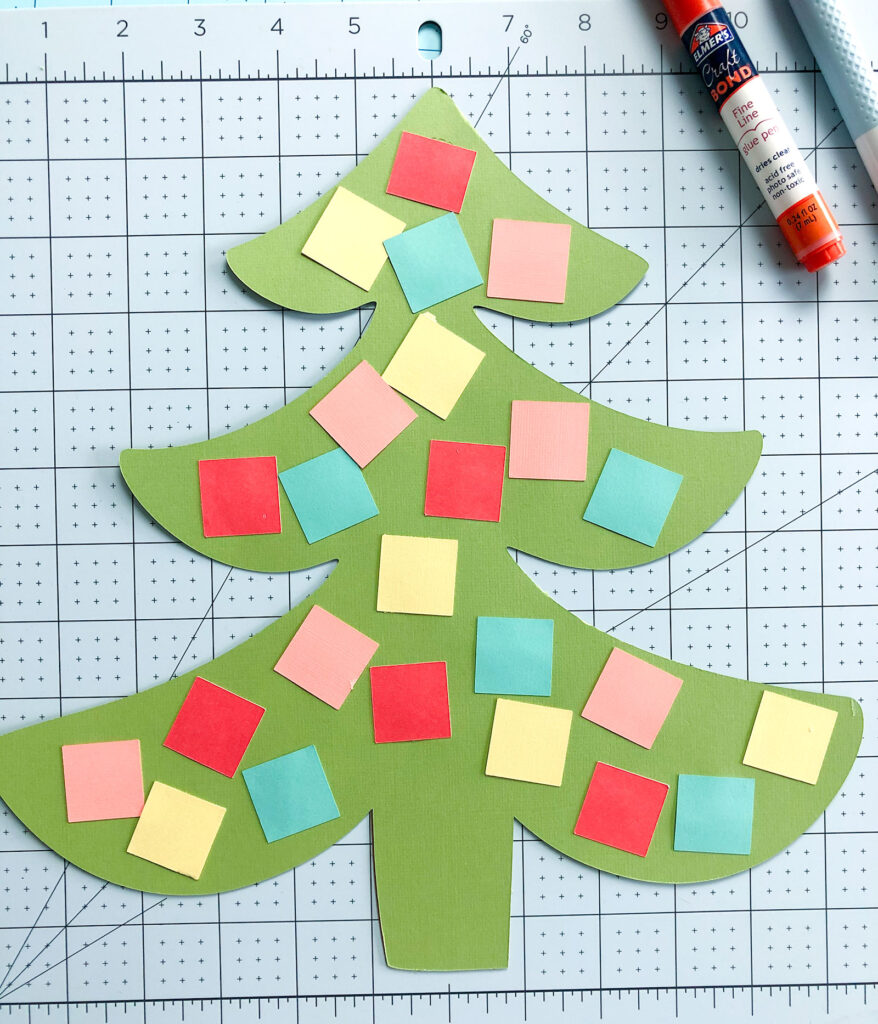
Finally, embellish the project as much or as little as you desire.
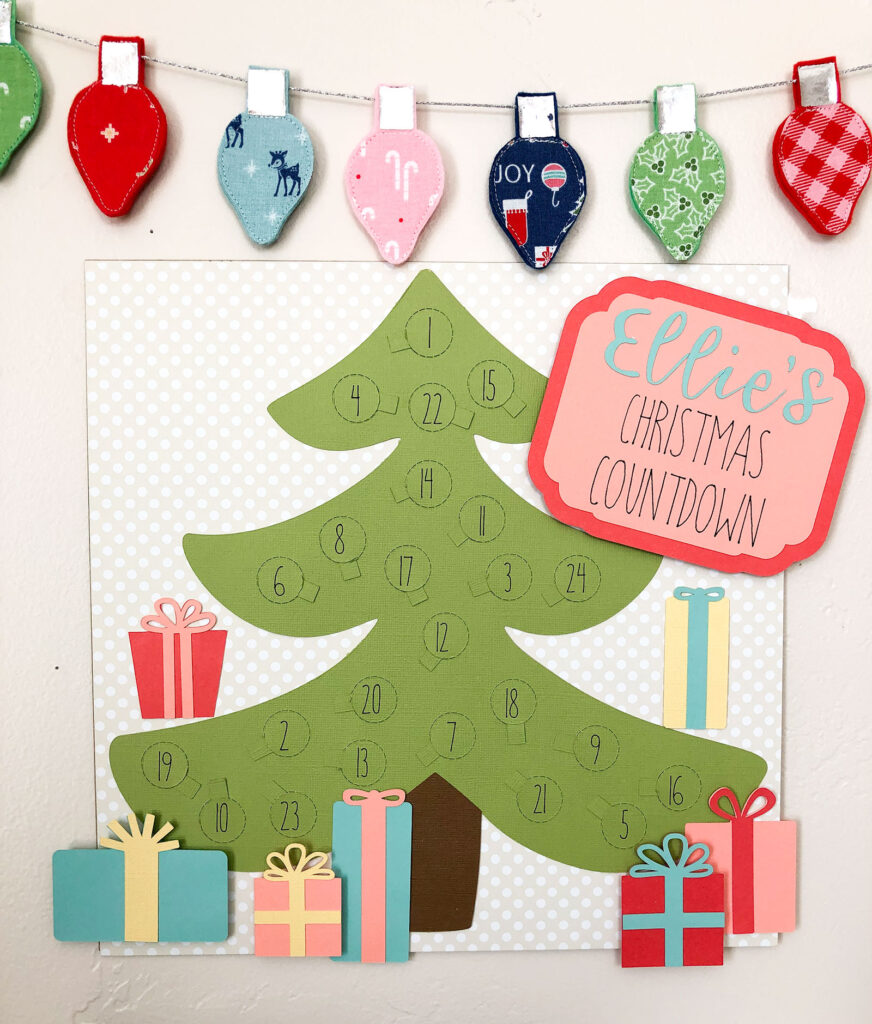
I think the gifts around the tree are so much fun. I used foam squares to mount some of the gifts as well as the title of the countdown to give it some dimension. You could use stickers, scrapbook embellishments, glitter or any number of things to make your Personalized Paper Christmas Countdown truly personalized! Or, maybe create the tree and let your recipient decorate the rest themselves!
I can hardly wait to celebrate the season and deck the halls! For now, I am going to anticipate the anticipation and enjoy the calm before the fun!
I used colors in my countdown to coordinate with the holiday decorations I made for my girls last year. You will find lots of creative ideas to DIY your holiday using your Cricut Maker.
These Christmas Stockings are a fun project and made much easier using your Cricut Maker to cut all your fabric!
Are you working on holiday making already? Let me know in the comments!
Happy Creating! xoxo, Amy


25 Cricut Personalized Gifts | The Crafty Blog Stalker
November 20, 2019 at 6:00 am[…] 6. Personalized Christmas Countdown Calendar […]
25 Personalized Holiday Projects to Make with a Cricut - Lydi Out Loud
November 20, 2019 at 4:23 pm[…] Personalized Christmas Countdown – Ameroonie Designs […]
DIY Christmas Gift Ideas - Personalized Gift Ideas - Pineapple Paper Co.
November 27, 2019 at 5:51 am[…] idea for a personalized Advent calendar – what kid (or adult?!) wouldn’t love this! Continue Reading… Custom Baby’s First Christmas OrnamentsOrnaments are a great way to commemorate Baby’s […]
Personalized Gifts With Cricut: 25 Cricut Ideas To Make Sure You Win Christmas This Year!
November 27, 2019 at 7:00 am[…] With this personalized Christmas countdown, each child has their own special countdown so there’s no more trying to remember who opened yesterday’s gift or whose turn it is to switch the calendar! See the full project […]
Make Christmas Personal using your Cricut Maker! – Sally's Angelworks
November 27, 2019 at 10:21 am[…] Ameroonie Designs – Personalized Christmas Countdown […]
25 Personalized Gift Wrap Ideas to Make with Cricut
November 27, 2019 at 6:12 pm[…] a personalized Christmas countdown calendar for each of the kids … it's easy to personalize with their favorite colors and designs with […]
25 Wonderful Personalized Christmas Gift Ideas Using Your Cricut Machine - Twelve On Main
December 4, 2019 at 5:00 am[…] Personalized Christmas Countdown | Ameroonie Designs […]
25 Personalized Cricut Holiday Projects - SookEe Designs
December 4, 2019 at 2:44 pm[…] Holiday Countdown from Ameroonie Designs […]
25 gift ideas to personalize with your Cricut | Ameroonie Designs
December 11, 2019 at 12:12 pm[…] Christmas Countdown by Ameroonie Designs Framed Christmas Countdown by Everyday Party Magazine Custom Holiday Pillows by Today’s […]