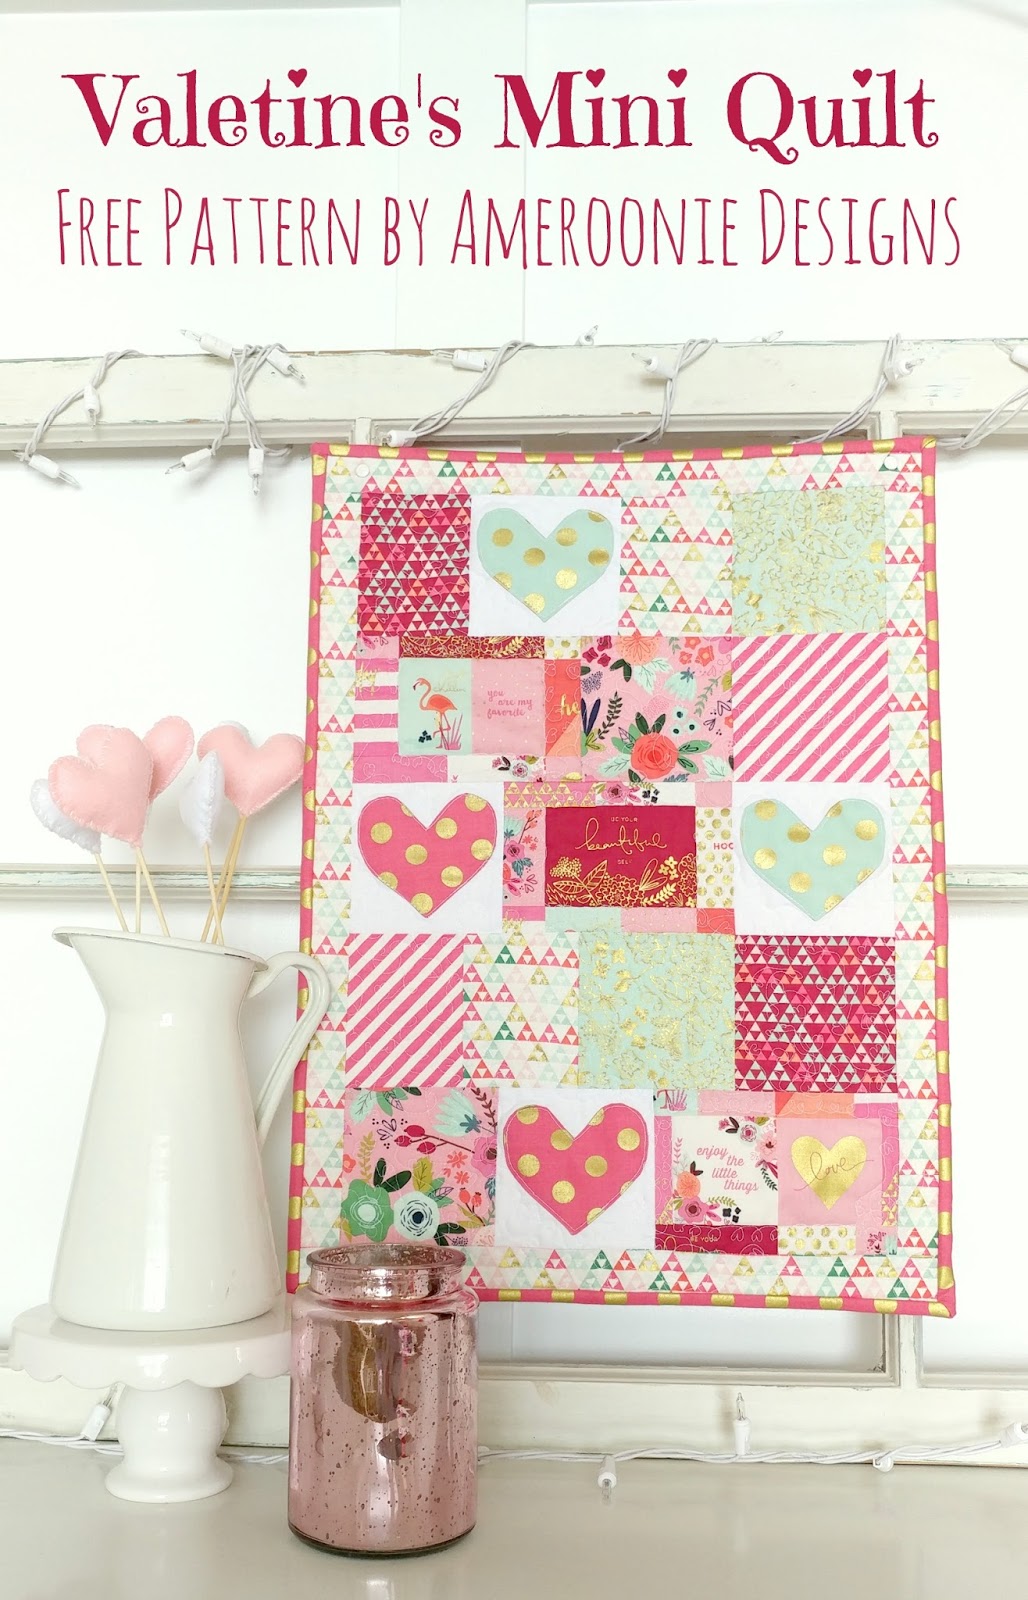
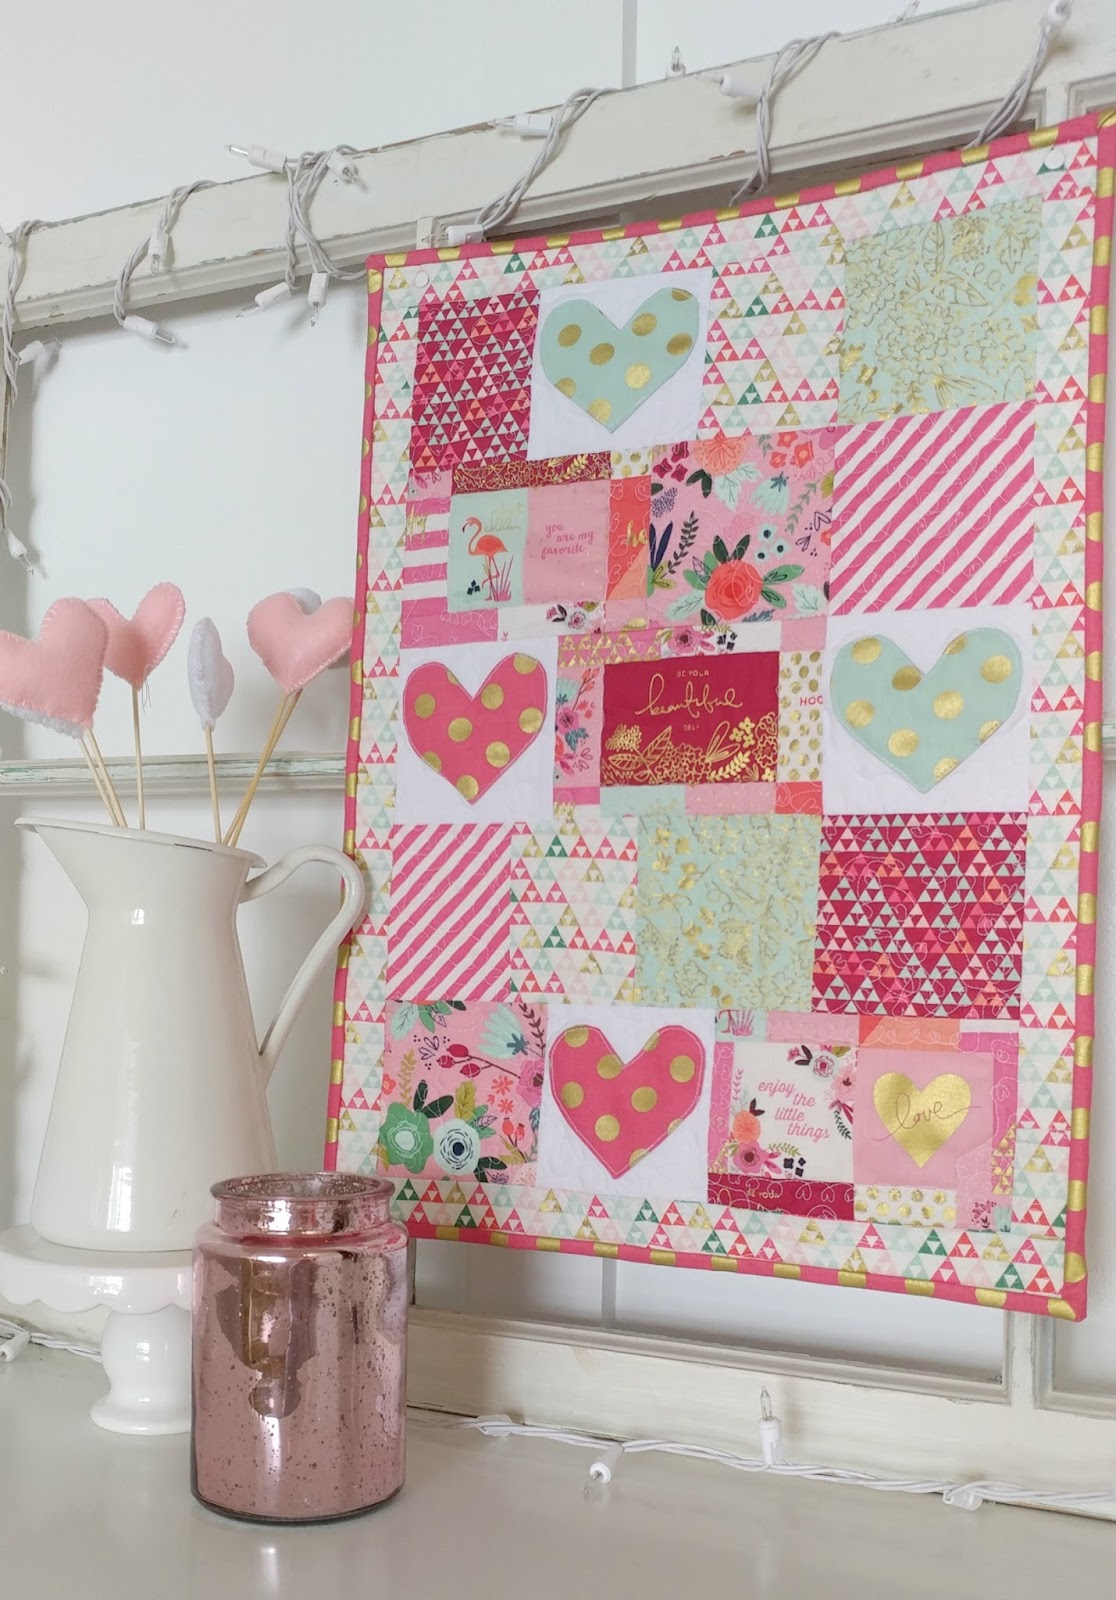
I have a spot on my gallery wall that has just been begging for a mini quilt. I thought I would change them out seasonally so I started with this one. Turns out it looks WAY better in my living room, and not the family room like I thought, so there aren’t any pictures of it in the gallery wall, but you still get a free tutorial out of the deal, so I think we’re good. 😉 Plus, now I need to make a bunch of decorations that room and my budget is zero dollars, so we’ll see what I can come up with- hopefully it will make for some good blogging. Lol.
The fabric I used is called On Trend and it’s designed by Jen Allyson (My Mind’s Eye) and produced by Riley Blake designs. They provided the material for this blog post, but On Trend is available in fabric stores and online. I love the prints and my favorite part is the sparkle of the gold. I designed this quilt based on the note card print and I just love how it turned out.

- Fabrics- This would be a great quilt to use 5″ squares with, or fat eights. You will need a bit of yardage for the borders and the binding (and of course the backing).
- I used 8 prints in this quilt along with some solid white to back the applique hearts. I will share the cutting dimensions and hopefully that will help you decide how you want to purchase your fabrics.
- Probably the most economical way to make this quilt is to get a 5″ stacker, then you will also need 2/3 yard white triangles (if you want the triangles to all face the same direction) fat eighth of note card print (or 1/4 yard if fat eight is not available); and 1/4 yard raspberry polka dot for binding.
- Lightweight interfacing for applique (unless you want to use a different method to applique)
- cardstock for heart template

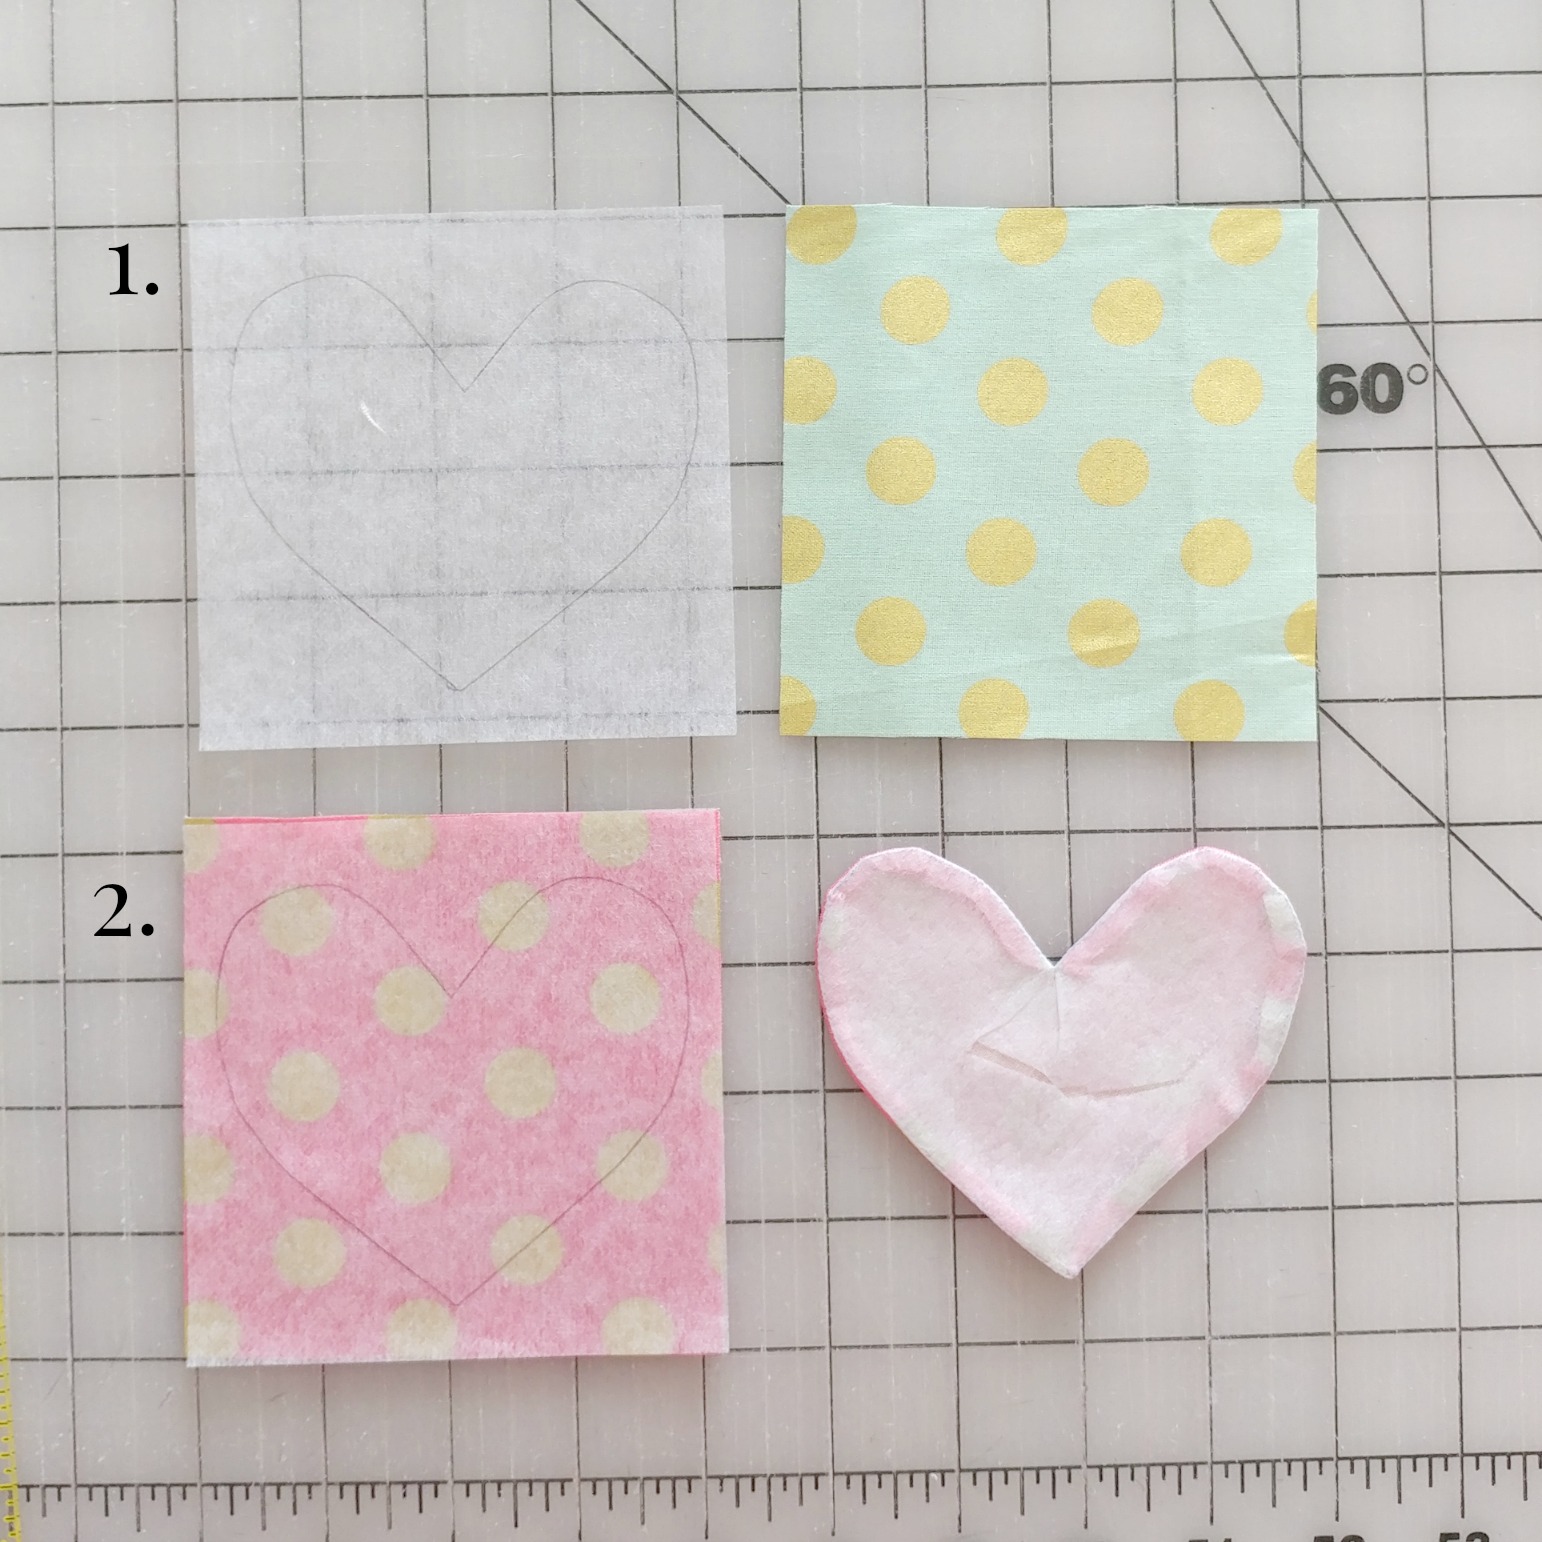
- Stitch along the pencil line around the heart.
- Cut around the heart, leaving a 1/4″ of fabric in the seam.
- Trim around the point of the heart and cut out wedges from the curves so they will lay a bit flatter.
- Cut a slit in the center of the interfacing and use that hole to turn the heart inside out. The edges will be contained inside the interfacing and you can use a dull edged tool to push the seams out. Press the seams well. (you can see what the finished heart looks like in the first picture)
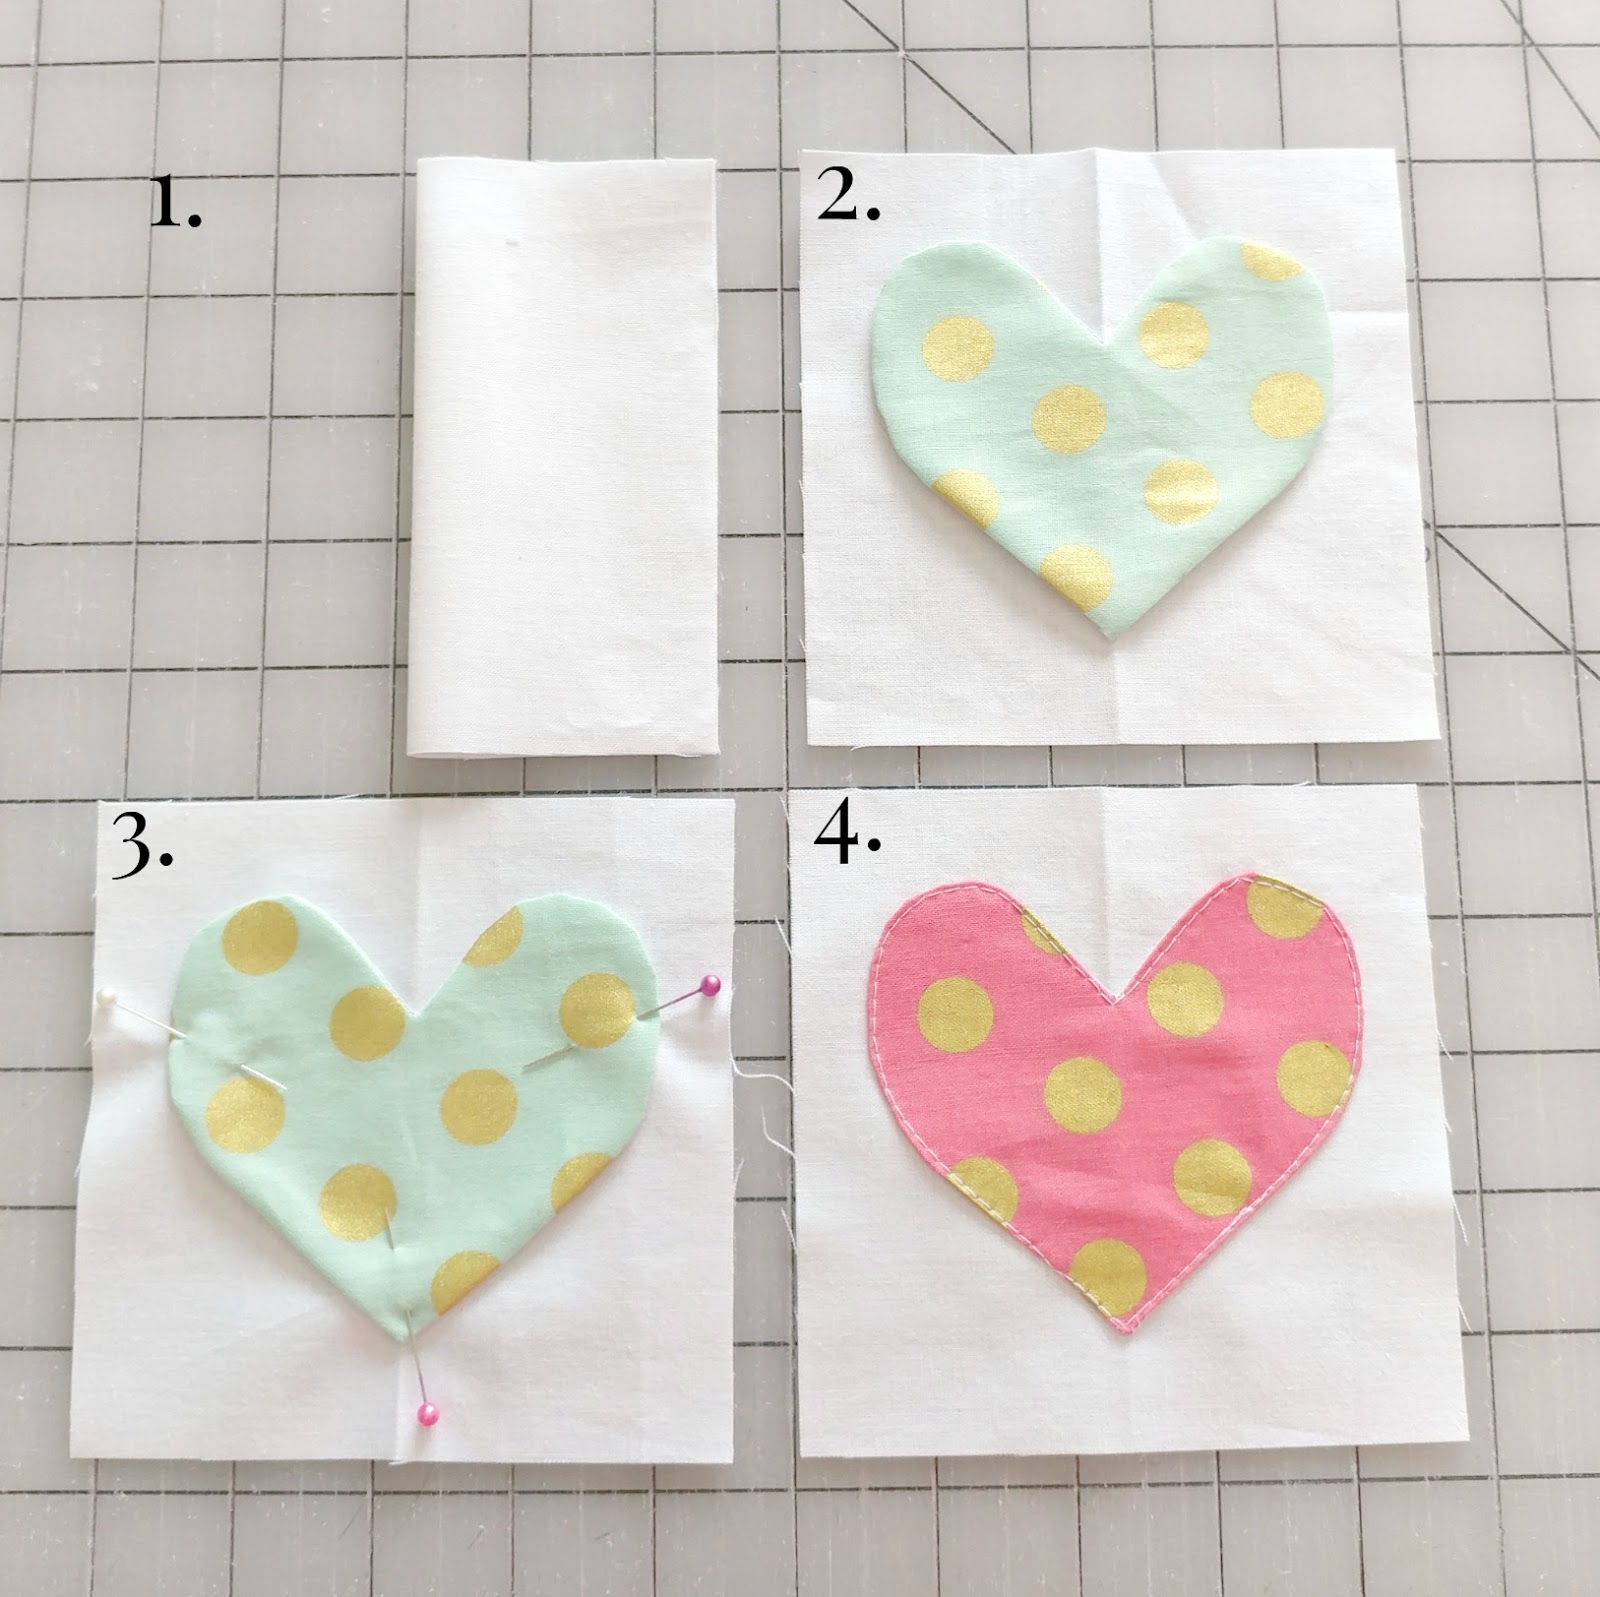
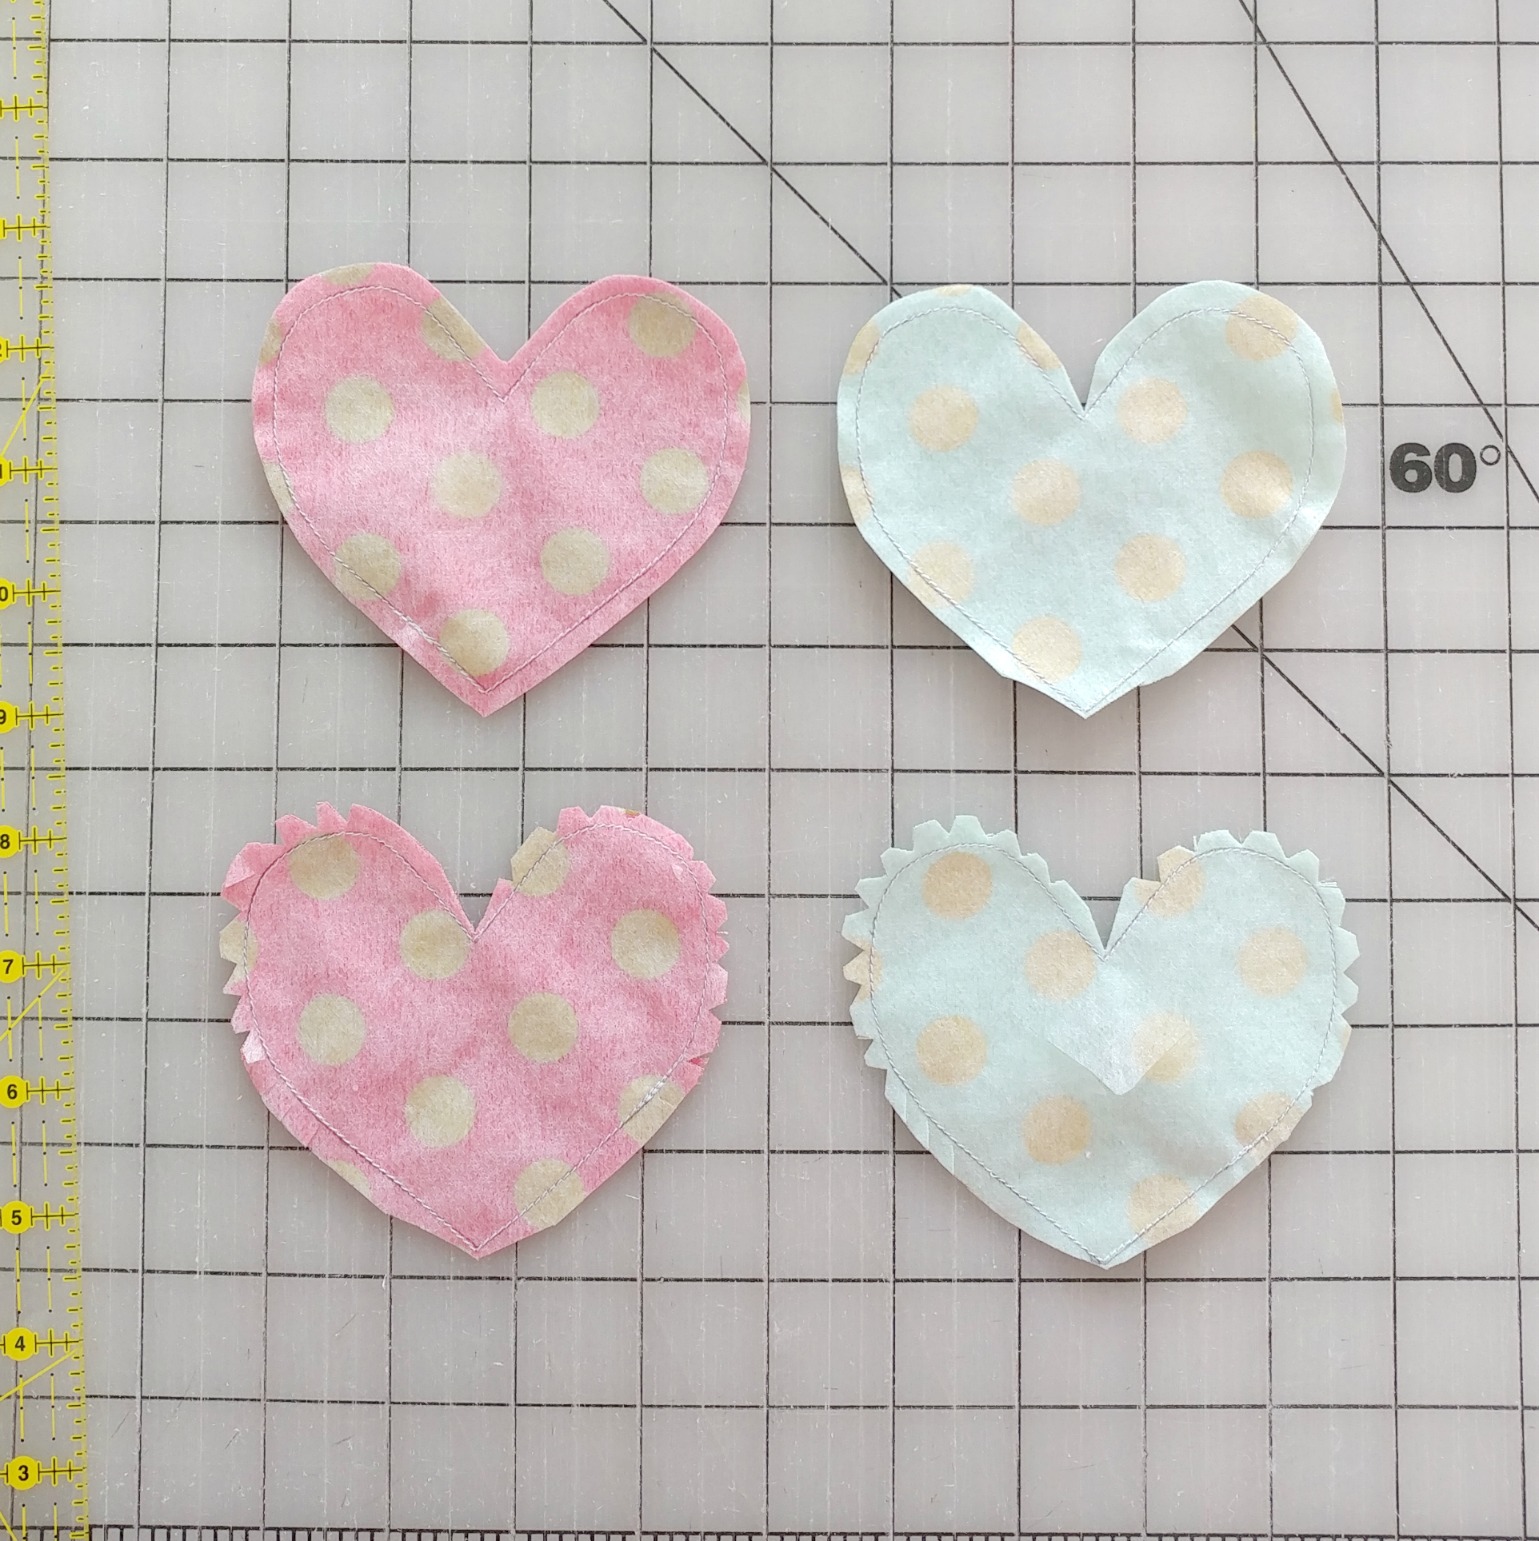
1. Take the white square of background fabric and fold in half. Lightly finger press to create a faint crease.
2. Unfold the white background square and line up the point and the dip in the heart with the center fold crease. Center the heart from top to bottom.
3. Pin the heart in place.
4. Top stitch around the applique heart.
Use the picture to help with your layout- I did switch the placement of some of the prints since I decided to use the white triangle print on the borders, I didn’t want those pieces on the edges. (and imagine the hearts are sewn down 😉 ) You will end up with five rows. Press the seams on each row in opposite directions. There aren’t many places where seams end up in the same place, but it’s helpful when they do. Sew the rows together. Sew on the side borders and then add the top and bottom border. You are now ready to quilt and bind.

I’m showing a close up of the quilting so you can see that it doesn’t have to be perfect. 🙂 I really made some wonky hearts in my quilting, but it’s a lot better than the last time I tried free motion quilting, so I’m going to take it and run with it. You can also see in this picture how I quilted around the centers of the notecard print to accentuate the sentiments I wanted to highlight. (and if you can look closely- you will see how I totally missed the corner- oops)
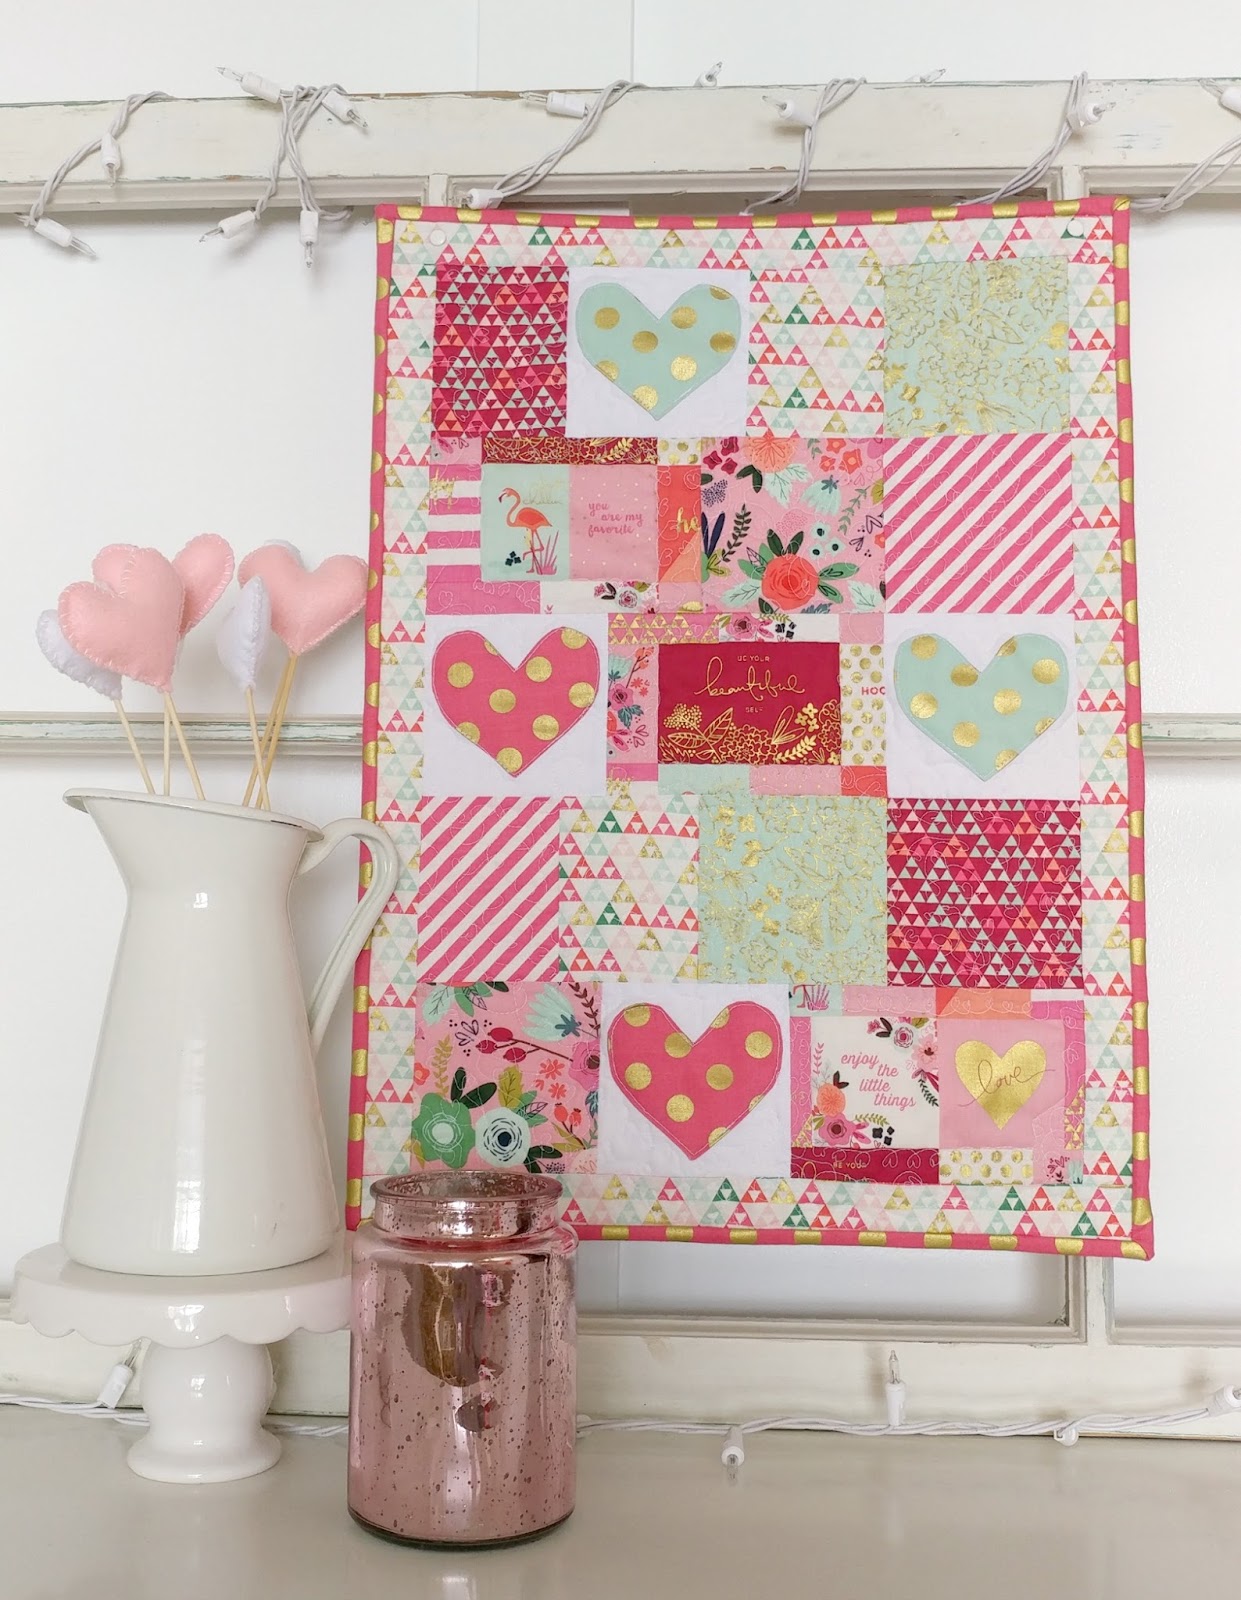
I love the non-traditional look of the colors in these prints. Now to make accessories that match! 😉
As always, if you make this quilt- I’d love you to tag me! @AmeroonieDesigns on facebook or Instagram.
Have a wonderful day!
xoxo,
Amy


Lynne Tilley
January 27, 2017 at 5:14 amThis is just TOO DARM CUTE! I love it so much!! Great job!!
joyce
February 2, 2019 at 4:05 amVery cute, how big is the quilt? Joyce Bayma