
*Disclaimer- this project is participating in the Cricut Design Space Star Contest and is eligible for prizes. All ideas and opinions are my own. This post also contains affiliate links. I truly do love my Cricut Explore and if you think you might want one, clicking through the links to purchase will result in a small cash compensation for me. That is all- on to the project. 🙂
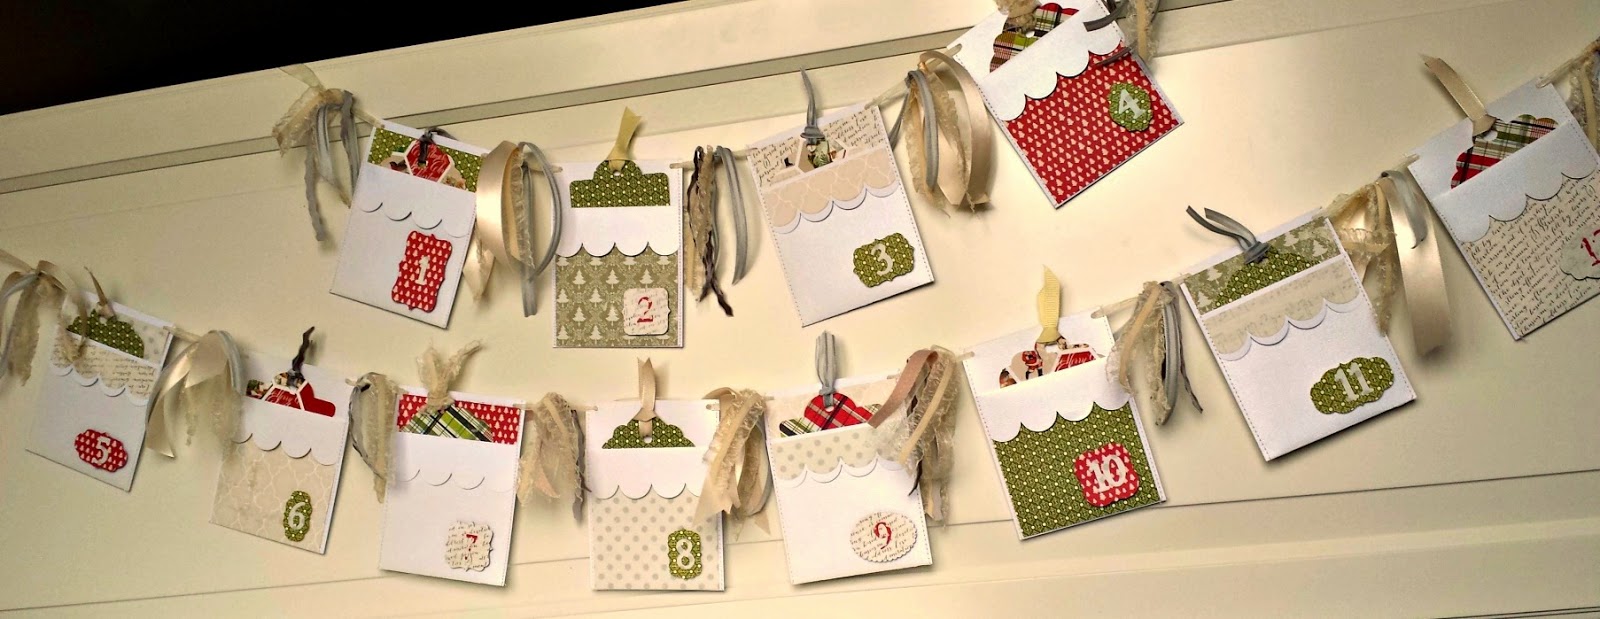
Can one have too many advent calendars? I don’t think so. We have a few at our house. I have five kids, so I’m thinking if I have 5 advent calendars they’ll all be happy and there won’t be any fighting about who’s turn it is that day. I can dream anyway. One of my favorite ways to count down to Christmas is to have simple daily activities that bring us together as a family for some fun, reflection or service. This scalloped advent banner is perfect for that.
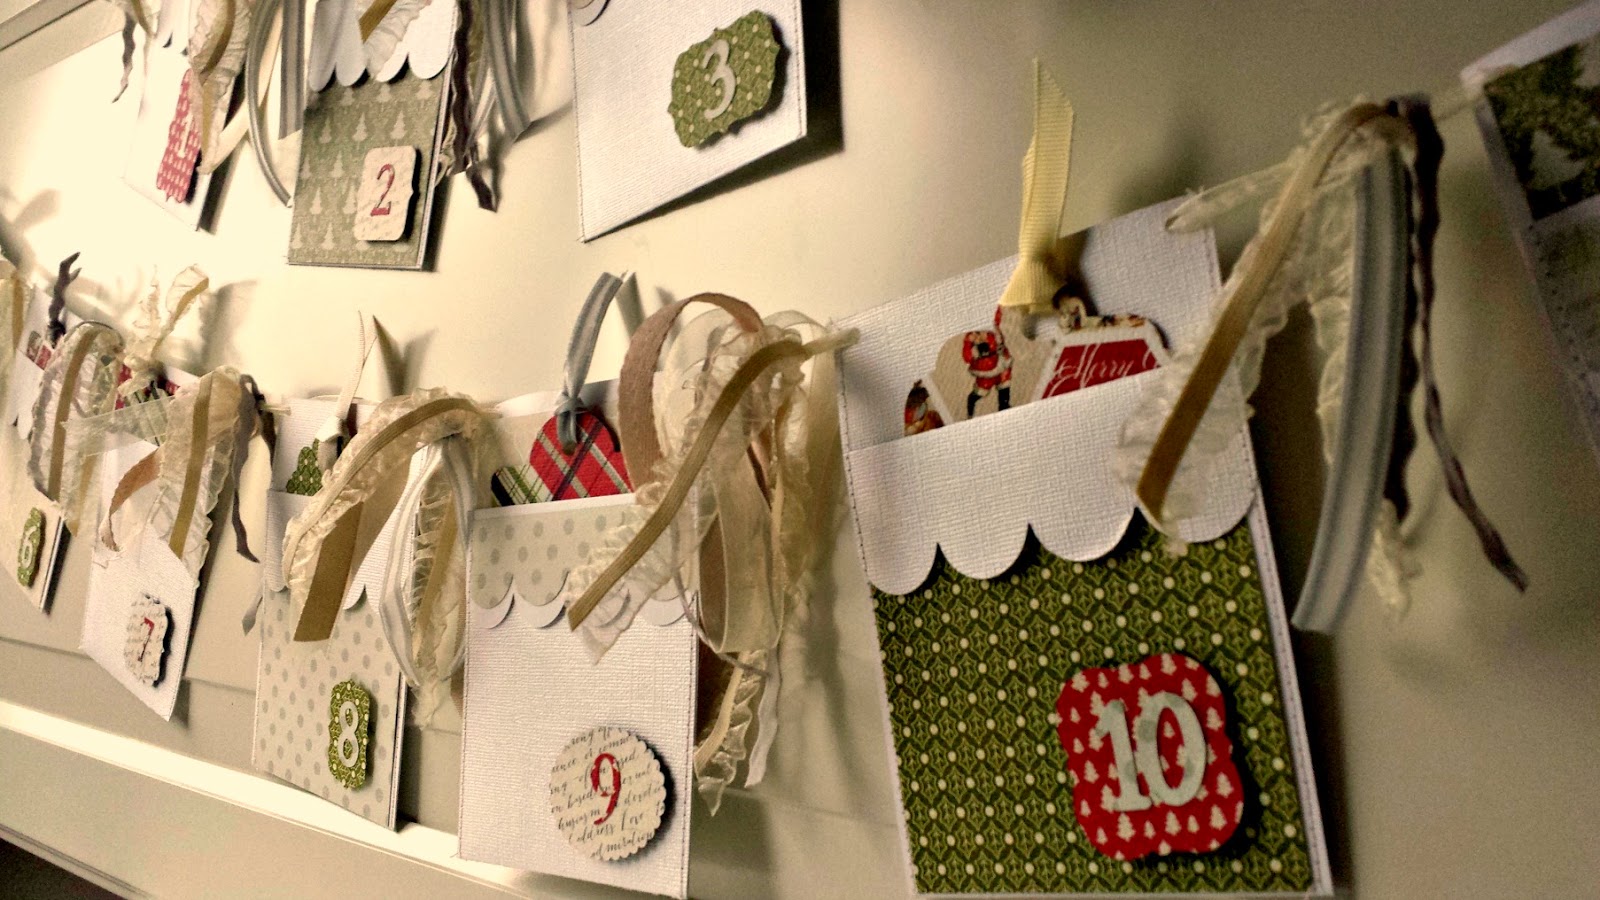
The tags inside the bunting are the perfect place to write that day’s activities. Some of our favorite things to include in our countdown are:
make gingerbread houses
read a Christmas story
watch a movie
play a game
make cookies
take a treat to someone
shop for presents
take a drive to see holiday lights
enjoy a treat
write a note to someone
wrap presents
have hot chocolate
visit family
have cinnamon rolls
play in the snow
do a craft
Sometimes we do an activity more than once, for instance read a Christmas story is one that we do at least once a week since we have so many favorite stories. My main goal with this is to make sure we are taking time every day to stop the craziness and just be together. But, with that being said- life gets crazy- especially during the holidays- so I really don’t want to add one more thing that makes things even more hectic. I edit the activities and make sure they are simple and reasonable for that day. For instance, I won’t plan the drive to see holiday lights on the same night as a work party- it wouldn’t get done and we would all be disappointed and stressed.

This banner was pretty simple to put together with the Cricut Explore. I uploaded the pocket file and cut out 12 pockets out of a pearl white cardstock. I find that when I’m using textured cardstock- especially one with a sheen- I need to use the posterboard setting to get it to cut cleanly. Then I uploaded the cutout file I created that created smaller accent pieces that wouldn’t distort the scallops and cut it out once of six different patterned papers. My team decided that our theme for this round would be Dreamy White Holidays- so I tried to keep the palette pretty muted and focused on white tone on tone paper with just a few hits of green and red. I cut out tags and labels from the same left over papers and numbers as well. It took some arranging to find combinations that worked, but I’m thrilled with the final result.
To assemble the banner fold the pockets on the score lines and crease well. Then I ran them through my sewing machine to close up the sides. You could also use glue or double sided tape, but it might make the pocket opening a little narrower and you may need to adjust the size of the tags. Glue or tape on your patterned pieces, labels and numbers. I used 3D glue dots to lift the labels off the flag a bit. Then just run some ribbon through the holes at the top of the banner. I tied extra ribbon between each of the flags for some extra texture and color. Add ribbon to the tops of the tags and write your activities on them. Place them in the right pocket and enjoy your holiday season.
If my project wins this round all the project files will be available in Cricut Design Space. I’ll keep you posted. 🙂
XOXO,
Amy


Mary Berg
November 15, 2014 at 11:11 pmYour advent banner is great! Thanks for the inspiration!
seven thirty three
November 17, 2014 at 4:44 pmI still can't get over how gorgeous this is! Great job!