
Today I am going to share with you how I make these super fun, easy flowers.
Do you like my amazingly technical name?
Scrunched Flowers?
It’s the best I could come up with. Feel free to share your opinions on the name of this flower.
Anywho.

You may remember seeing these flowers here on my most recent Business card portfolio.
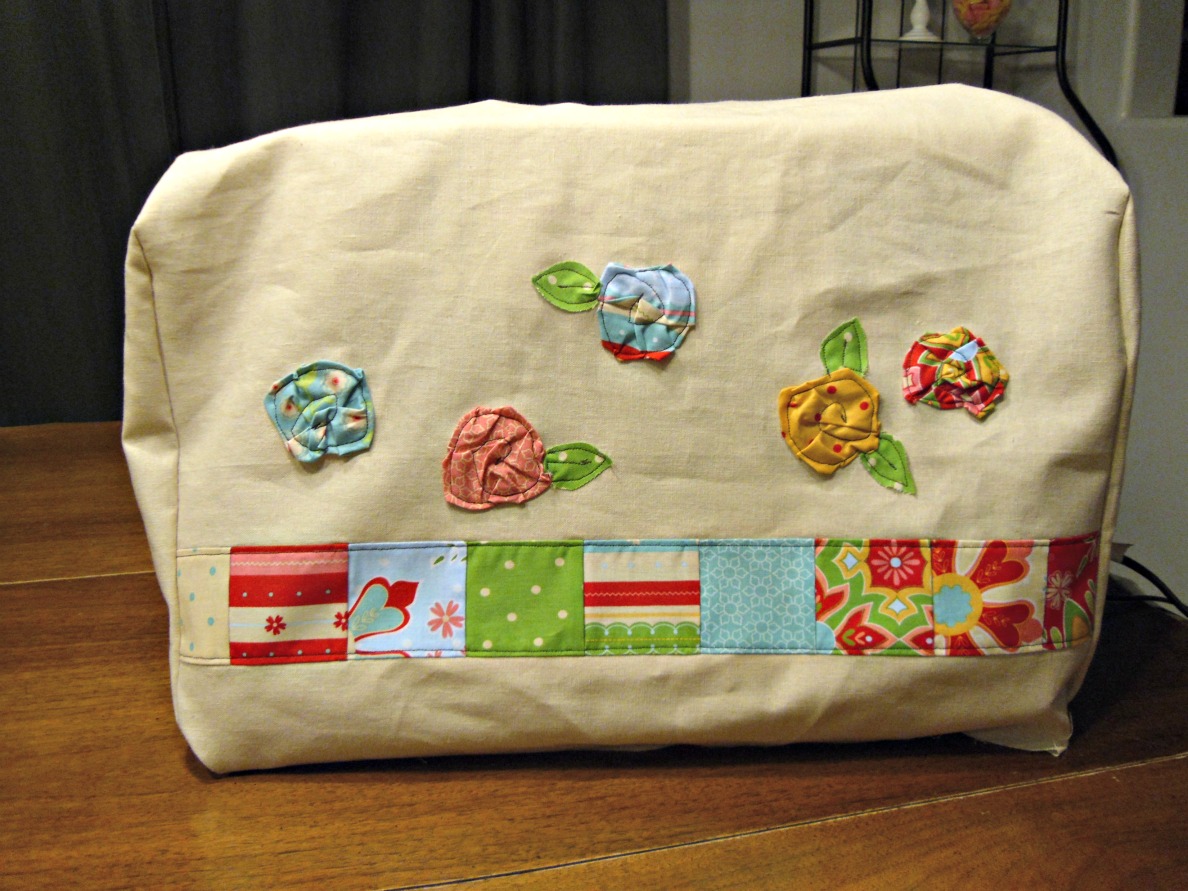
Or you might recognize them from this machine cover I sewed last year.
They are a favorite of mine because they are simple and fast and flat, so they add some style, without adding bulk to your project.
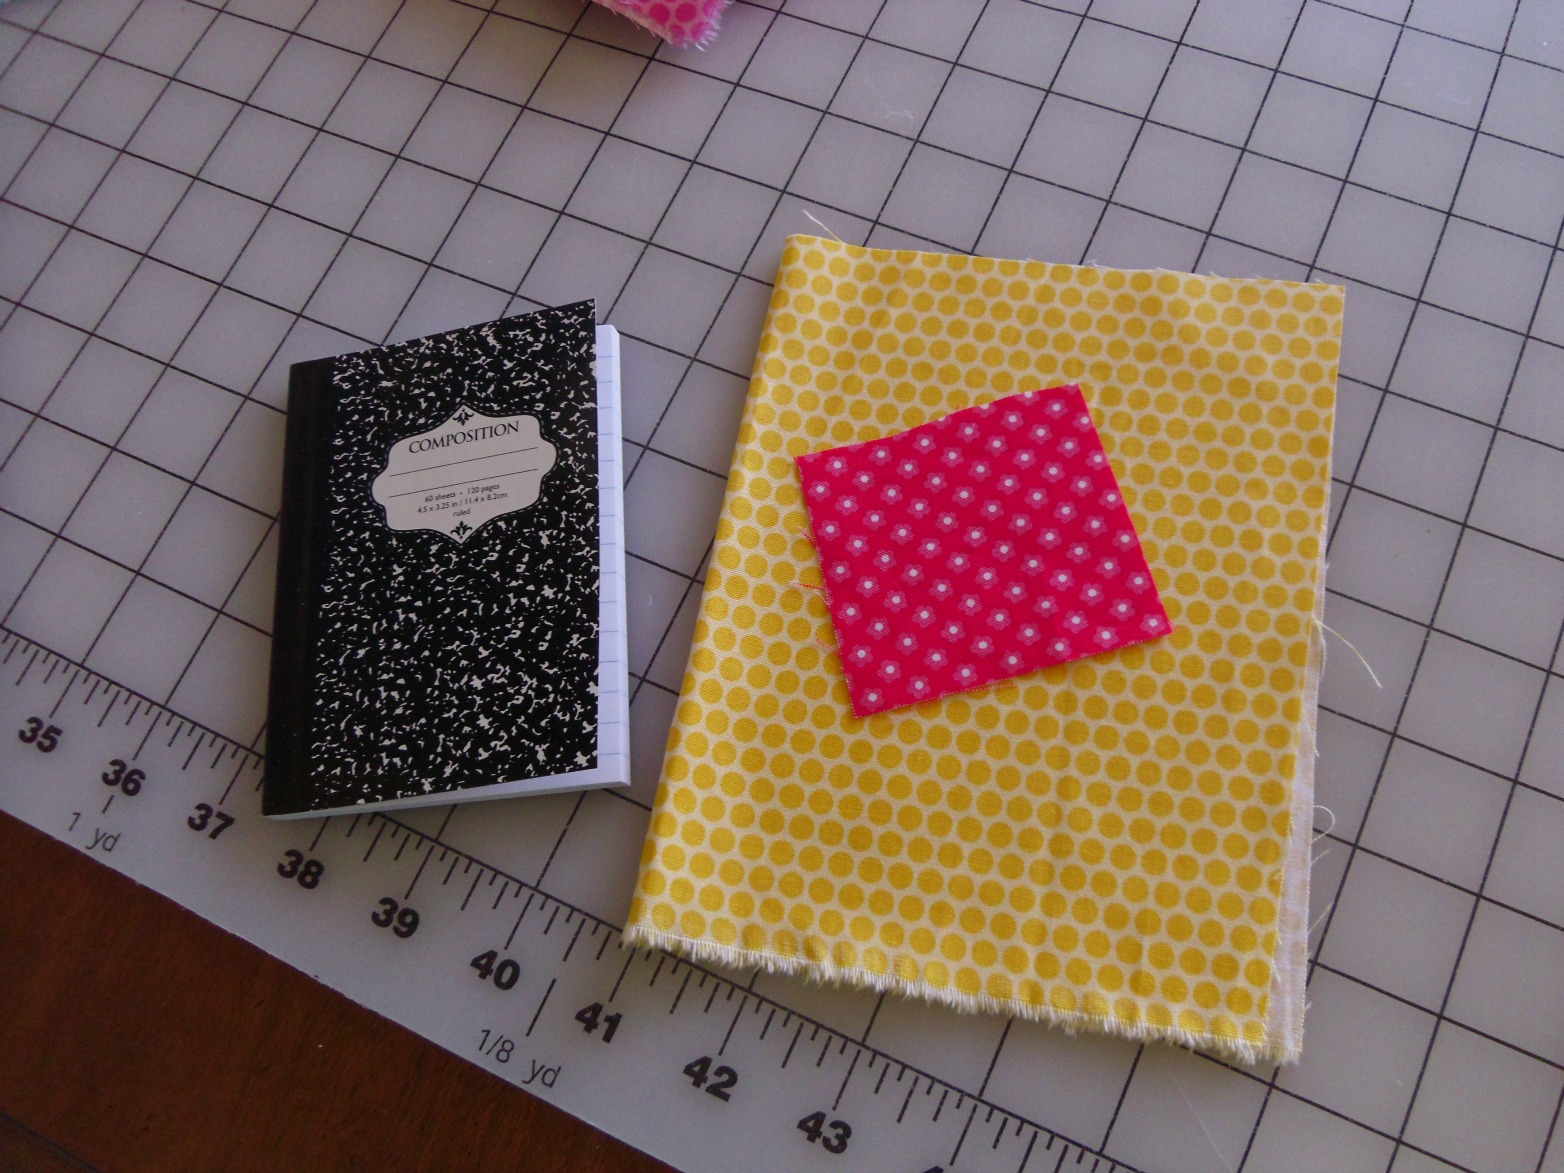
Let’s get started shall we? For the purposes of this tutorial, I will only show you how to make the flower, but I am doing so on a cover for a small notebook. For the flower you will need a base fabric to sew on and a square of fabric that is larger than the flower you want to make. How much bigger the square is will determine how full and “scrunched” the flower ends up. In my example, the square is only slightly bigger than the flower I will be making. If you want to add leaves, you will also need a scrap of fabric for those.
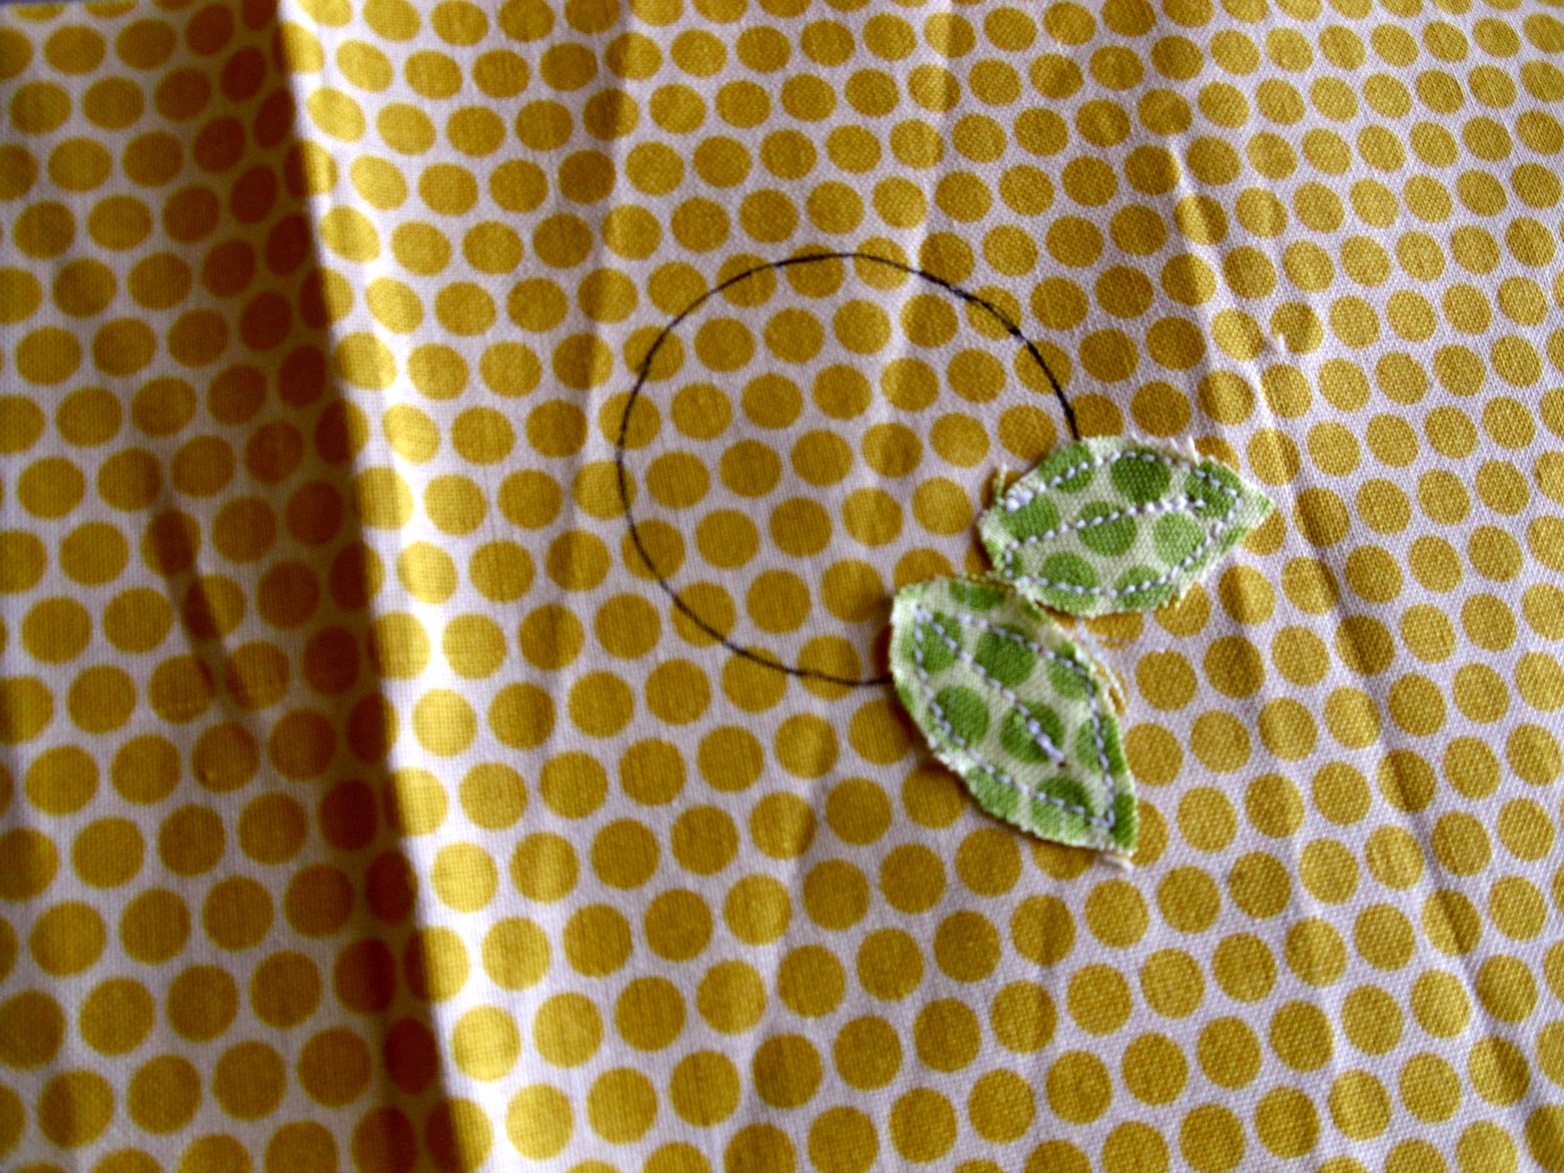
Start by drawing a circle that is just barely smaller than the flower you want to make. (I often get lazy and skip this, but it’s much easier to end up with the shape you want if you do it. 😉 ) If you are adding leaves, now is the best time to stitch those down. Make sure the end overlaps the circle so it is covered by the flower.
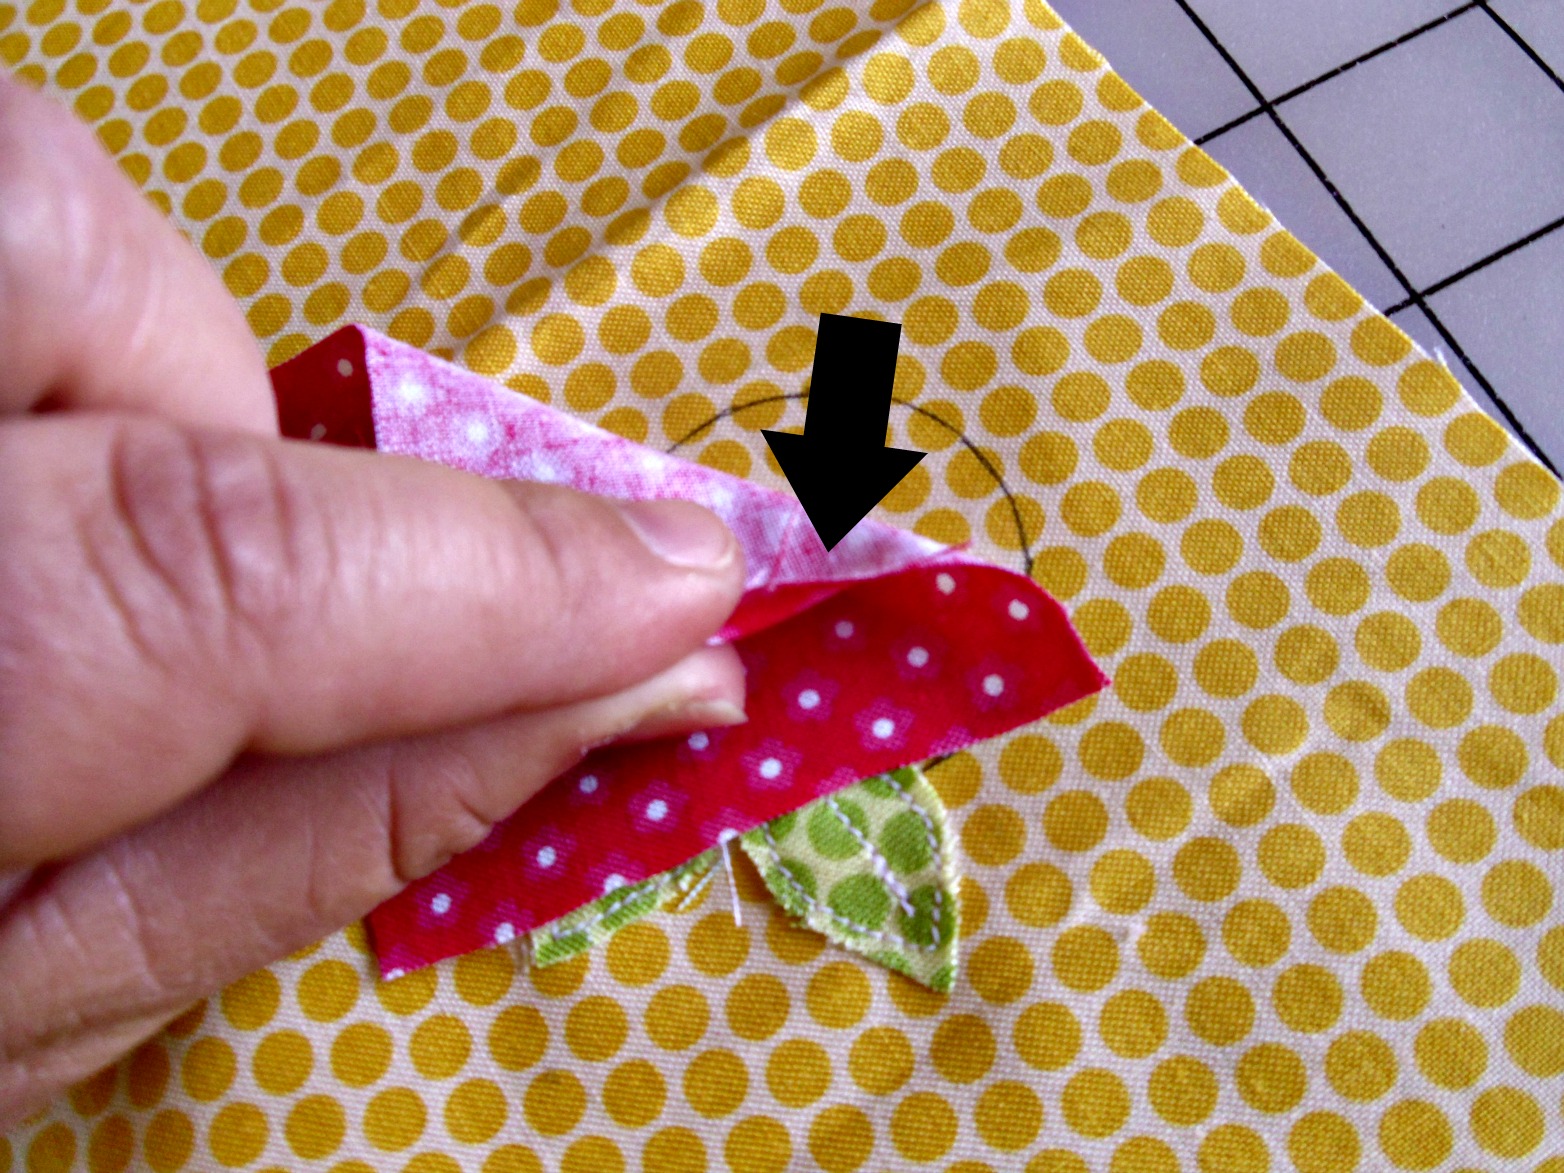
Bring the flower fabric over to the circle. Fold over the edge of one straight side just a bit. You can see in the picture how I do it. Take this folded edge and place it over the circle. Begin sewing, but just take a few stitches.
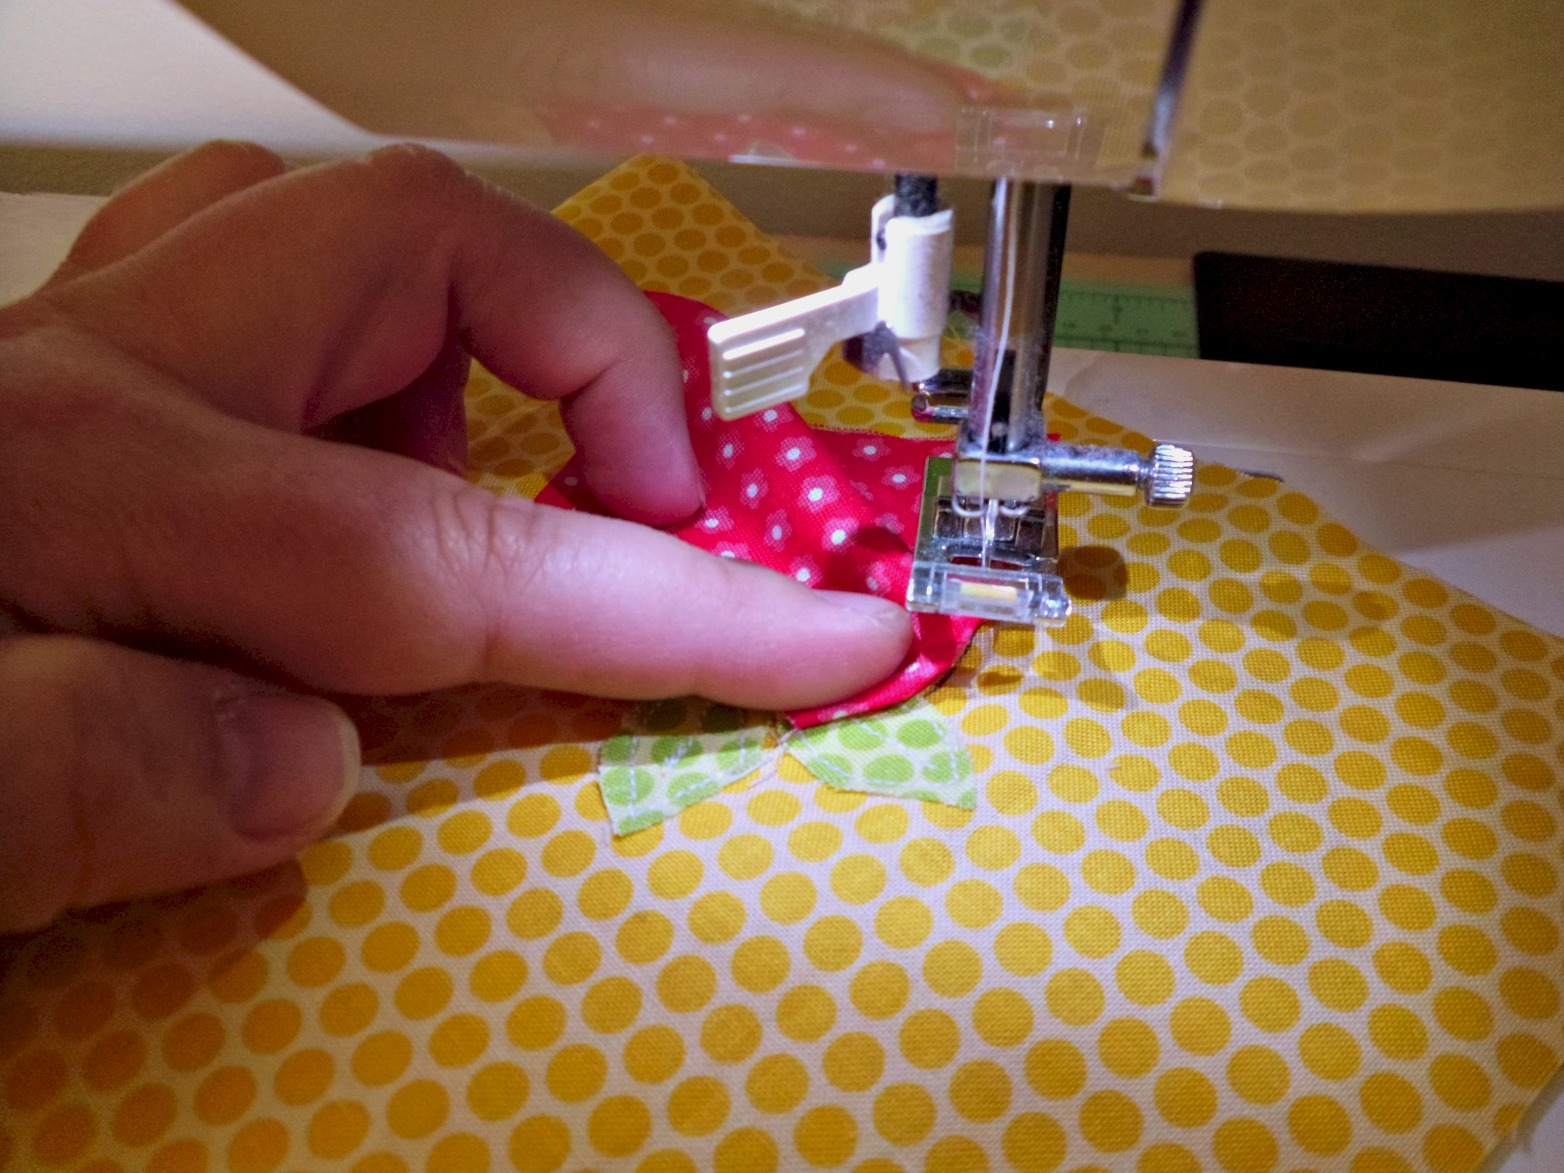
Continue around the circle, lifting up the presser foot and adjusting the fabric as you go around. When you get to the corners of the flower fabric, you will need to push it in to line it up with the circle, this is what gives the folding and pleating that creates the flower effect. Taking your time, lifting the presser foot often and making sure your folded edge is just wide enough to be caught and sewn down, but not so wide it eats up your flower fabric, will ensure the best results.

When you get to the beginning of your sewn circle, you will have a “pouf” of fabric in the center. It means you did it right. 🙂 Take the fabric and “scrunch” it down, creating folds and tucks. Sew down with a loose swirl in the center of the flower.
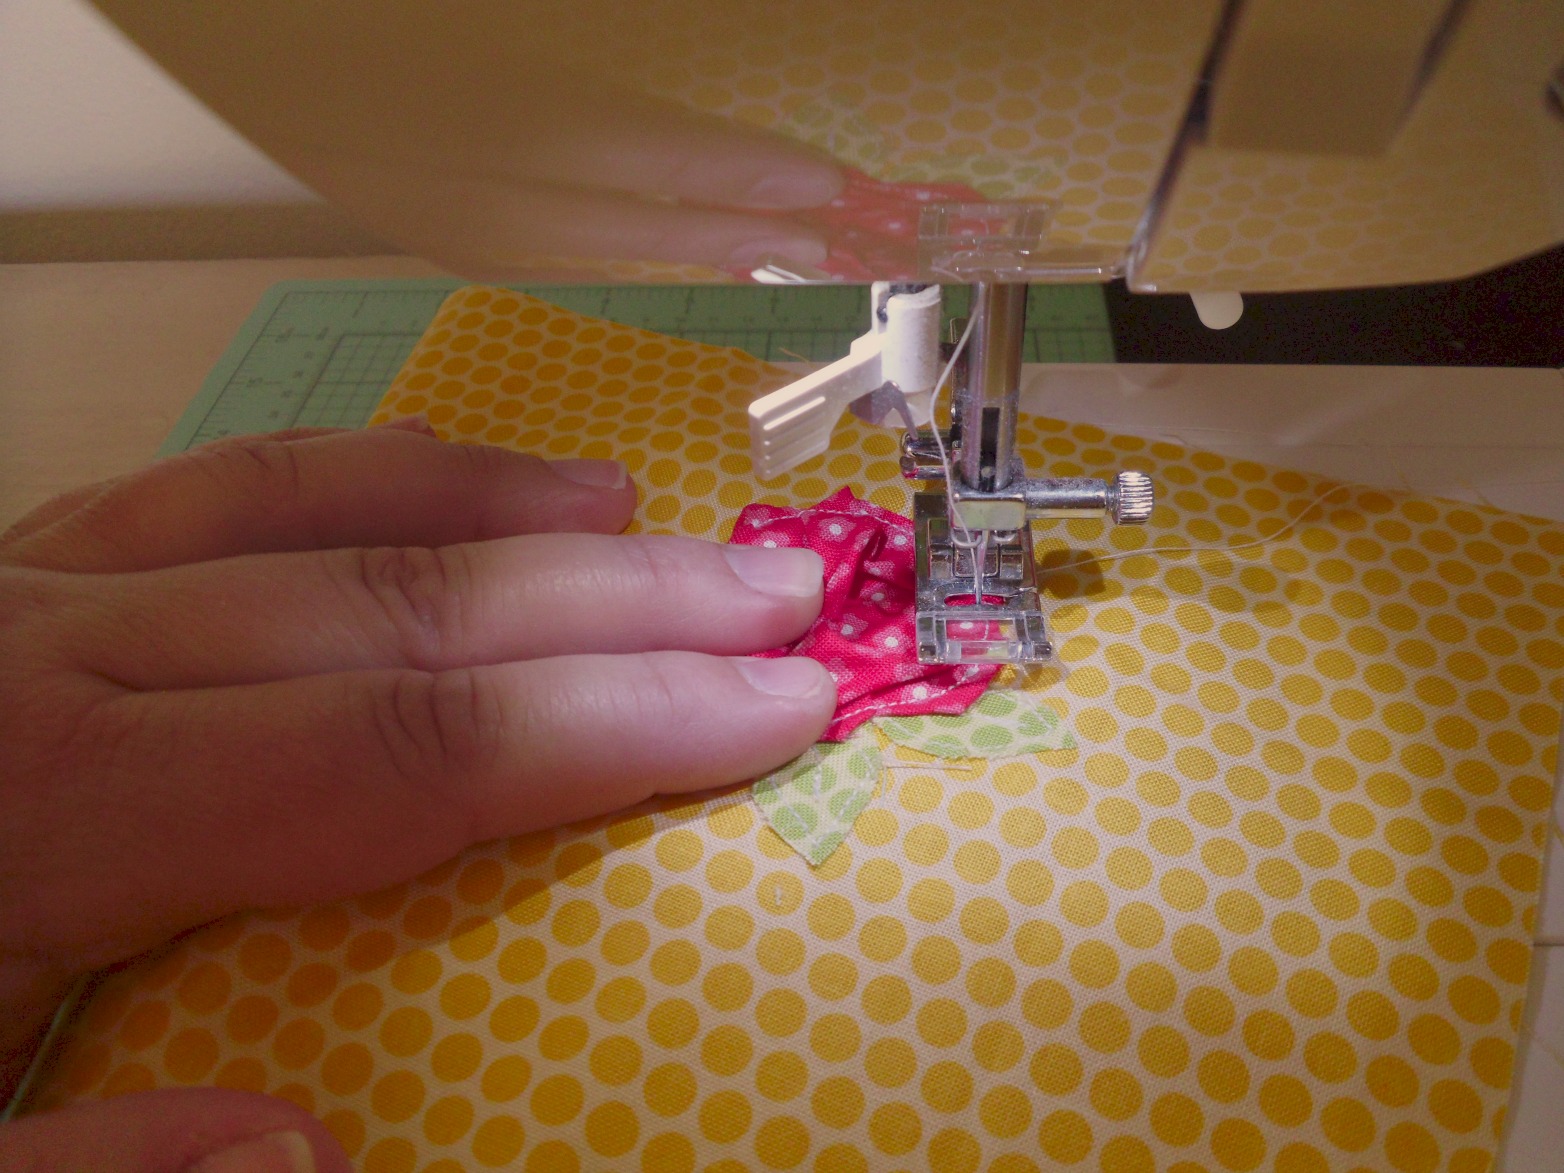
Use your fingers the push the fabric around to make sure the folds get tacked down. When your swirl reaches the center, you’re finished.
Trim your threads and enjoy your flower.
If you have any questions, feel free to ask- I will be happy to help.
xoxo,
Amy


Kara
May 17, 2013 at 1:27 pmLove these! Thanks so much for sharing Amy. I know you showed me at your house, but I kinda forgot. 🙂
Gwen @ Gwenny Penny
May 23, 2013 at 12:52 amThis is so cool! Like you said, love that it doesn't add bulk. Cute!
Zelda Behr
March 6, 2014 at 3:43 pmOoooh! these are great pinning to my baby board. They will look awesome on a onesie!