
I shared this project a few weeks ago on The Ribbon Retreat blog. I’m still so in love with it- I can’t wait until we finally get the nursery painted and I can start decorating for real. And just in time too- I only have about three weeks before this little darling is due to make her appearance.
This project would also be a fantastic centerpiece for a shower, wedding or a fun addition to any room in your home. Change up the colors and you have a completely different piece. Ready to make one? Let’s get started.
Seam Binding Mobile
Supplies:
Seam binding– I used about 12 different colors and used most of the entire 5 yards of each color.
paint
hot glue gun and glue
flowers (optional)
Creating the frame:
I chose to make a frame using wood dowels. You could always use embroidery hoops or a plant hanger as your frame, but I wanted the square look, so I made one.
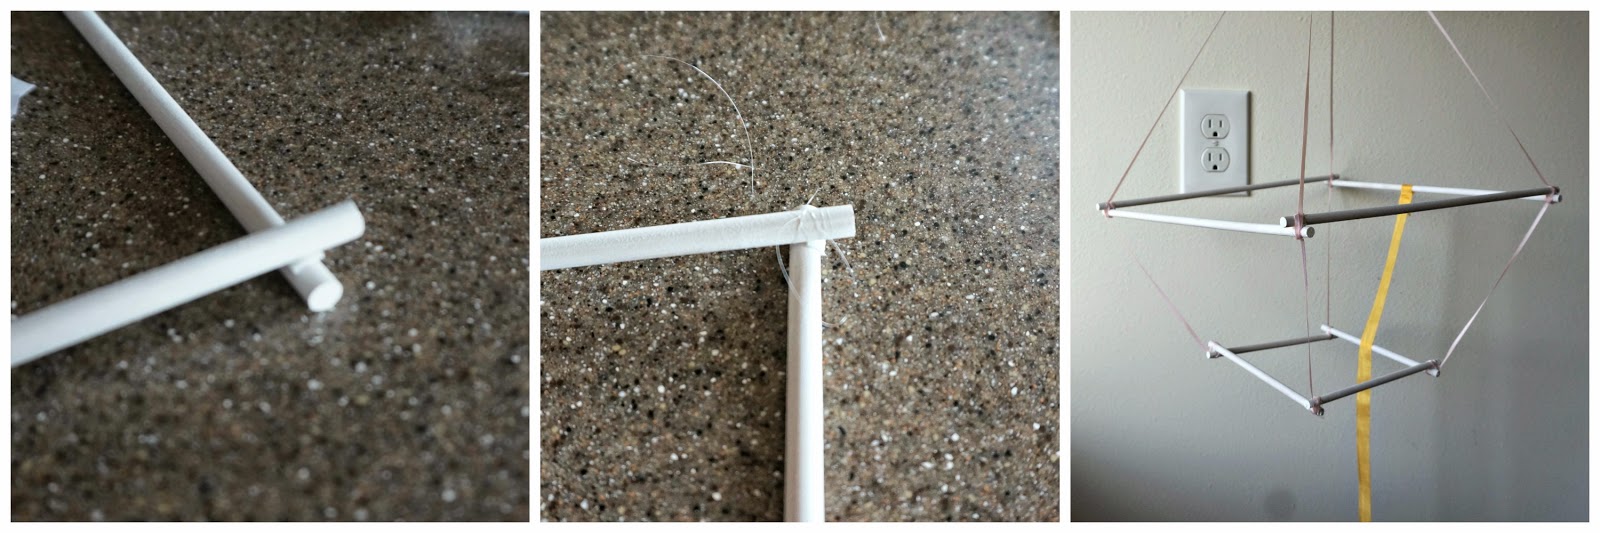
1. First take two dowels and cut them in half.
2. Paint four full size dowels, and your four half size dowels white. Pay most attention to the ends, the rest will be covered.
3. Arrange the four full sized dowels in a square. Overlap the ends approx. 1/4″ and glue. I used the foam squares that were in the package with the dowels.
3. Use clear thread or white thread to tie the corner together securely. I crossed over and under both dowels to create an X pattern and then tied it off with a knot. This will be covered with ribbon and flowers, but I wanted to make sure it was secure. You could also use hot glue for this step, but I was worried about it looking too goopy. 🙂
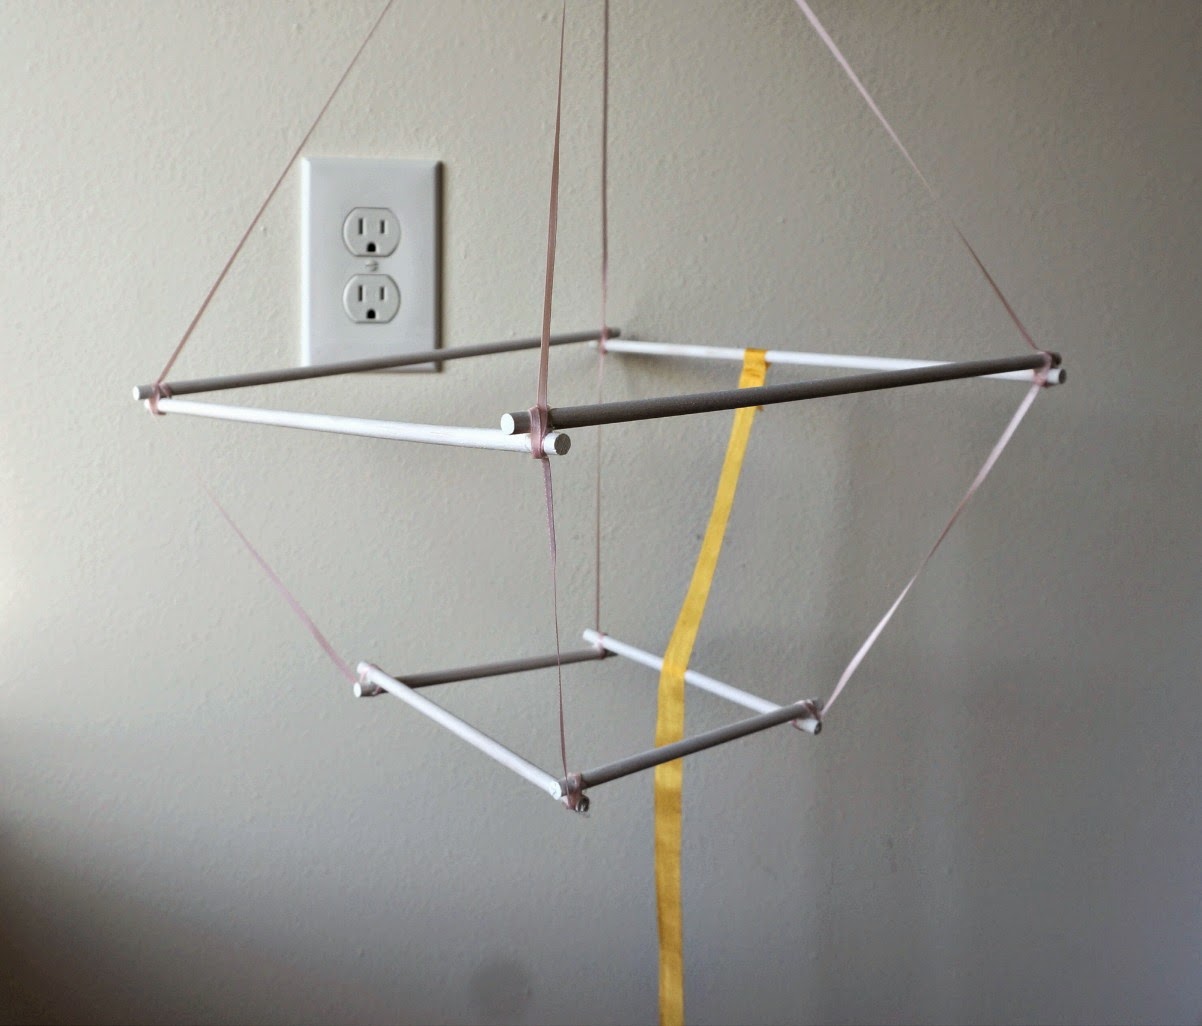
4. Repeat steps 2 and 3 for the half size dowels. You should now have two squares.
5. Use narrow ribbon and glue to attach the smaller square to the larger square. I used 11″ lengths of ribbon, but you may use more or less depending on what size mobile you want to end up with. Just make sure all four lengths of ribbon are the same length and you attach them all in the same way so that it hangs evenly.
6. Cut 4 longer lengths of narrow ribbon (at least 18″) to create the hanging loop. Attach the ribbon to each corner and adjust so the mobile hangs evenly- tie to create a knot for hanging. Steps 5 and 6 are by far the most difficult of the whole project. Take your time to create an even, level base, but don’t get too carried away- the final project is very forgiving and covers a multitude of uneven sins. 😉
Adding the ribbon:
*a word of caution here: I used hot glue to attach the ribbon to the frame. This means getting up close and personal with your glue gun. Be careful to not burn your fingers. I recommend using a low temp glue gun if you have one. Also, once you add the glue to the ribbon, wait a few seconds before pressing it to the other side of the ribbon to let it cool just a bit. You could also use glue dots, fabric glue or craft glue. I just like the immediate gratification hot glue provides.
1. Cut your seam binding ribbon into varying lengths. I cut mine between 15″ and 20″. I didn’t measure, I just snipped.
2. Begin randomly attaching the ribbon to the top square of the frame. I added a line of glue to the ribbon about 4″ or so from one end, then I slid the short end of the ribbon over the frame to the outside and pressed it to the line of glue. This allowed me to move the ribbons around on the frame if I needed to.
3. Continue adding ribbon until the entire top frame is full.
4. Put all the ends of ribbon to the inside of the smaller frame.
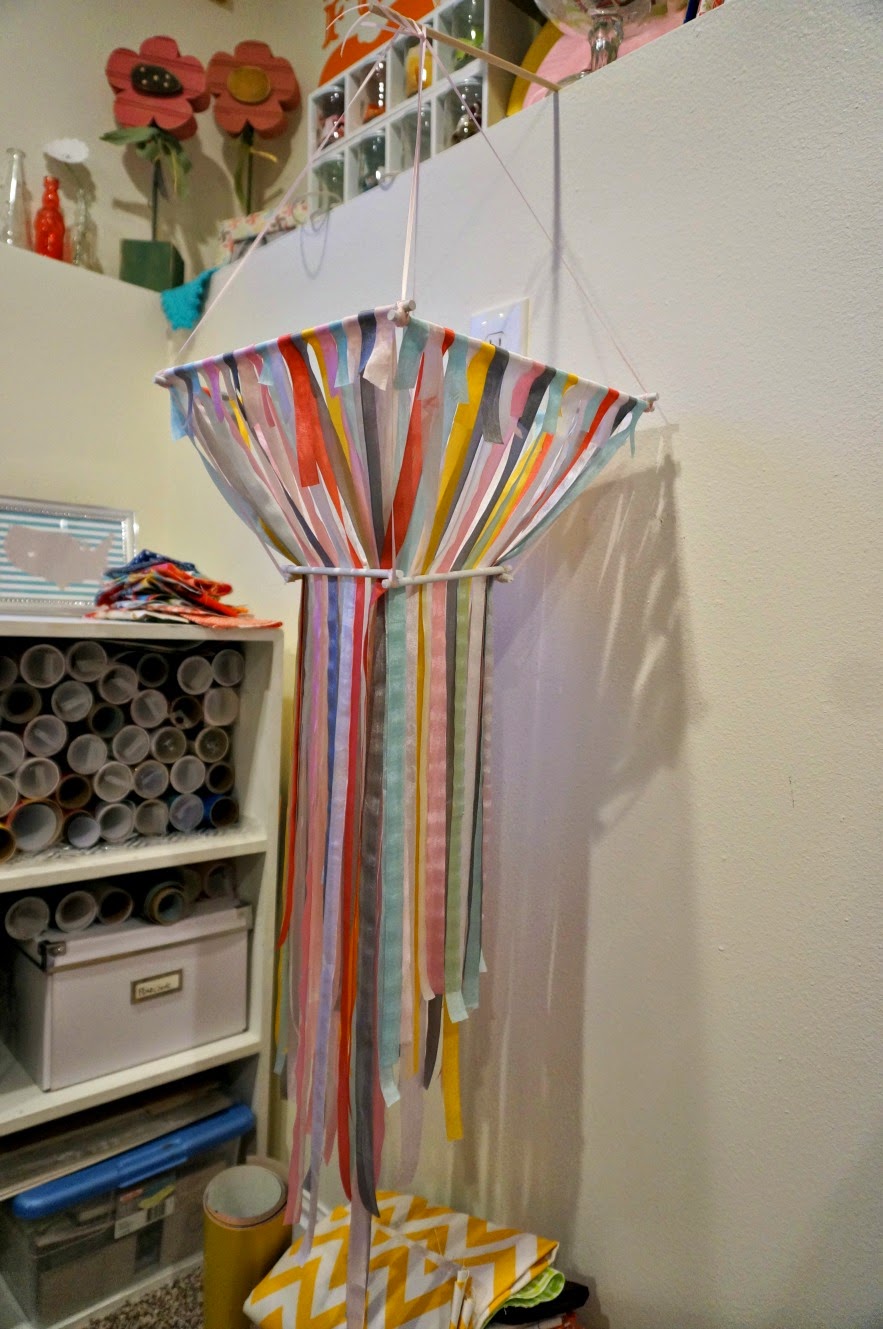
5. Pull one ribbon to create a swag that hangs to your desired length. Add a line of glue and glue it to the remaining tail of ribbon still on the inside of the small frame.
6. Repeat with random ribbons along one side of the mobile until the small frame is covered with ribbon.
*You can see in this picture that some of the ribbons on this side are still straight in the center of the mobile. I usually skipped one or two ribbons across the side of the frame on this first layer.
7. Pull the remaining ribbons through to create swags that are shorter than the first layer. Glue them to the ribbon loops created with the first layer.
8. Repeat until all the ribbons on this side are pulled through.
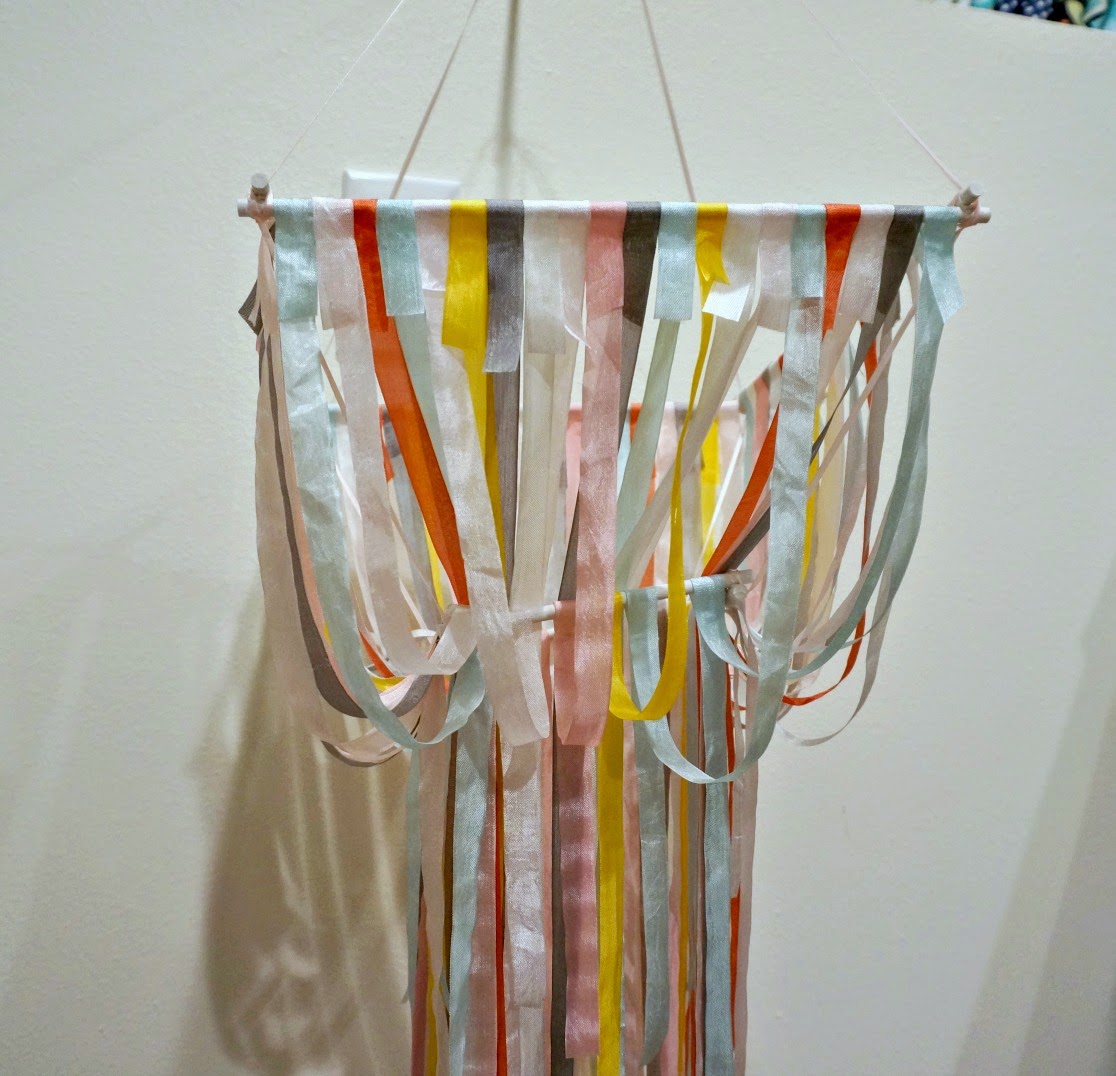
9. Repeat for the other three sides of the mobile- use your first side as a guide for how deep your swags will be so all four sides are uniform.
10. Finish by adding flowers to the corners of the mobile (if desired).
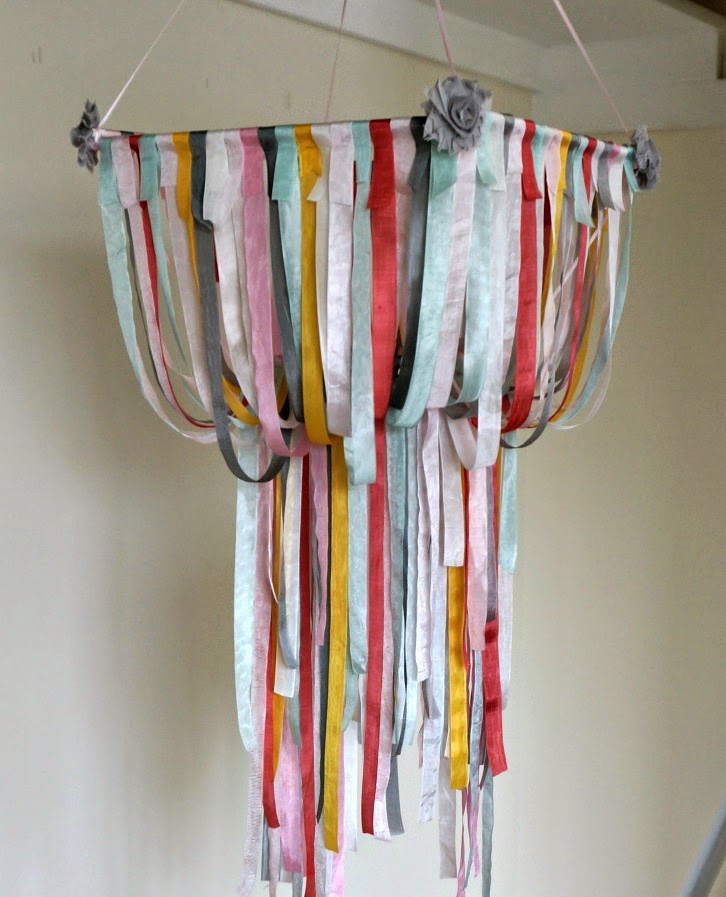
I love how whimsical this looks.

I hope the baby loves it as much as I do.
xoxo,
Amy


Kara
August 13, 2015 at 12:31 amSuch a cute idea! I bet it looks so pretty with a breeze blowing through it. 🙂