This wavy ruffle pillow tutorial was originally published in August 2011 and updated in November 2019.
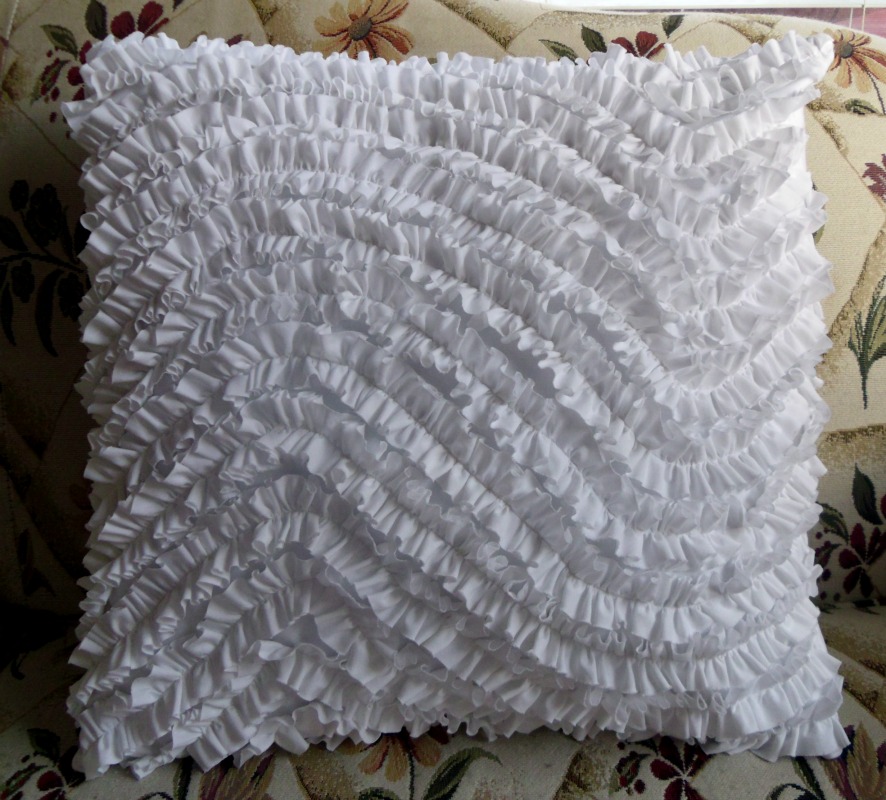
So, I kind of have the impression that you like this pillow. 🙂 I’m so happy. It’s been featured and pinned all over the place, and for that I am forever grateful. I thought, since it was so popular and all, that you might like the deets about how I made this ruffilicious thing of beauty.
First you will need some fabric. I think a yard and a half should more than cover you. It might even be too much, but I want to cover my bases. 😉 {when I made my pillow I had some yardage from my MIL. It was 60″ wide and I didn’t measure how much I used.} You should be able to get both your ruffles and your pillow cover from the 1 1/2 yards. (of 45″ wide fabric) You will also need a pillow form and various sewing implements.
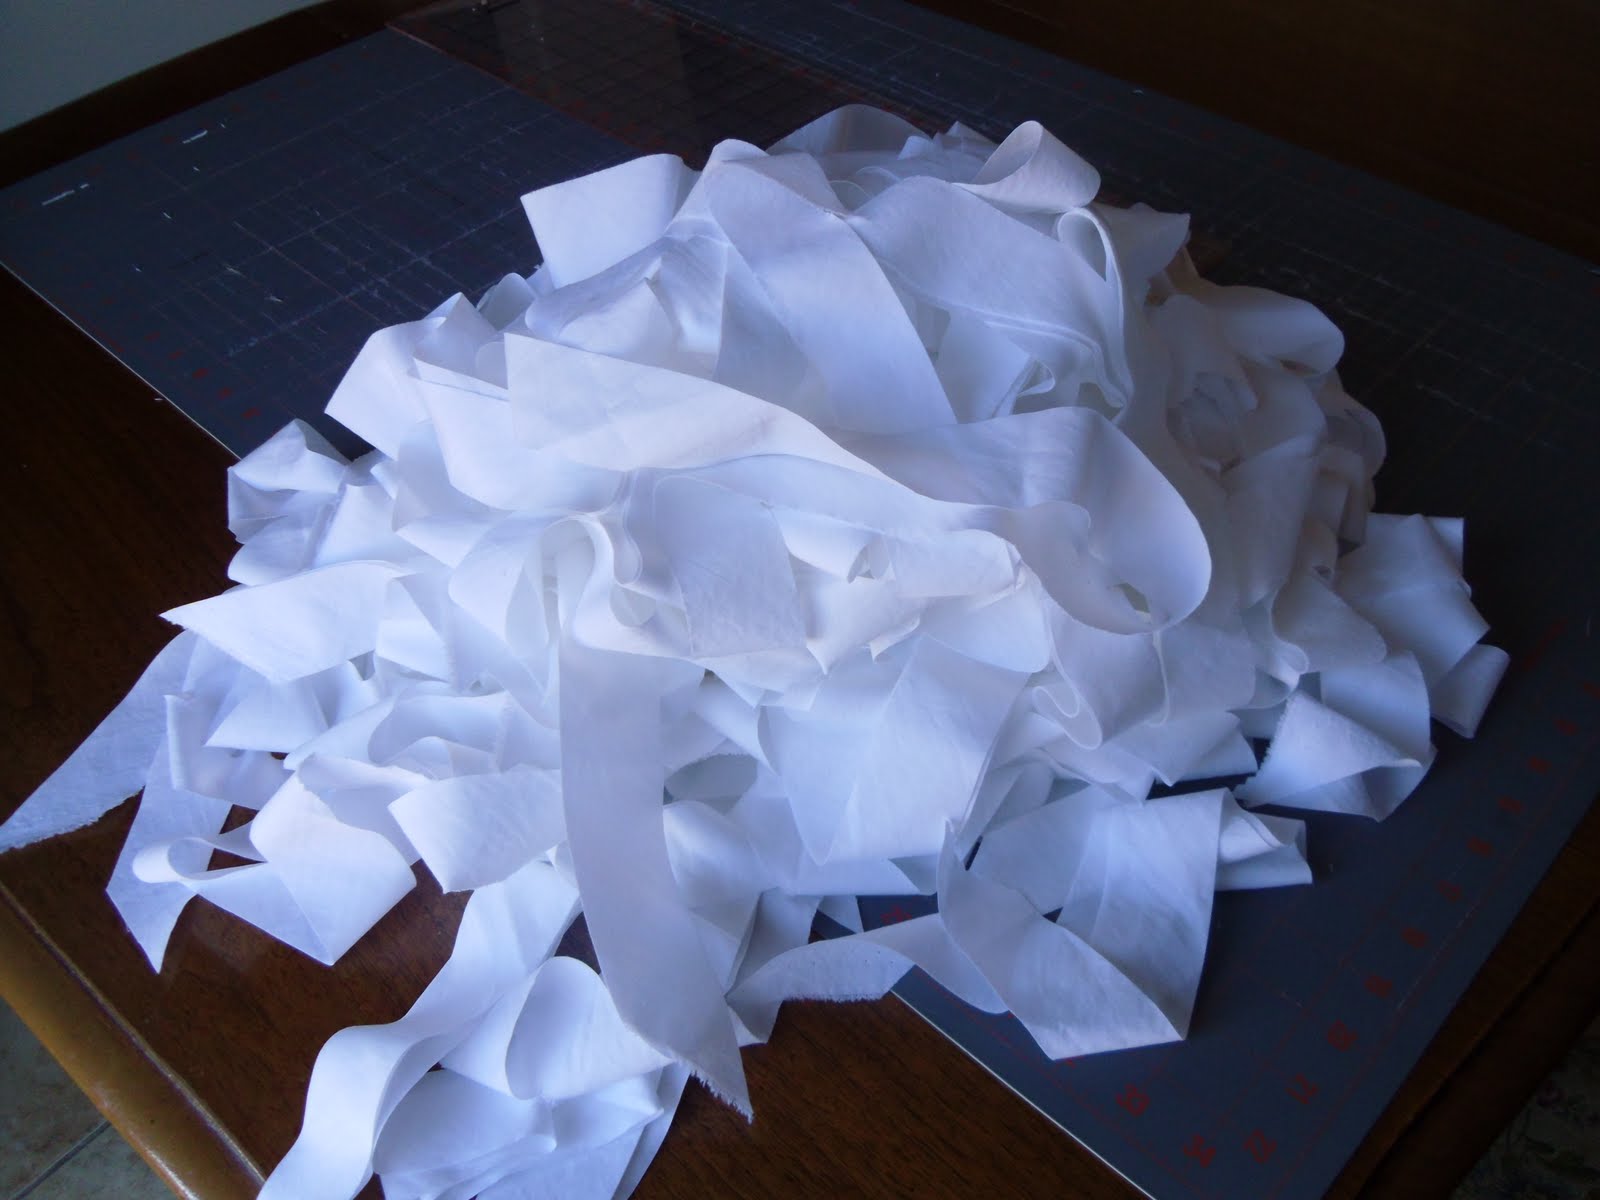
Cut your pillow cover front. I usually cut mine 1″ larger than the size of the pillow form. Then cut your strips for the ruffles. I used this tutorial from Dana over at Made to cut the strips on the bias. I cut my strips 1 1/2″ wide. You don’t need to cut all the way down to the corner- you will just want the longer strips cut right on the diagonal- you will need about 18 strips total. (depending on the size of your pillow) I cut them on the bias so they don’t fray- if you like the look of frayed ruffles, then don’t worry about bias cutting them. (you will probably need less fabric)
Now we need to take this pile:
and turn it into this pile:

I use a tip I learned from Vanessa to start the ruffle process. I lightly pinch the thread as it comes off the spool while I’m sewing down the center of the strips. (the stitch length is at the longest setting)
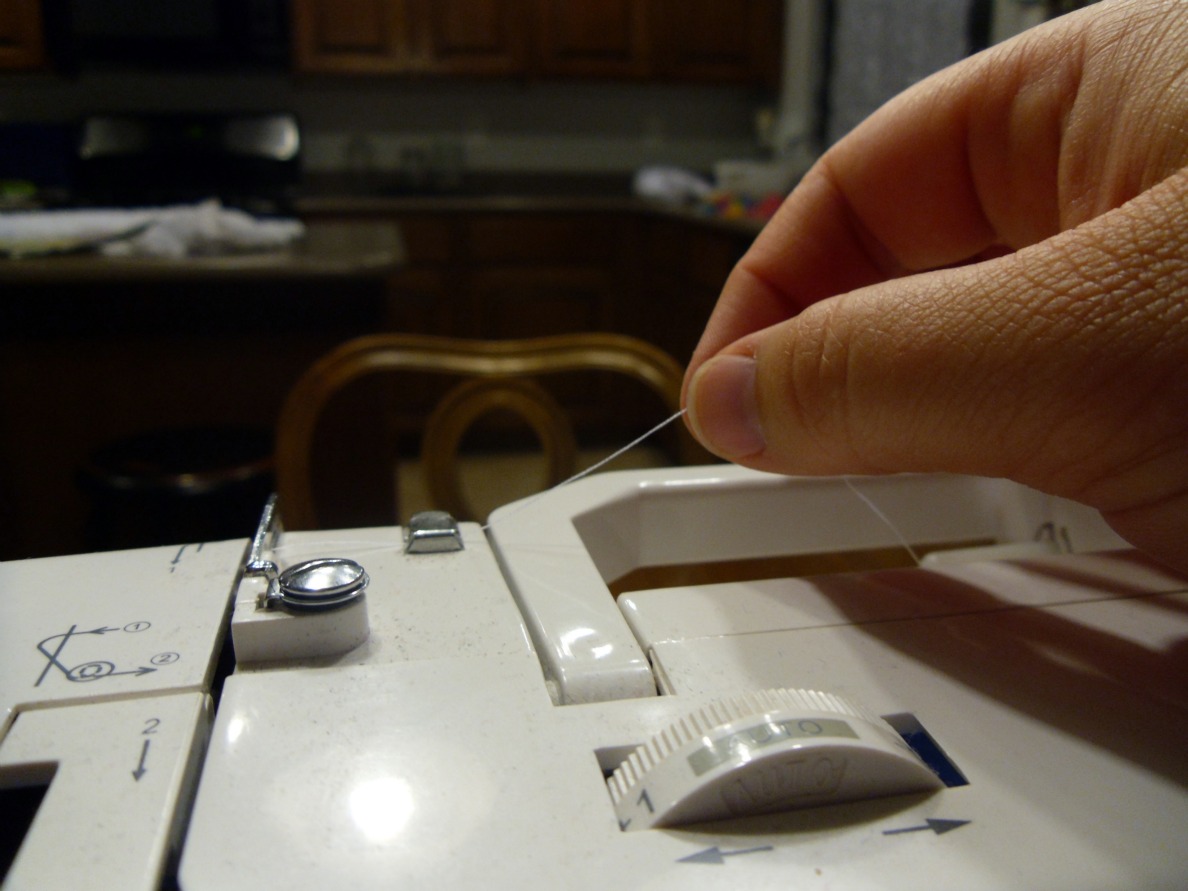
This will ruffle up the strips nicely, but I don’t have to mess with my tension at all. (my machine doesn’t like me to mess with the tension AT ALL) Make sure you leave tails of thread to start and stop each strip so they don’t start to unravel, but Don’t backstitch. You can leave your ruffles as they come off the machine, but I like my ruffles really ruffly, so I gathered them up even tighter by hand.
Now it’s time to get them on the pillow cover.
Take your front piece and lay it flat, right side up. Take your first ruffle and place it down in the pattern you want your ruffles to be in.
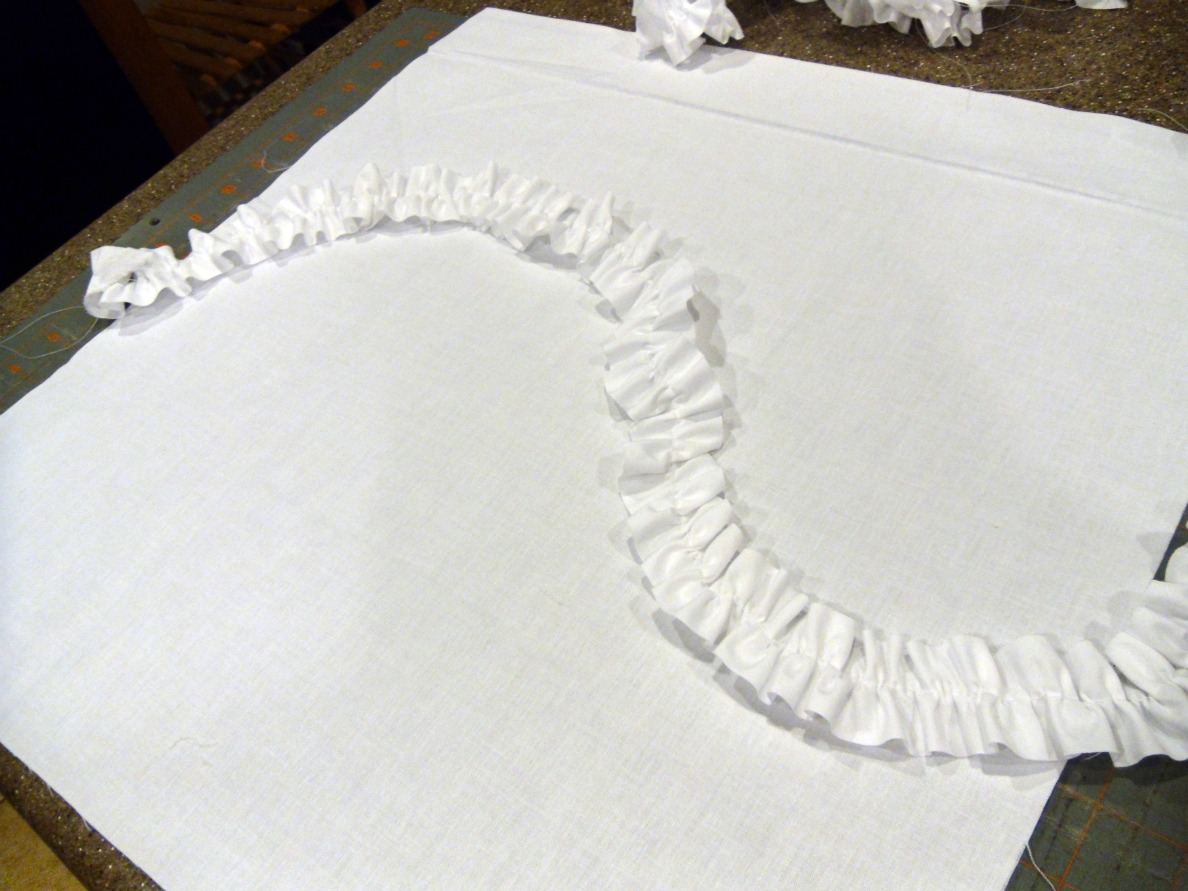
Pin it down.
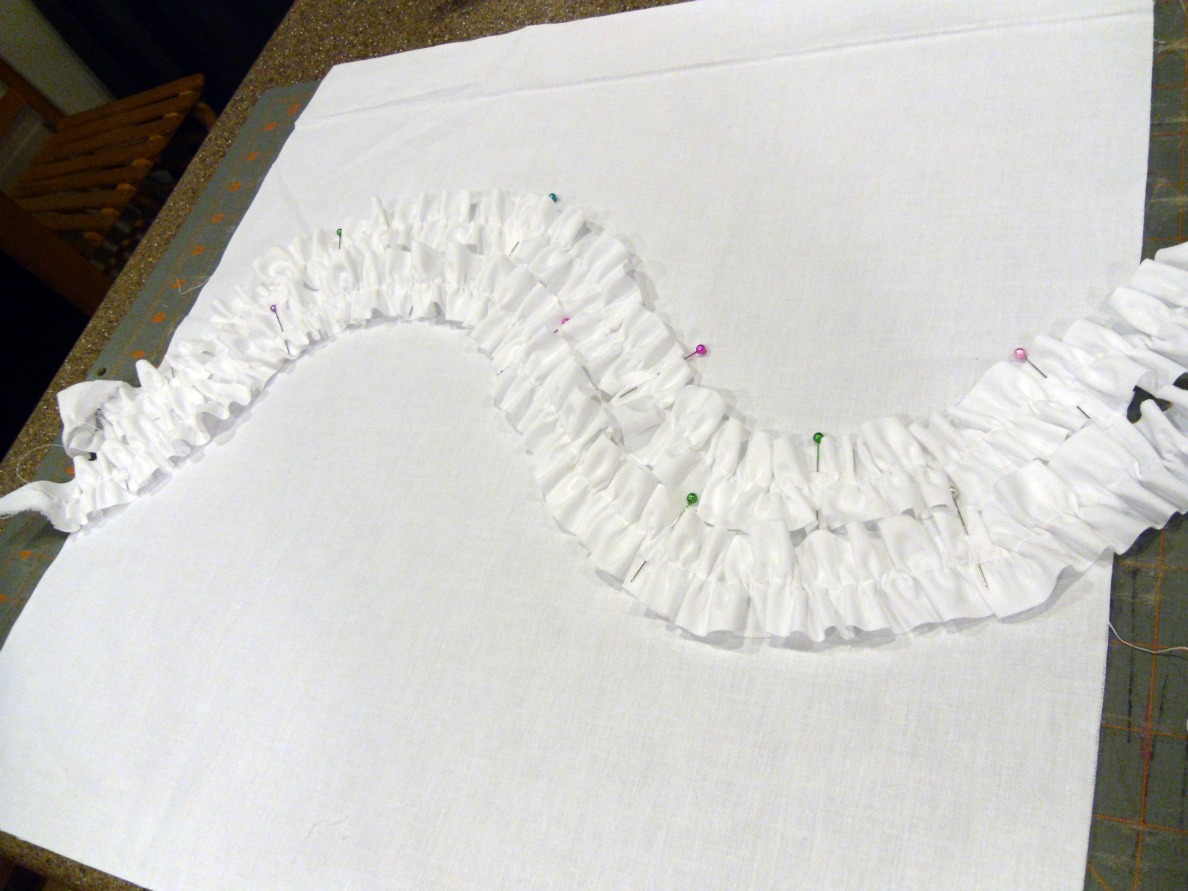
Add the next one and pin it down. I find it’s easier to get them all in place and pinned before sewing, but you can pin one row and sew it then repeat too. 🙂
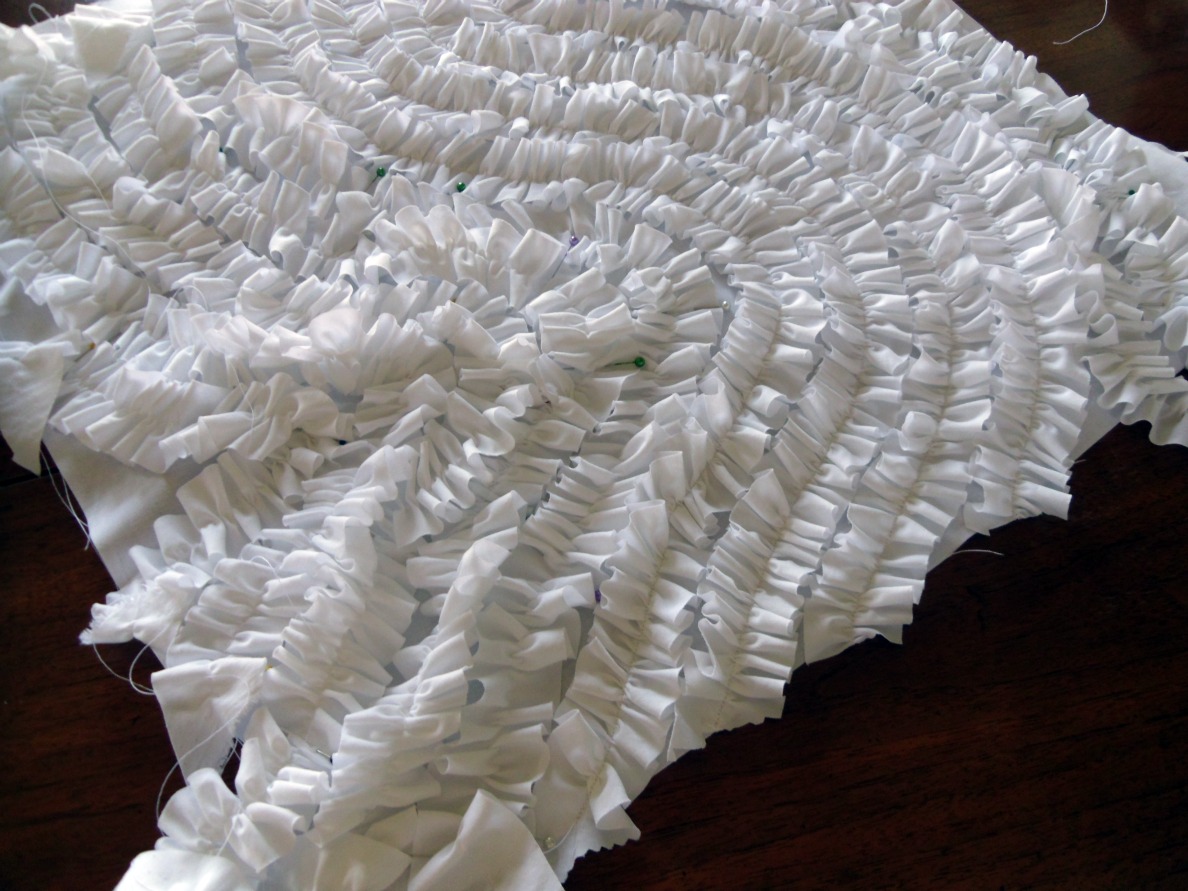
I start sewing on the first row I placed. The design tends to get skewed a bit by the curves, so I want my main shape to stay true. Then I work out from there. In this shot I have sewed the middle four rows down. continue sewing until all the ruffles are in place. Once the ruffles are sewn down, trim the edges so they are straight again. Now you can finish your pillow cover with your method of choice. I used an envelope style closure and put a ruffle down the edge of the outside flap.
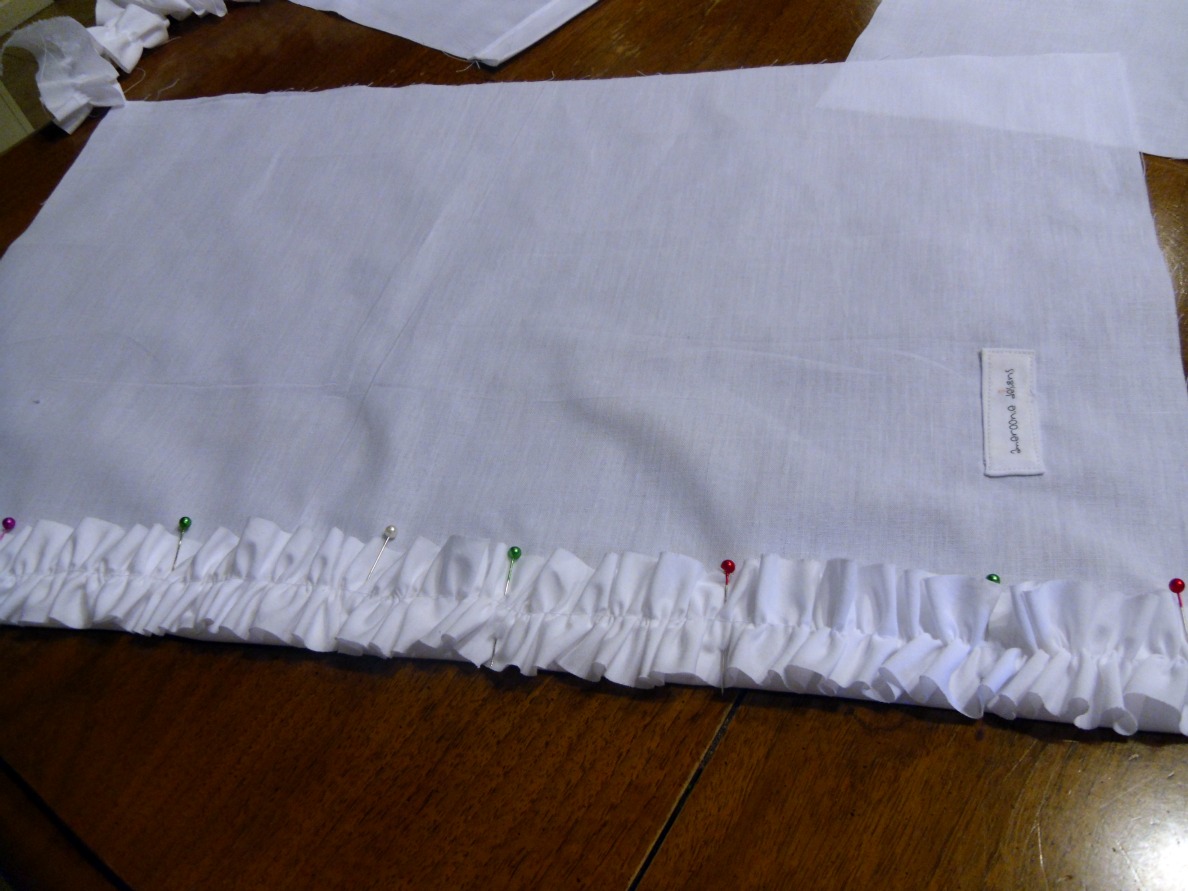
When you get ready to sew the front to the back you will want to pay attention to which parts of the ruffles you want caught in the seams (the ends of the strips) and which parts you don’t (The ruffles themselves). Use pins to keep the parts you don’t want sewn down out of the line of fire.

Then you’re good to go.

On this pair I did the big curve on opposite sides of the pillow so they would complement each other. I think they look great on my bed- but I’m going to put these in the boutique. I guess I’ll have to make more for myself when it’s over. 😉
If you make any of these pillows- I would love for you to send me the link. It’s fun to see how people use your tutorials.
Have a ruffly weekend- I’ll see you Saturday.
xoxo,
Amy
Linked up to Fun Friday Finds at KoJo Design, Friday Flair at Whipperberry, Weekend Wrap Up party at Tatertots and Jello


Tonia @ TheGunnySack.com
August 12, 2011 at 4:39 amI would love on of these for my bed. Thanks for the tutorial!
Gwen @ Gwenny Penny
August 12, 2011 at 1:31 pmGreat tutorial, Amy. This is such a pretty pillow and a unique take on ruffles. Love it! I hope your computer troubles are over.
Louisa
August 12, 2011 at 1:50 pmWhat a beautiful pillow. Thanks for sharing the tutorial.
Sweet Coconut Lime
August 12, 2011 at 9:01 pmI love this pillow! I need to make something like this for my bed. Thanks for the tutorial.
http://www.sweetcoconutlime.blogspot.com
Caroline T. alias Wiccat
August 13, 2011 at 10:10 amThat's really a cool idea. It comes on my list "to try".
Amy {The Idea Room}
August 14, 2011 at 3:45 amLOVE IT!! I need me a wavy ruffle pillow!
Spunky Junky
August 19, 2011 at 12:37 pmWOW Amy! You are the pillow queen! I love this one–I am featuring you in the morning…
Halz
Anonymous
August 21, 2011 at 3:15 amWhat a beautiful pillow. Thanks for sharing this wonderful tutorial.
tips to sell your house quickly
Ricochet
August 24, 2011 at 2:47 pmI made a post about bias ruffles and linked to this awesome tute. You can find it at http://ricochetandaway.blogspot.com/2011/08/bias-ruffles-godsend-for-ruffle-addicts.html
OnePerfectDay
August 26, 2011 at 2:10 amThis is perfect!
i found you through Ricochet- right above.