
When I was a little girl I remember sitting up late on a summer evening peeking through the door to look out on the grown-ups and see what they were doing. My great-grandfather would pull out his harmonica and play this song. I remember feeling so happy inside.
Fast forward a couple decades and that same feeling fills me up as I sing the words of this song to my children. My youngest especially loves this song. In fact, when I told her that the pillow was going to say “You are my Sunshine,” she said, “That’s because it loves me.” It makes me happy that she associates me singing this song to her with love, and that she translated that love to the pillow. 🙂
You can see what inspired me to make this pillow in my Point of View reveal post, but the fabrics were chosen because they are the basis for my daughter’s bedroom makeover. I added in a few different fabrics, the yellow, green, pink and orange, to make it feel more like a sun, but the rest of the fabrics are from the Ruby line from Moda.
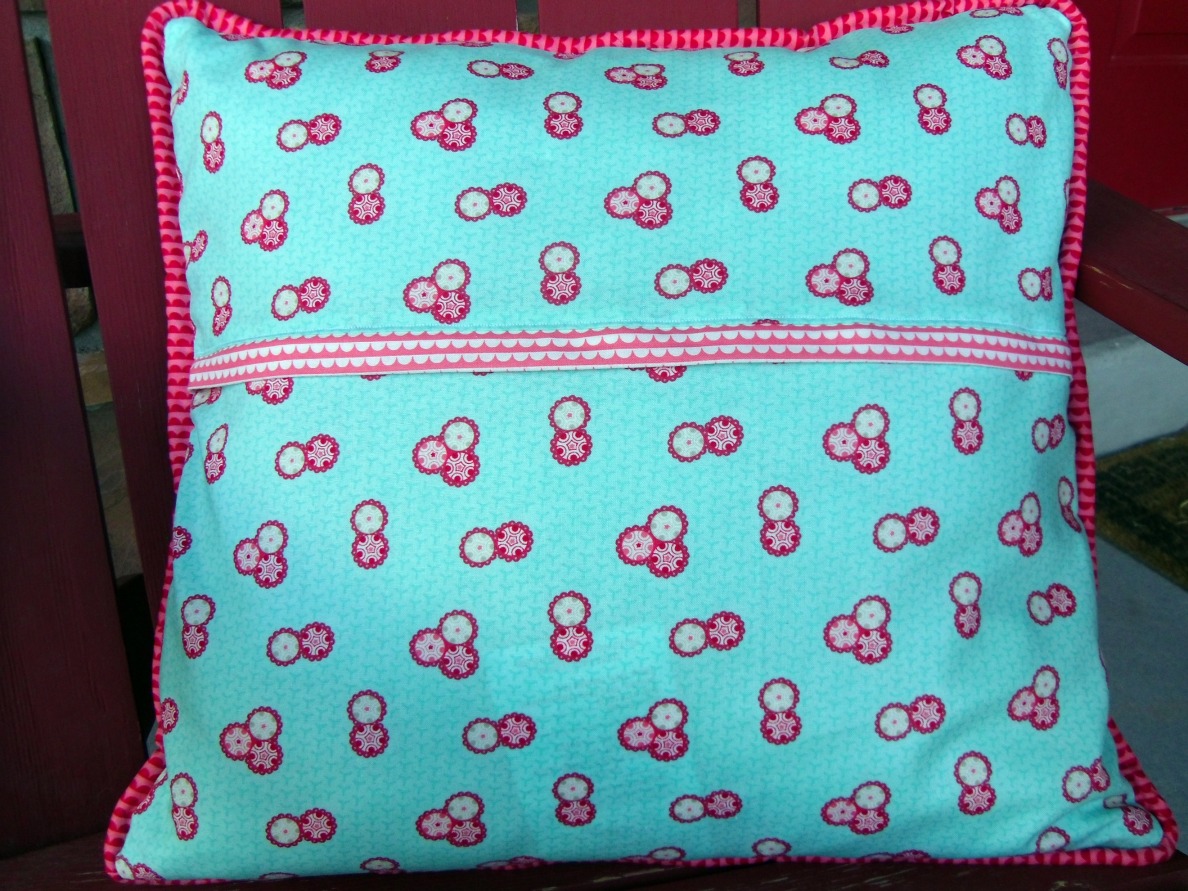
This tutorial is a little incomplete because I’m still not very good at piping, and the back was my first attempt at adding a zipper enclosure to a pillow, so I didn’t take pictures of those parts, mostly because I was totally winging it and making it up as I went. 🙂 But I do have instructions on how I made the front, I hope it helps.
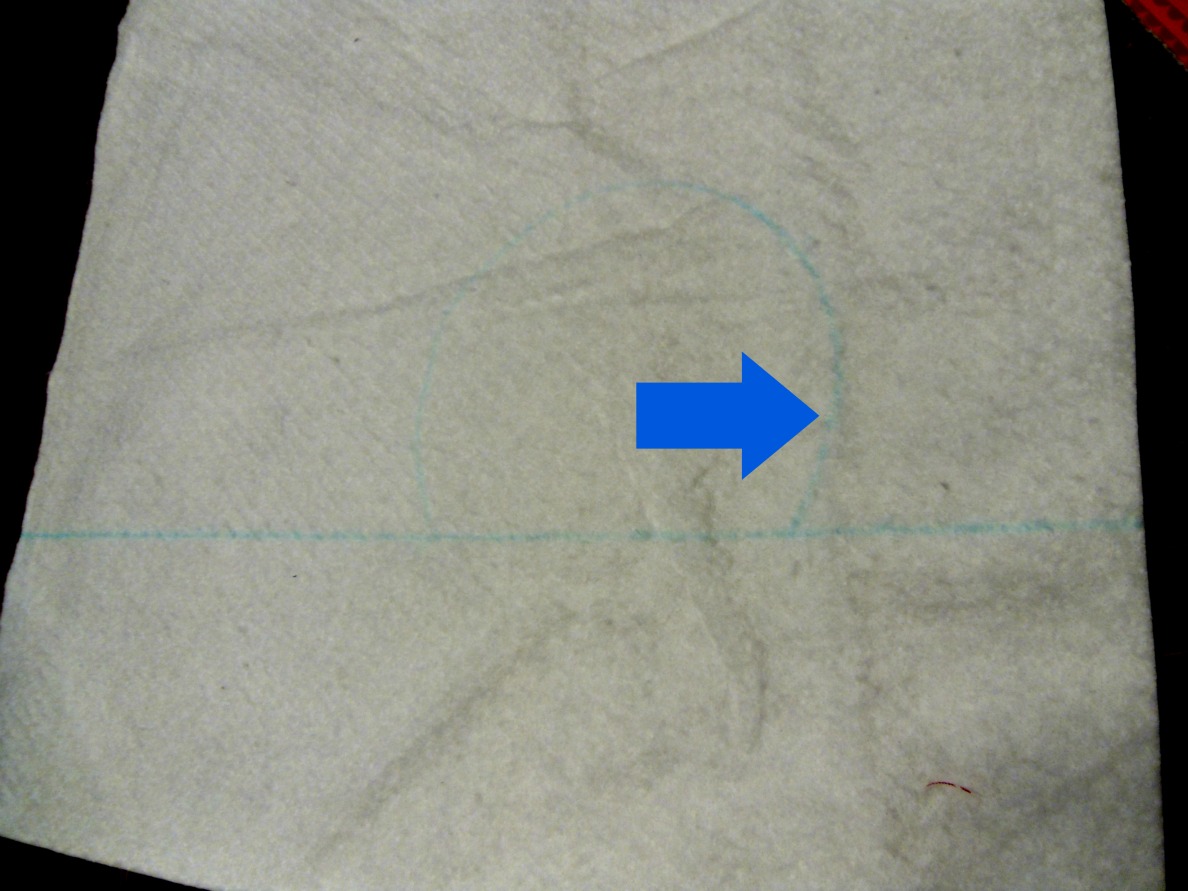
I wanted to do a quilt as you go type application, so I didn’t have to cut out precise angles on the colored pieces. To start, I cut out a piece of quilt batting 18″ X 18″ square. I drew a line about 4″ up from the bottom to be my “horizon” then traced a bowl the size I wanted my sun. (the arrow is pointing to the traced lines since they’re hard to see)
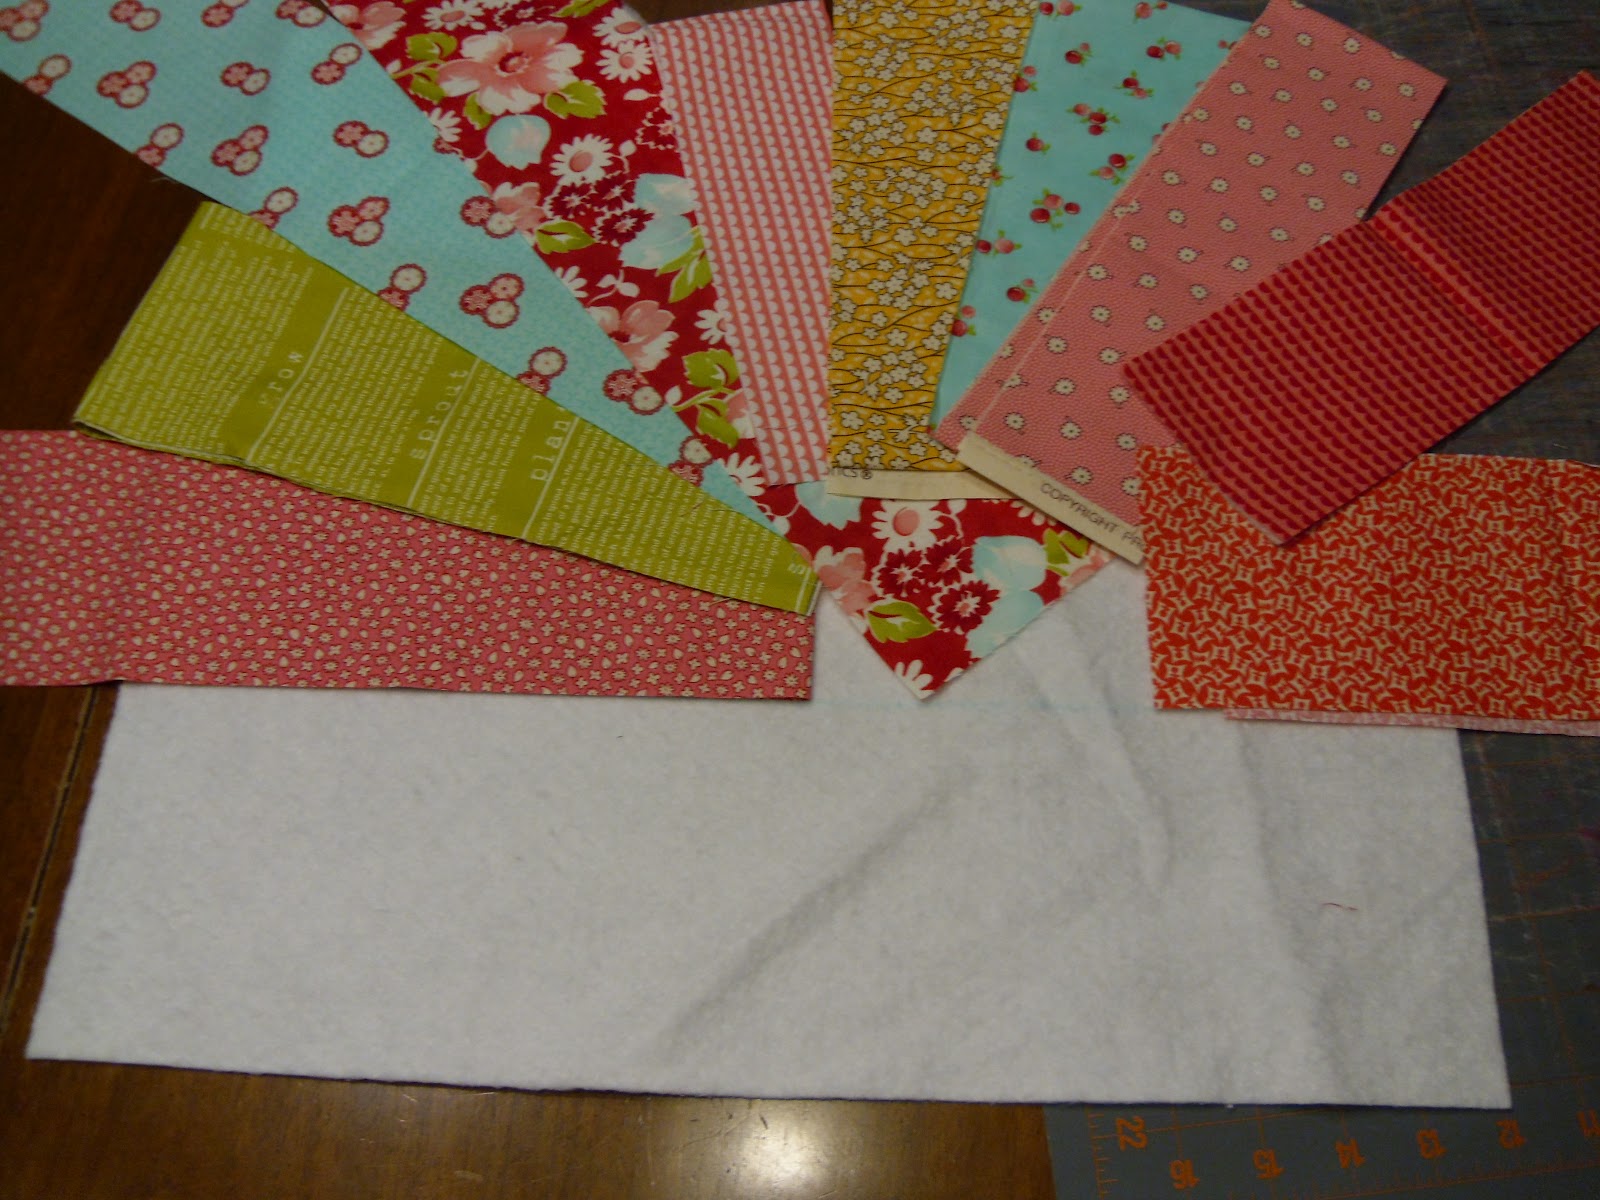
I cut strips of my fabrics 3-4″ by 18 or so inches long. I was using fat quarters and yardage so some were longer than others, but the 18″ long ones were plenty long. I arranged the fabrics how I liked them (and took a picture so I’d remember what that arrangement was).
I sewed the first piece down lining up the edge to the drawn horizon line. I originally thought I would quilt each strip as I attached them, but quickly learned that wasn’t going to work. As I laid the green piece down, you can see the overhang of pink underneath- I need to trim that off , but can’t since it’s quilted down- so that quickly changed my plans. So here’s how the rest of the strips went down.

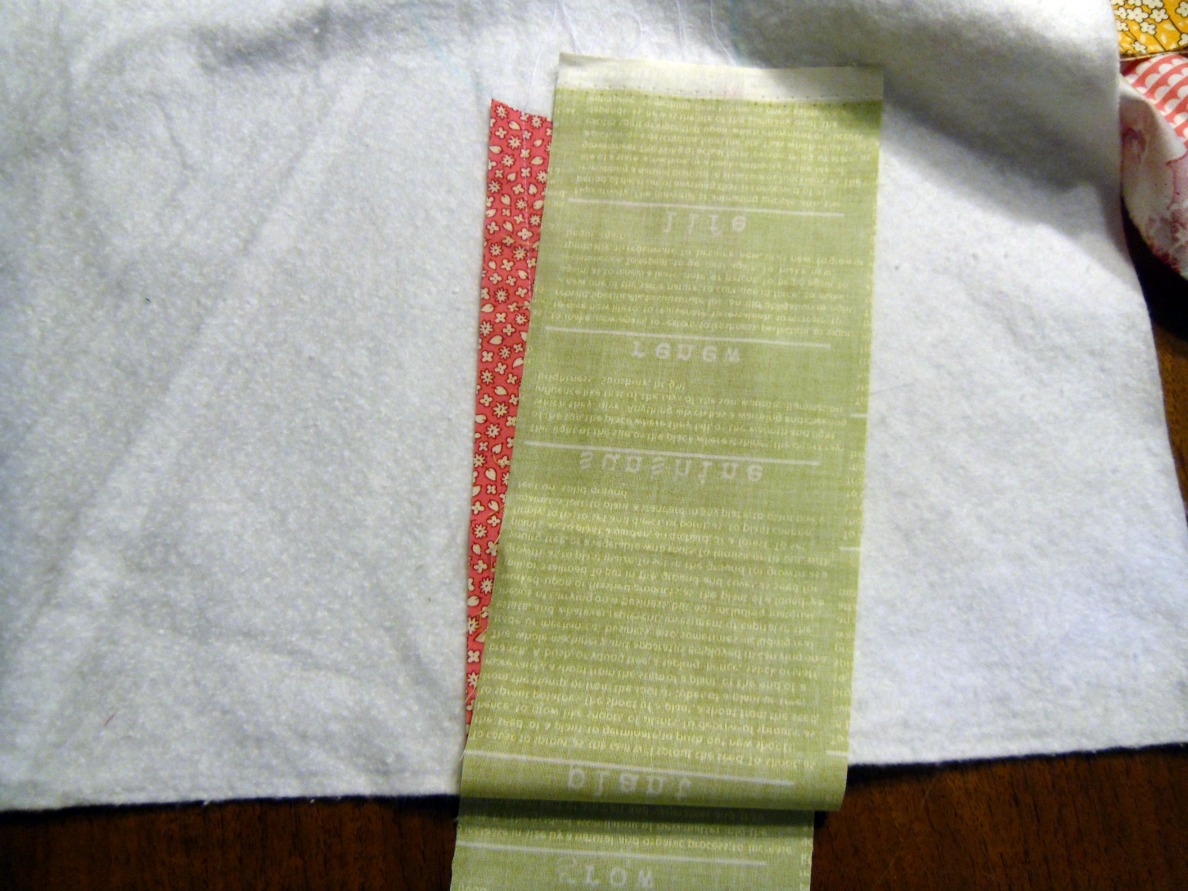
Line up your strip at your chosen angle, right side of fabric down. The arrows show you what points you will need to pay attention to so that you make sure you’re getting the batting all covered. I used a 1/4″ seam allowance, so when you’re checking the side closest to the sun, make sure you’ll still going to see the color of the previous ray. Sew down the pinned side using a 1/4″ seam allowance.
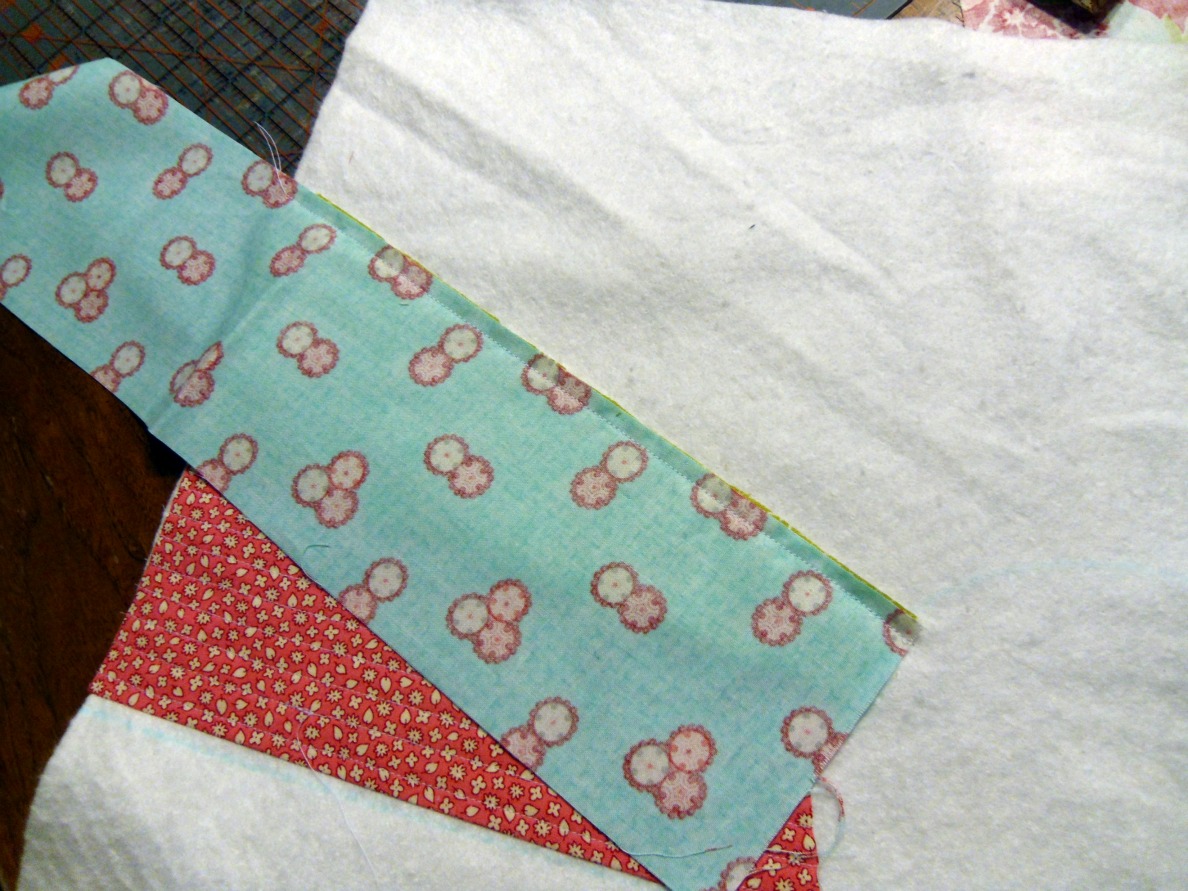
Trim the excess fabric from the previous ray (in this case, the green), then press the ray over so it’s laying flat against the batting. Repeat for all the rays. Then quilt all the rays. I alternated between a 1/2″ row of straight quilting (first pink ray), and “ray” quilting (angled rows of quilting, as in the green ray).


To make the sun, I traced a circle on the white fabric just larger than the circle I traced on the batting. (again the line is hard to see, so I added the arrow. 🙂 ) Then I folded the fabric so there were two layers.
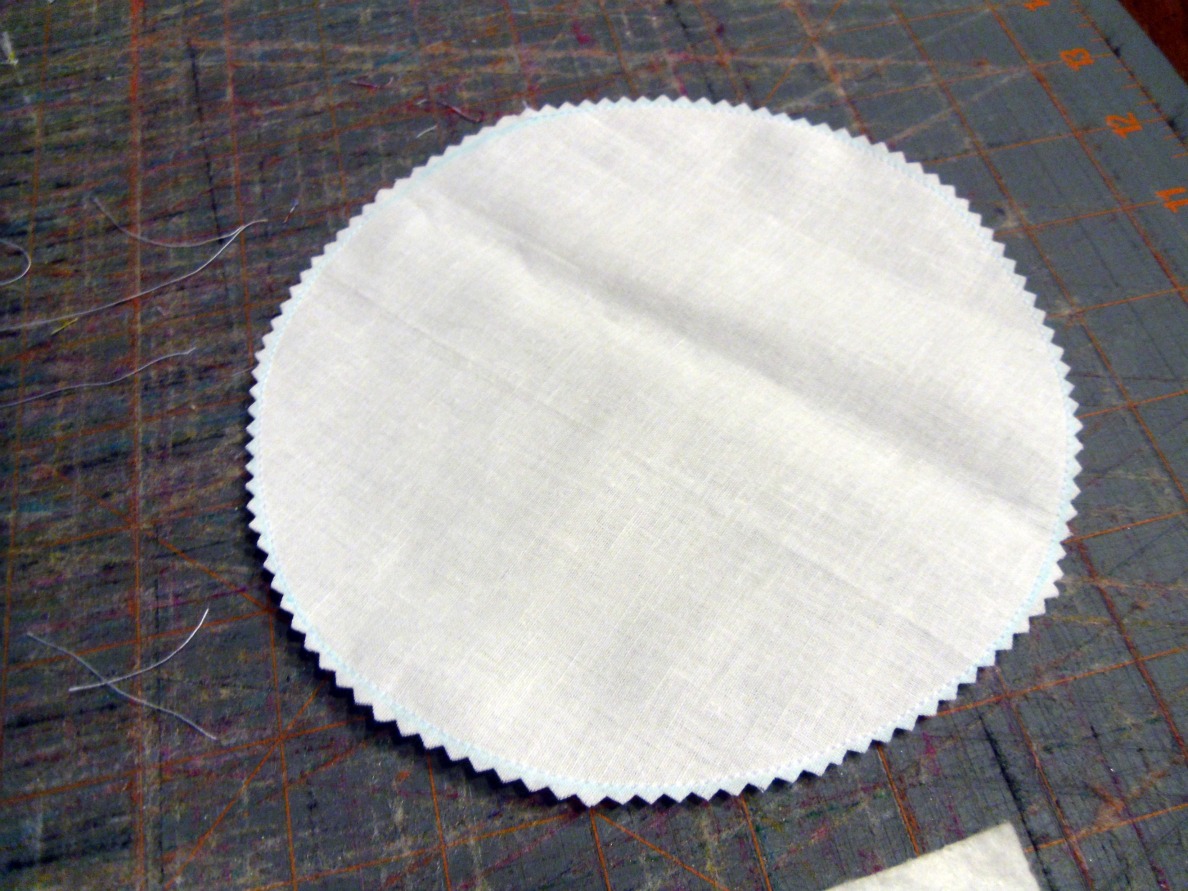
I stitched around the circle On The Line leaving about an inch or so open for turning. Cut out the circle with pinking shears so it will lay flat. (you can also cut out notches around the circle if you don’t have pinking shears) Turn the circle inside out and press down. (use a dull instrument to push the edges out to make the seams even)
And, here’s where the pictures disappear and I just tell you what I did because I was in too big a hurry to get it done. So sorry about that.
Place the sun so it covers all the edges of the rays, with the open end at the bottom where it will be covered by the horizon. Stitch down with two rows of stitching.
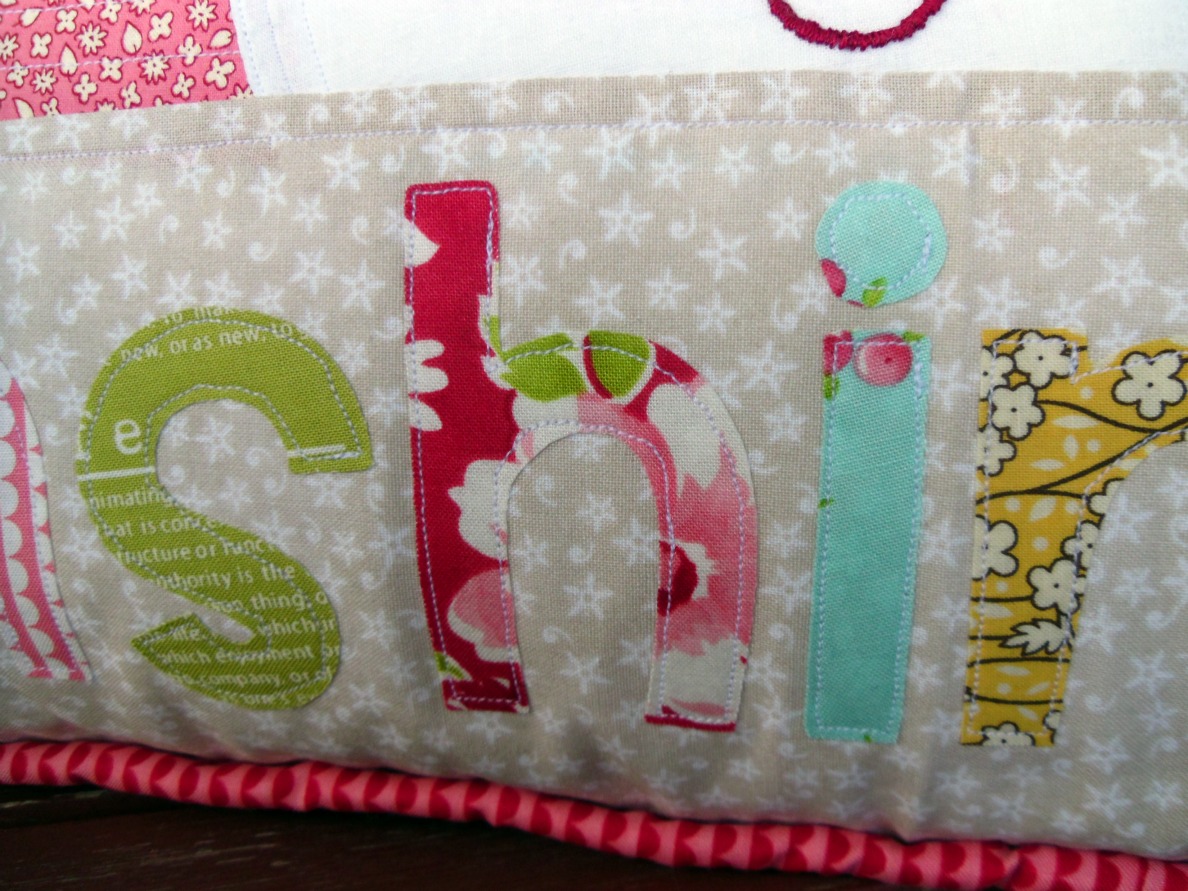
Sew down the horizon the same way you did the rays. Place the horizon fabric down, right side down, over the sun, lining it up with the line you drew in the beginning, making sure all the raw edges of the rays and sun are covered. Stitch down, and press over. Topstitch. Embellish how you would like. I used my own handwriting to write “you are my” and embroidered them in the sun. Then I cut out the letters for “sunshine” using my cricut and traced them (backwards) onto light heat n’ bond (the purple kind). Using remnants from the rays, I fused the heat n’ bond to the fabric, cut out the letters and pressed them down on the horizon. Then I stitched them down to make sure they would stay in place.
Finishing the pillow, as I said before was more a matter of trial and error (more error than I’d like to admit). I need to do more research on the best way to add piping to a pillow and adding zippers is definitely something I need to practice more. Still, I think it looks pretty good.
🙂 Not too shabby, right?
I love the quilted look, and it has me really excited to make the other two pillows I have planned for this room. And to finally make the quilt I’ve been planning for her as well. Man, I better get busy. 🙂


Jonie Marie
March 23, 2012 at 2:07 pmYou did a beautiful job! I love the vibrant colors and I have always loved that song as well. I've said it once, and I'll say it again. You are the queen of pillows 🙂
Jonie
Leanne
March 23, 2012 at 2:49 pmThe pillow is adorable! I love the colors and the design. You've done it again!
Kara
March 23, 2012 at 3:21 pmSo, so adorable! You are the queen of cute pillows my friend!
Ashlee @ I'm Topsy Turvy
March 23, 2012 at 4:34 pmIt is SO pretty! Not only the designs, but the wonderful spring colors as well! I need one…
Karen
March 23, 2012 at 4:48 pmIt turned out darling! I love the whole thing.
Gwen @ Gwenny Penny
March 23, 2012 at 6:11 pmLove that this was inspired by a scrapbook layout! Beautiful pillow, Amy, and bonus that your little one loves it, too.
Lorene (just Lu)
March 23, 2012 at 7:33 pmAmy, it looks great! I love it. You really are the queen of pillows!
chris
March 25, 2012 at 2:56 amThis is DARLING!
Andi @ Jane of all crafts
March 26, 2012 at 1:50 amReading about your connection to this song made me smile. This song means a lot to my girls and I as well, it's the song they always request and I sang it to them when they were babies. I love this pillow and am going to pin it so I can make one for my girls! Rock on pillow queen!
Michele Pacey
March 26, 2012 at 12:56 pmI have visions of your little one hugging the pillow and singing the song. What a great project Amy!
Sara @ CleverPinkPirate.com
March 29, 2012 at 4:28 amStopping by from SNAP, looove this pillow! You did a great job!
Faith, Trust and Pixie Dust
April 3, 2012 at 1:53 amHoly cow! How adorable. You did a great job on this project & I adore the fabric choices.
Warmly, Michelle
Debra
April 26, 2012 at 2:06 amBeautiful! All of your pillows are so fantastic!