 So, here is this week’s “Theme”day Thursday project: as promised- the Happy Birthday Banner Tutorial! I can’t really qualify this tutorial, but I do have a request- if you are going to make these to sell, please change them up and make them your own, since I’ll be selling them in my ETSY shop (hopefully I’ll get them listed next week!).
If you’re interested in purchasing one from me leave a comment here and for the next week I’ll ship it for free.

On to the tute.
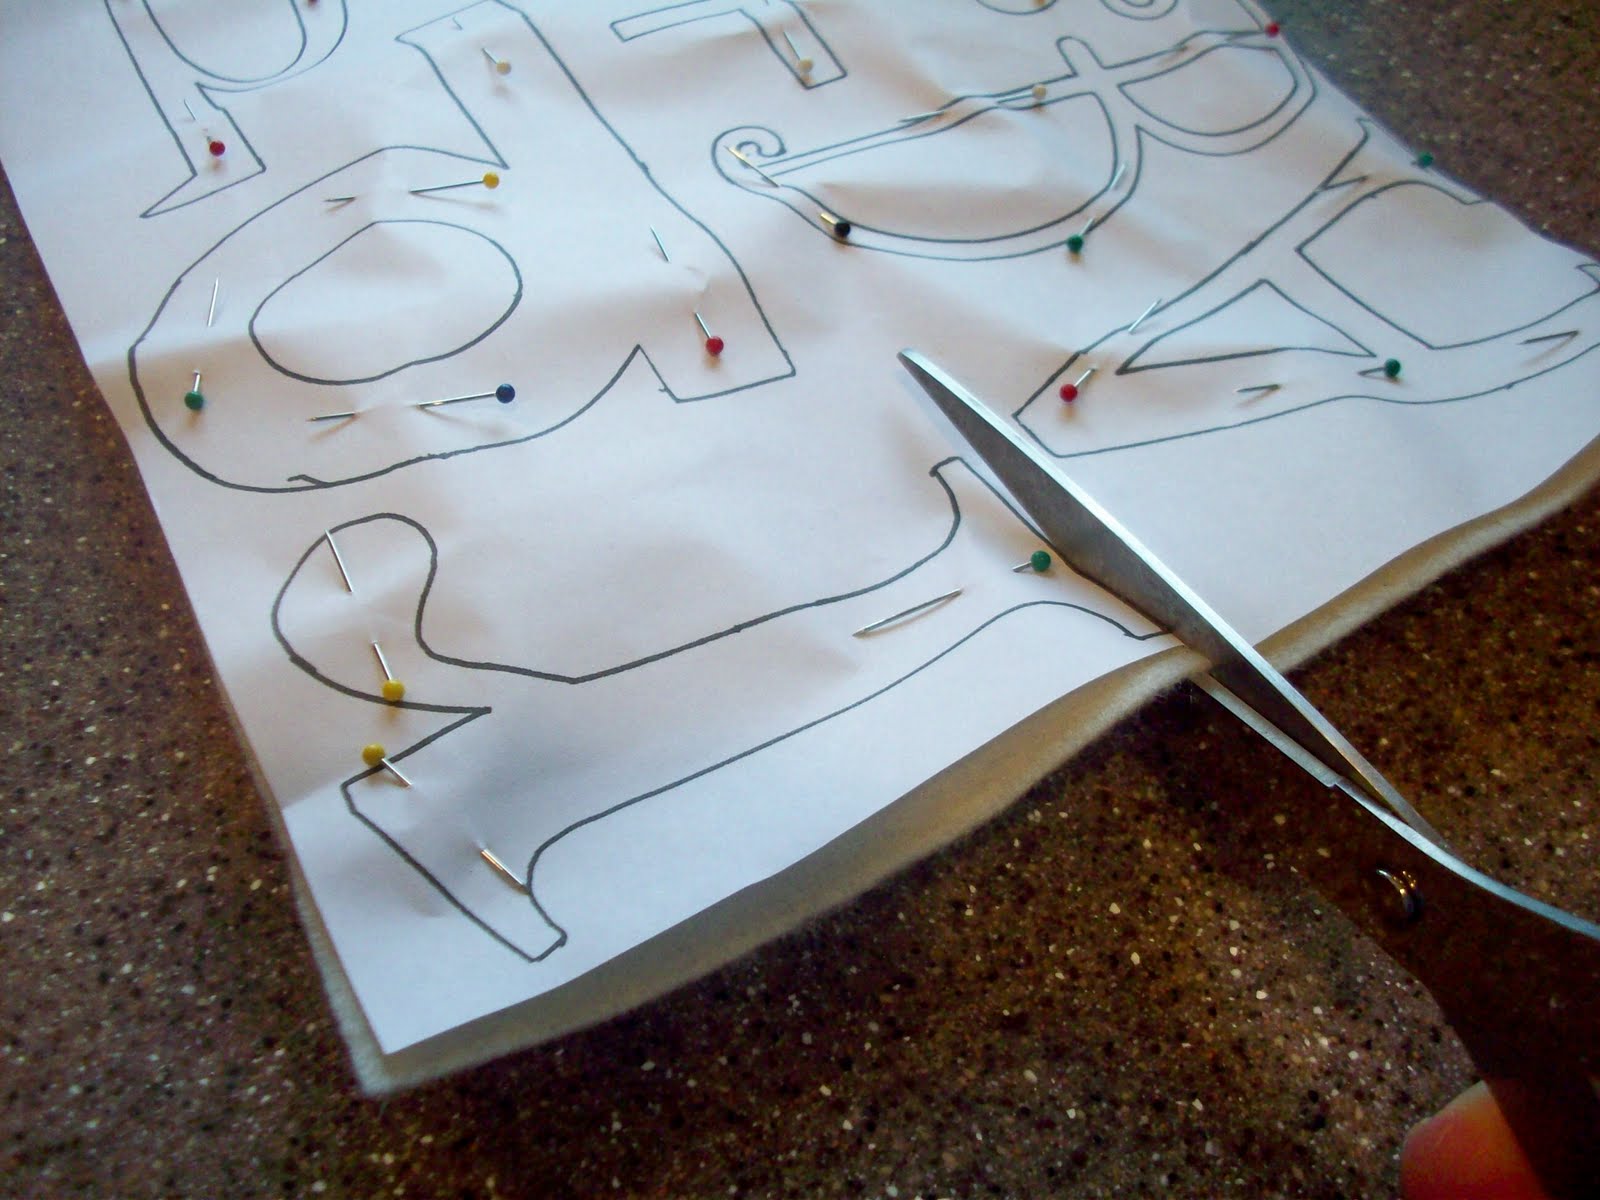
 Now it’s time to cut out your letters. type out the letters in your favorite font. {I made my templates years ago and I have no idea what fonts I used- I know I used a Cricut though, so I’m not going to provide templates, since I’m pretty sure they wouldn’t like that. – Sorry!} kevinandamanda.com have great fonts- I think smiley monster would look so great on a happy birthday banner. Print out the letters the size you want them (remember they will need to fit on your flags!). I would print out just the outline, to save ink- but I’m cheap that way. Then, take your paper and pin, pin, pin it to the felt you are using for the letters (in my case, cream).
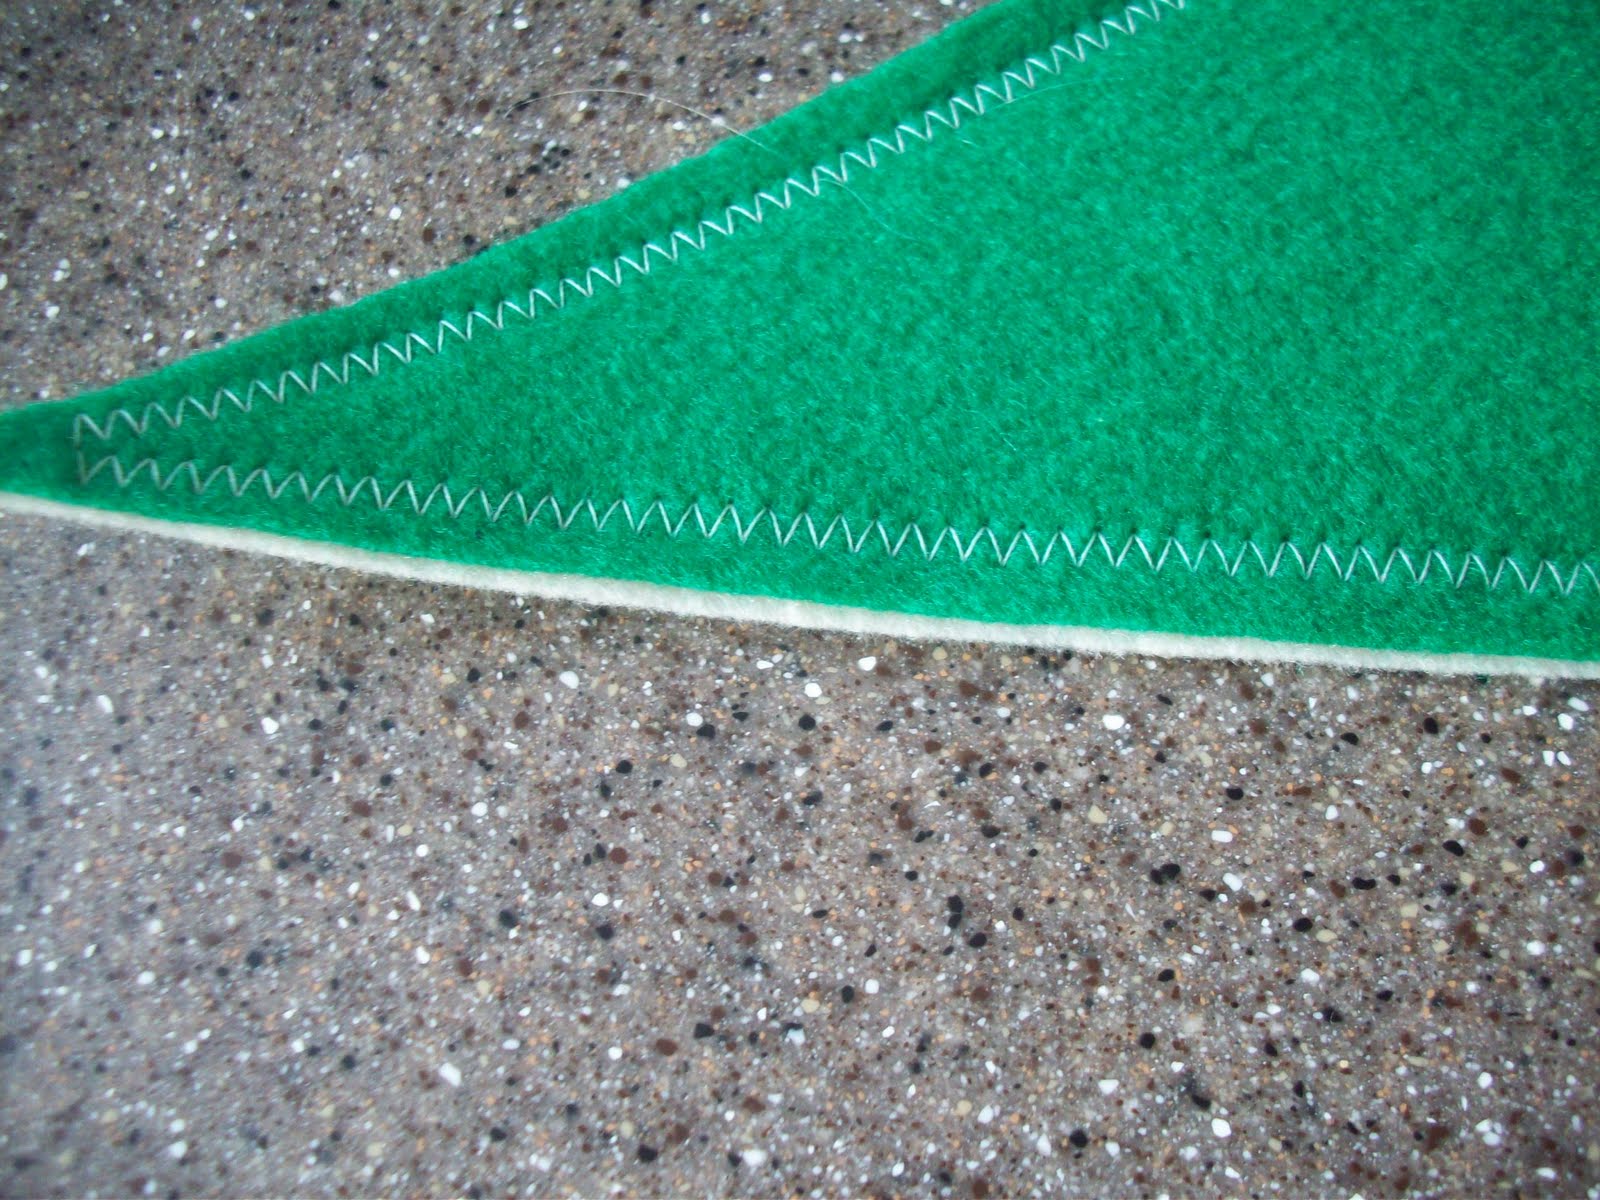
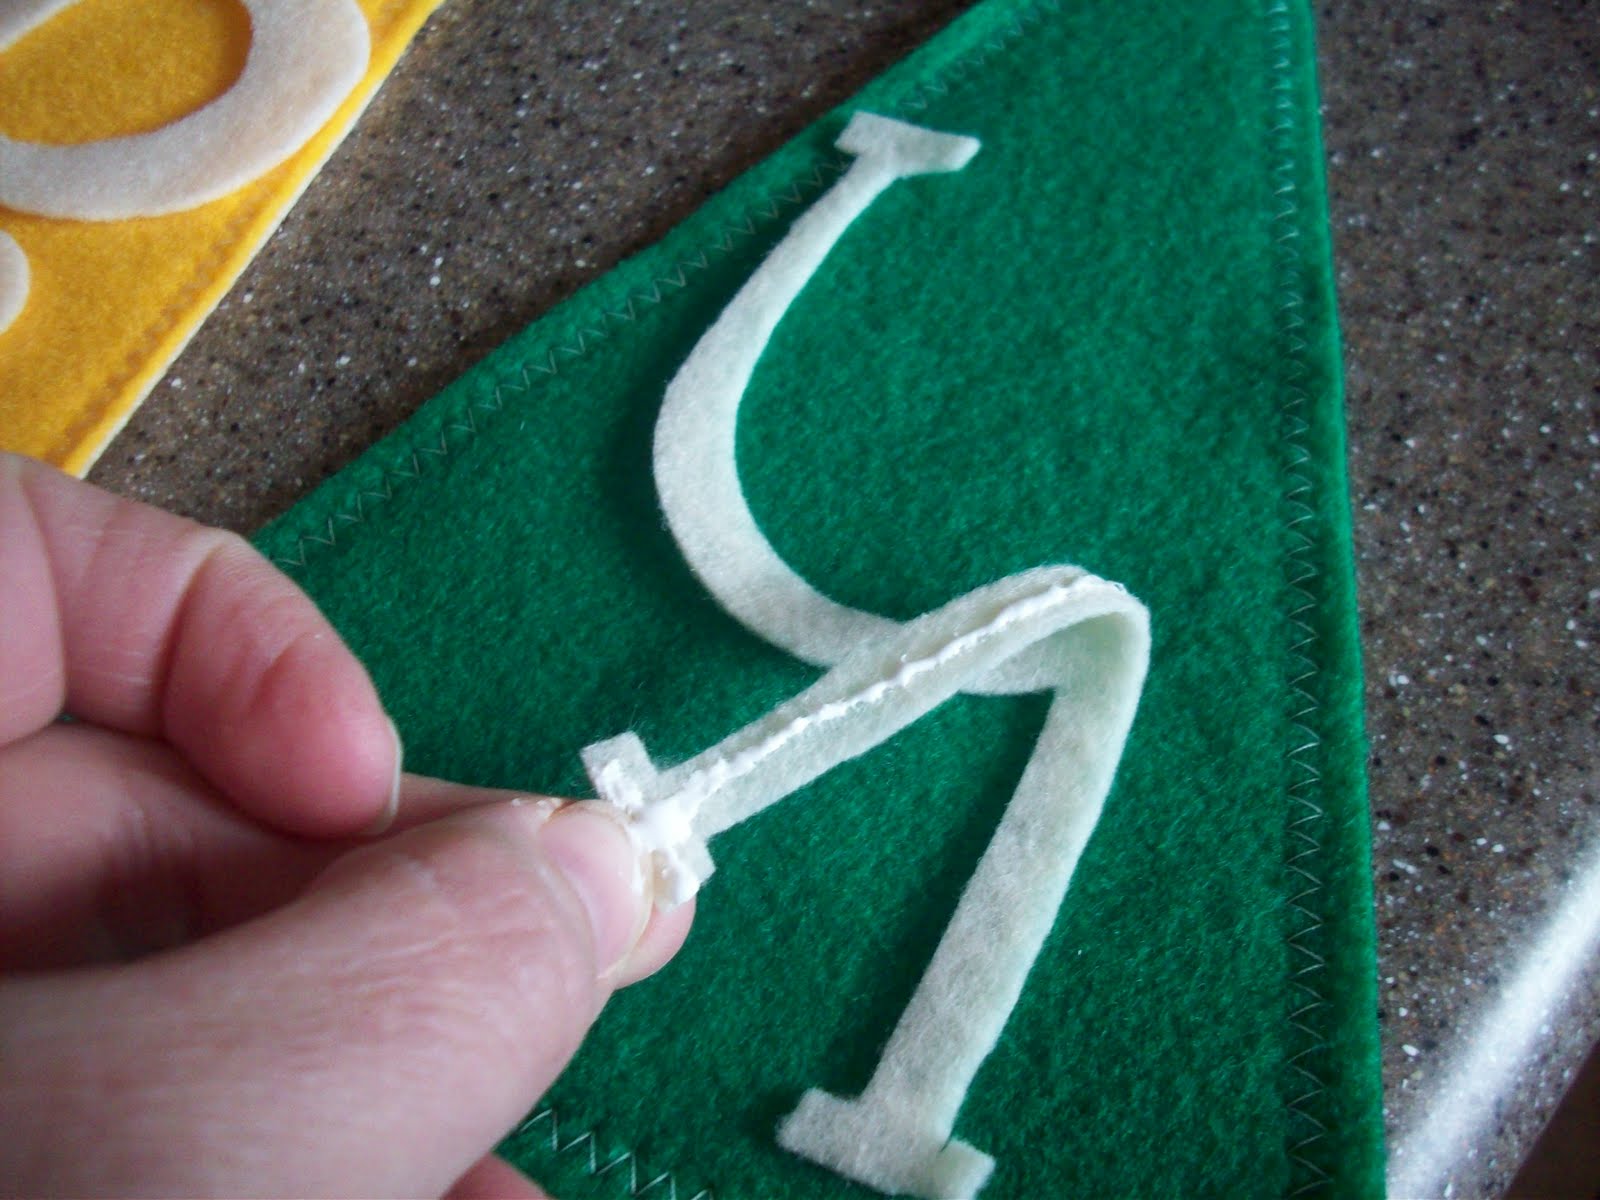
 Now take your scissors and cut out on the lines. Make sure the felt doesn’t fold up under your scissors-especially little edges or curls- they’ll get cut off. (I’ve done it so many times, I’ve lost track) I use cheap IKEA kitchen scissors because I don’t want my nice fabric scissors to get dull from cutting paper.
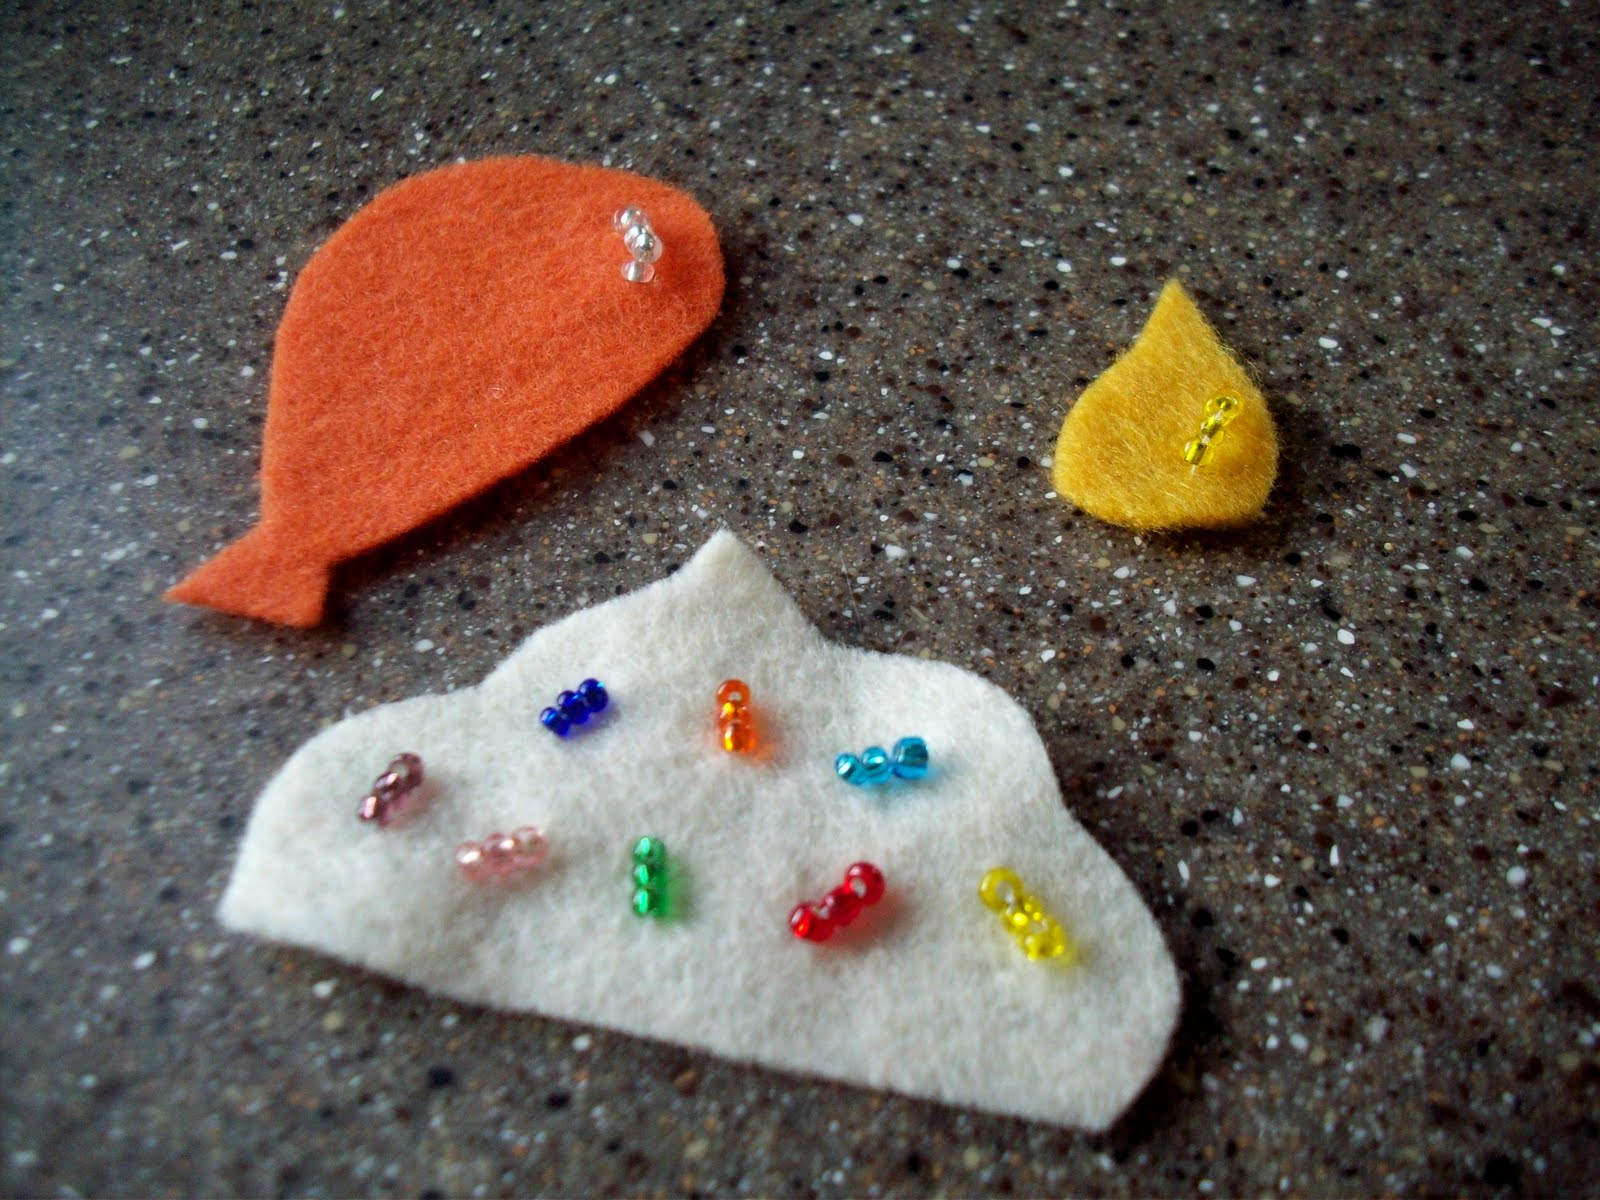
Next, take scraps of different colors of felt and cut out your embellishment pieces. Add any other decorations you would like. I use seed beads to add just a little sparkle to mine- I’ve also used scrapbooking brads. If you are interested in the template for the embellishments I use, either leave me a comment on this post, or send me an e-mail (address on the right of the blog) and I will get it to you.
 Arrange the flags in your desired color pattern. Place the letters on the flags in order and glue them down. I just use tacky glue- it’s cheap and works great! Tip: leave the letters in place on the flag and just lift up pieces at a time to add glue to- if you try to do the whole letter at once, it’s floppy and hard to place correctly. Even though the glue does dry clear- it leaves hard spots on the flags that are noticeable if you have to move the letters around. Once all the letters are in place, glue the embellishments down.
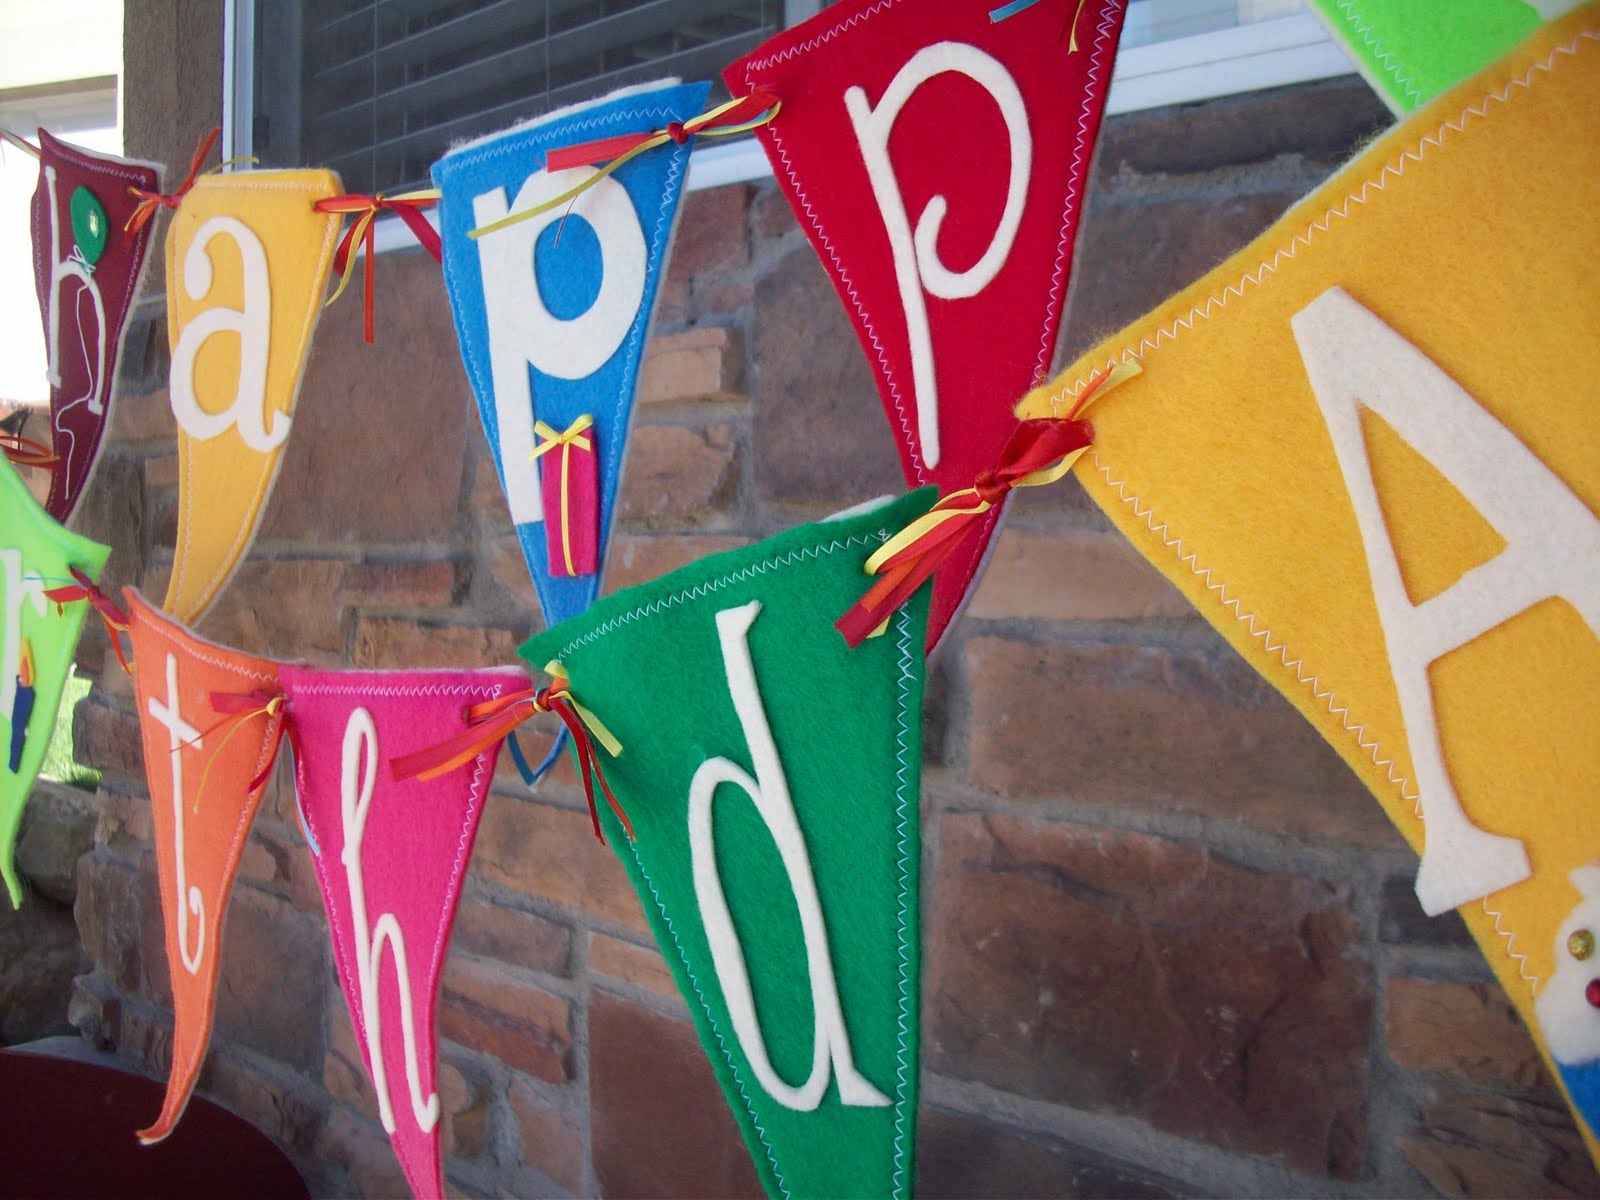
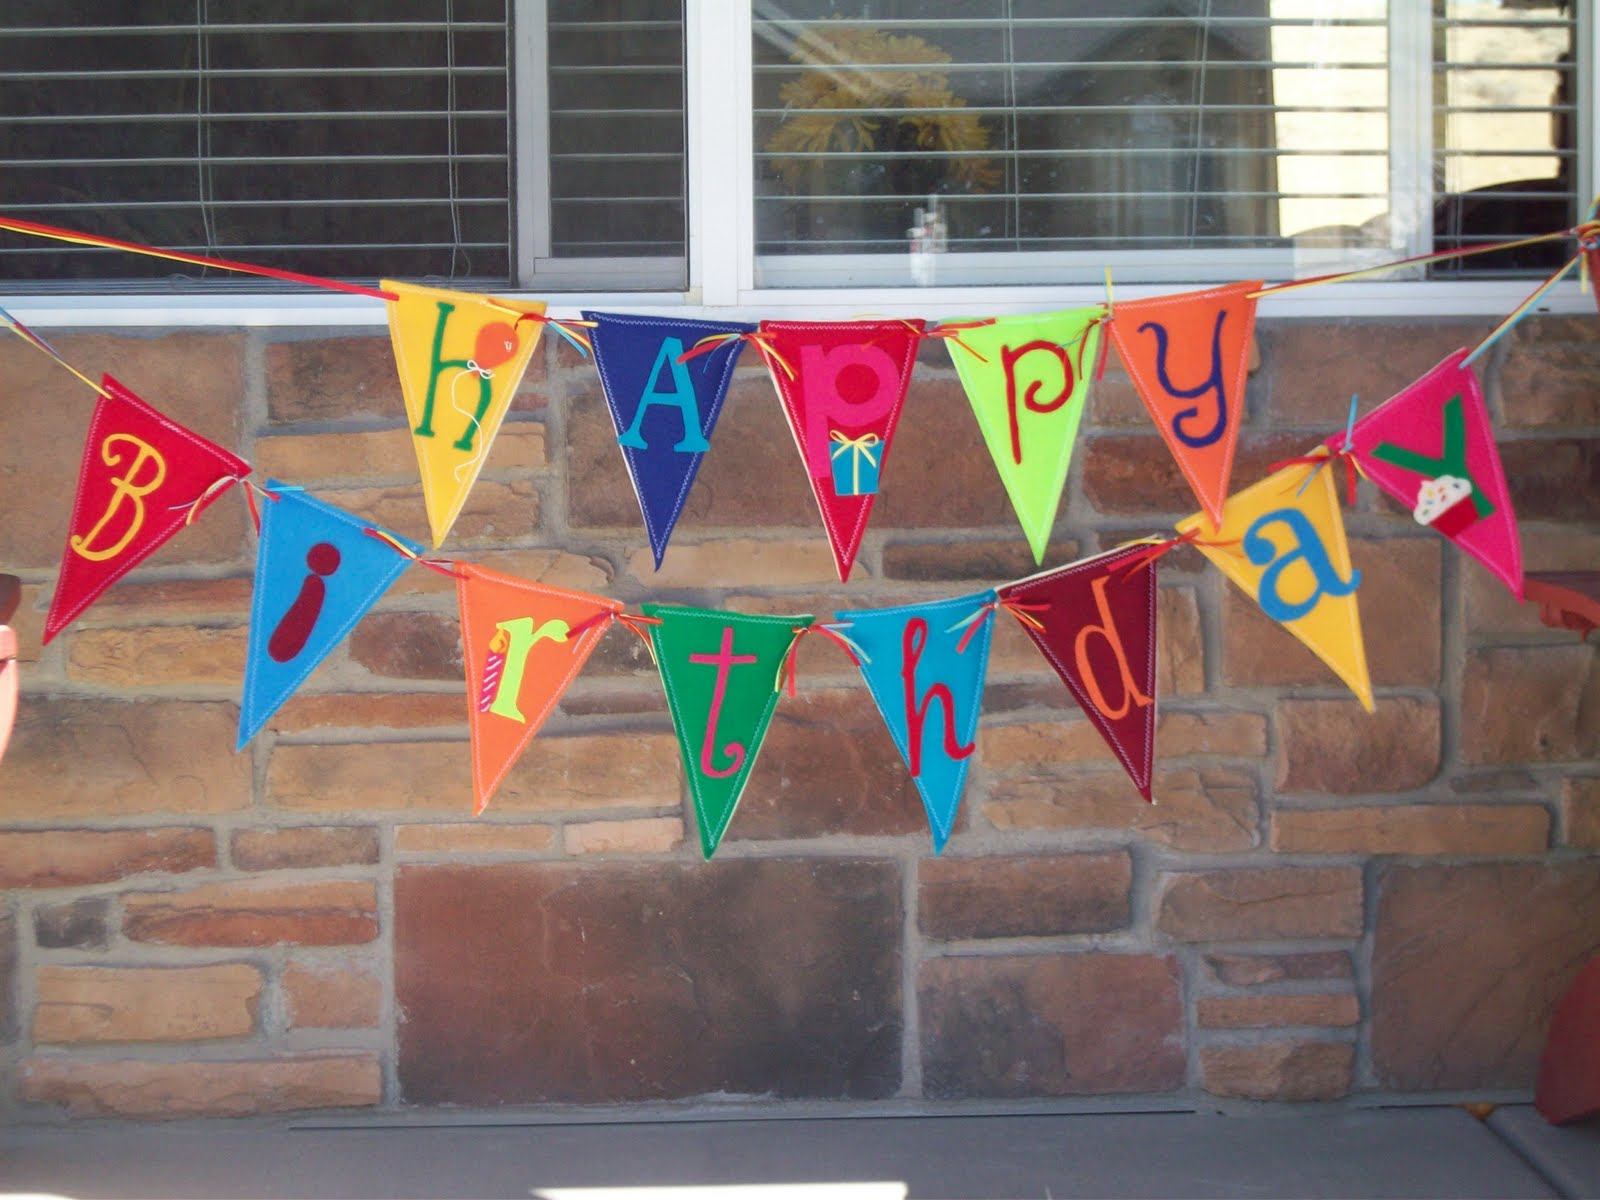 Here’s the whole banner {this is one I made a long time ago- I used different colors for the letters for a different look- usually I use the same color for all the letters}. I tried to keep the tutorial short, but if you have any questions, PLEASE ask it in the comments and I’ll make sure to answer it! If you make one of these I’d love to see it- and even feature it over here on my blog!
XOXO,
linking up to Tidy Mom’s I’m Lovin’ It Friday! and Tatertots and Jello Weekend Wrap up party


Leanne
January 27, 2011 at 3:37 amThat's so cute Amy. Maybe one day I'll try this when I graduate to sewing with fabric instead of paper. LOL
Gwen @ Gwenny Penny
January 27, 2011 at 2:30 pmGreat tutorial, Amy! I love the tip on gluing the letters… never thought of that. I like your template idea for the holes, too. Too late for me to throw one together for my youngest's 1st birthday party this weekend, but maybe I can get one made for my oldest this summer.
So you're listing in your Etsy shop soon, huh?! Exciting!!!
Wendy
January 27, 2011 at 3:13 pmThis is a great project! Thanks for sharing, it's really generous of you to share a project you're then going to sell and saying you don't mind other people selling from your patterns – you don't find much of that around!
Samantha
January 27, 2011 at 6:42 pmNice project, Amy! I didn't realize you have an Etsy shop, I'll check it out 🙂
Kristen @ ladybug-blessings.com
January 28, 2011 at 3:32 amthis is such an adorable banner! I love it! If you ever have a chance I'd love for you to link up to Handmade Tuesdays @ Ladybug Blessings. http://www.ladybug-blessings.com oh & p.s come enter my giveaway for an inspirational dog print 🙂
[email protected]
January 28, 2011 at 2:30 pmHey, you may have received one already but I'm giving you a Stylish blogger award 🙂
http://sweetpeaandjojo.blogspot.com/2011/01/winner-and-award.html
Something Wilde
January 28, 2011 at 5:21 pmHow cute – I love how sturdy it looks. Awesome!
Anonymous
January 28, 2011 at 7:59 pmHi! I’m your newest follower. Please stop by and follow back when you have a chance. You can also add your blog to our Blog Hop! Have a Sweet Friday.
http://www.AMommysSweetBlogDesign.com
http://www.MommysReviewsandGiveaways.com
Megan
January 30, 2011 at 3:34 pmI LOVE me some felt! It goes together so easily and is available in so many wonderful colors. Great banner!
Tammy @ she wears flowers
April 7, 2011 at 3:03 amI love this banner more than any I have ever seen (or made!)–I'll be linking tomorrow on my blog. Please stop by! 😉
Louisa
April 9, 2011 at 8:33 amI love your banner! I love your embellishments! What fun!
rads
April 9, 2011 at 8:33 amhi Amy,
thank you for the tutorial..i would love to get the embellishment templates. i might make this for my daughter's first birthday.
Auntie Lolo
April 12, 2011 at 7:03 pmI love this! I just featured it on my blog. Thanks!
Lois
http://www.auntielolocrafts.blogspot.com