This post is part of Nancy’s Notions Holiday Blogger Gift Program.

I love the idea of the Jelly Roll Rugs I have seen popping up on the internet and decided I wanted to make something using that method. The first project I made was this gorgeous Jelly Roll Pillow! I absolutely love the texture and feel of this substantial pillow. In this tutorial I will teach you how you can make one of your own. These would be wonderful for watching movies, propping up in bed or just lounging around.
You can follow along in the video, or the directions can be found lower in the post.
These directions are for a 26″ pillow form. If you want to make a smaller pillow, reduce the length of the strips to 1″ longer than the width of your pillow form. You will also need fewer strips.
Supplies:
1 roll of 2 1/2″ precut strips- I am using a Rolie Polie of Wild Bouquet by Citrus and Mint Designs for Riley Blake
2 rolls of 2 1/2″ Bosal batting strips (you will not use the entire second roll)
fabric for back of pillow: 1 yard
26″ pillow form
Assembly:
Cut your fabric strips into 27″ lengths, you will need approx. 40 strips. If you would like, take some of the leftover strip lengths and sew them together on the bias to make scrappy strips to add to your pillow.
Cut the Bosal batting roll into 27″ lengths as well.
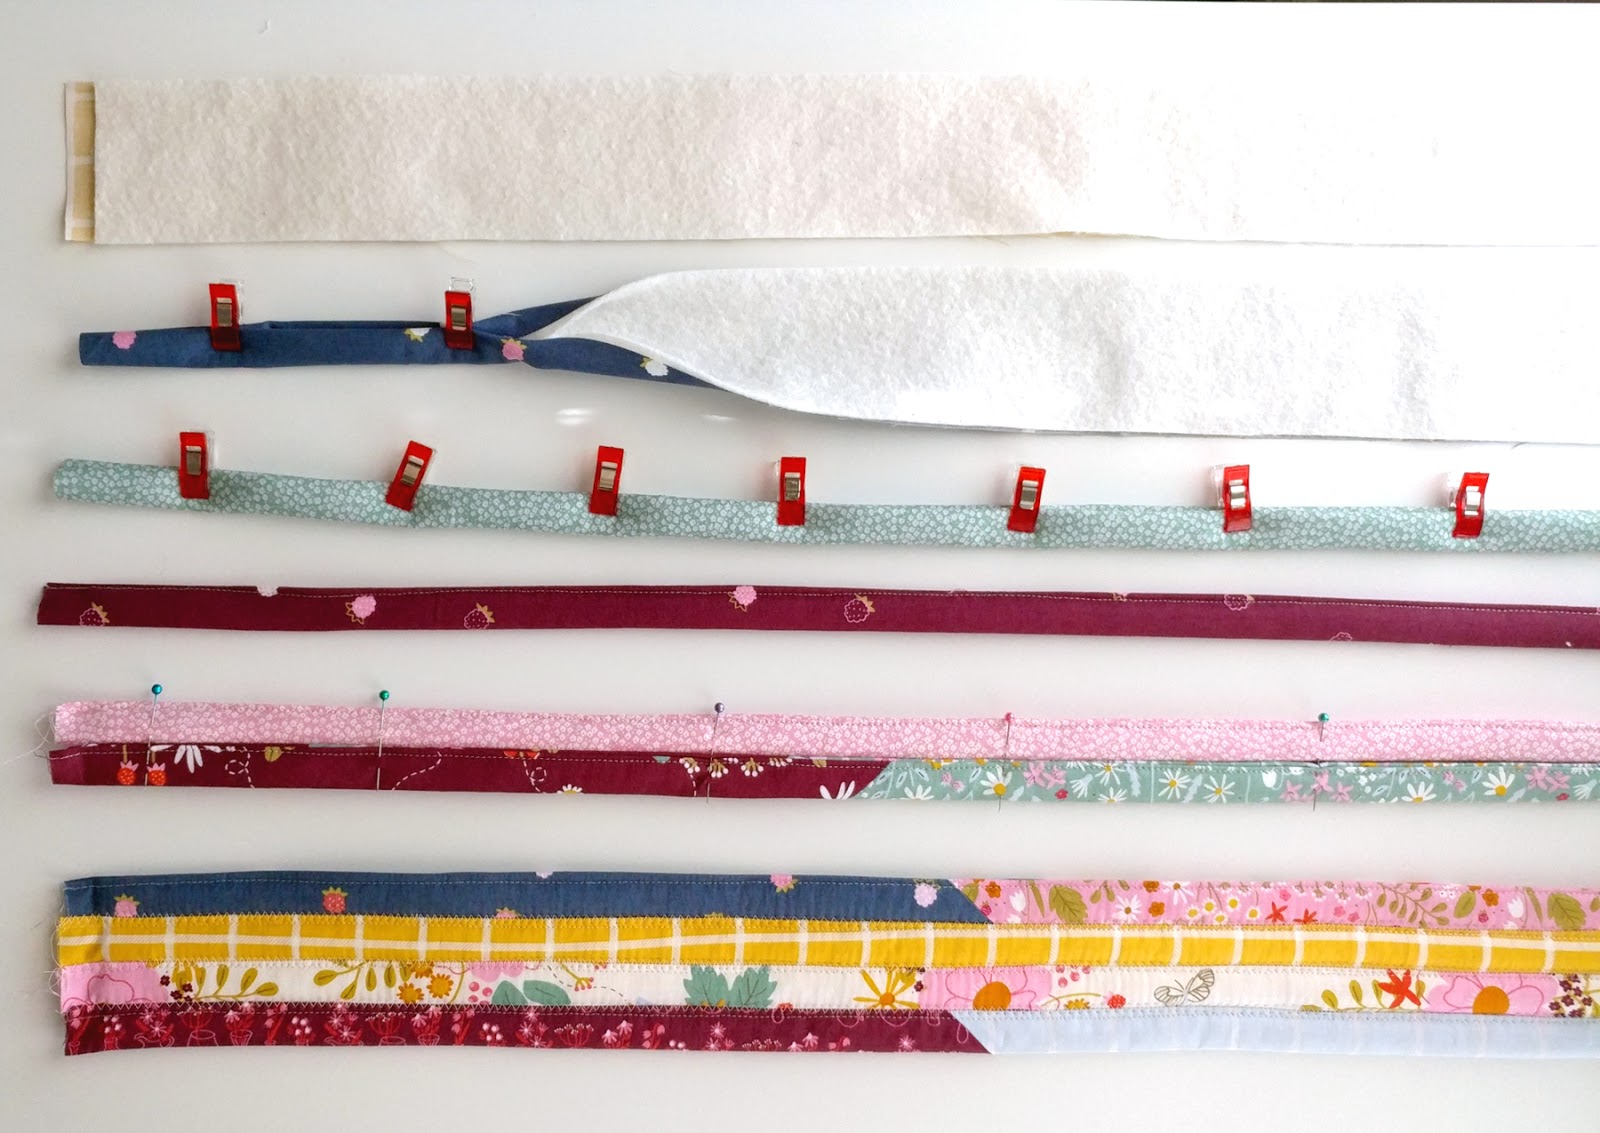
Once all the strips are cut, place a strip of fabric wrong side up. Place a strip of batting on top.
Bring the long sides into the center of the strip, and then fold the strip in half.
Use wonder clips or biding clips to hold the folded strip together.
Sew along the side with 2 folds to hold the strip closed. Repeat for all the strips. If desired- arrange your strips in your preferred order. I just grabbed my strips as I went, I wanted a more organic scrappy feel.
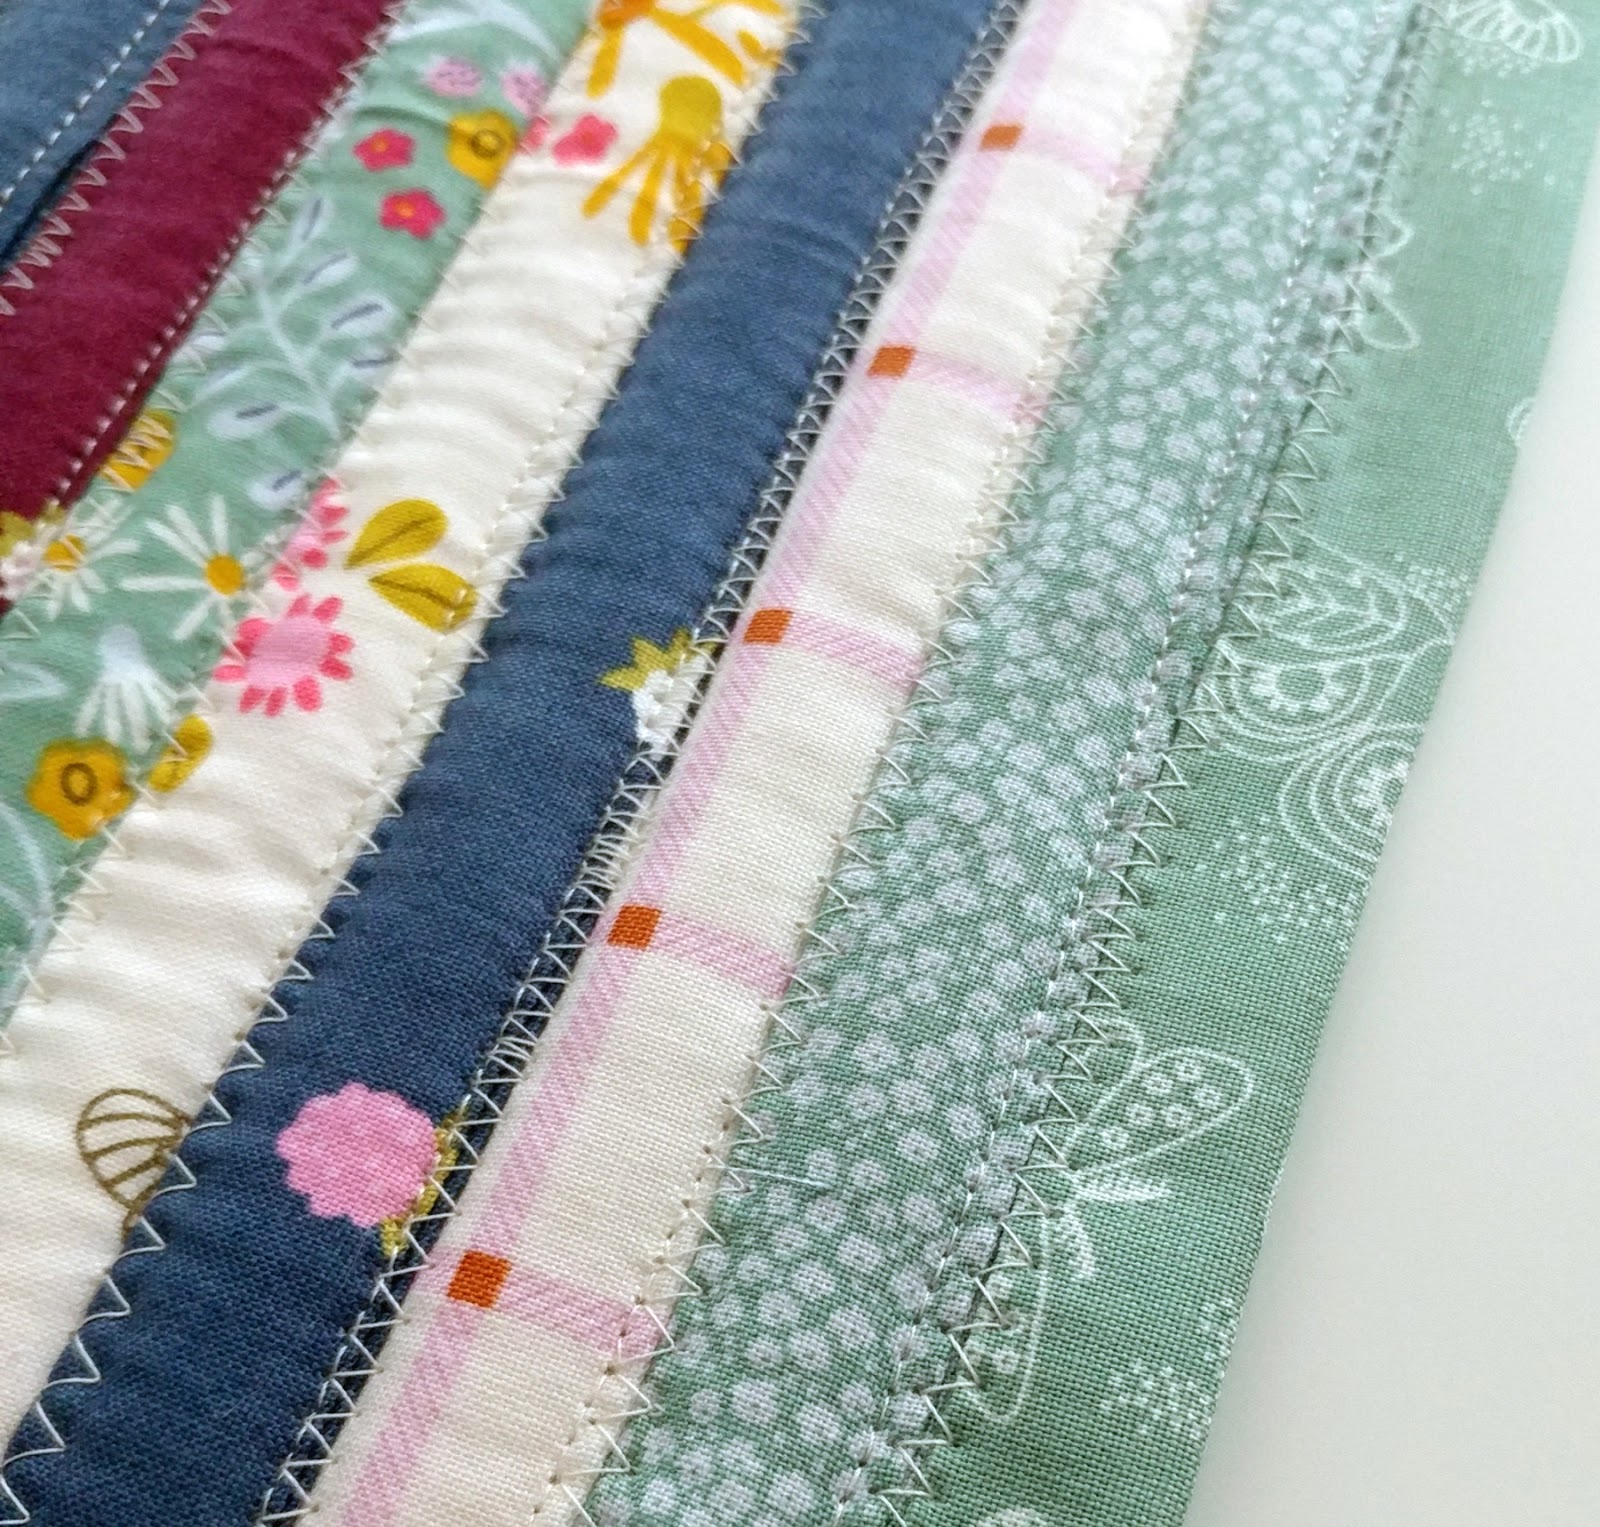
Place 2 strips next to each other- I like to place the sewn edge of one strip next to the folded edge of the second strip. Pin in place.
Change your stitch on your machine to a wide zig zag stitch. Center your stitch so it catches both strips of fabric. * I like to chain stitch at this point creating a few different groups of strips I am adding onto. Just make sure you don’t create a group that is too big to sit flat on your machine as you sew them together.
Once your piece is 26″ wide, take your pillow front to your cutting mat. Square up the pillow front to 26″ square.
Make a back for your pillow using your favorite method. Sew pillow back onto pillow front- I like to use a 1/2″ seam allowance to create a firmer pillow. If you like a softer pillow, use a 1/4″ seam allowance.
Turn your pillow cover right side out and press the seams.
Insert your pillow form and Enjoy!!
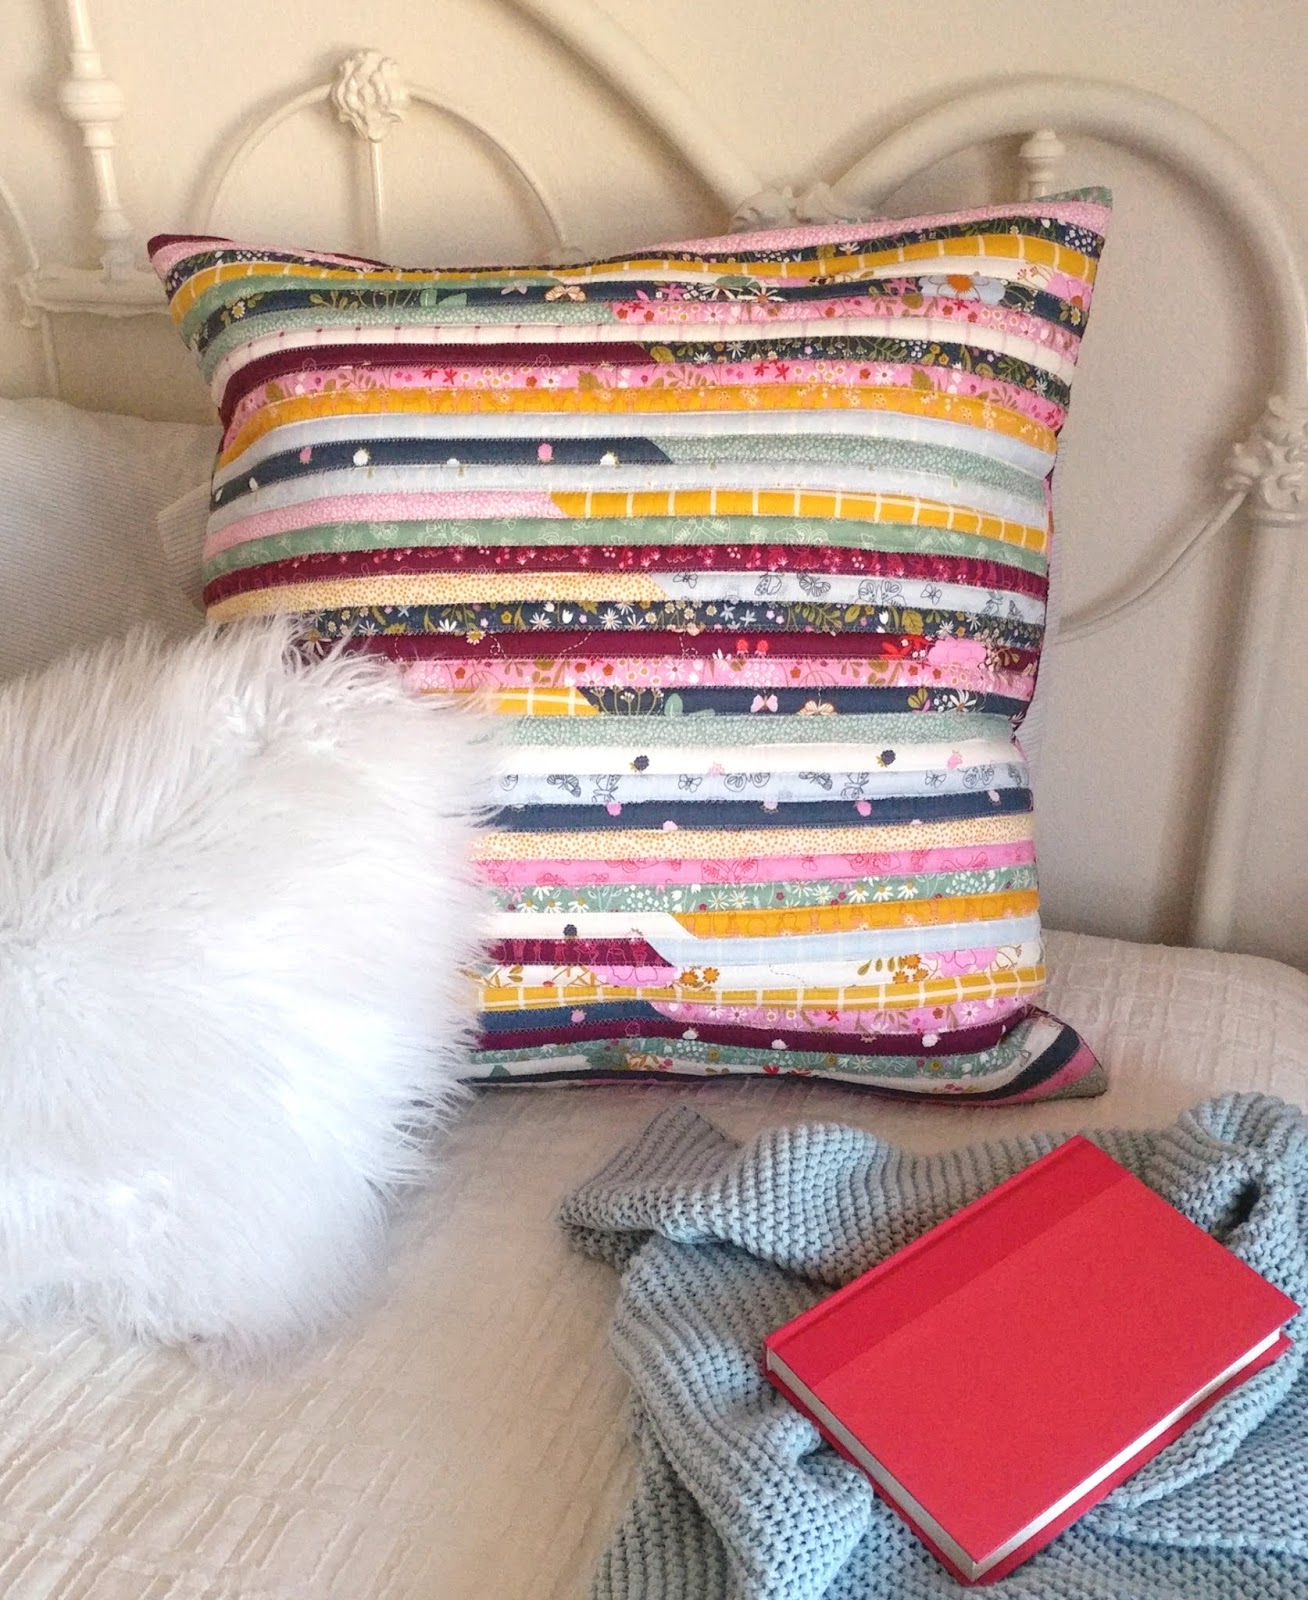
The resulting pillow is soft and luxurious with an incredible feel! My children are already fighting over who gets to use this jelly roll pillow. I think I will have to make one for each of them!
I’d love to see your beautiful Jelly Roll Pillow – so please tag me on Facebook or Instagram if you share, or feel free to e-mail me a picture, I just love seeing your work!
xoxo,
Amy


Patti
October 19, 2018 at 8:37 pmI love your pillow! I'm planning to make a rug soon, I have all of the supplies so I just need to start! I'd like to make some of your pillows. If I bought 3 rolls of the batting strips would it be enough to make 2 pillows?
itsthebaileys
October 20, 2018 at 1:50 amFantastic idea for Christmas presents! Great tutorial! Now to get sewing….
Amy at Ameroonie Designs
October 24, 2018 at 4:23 amPatti- 3 rolls of strips should be plenty to make 2 pillows!