The fabric and Chunky Thread were provided to me by Riley Blake Designs. The design and opinions are all my own.
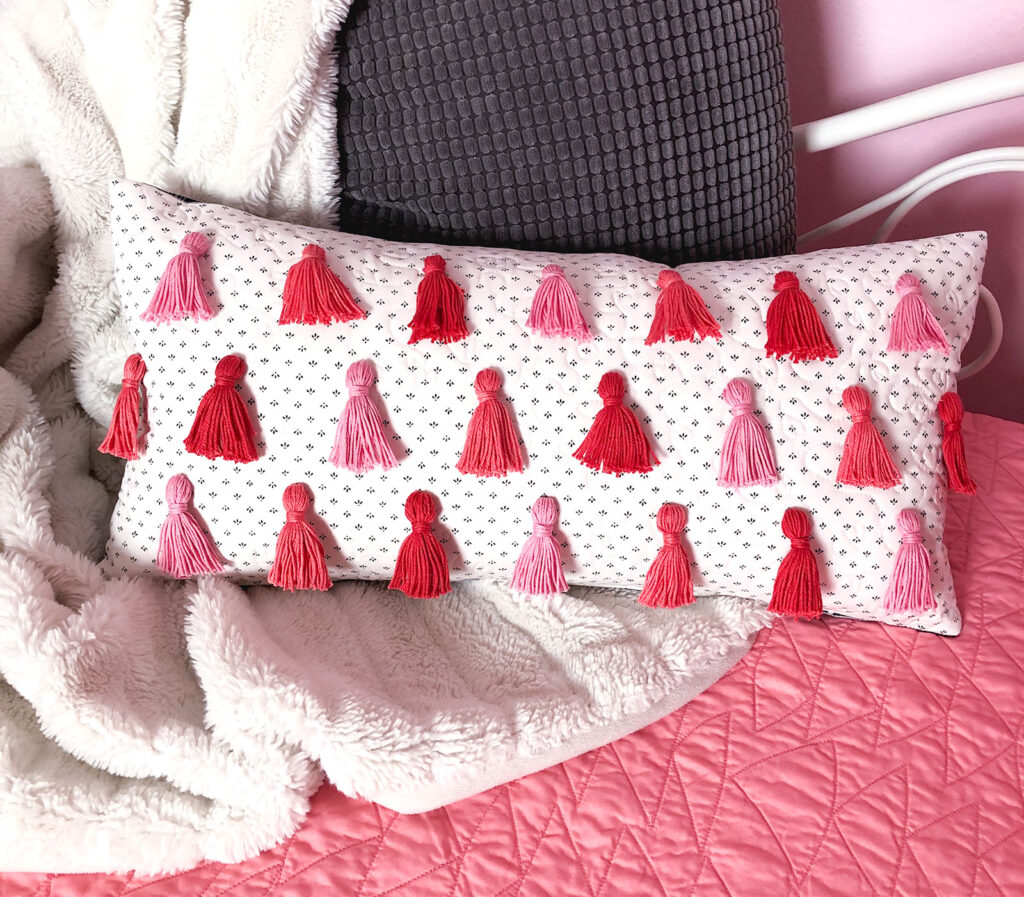
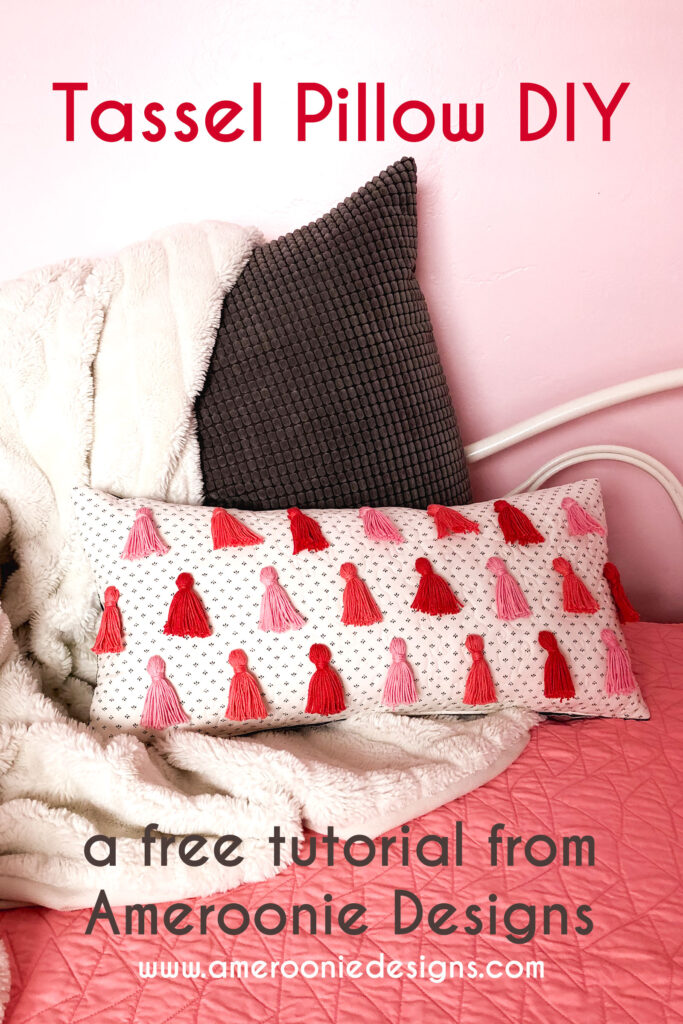
Chunky texture, colors of your choosing, a delightful and unique accent. All of these can be yours simply by following this Tassel Pillow DIY! The tassels are quick to make and are secured to the pillow so you don’t have to worry about strings pulling loose. Create a seasonal statement piece, or match the color way to your home decor, because it’s DIY you get to make it just how you like!
Tassel Pillow DIY
Read all the way through the Tassel Pillow DIY instructions before beginning.
Supplies:
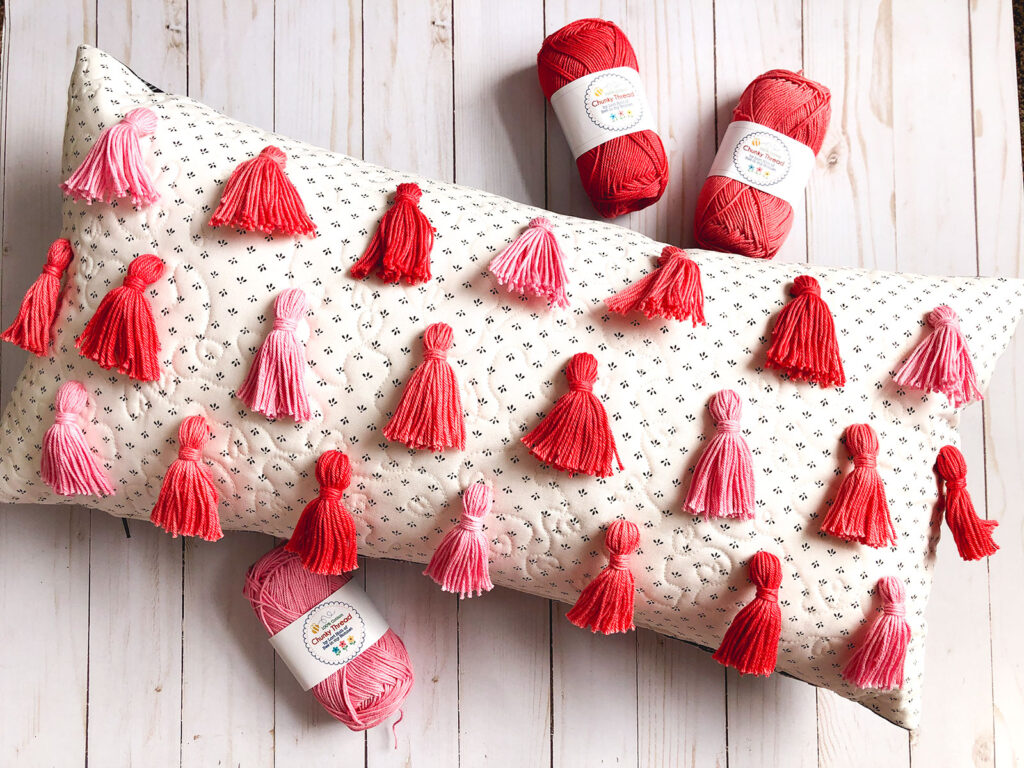
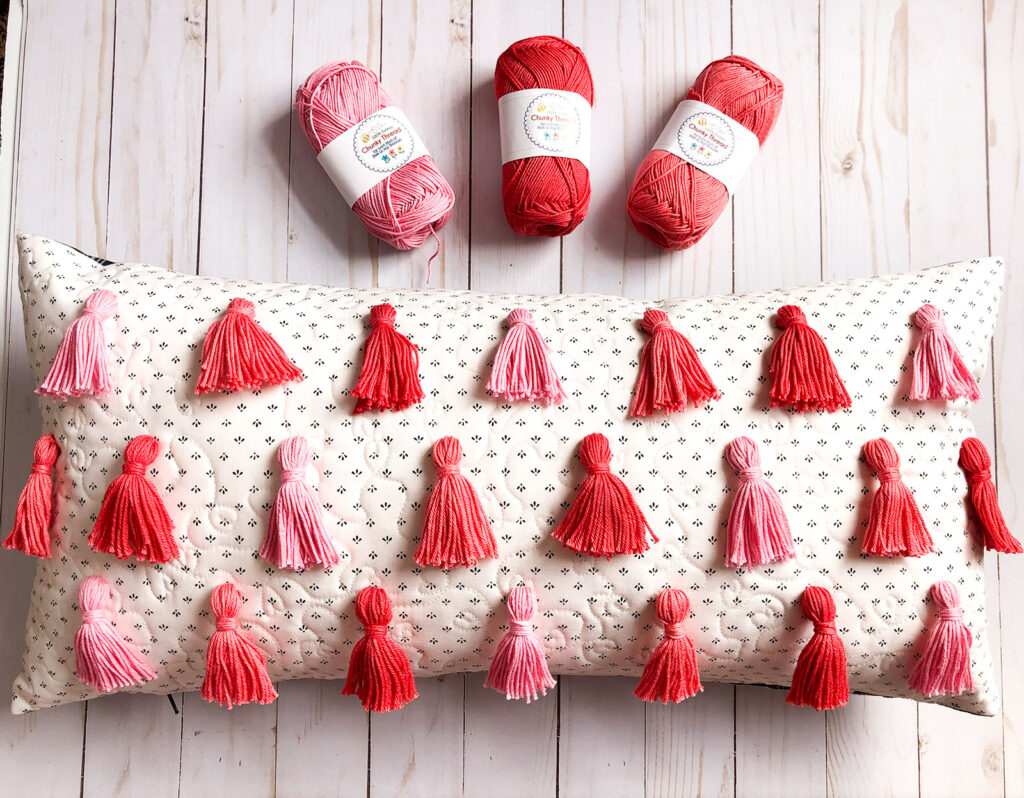
- Start with your pillow form. The one I am using is a 12″ X 24″ pillow.
- Fabric for pillow front and back*. This will need to be the size of your pillow form, plus 1″- so in my case, two 13″ X 25″ pieces. *This might be different if you are using an alternative closure for your pillow such as an envelope closure.
- Zipper- no shorter than 5″ less than the size of the pillow form- so in my case, at least a 20″ zipper
- Chunky Thread or yarn in the tassel colors you would like.
- Batting or fusible fleece for the pillow front
- Frixon or water soluble pen for marking tassel locations
Prepare Pillow front:
Begin by quilting the pillow front fabric to the batting or add the fusible fleece to the front fabric. This will add some stability and structure to the pillow front to support the tassels. Alternatively, use a canvas or home decorator weight fabric as your pillow front.
Mark Tassel placement:
Determine how you would like your tassels to fit on your pillow front. I decided to create tassels that would measure 2 1/2″ long and I wanted 3 rows to fit on my pillow. I marked the first row 2 1/2″ down from the top. The first mark is 3 1/2″ from the edge and then mark every 3″ until you have marked places for the 7 tassels on this row. The second row is marked 2″ down from the first row. The first tassel will be placed 2″ from the edge and then mark every 3″ until you have 8 marks. The third row is a repeat of the first row, 2″ down from the second row.
If your pillow is a different shape, or if you are making your tassels smaller or longer, you may want to change up the spacing for the tassels. Keep in mind the length of your tassel and the curvature of your pillow form so you don’t place tassels where they might not be seen or lay as you would like them to. To play with the tassel layout, I used washi tape on my cutting mat to have a visual idea of where the tassels would be and how they would fit on my pillow front.
Tassel Instructions
Prepare Tassel
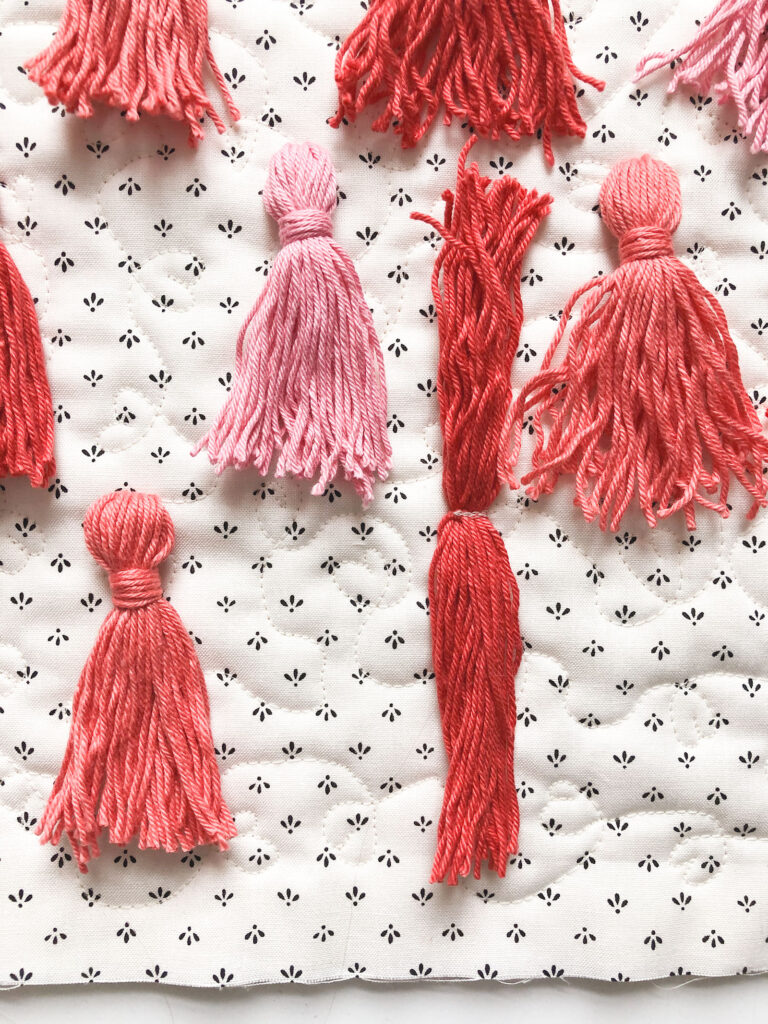
Begin making your tassels by wrapping the chunky thread approximately 25 times around the four fingers of one hand. Cut this loop open and then tie a length of thread around the center of your group of threads.
Next, place the center of your tassel (where the tie is) over your mark on the pillow front. At your sewing machine, stitch over this tie 3-4 times to secure all of the threads of the tassel to the pillow.
Create Tassel
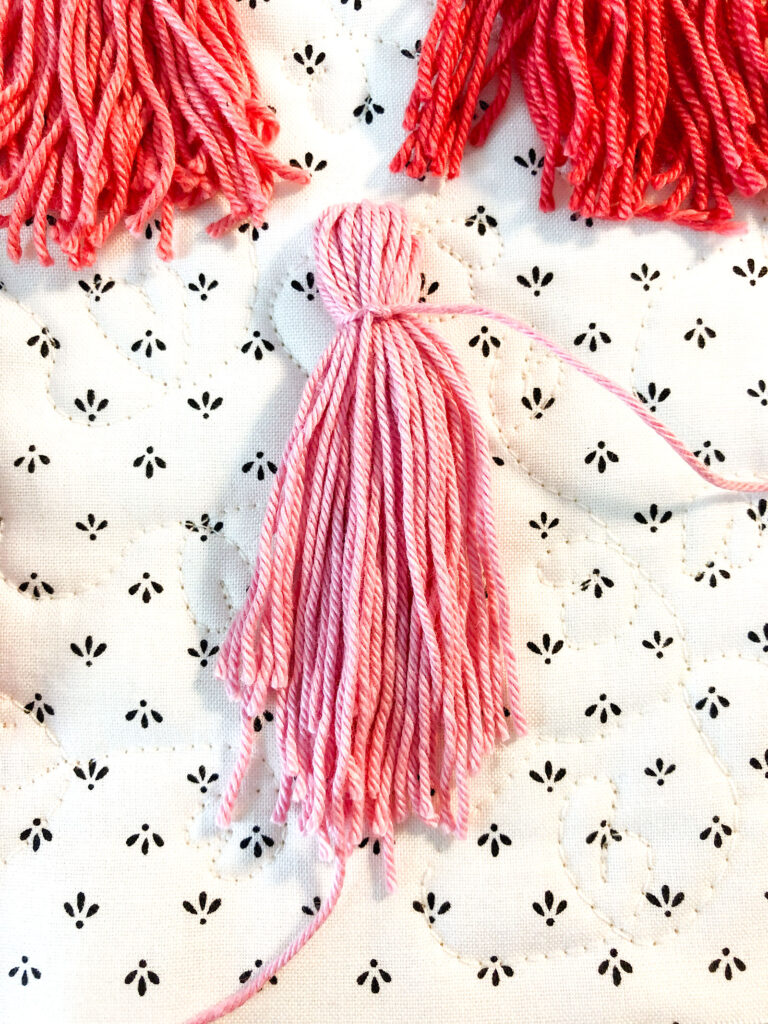
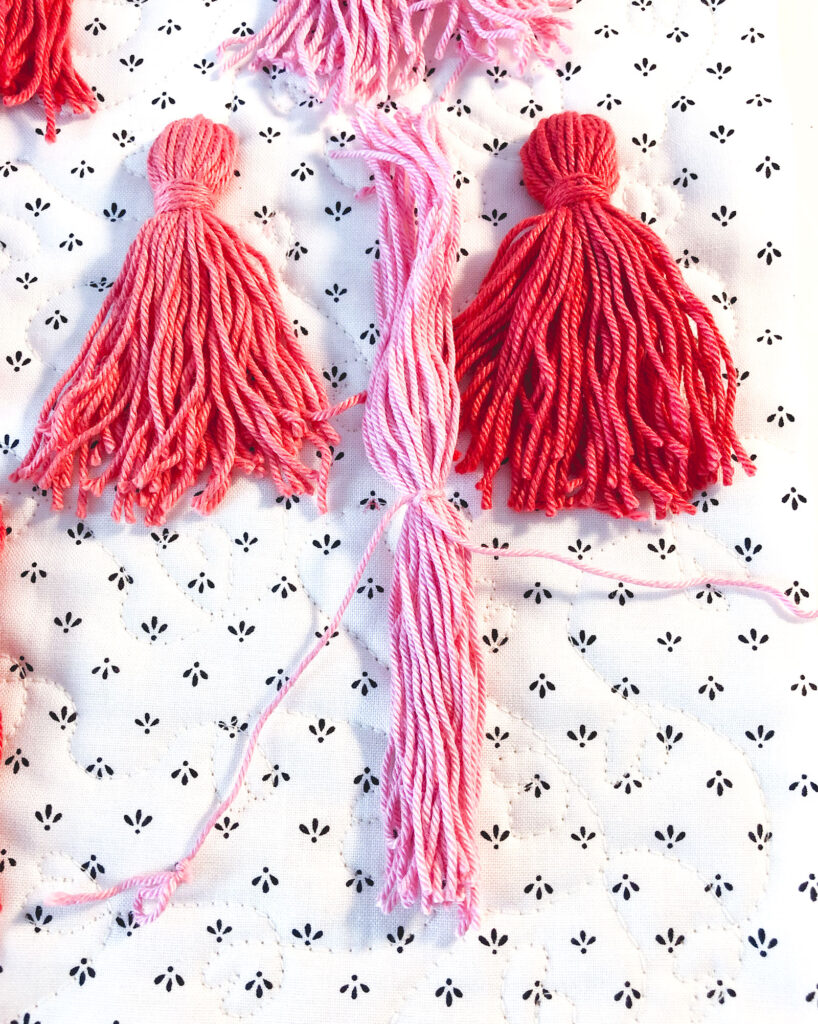
Straighten the threads of the tassel as best you can. Fold over the threads toward the bottom of the pillow. Then, take a 15″ piece of thread (approximately) and tie it around of the threads to create a head on your tassel. Next, wrap it around the threads to create a neck for your tassel, being sure to cover the knot you created to form the head.
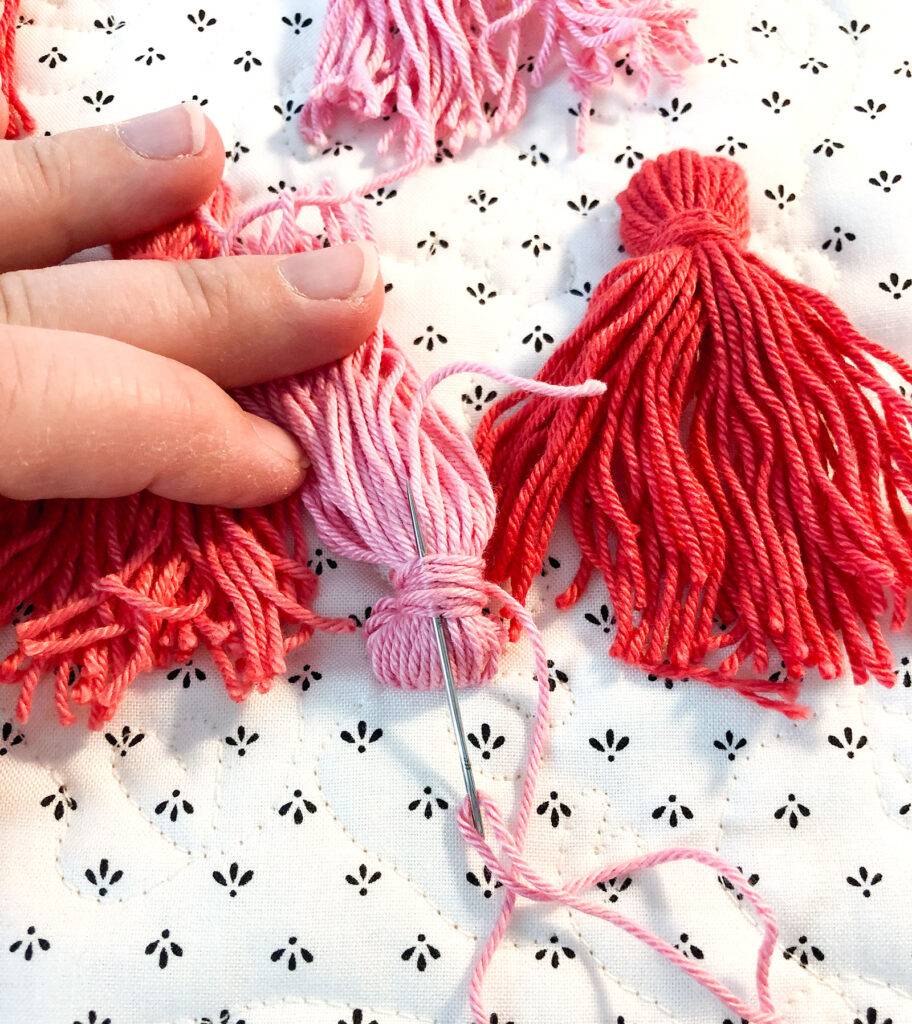
Thread a large-eyed needle with the remaining length of thread- DO NOT cut it off yet! Flip the tassel up toward the top of the pillow and push the needle through the neck of the tassel. Go back and forth 2-3 times to secure the thread making sure the thread goes toward the bottom of the tassel on the final pass. Stitch the thread through the middle of some of the threads of the neck to add a little extra security to the finished tassel.
Finishing your Tassel Pillow:
An additional step you may want to take is to take some regular thread and stitch the neck of your tassels to the pillow front to keep them in place on the pillow. I kind of liked the look of them loose for this pillow so I did not do this step.
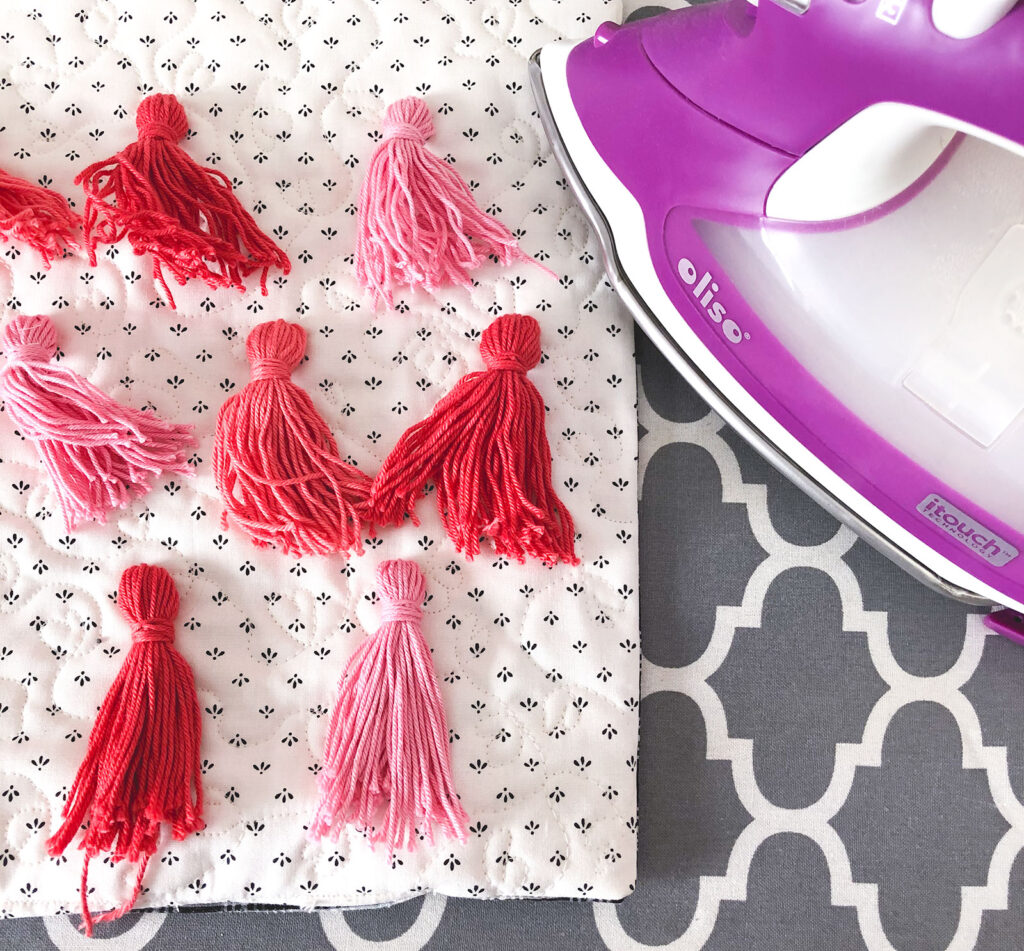
The final touch for your tassels is to steam them straight. Take the pillow front to your ironing board and set your iron to steam. One at a time, hold your iron over the tassel- DO NOT put the iron ON the tassel. Push your steam button on your iron to release a puff of steam on the threads. Put down the iron and use your fingers to straighten the threads. You may want to do this twice for the tassel, depending on how twisted the threads are. Allow the tassel to cool and dry before fluffing and trimming to your desired finished length.
Finish your pillow using your favorite method. I used my hidden seam zipper method for the back of this pillow. Use a 1/2″ seam allowance when you sew your pillow back to your pillow front. Just be careful that you don’t sew any tassels into your side seams.
Finally, insert your pillow form, fluff your pillow and step back and admire your work! This is always my favorite part of any project.
If you are looking for more pillow inspiration, you might love making this Rainbow Sunshine pillow/ mini quilt. Or, if you want more Valentine’s day inspired pillows, this Sending you Love pillow is a fun way to feature your favorite seasonal fabric.
If you have any questions or make a pillow using this Tassel Pillow DIY or one of my other tutorials, I would love to hear from you! Tag me or DM me on Facebook or Instagram- @Amerooniedesigns.
Happy Sewing Friends! xoxo, Amy
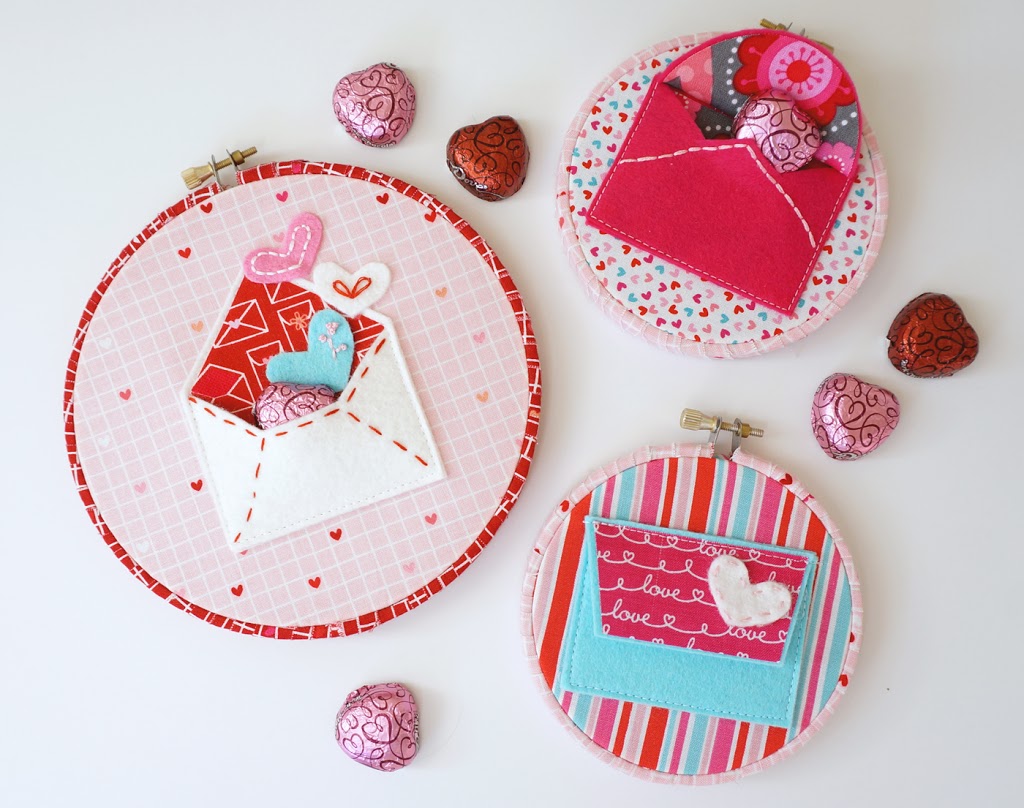


Valentine Fabric Envelope with HeatnBond Lite - Therm O Web
February 5, 2020 at 7:00 am[…] are looking for more Valentine projects to make for your home or loved ones, you might like this gorgeous Tassel Pillow, or these envelope […]