The fabric for this project was provided by Riley Blake Designs for my participation in the Ahoy Mermaids project tour. The project and opinions are my own.
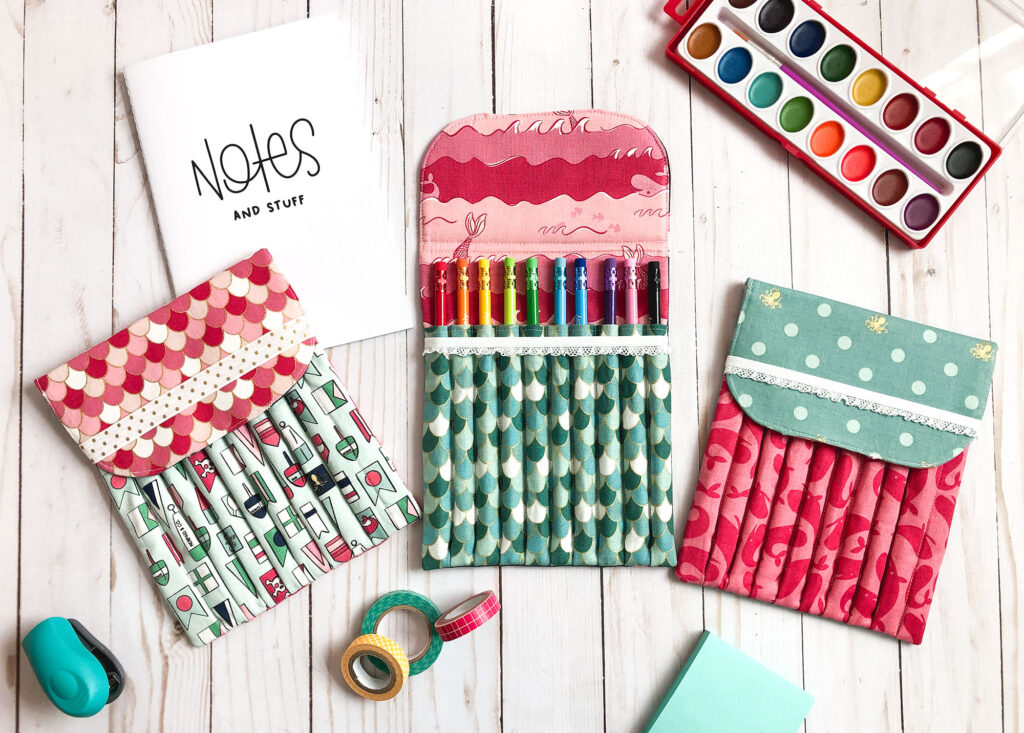
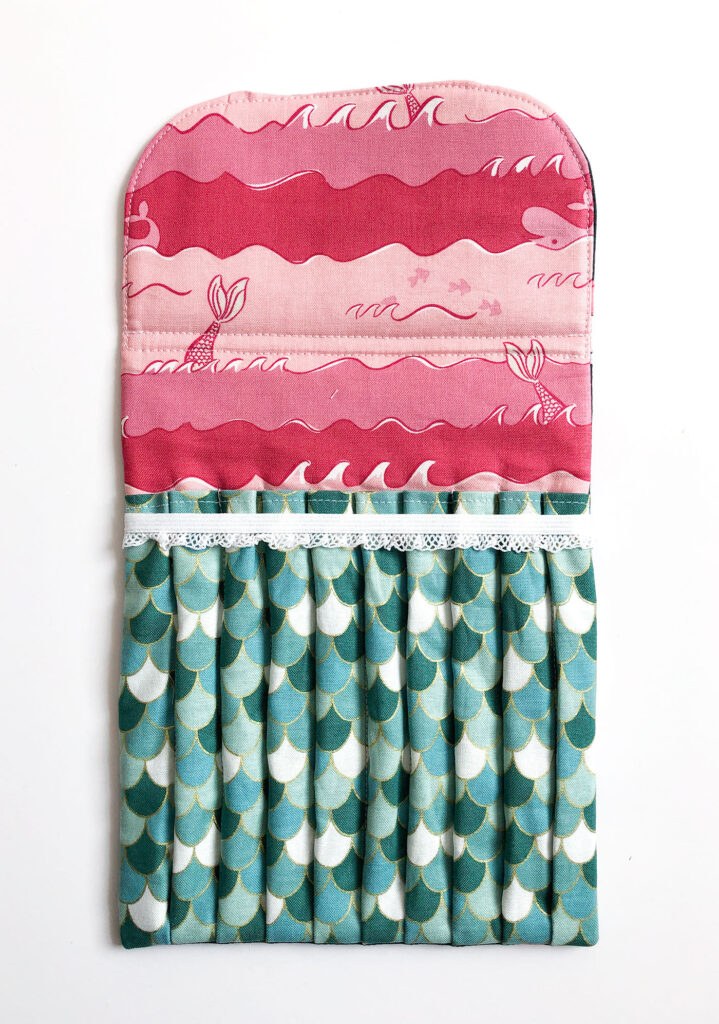
Keeping children occupied on car rides, on plane rides or in church is not for the faint of heart. Just when you think you have them cheerfully coloring– the ONE color they need has rolled out of reach. Or, at the most inopportune time, the entire rainbow clatters loudly to the floor. This beautiful colored pencil pouch will solve those annoying problems for you. Keep those pencils organized and within reach so creativity can flow- quietly- with this simple sewing tutorial.
Ahoy Mermaids Fabric
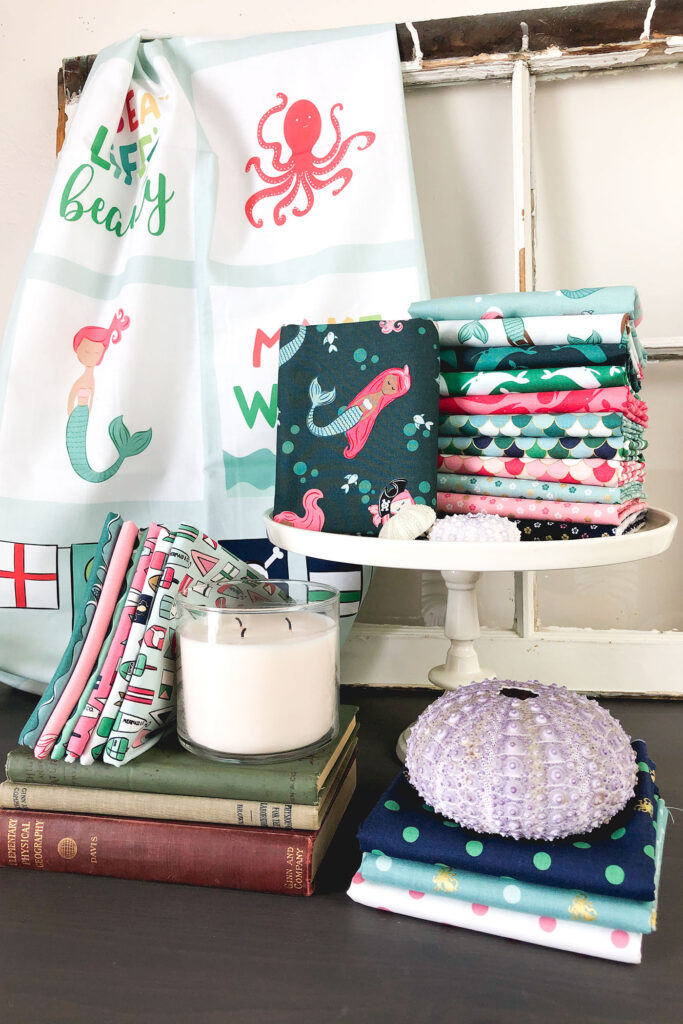
Ahoy Mermaids fabric is designed by Melissa Mortenson of The Polkadot Chair. It is a revision and update to her earlier mermaid fabric line. This one has such fun supporting prints in addition to the beautiful pirate mermaids in the main print. I love all the variety in the mermaid skin tones, the gold sparkle and the teal colorway of the line just makes me so happy! This fabric also has a darling panel that would make a quick and easy quilt!
A covered notebook would be so cute in this fun fabric and make a perfect companion to your Colored Pencil Pouch.
Colored Pencil Pouch Tutorial

Supplies:
- 2 fabric pieces for inside and outside- 7″ (W) X 12″ (H)- these can be two different fabrics, or the same fabric. Non directional fabric is best.
- 1 piece fabric- 9 1/2″ (W) X 12 1/2″ (H) for the pencil pockets.
- Medium weight interfacing- 1 piece 6 1/2″ (W) X 11 1/2″ (H)
- Fusible Fleece- 1 piece: 6 1/2″ (W) X 11 1/2″ (H)
- elastic- 7″ long
- heat or water soluble marking pen
- optional- free pattern piece for newsletter subscribers *note: you will need to confirm your subscription to the newsletter before the template will be sent. Check spam or junk folders.
Preparation:
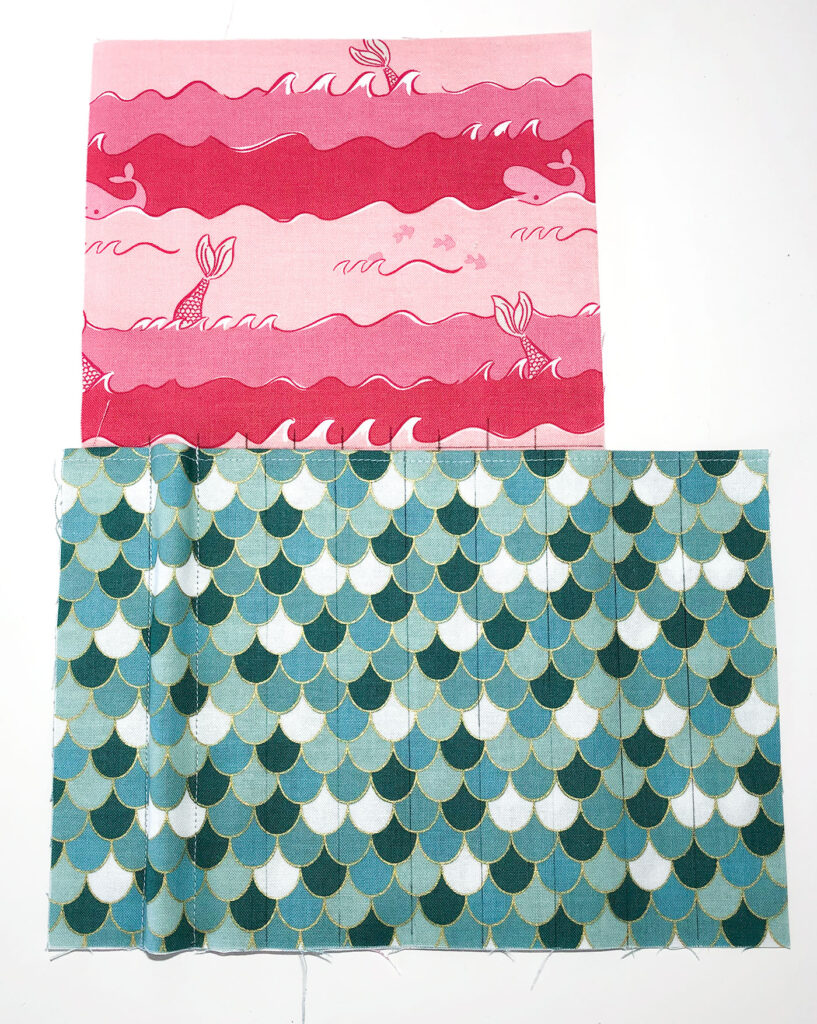
- First, press the 12 1/2″ X 9 1/2″ in half along the 12 1/2″ side. Sew an edge stitch across the folded side.
- Next, fuse the fusible fleece to the wrong side of the inner pouch piece (the side that will have the pockets).
- Fuse the medium weight interfacing to the wrong side of the exterior pouch piece.
NOTE: if you do not want to watch the full video tutorial, but would like to see either marking the lines for the pockets, or sewing the pockets for the pencils in a video tutorial, you will find both at this playlist on my YouTube channel.
Mark the pocket lines:
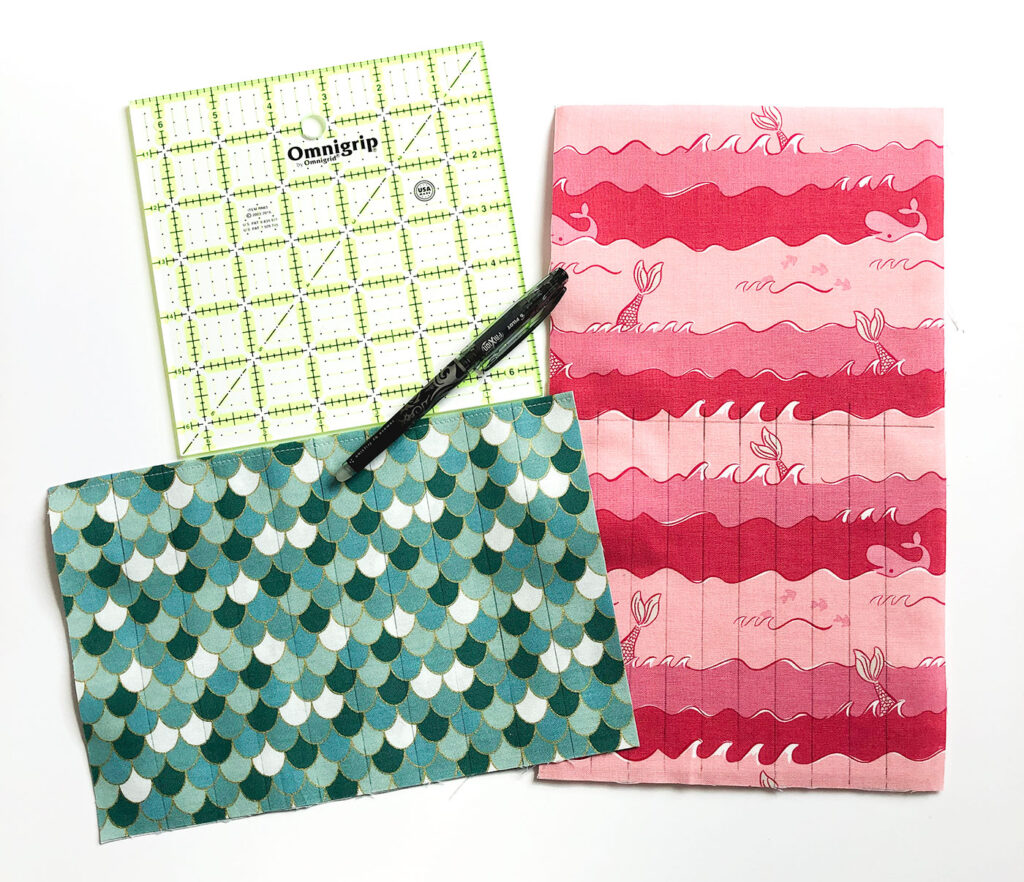
- On the folded pocket piece. Mark a line that is 1 1/8″ from the left side. Use a heat or water soluble marking pen to do this.
- Measure over 7/8″ from the first marked line and make another line.
- Continue marking lines 7/8″ apart across the width of the pocket piece.
- When you get to the end of the pocket piece, measure the final space. If it is larger than 1 1/8″ trim it down to 1 1/8″.
- Next, move to the inside pencil pouch piece. Begin by marking a horizontal line 6 1/4″ up from the bottom of the piece.
- Second, measure over 7/8″ from the left side of the piece. Mark a line that extends just above the previously marked line and goes to the bottom of the fabric piece.
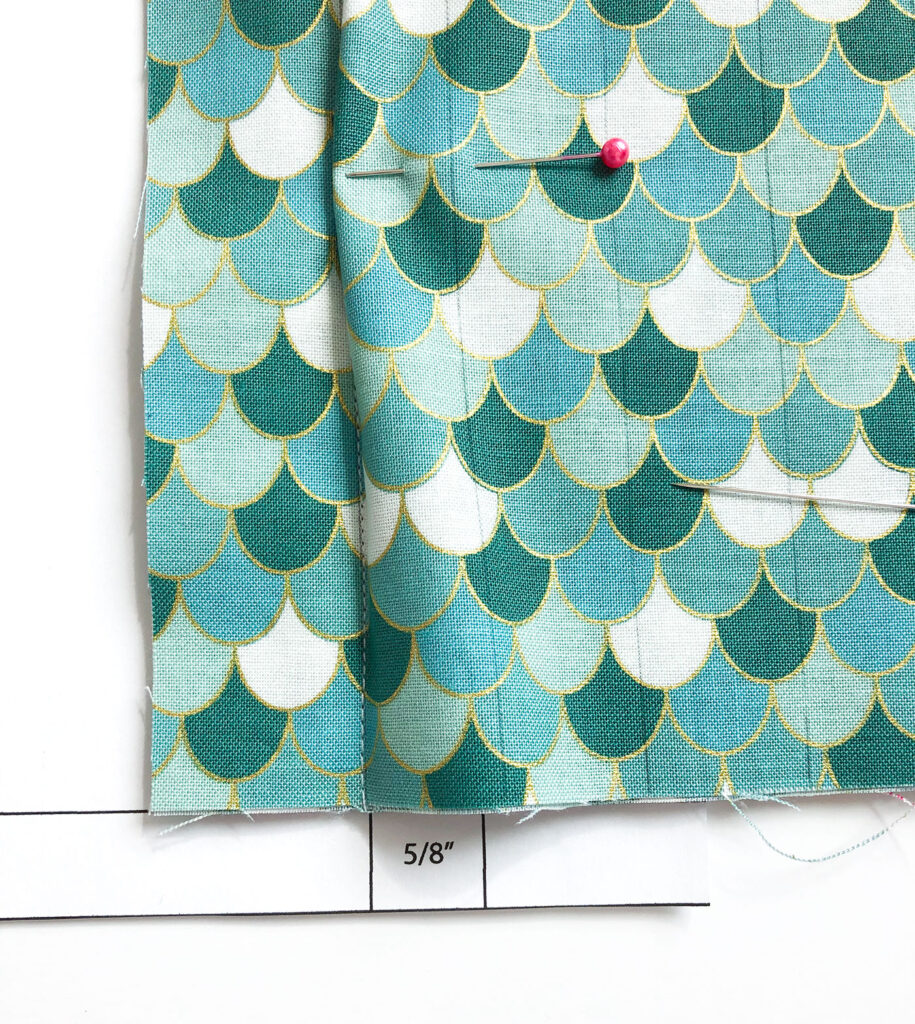
- Now we will measure over 5/8″ from the last marked line and make a second vertical line. Make sure that your marks extend just above the horizontal 6 1/4″ line.
- Repeat the 5/8″ measure and mark sequence until you have 9 vertical lines.
- Finish by measuring the final space of your fabric piece, if it is larger than 7/8″, cut it down to the correct size. *BE SURE to also trim the outside fabric piece to be the same width.
Form Your Colored Pencil Pockets:
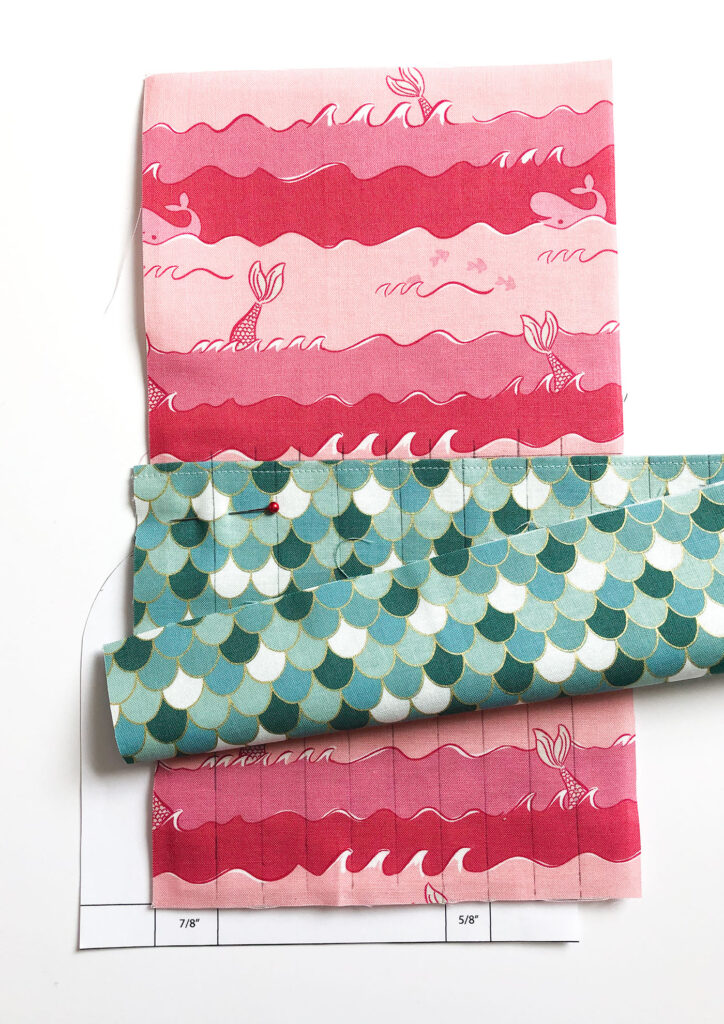
- Line up the top of your pocket piece with the 6 1/4″ horizontal line. Match the top of the first marked line on the pocket fabric with the line on the backing fabric. Pin the top of the pocket fabric in place.
- Use the template to guide the placement of the bottom of the first line on the pocket fabric. To do this, place the corner of the backing piece so it is lined up with the template as shown. Shift the bottom of the pocket fabric so the marked line matches up with the line 7/8″ from the corner. If you do not want to use the template, simply use a ruler or the mark on the bottom fabric piece to help line up the bottom of your first pocket mark.
- Sew down this first line, being sure to back stitch at the top of the pocket fabric piece.
- Line up the next marked line on the pocket fabric with the second marked line on the background piece. You will need to make a slight bump in the fabric to get them to line up. BE SURE the top of the pocket piece continues to be lined up with the 6 1/4″ line as you work across the top. This will ensure your pockets are straight.
- Pin the top of the pocket in place.
- Next, use the template (or ruler, or marks on the background fabric) to line up the bottom of the pocket. Line up the sewn line with the left side of the 5/8″ section and then slide the marked line to match up with the right side of the template mark. Pin in place.
- Sew down the second side of the first pocket, again back stitching at the top of the pocket.
- Repeat the steps, using the 5/8″ guide on the template to line up the pockets across the pouch.
Prepare flap and finish inside of Colored Pencil Pouch

- Now that the pockets are sewn down, place the front and back of the pencil pouch right sides together and use the template to round the flap. If you do not have the template, you can use a teacup, lid or other round object to do this.
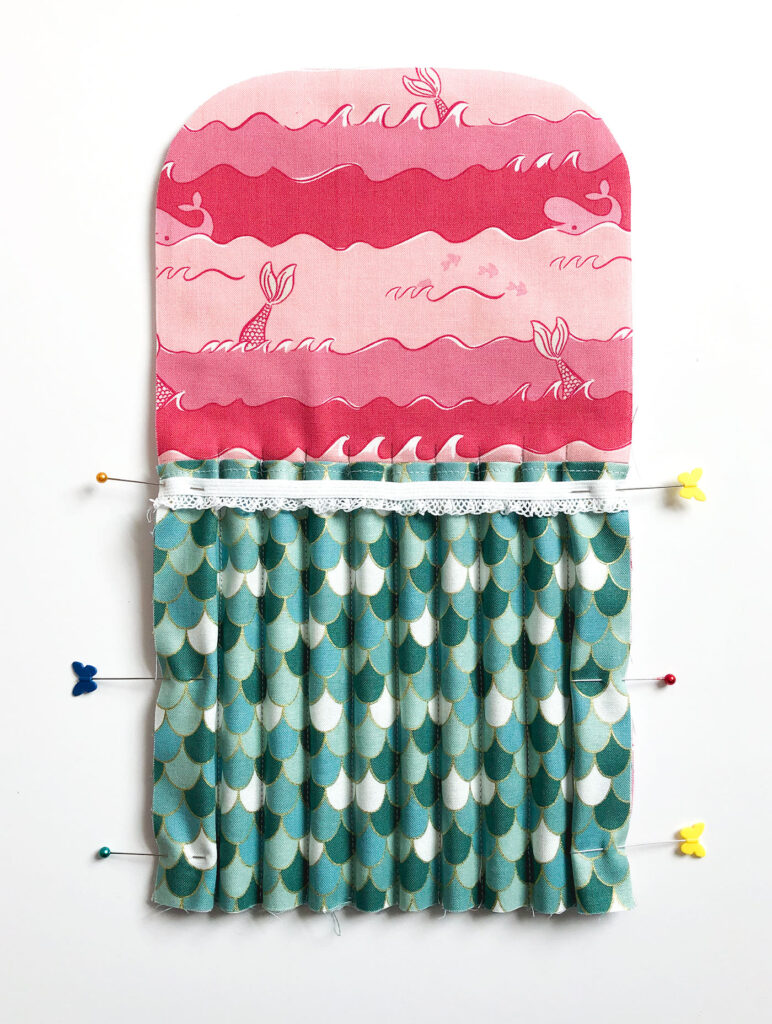
- Next, you will bring the sides of the pocket fabric and line them up with the sides of the backing fabric. Pin them in place.
- Then, measure 1/4″ down from the top of the pocket fabric and position the two ends of your elastic. Pin the elastic in place.
Finishing your Colored Pencil Pouch

- Place the backing and outer fabric pieces for the pencil holder right sides together.
- Pin well.
- Sew around the pencil pouch using a 1/4″ seam allowance. Begin sewing at the top of the pouch, just before the curve and finish sewing at the top of the pouch, just after the curve. You can see the area I recommend leaving open as marked by the red butterfly pins in the picture. Back Stitch at the beginning and ending of your sewing.
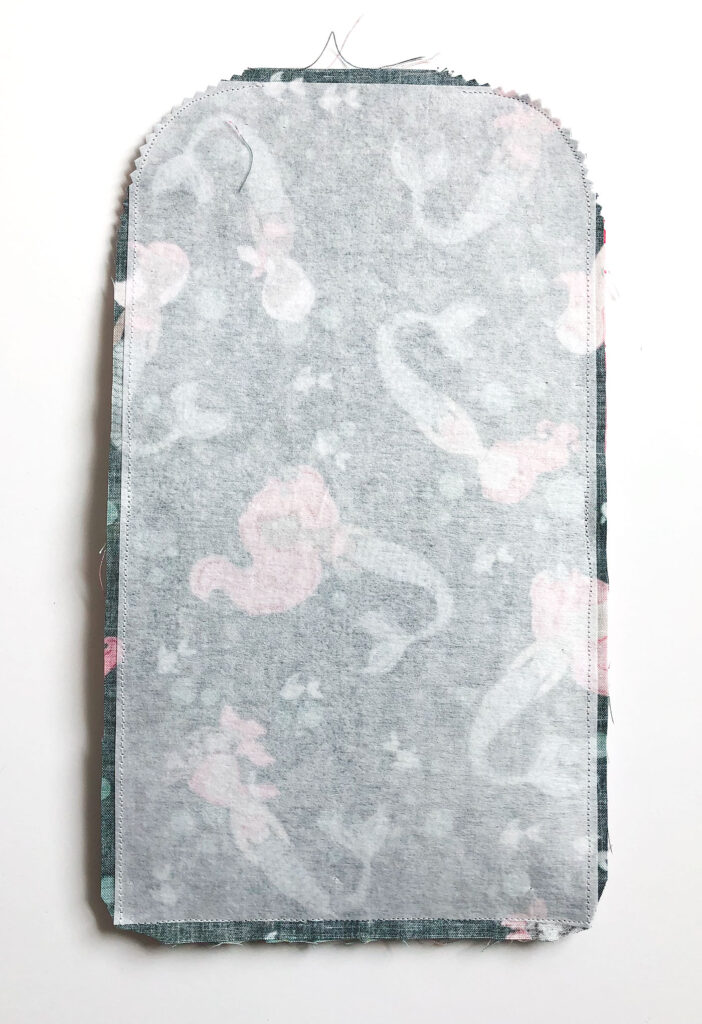
- Clip notches in the curves of the flap.
- Also, clip the seam allowance of the bottom two corners.
- Turn the pouch right side out through the opening in the flap. Be sure to push out the corners and curves and press well.
- Turn under the seam allowance of the opening to create as straight an edge as possible.
- To finish your pouch, measure 3 1/2″ from the top of the flap and mark a line.
- Use your colored pencil to test the height of your pouch, if your pencil is short, add a line of stitching 1/4″ away from the marked line TOWARD the pockets, if your pencil is tall, add your second stitching line 1/4″ AWAY from the pockets.
- Sew along the marked line and then up and around the rounded end of the flap, closing the opening left for turning. Use an edge stitch as you sew around the flap.
- The final step is to press the two horizontal lines you just stitched to add creases to help your flap to close well.
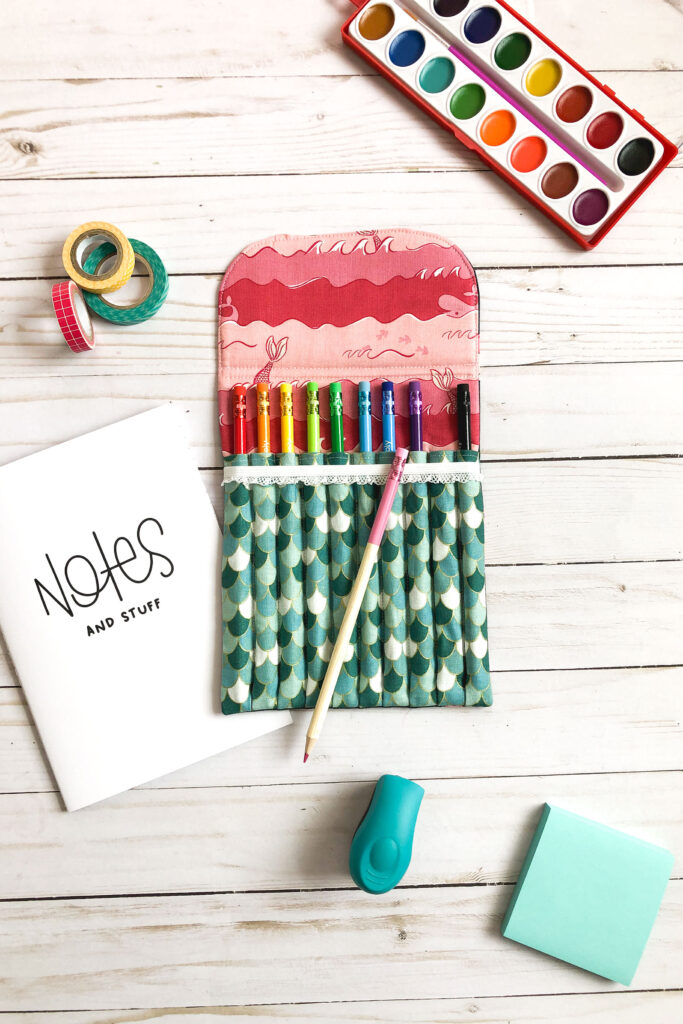
Fill your pouch with colored pencils, grab a notebook or coloring book and you are ready to get creative!
Don’t forget to subscribe to my YouTube channel for tutorials, instructions and lots of fun.
Happy sewing! Amy


Ahoy! Mermaids – Pencil Pouch + Tutorial – Riley Blake Designs
March 31, 2021 at 6:48 pm[…] pencil pouch that holds a rainbow of colored pencils? Yes, please! Today we’re visiting AMEROONIE DESIGNS, where Amy is sharing a FREE tutorial for this adorable Pencil Pouch featuring fabric from the […]