This Composition Notebook Planner Cover post was originally published 6/8/2018 and was updated 2/8/2020.

*This project is part of the Hello Lovely blog tour. The fabrics were provided by Riley Blake Designs. the pattern and opinions are all mine
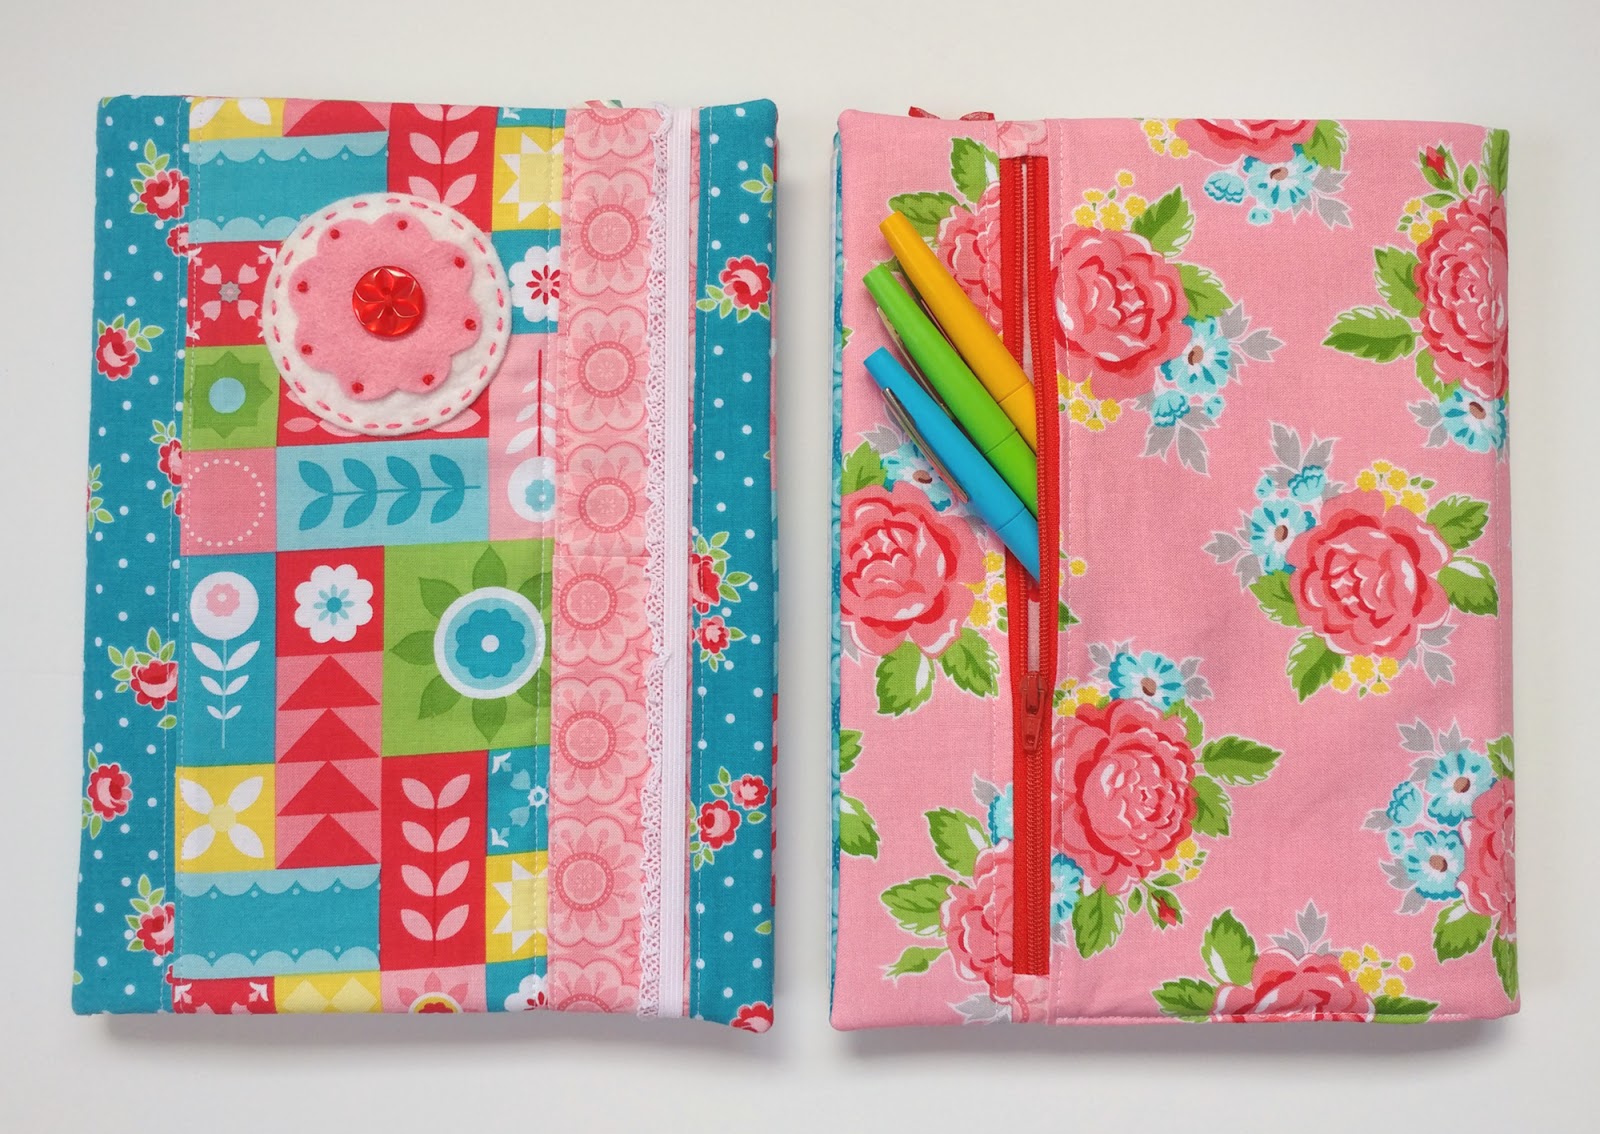
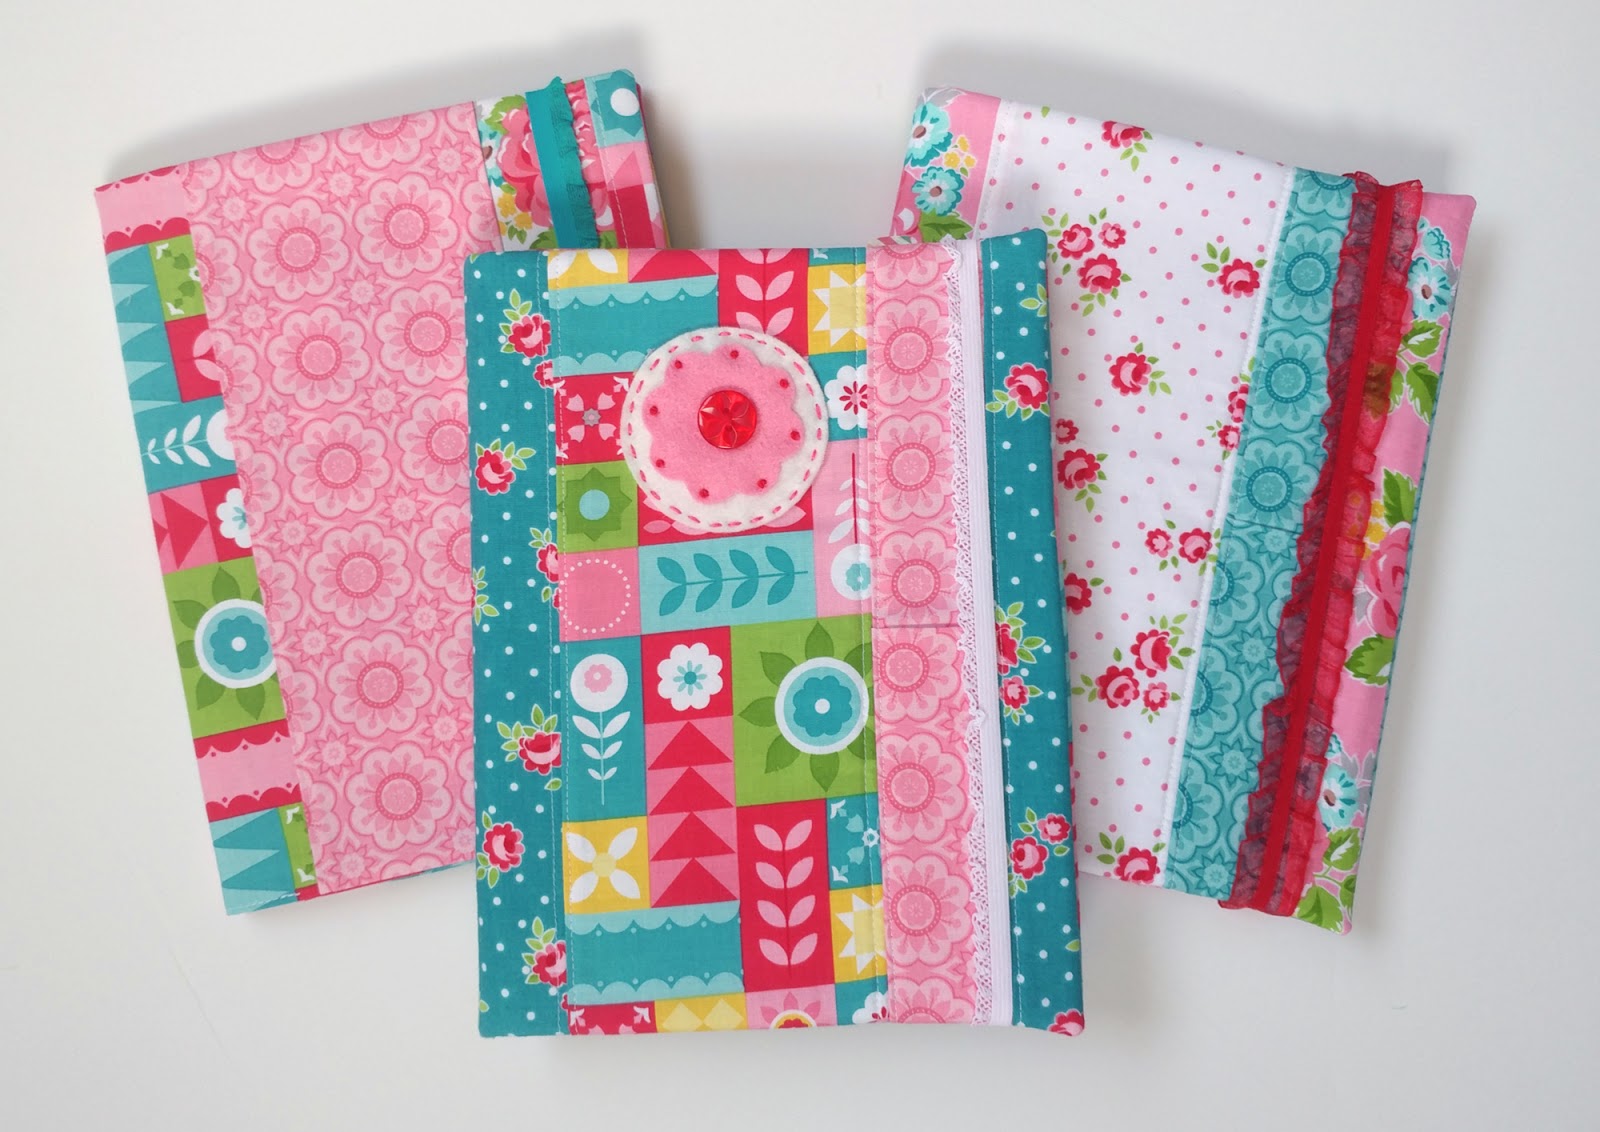
If you were to take a peek in my craft room you might realize that I love notebooks, especially composition notebooks. I use them all the time to keep track of projects I’m working on, notes from podcasts, and as my bullet journal where I track to do lists, goals and basically my whole life. It’s no wonder that I have designed multiple variations of fabric notebook covers (like my Ruffle Notebook Cover), but this Composition Notebook Planner Cover is my favorite one yet! Designed to be the ultimate bullet journal cover, I just love the display of all the pretty fabrics, the pen/pencil holder on the front and the zipper pocket on the back. It’s useful, lovely and organized- all in one fun project.

My girls have claimed the samples from this post for their own summer notebooks, to draw, journal and play with- another great use for this project!!
Composition Notebook Cover Tutorial
*Please read through the ENTIRE tutorial before beginning.
Supplies:
You will need 4-5 fat quarters for variety, but 3 will give you plenty of fabric. I am using Hello Lovely fabric, designed for Riley Blake Designs by Amanda Herring.
*Note: This project first appeared on the blog Polkadot Chair as a Christmas Planner notebook cover. I have changed the pattern just a bit to eliminate the pocket on the front flap- if you’d like to add that pocket, please check out the tutorial there.
In addition to fabric you will need:
- composition notebook
- felt or batting, or lightweight fusible interfacing- *updated to add: I have found that I prefer to use a medium weight interfacing instead of felt or batting.
- elastic for closure
- 9″ zipper (or longer)- if adding the back pocket
- embellishments as desired
Cutting:
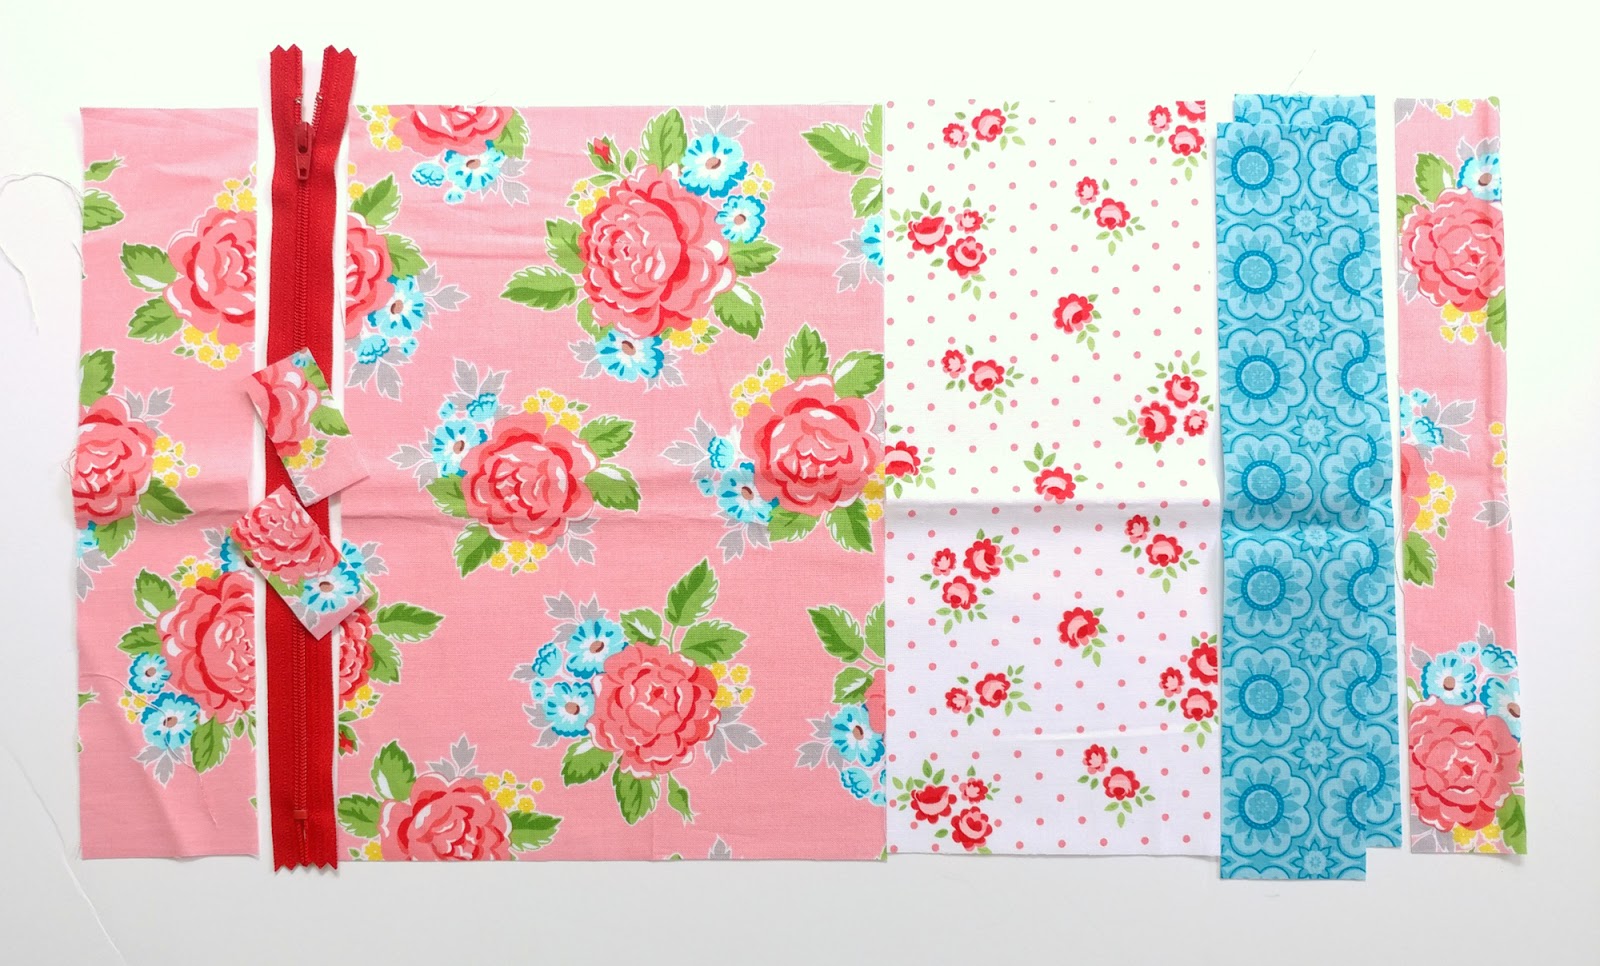
For the outside of the cover-
*pattern update: if you prefer a more snug fit on your cover, cut ALL your pieces to 10 1/4″ instead of 10 1/2″.
- 2 1/2″ X 10 1/2″ (pink floral)
- 7 1/2″ X 10 1/2″ (pink floral)
- 4 1/2″X 10 1/2″ main print (red flowers on white background)
- (2)- 2″ X 10 1/2″ accent for pen pocket (blue medallion)- press one in half
- 1 1/2″ X 10 1/2″ accent (pink floral)
- (2)- 6″ X 10 1/2″- lining of zipper pocket (not shown)
- (2)- 1″ X 2″ for ends of zipper
- 1- 15 1/2″ X 10″ piece of fusible interfacing (or felt or batting)
- **If you don’t want to do the zipper pocket, you can just cut 1- 9 1/2″ X 10 1/2″ piece instead
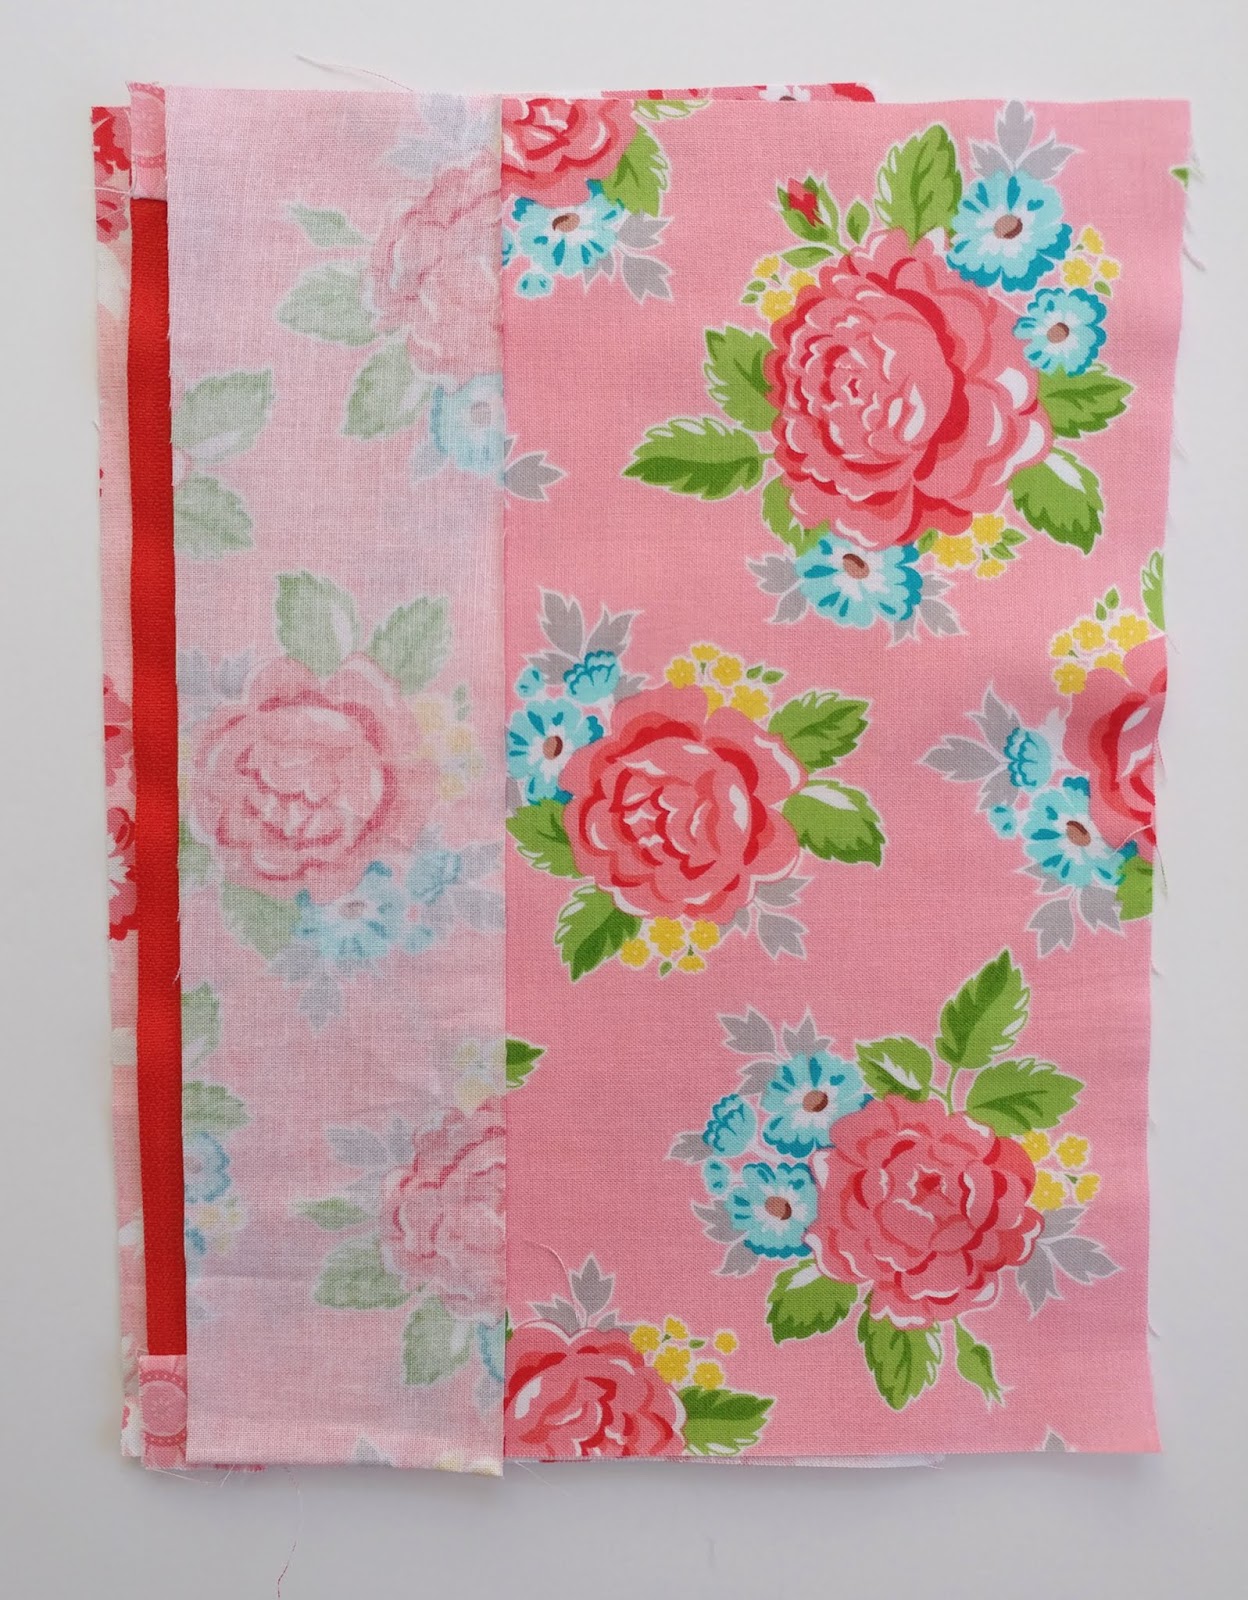
Inside of Planner Cover
- 16″ X 10 1/2″ lining piece
- (2) 5″ X 10 1/2″ for sleeves (press in half to create 2- 2 1/2″ X 10 1/2″ pieces)
Assembly:
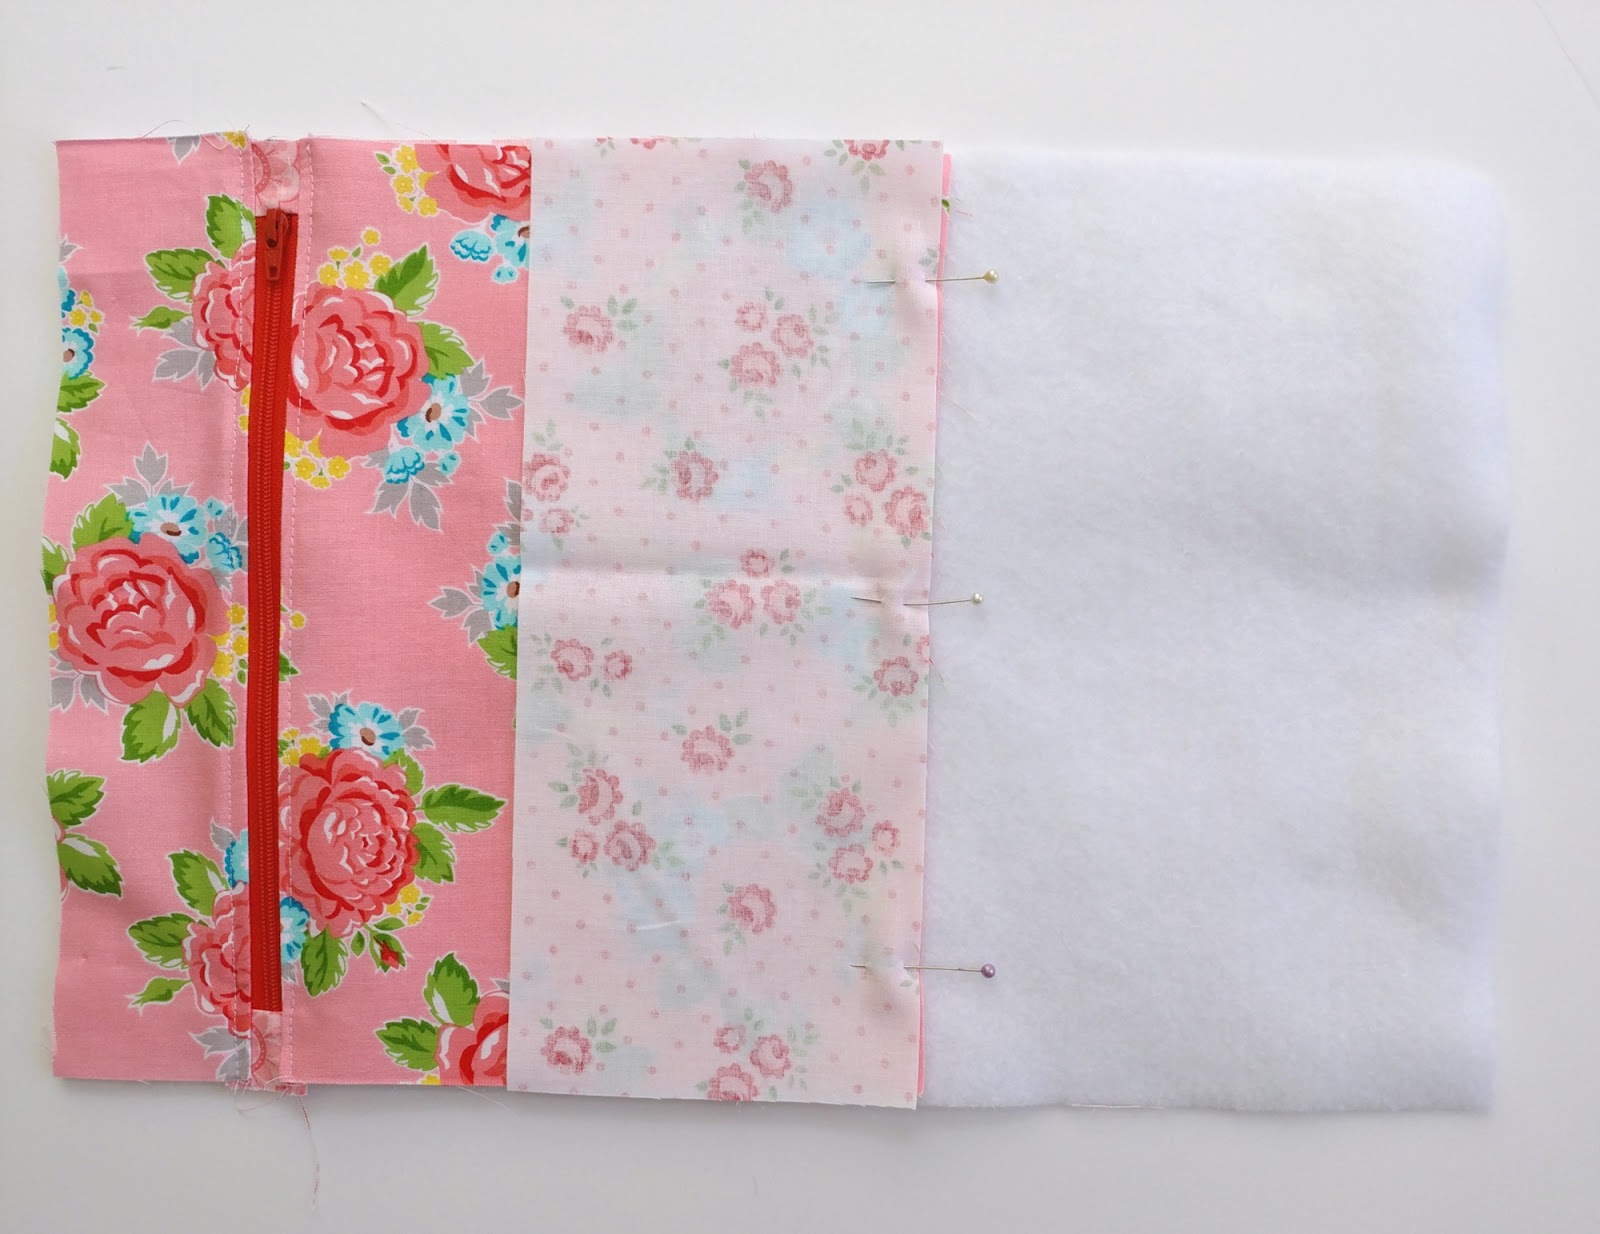
Start with the back zipper pocket.

Add the 1″ X 2″ fabric pieces to either end of your zipper. Make sure the zipper measures just under 9″. I like to add the fabric tabs just inside the metal zipper tabs so I don’t have to worry about the needle hitting them, but you can do whatever you prefer. Press the fabric away from the zipper. You can top stitch these down if you like, but it’s not necessary.

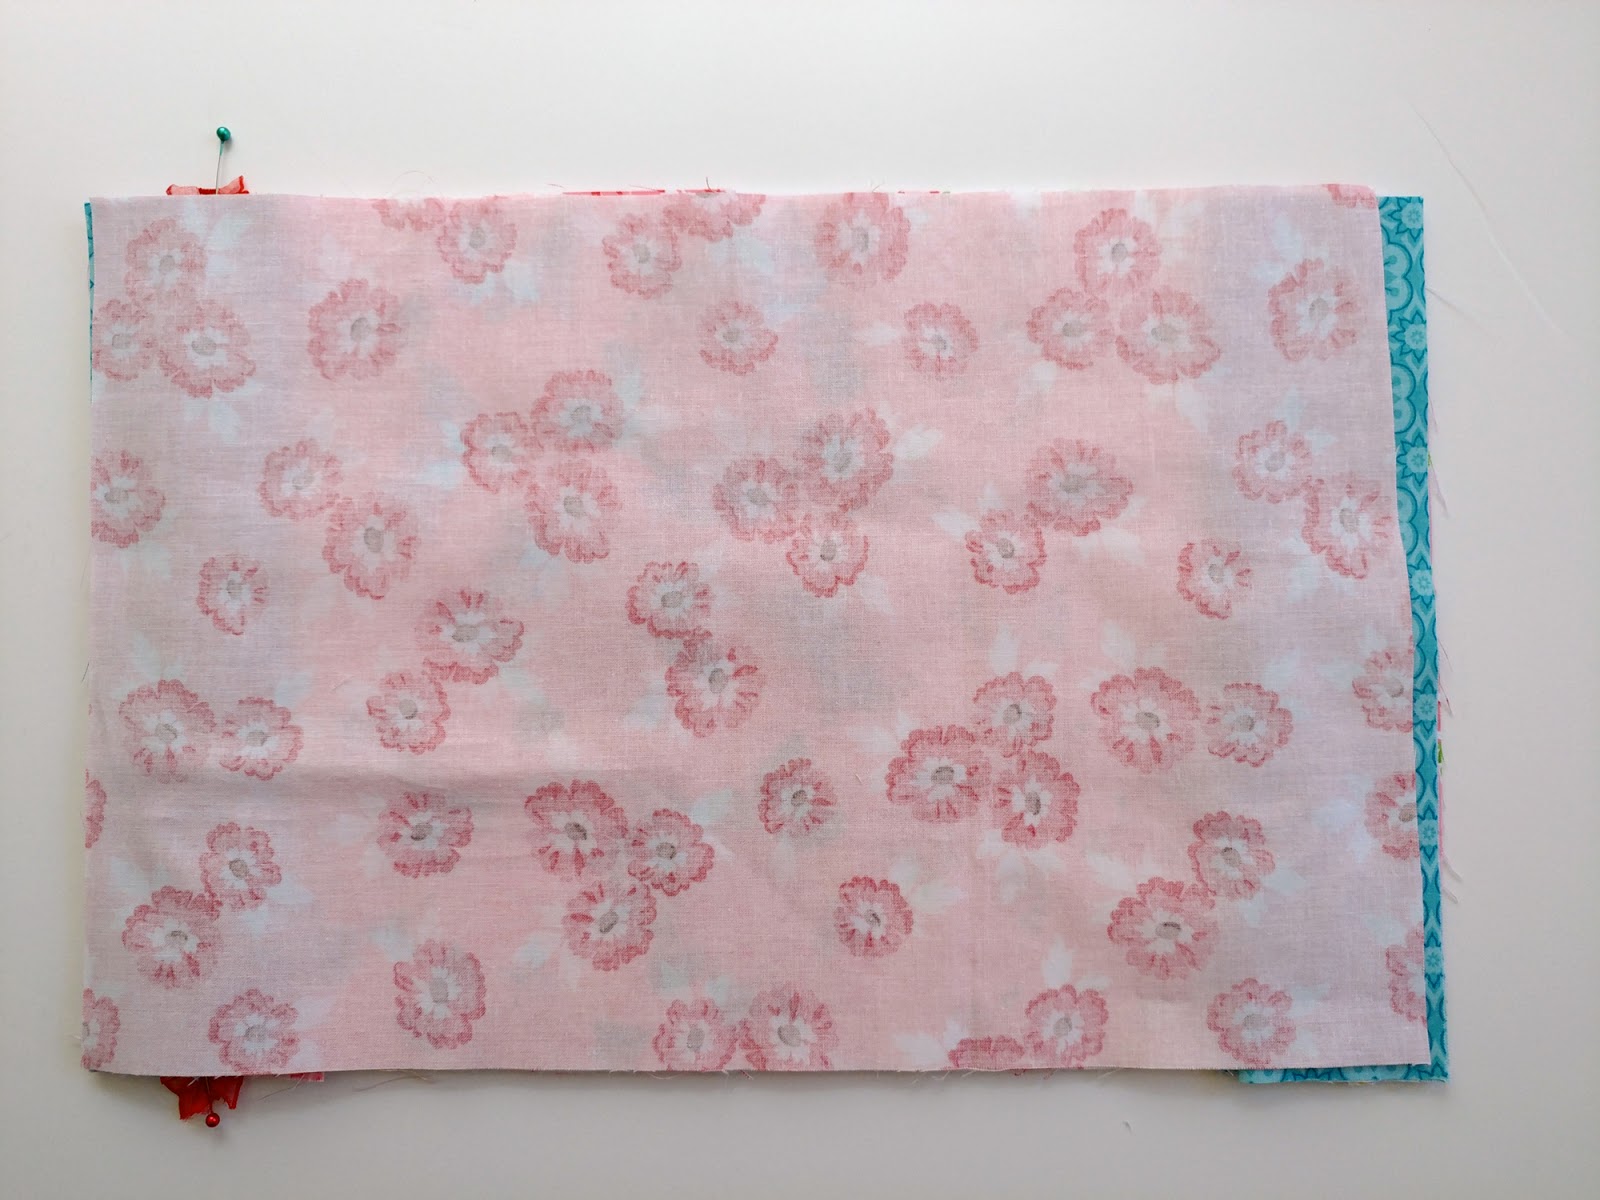
- Place the zipper face down on the left side of the 7 1/2″ X 10 1/2″ back pocket piece
- Place one of the lining pieces face down on top, make sure all the edges are lined up
- Sew using 1/4″ seam allowance
- Press both sides away from the zipper
- Top stitch along the zipper
- Take second lining piece and place it right side up
- Line up zipper- right side up- with the left side of the lining piece
- Place the 2 1/2″ X 10 1/2″ piece of back fabric right side down, lining up the left side
- Sew along side using 1/4″ seam allowance

- Press ONLY the 2 1/2″ piece away from the zipper
- Turn the pocket over and sew 1/4″ in from the bottom of the shorter lining piece to create the bottom of the pocket
- Trim off the extra lining fabric
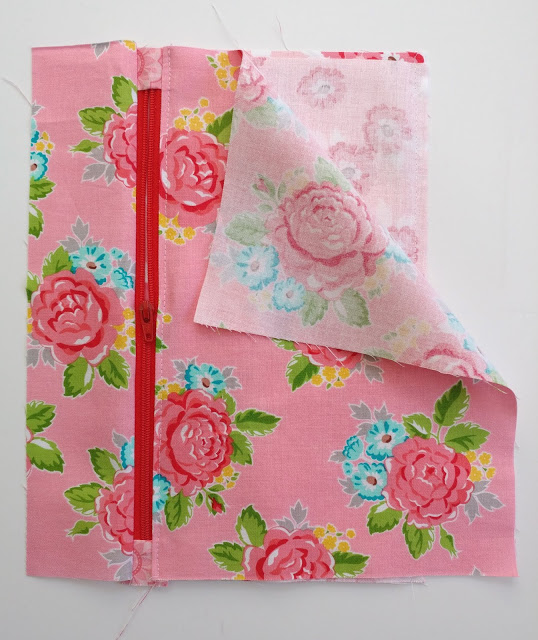
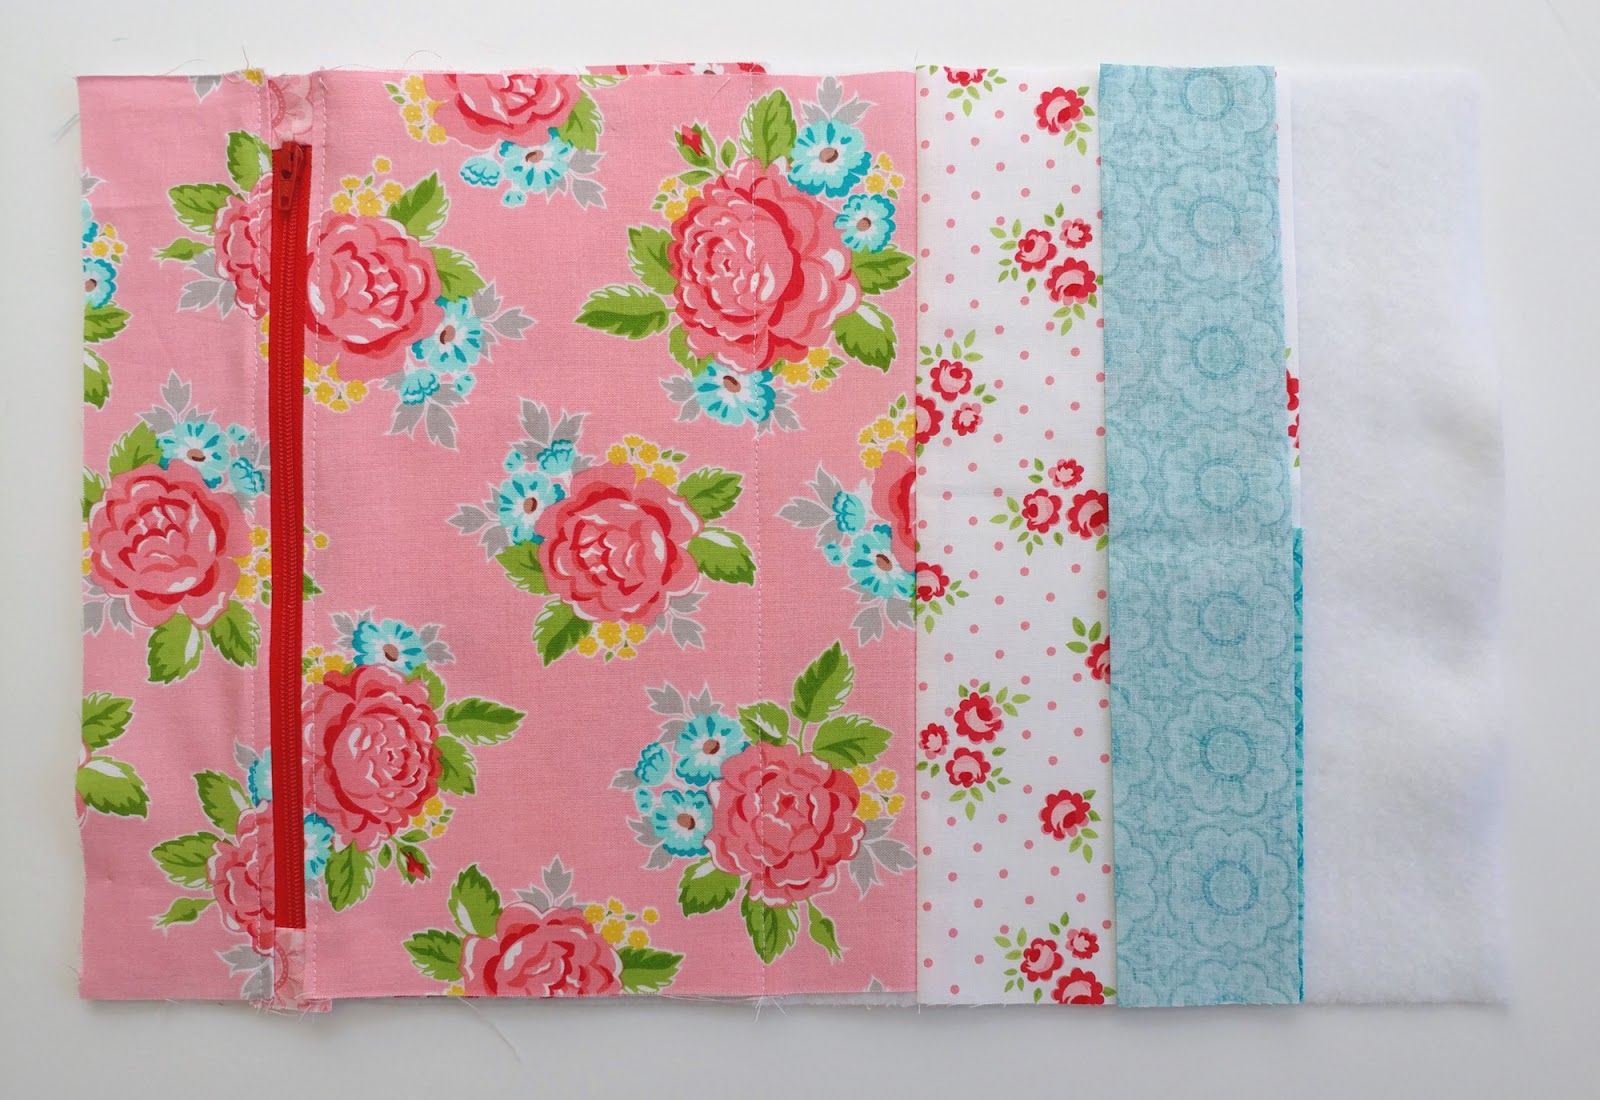
Finish the front of the Planner Cover
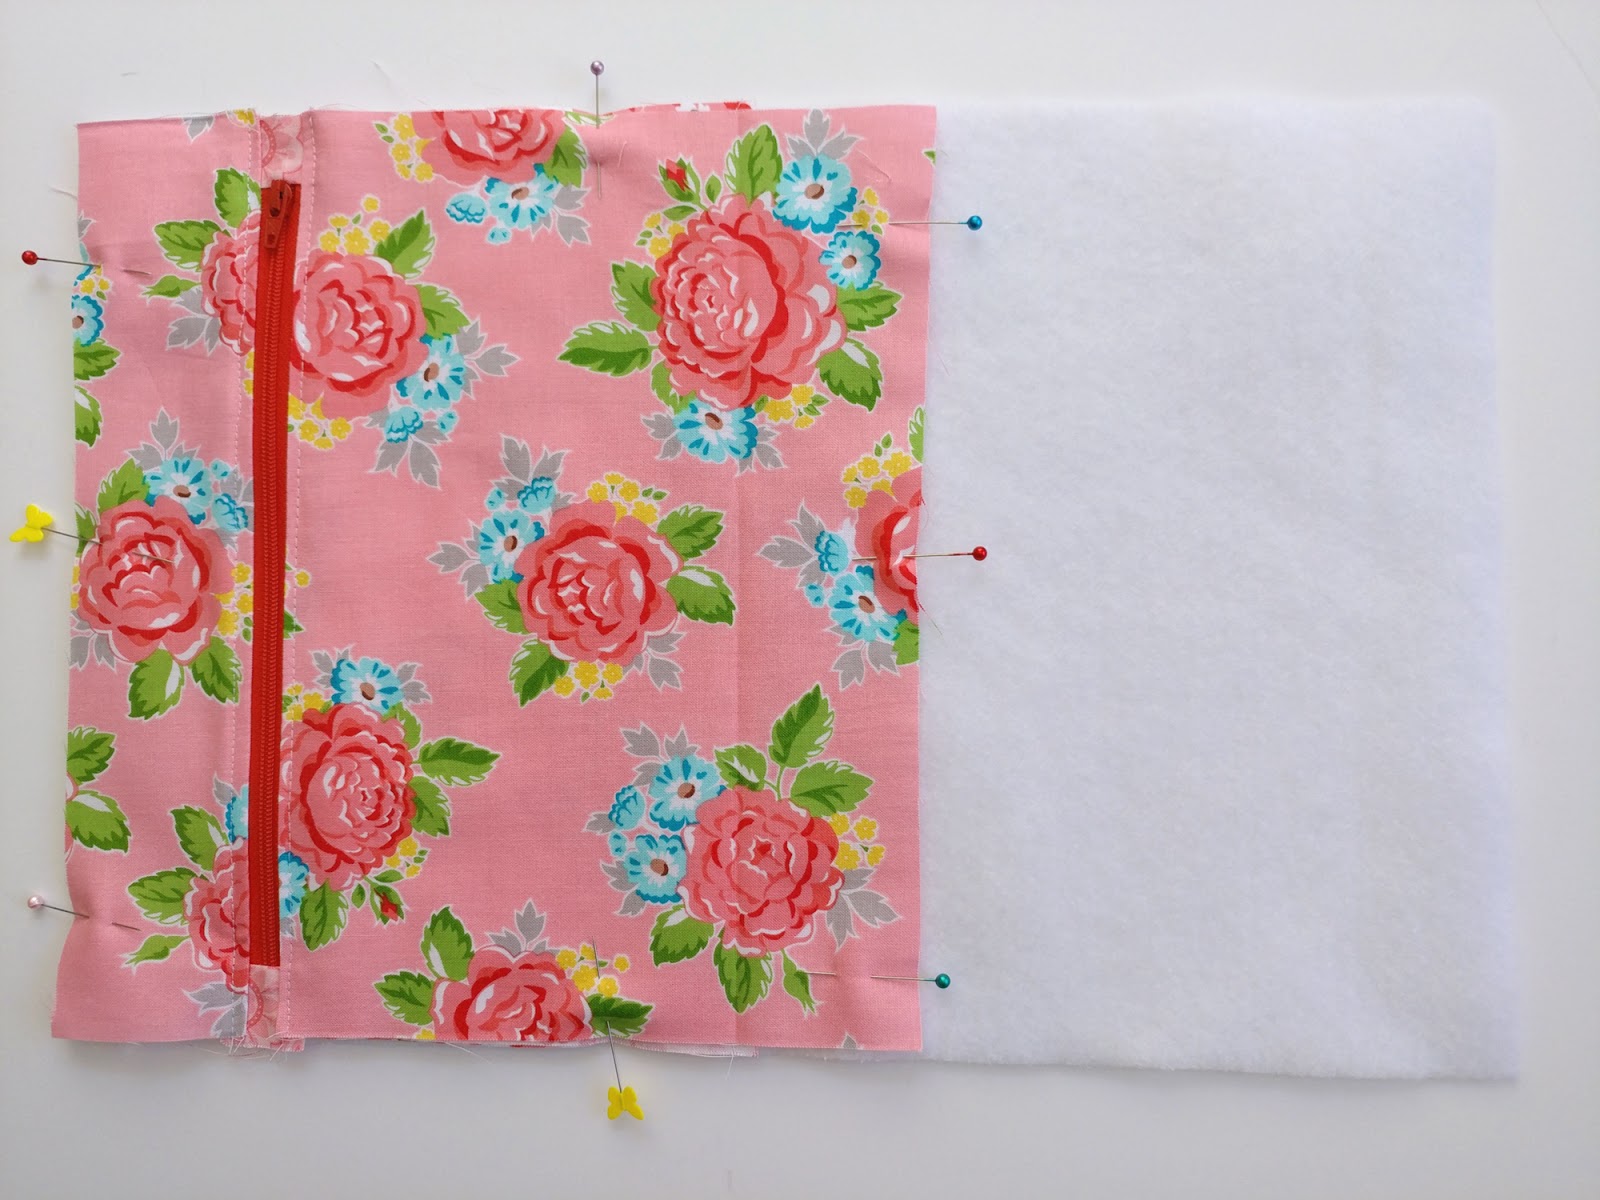
*In the following pictures I demonstrate a quilt as you go method for assembling the front of the cover. Additionally, you can just sew the pieces of the front together, pressing the seams to one side and then fusing a 10 3/4″ X 16 1/4″ piece of lightweight interfacing to the completed front.
- Cut piece of batting to 11″ X 16 1/2″
- Line up the back pocket piece with the left side of the batting piece
- Top stitch down the left side of the zipper
- Fold over the top piece of the back pocket
- Line up the fold with the stitch line of the pocket lining, finger press
- Unfold and top stitch along the press line to hold the pocket in place
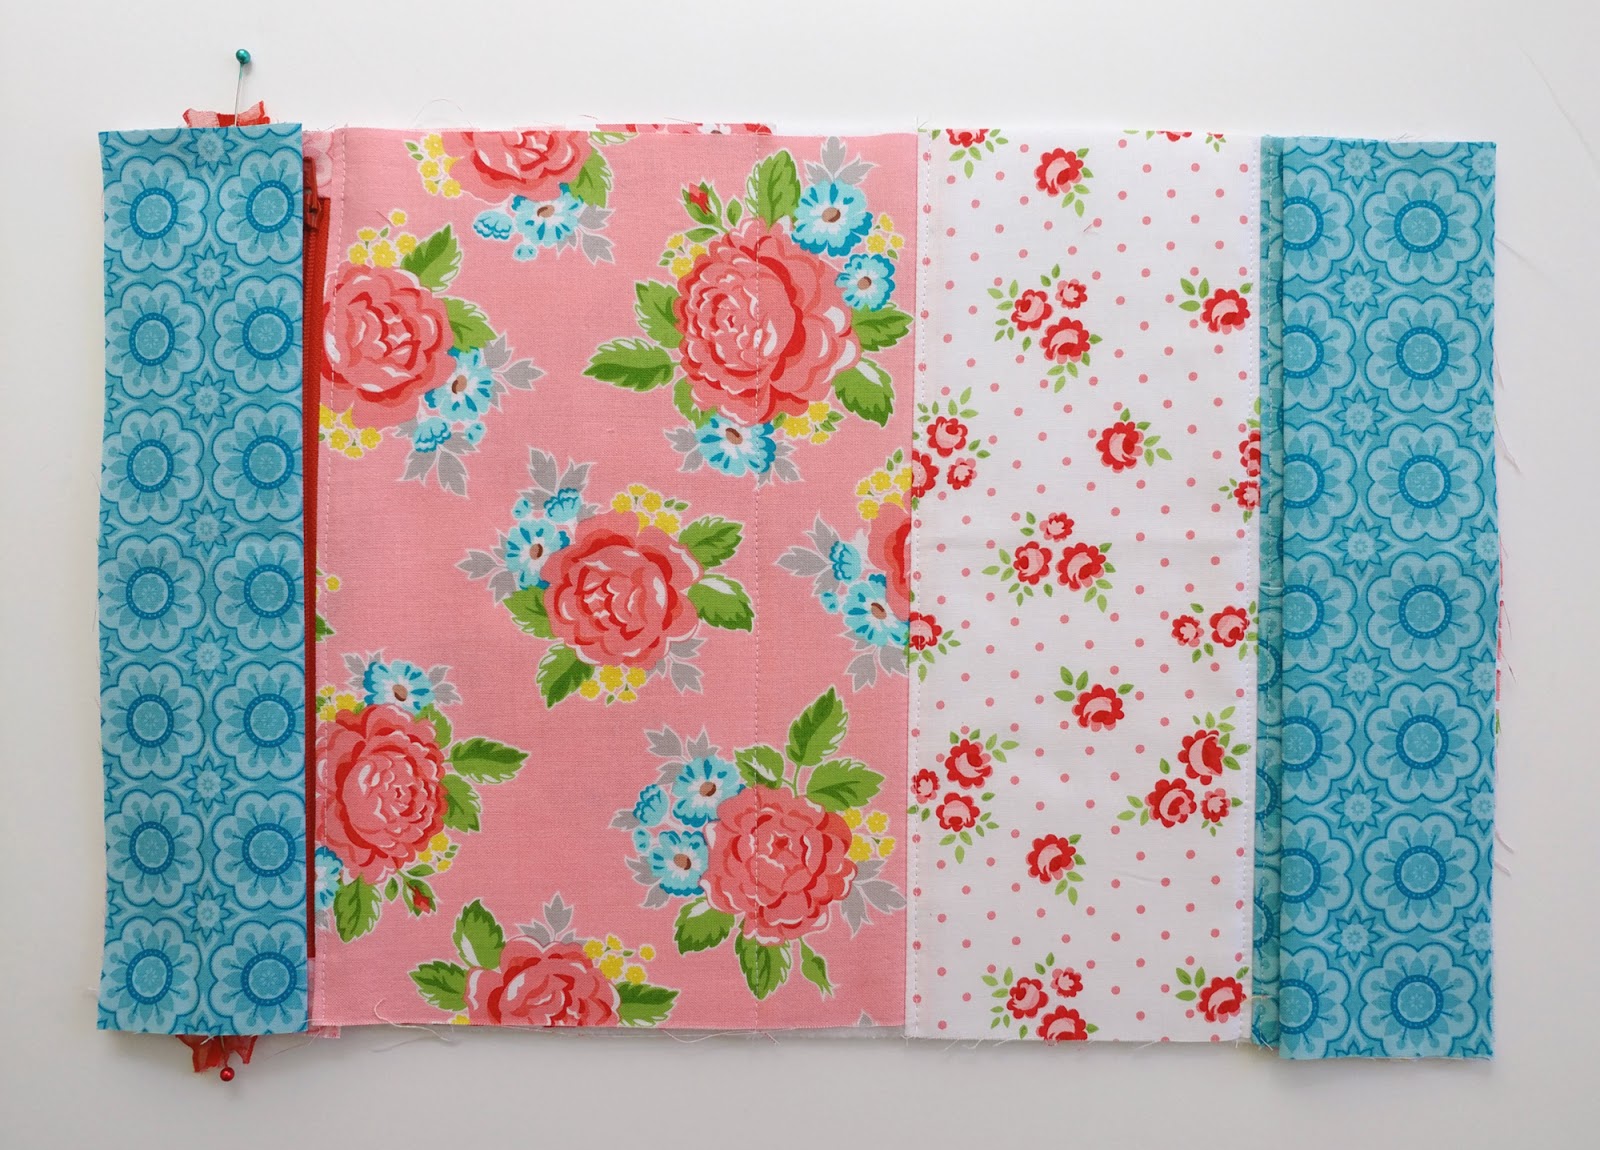
- Starting with the accent piece, place it right side down and line it up with the right side of the pocket piece, stitch using 1/4″ seam allowance
- Press the piece away from the stitch line and top stitch both sides of the stitch line to quilt as you go.

- Repeat with the pen pocket (fold one piece in half and place it down first, then line the second piece on top of that) and final accent piece.
- Trim the front cover to be 10 1/2″ X 16″

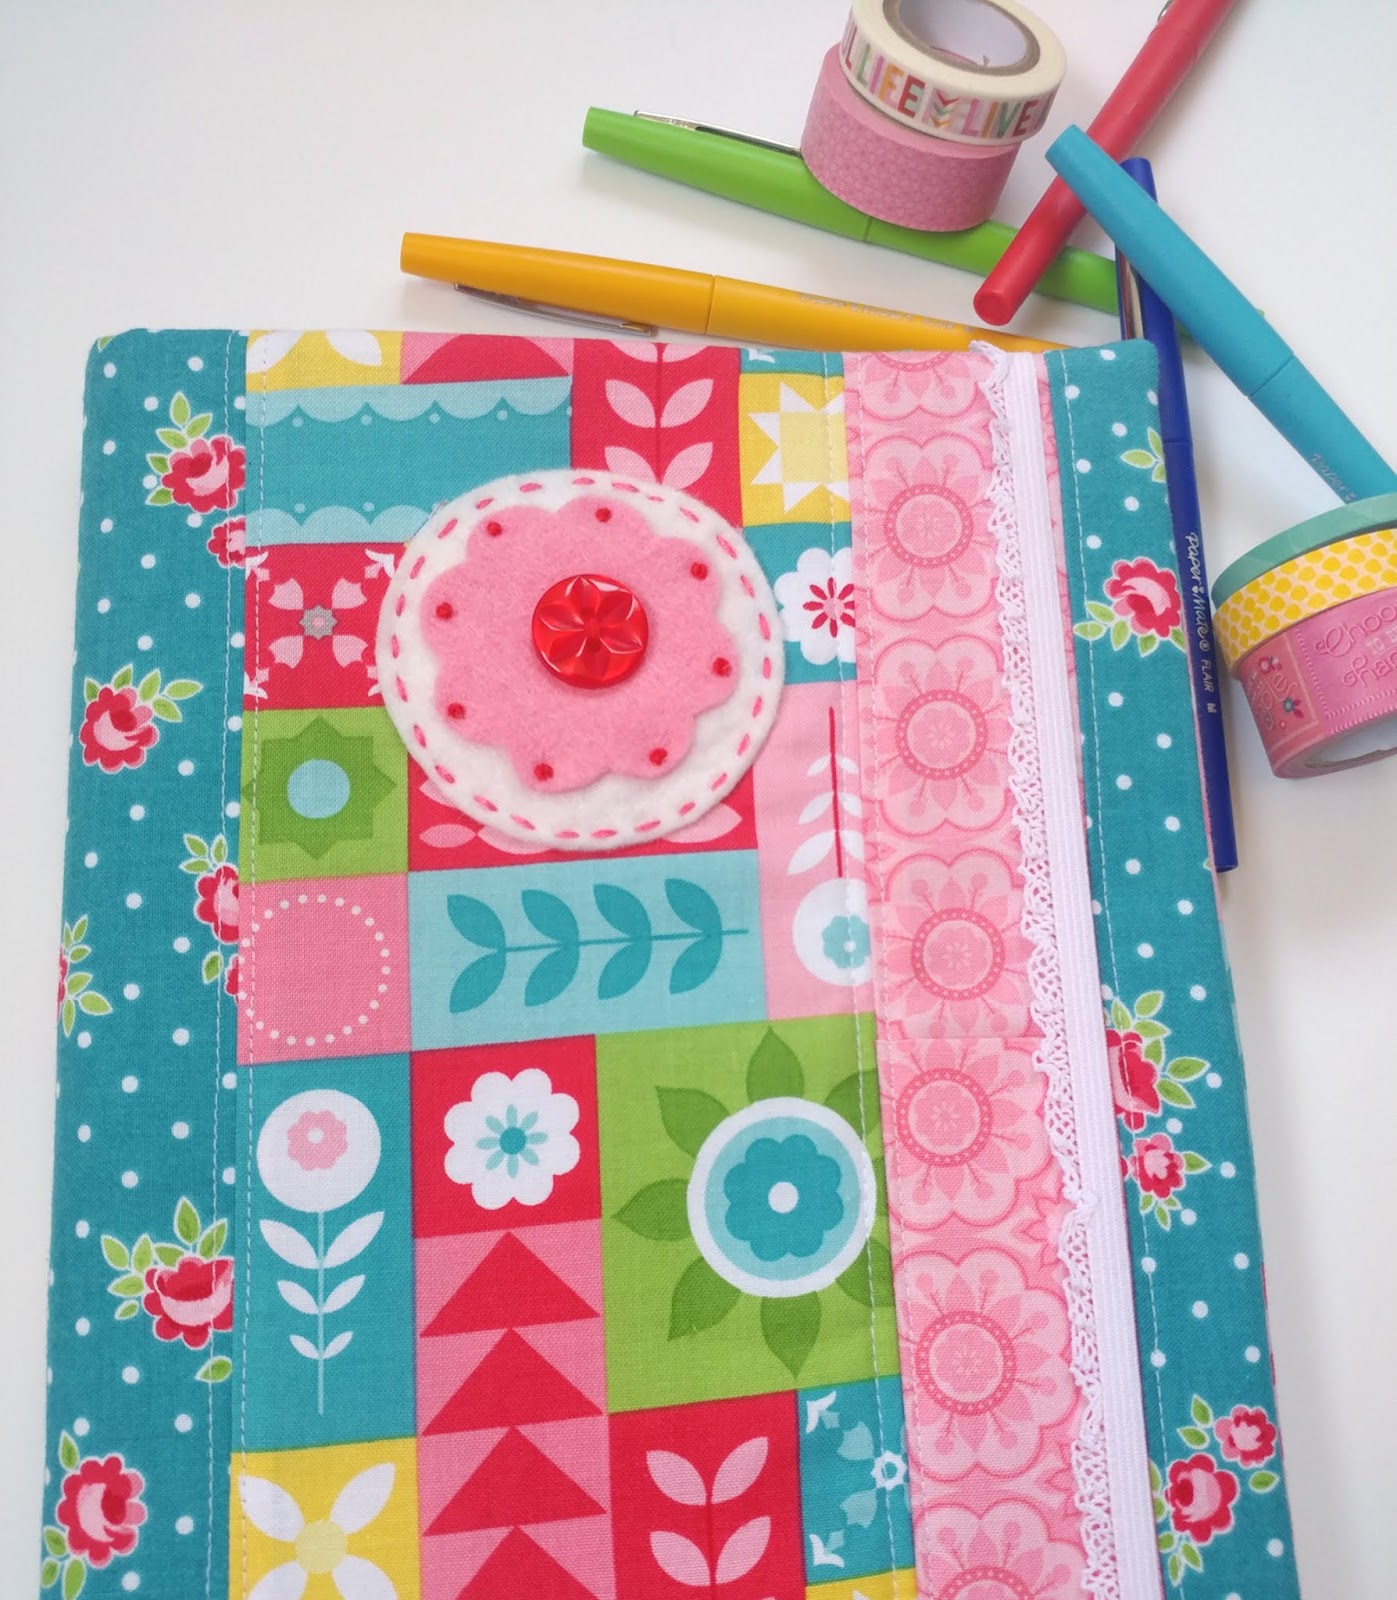
- If you want to add any embellishments, do so now. I used wool blend felt and templates from Amanda’s Friendship Quilt to make mine. *You could also add pom pom trim, ric rac or any other embellishments you like.
Finishing your Notebook Cover

If you’re adding elastic to keep the notebook closed line it up 1 1/4″ from the left side of the front cover. Pin in place
- Place sleeves on cover
- Make sure to line up the raw edges so the folds are toward the center
- Place the 16″ X 10 1/2″ lining piece right side down on top of the cover, line up edges and pin in place
- Sew around the entire cover using a 1/4″ seam allowance, leaving 3-4″ open on the bottom for turning
- Clip corners and turn right side out
- Press carefully- making sure to push out corners and edges. *Note: at this stage I try out the cover on the composition notebook. If there are any adjustments I want to make I will turn the cover wrong side out and fix them before closing the opening in the cover.
- Fold under seam allowance of opening and press.
- Top stitch opening on bottom.
Use your Composition Notebook Planner!
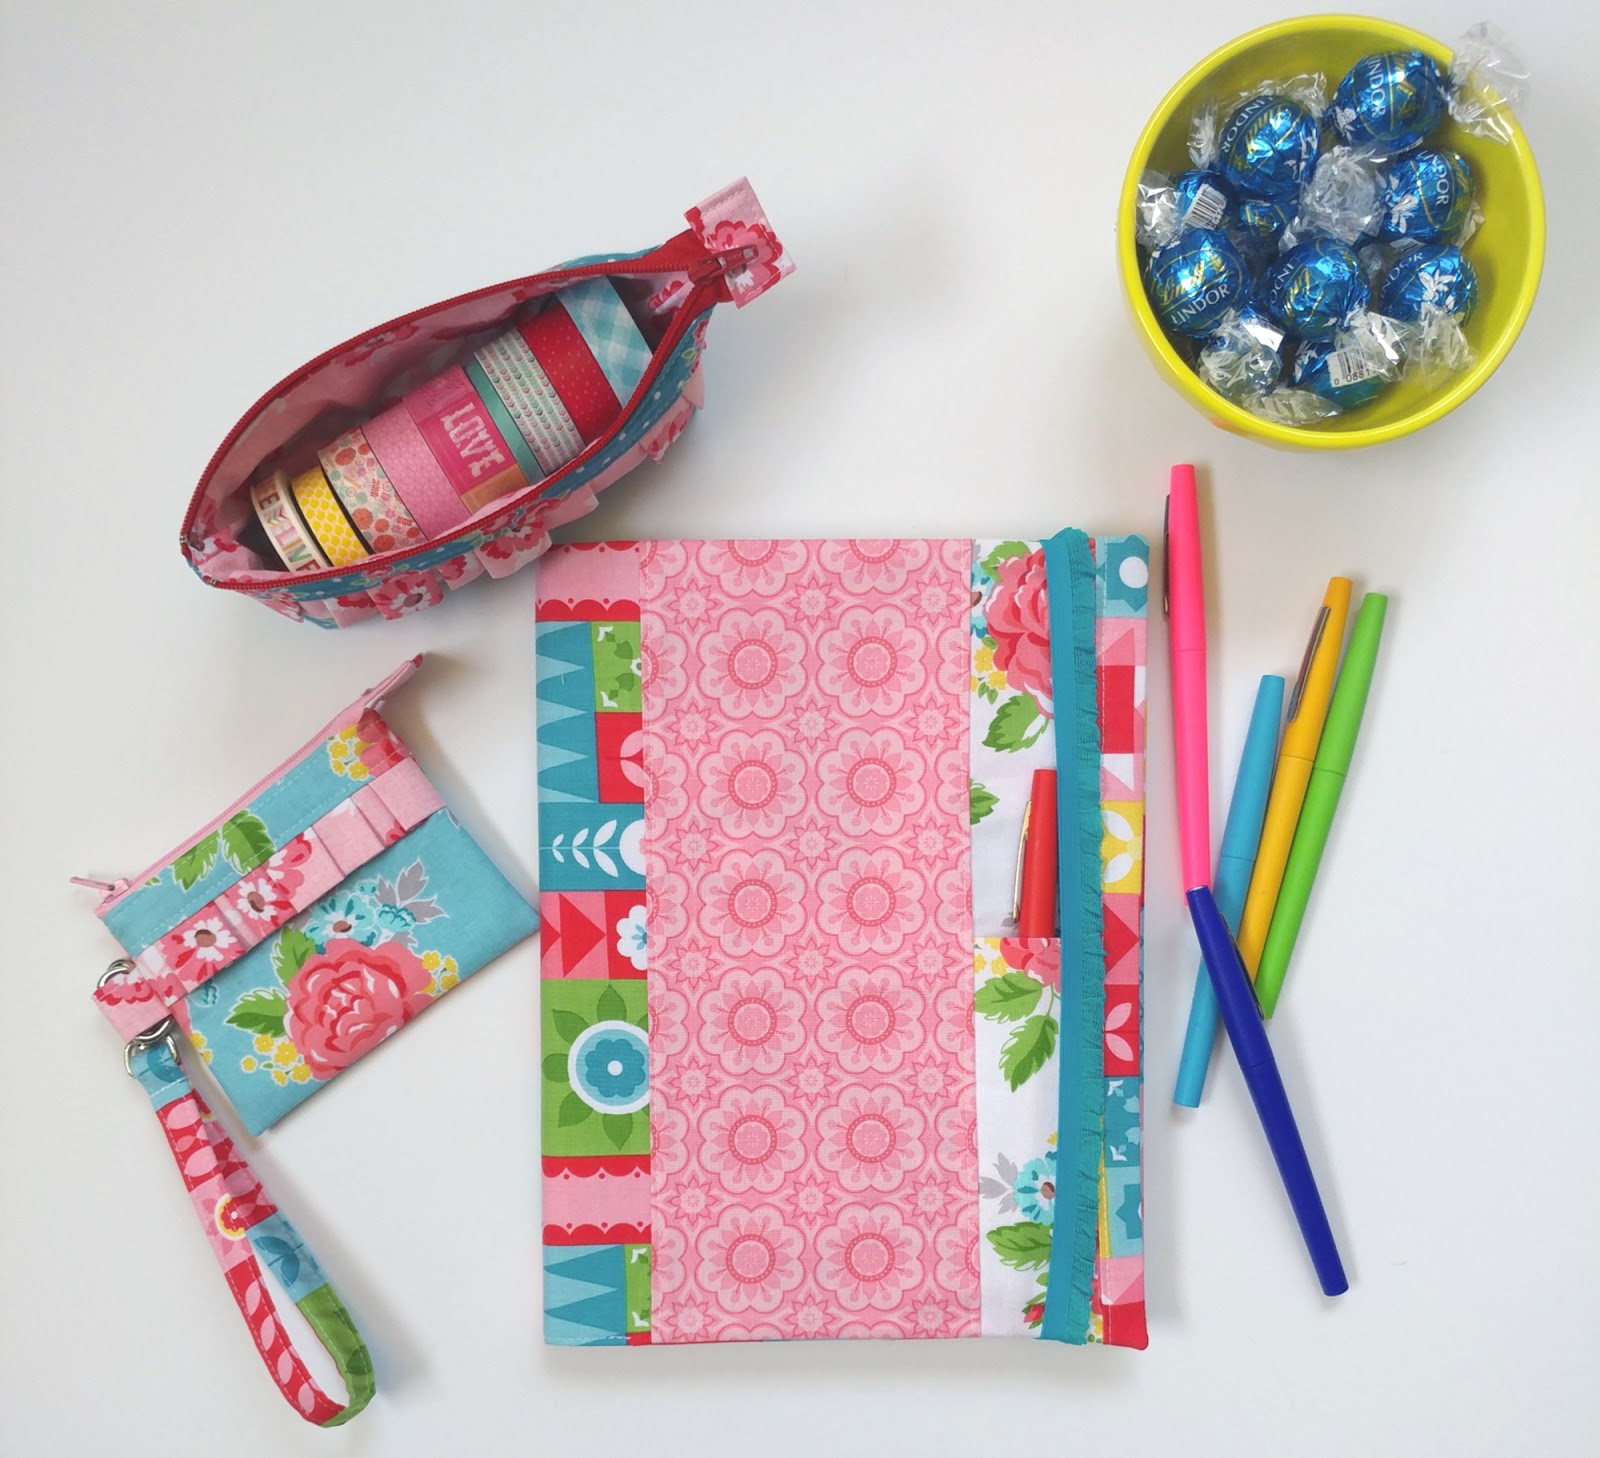
The zipper pocket on the back is perfect for holding pens or colored pencils.
These notebook covers are addicting, so consider yourself warned! In addition to the composition notebook covers (there is a color blocked simpler version of a notebook cover here) I also have a gratitude journal cover as well as the Ultimate fabric covered notebook guide that helps you customize a notebook of any size!
If you make one- (or 3) I would love for you to send me pictures or tag me on Instagram or Facebook @AmeroonieDesigns!
Have a happy day!
xoxo,
Amy


FREE Garden Themed Applique Pattern - Therm O Web
May 7, 2019 at 12:00 pm[…] This tutorial will show you the steps for applying the applique. If you would like to make the fabric notebook cover as well, you can go to my blog and find the full tutorial. […]