The fabric for this post was provided by Riley Blake Designs for participation in the Saturday in Paris blog tour. The project and opinions are my own.
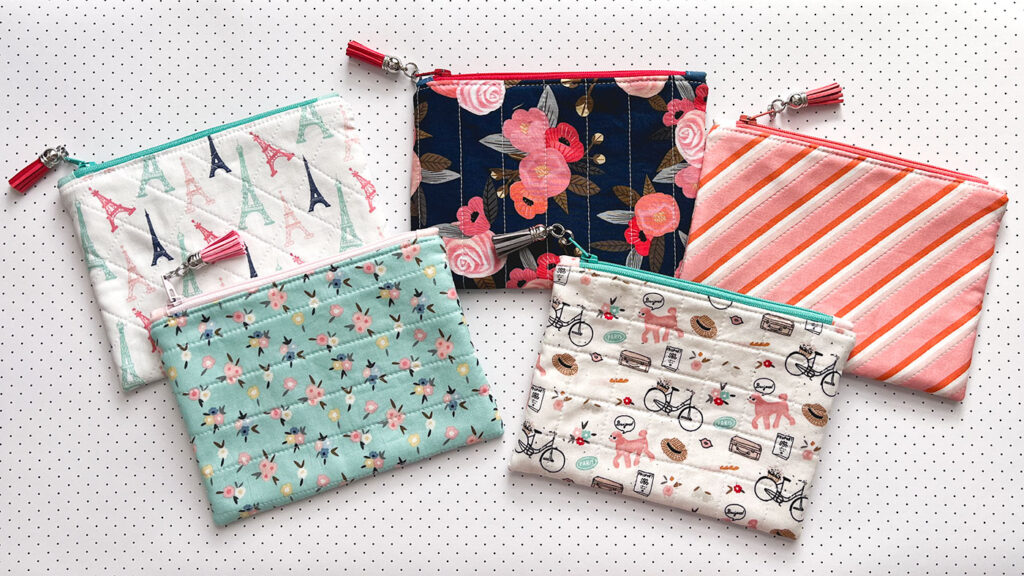
Lost in the chaos of my purse, drifting through crumpled wrappers, miles of grocery store receipts and “mom, can you hold this” paraphernalia are the things I actually need- chapstick, a pencil, mints. Trying to find them can be like searching for the Lost City of Atlantis. But it doesn’t have to be this way. Learn how to sew a simple zipper pouch and your purse, backpack or anywhere really can become a sanctuary of organization and peace. Well, maybe just organization.
Some other zipper pouch tutorials you might also like from my blog include the nesting travel pouches and the color block pencil pouch.
What Supplies do I need to Sew a simple zipper pouch?
First, of course you will need a zipper. Second, fabric- the cuter the better! Third, fusible fleece. And finally, basic sewing supplies such as a rotary blade and ruler, sewing machine, scissors, etc.
I am also delighted to share that I have a PDF pattern for these pouches, available for free to subscribers to my newsletter. If you fill out the form below, you will be added to my email list and get this pattern (and FOUR others) for free!
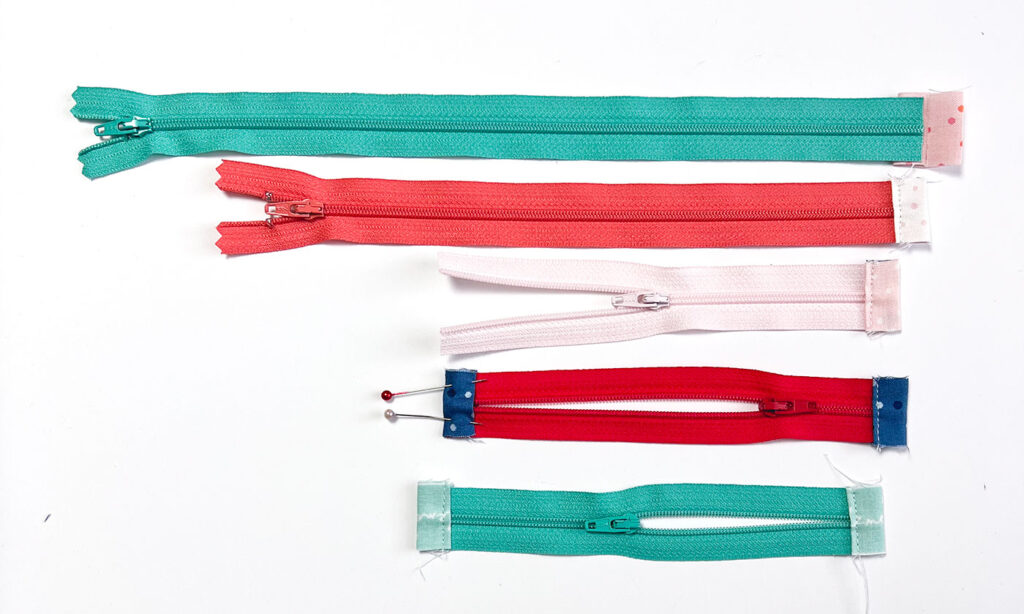
What are the Best zippers for a simple zipper pouch?
Especially if you are new to sewing zippers I strongly recommend using a nylon (plastic) zipper. I purchase my zippers from Zipit zippers on Etsy, but you can really buy them anywhere. They are easy to shorten and not as intimidating as metal zippers can be. Plus, they come in tons of fun colors which to me is a big bonus.
What type of fabric should I use for a zipper pouch?
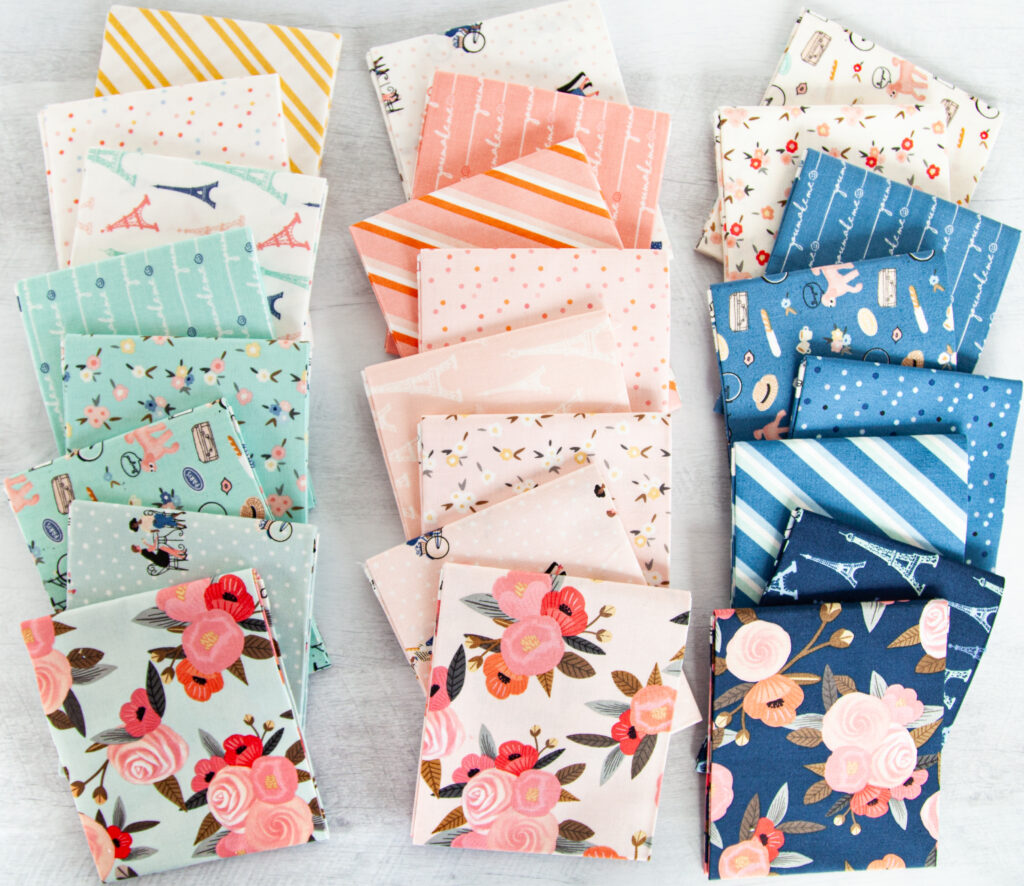
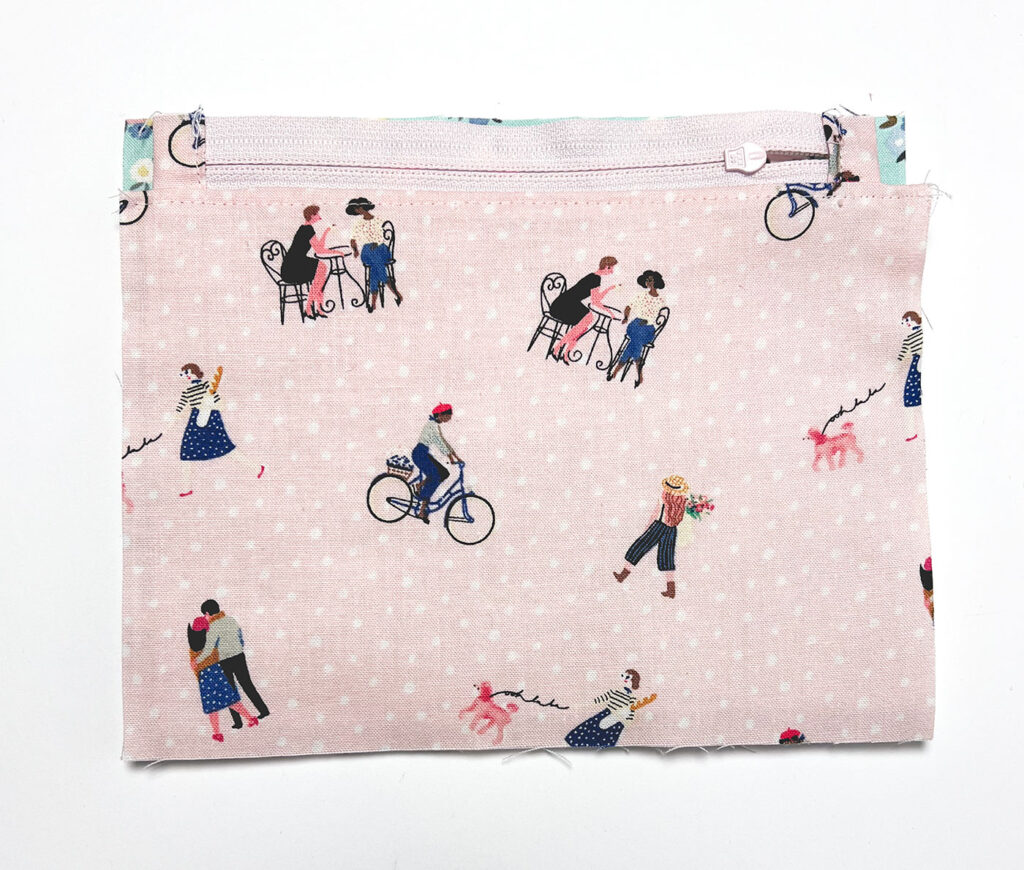
Cotton fabric is easy and straightforward to use. You can also use thicker fabrics, such as denim, upholstery fabric or canvas, but they can be a little trickier. I recommend using a nice quilting weight cotton fabric for your zipper pouch. In this tutorial I am using Saturday in Paris fabric by Christopher Thompson for Riley Blake Designs. I love all the cute patterns and the colors are bright and fun. Select two different fabrics for your pouch. You will need fabric for the inside of the pouch (and the tabs for the zipper) and fabric for the outside of the pouch.
Do I need interfacing for my zipper pouch?
The short answer is no. The longer answer is you don’t need it, but I strongly recommend it. My preference is to use fusible fleece for the exterior of the pouch. It gives structure and body to the pouch and helps it hold its shape. It’s easy to use and gives a lovely finish to your project. But again, it’s not absolutely necessary. You can also use medium weight interfacing or quilt batting if you want to reinforce your pouch but don’t want to purchase fusible fleece.
How to Sew a Simple Zipper Pouch Sewing Tutorial
Fabric and Interfacing Cutting
- Exterior fabric: Cut 2 pieces 7 1/2″ (w) X 5 1/2″ (h)
- Lining fabric: Cut 2 pieces 7 1/2″ (w) X 5 1/2″ (h)
- For Zipper Tabs, from Lining fabric: Cut 2 pieces 1″ (w) X 2″ (h)
- Fusible Fleece: Cut 2 pieces 7″ (w) X 5″ (h)
Prepare Zippers for Simple Zipper Pouch
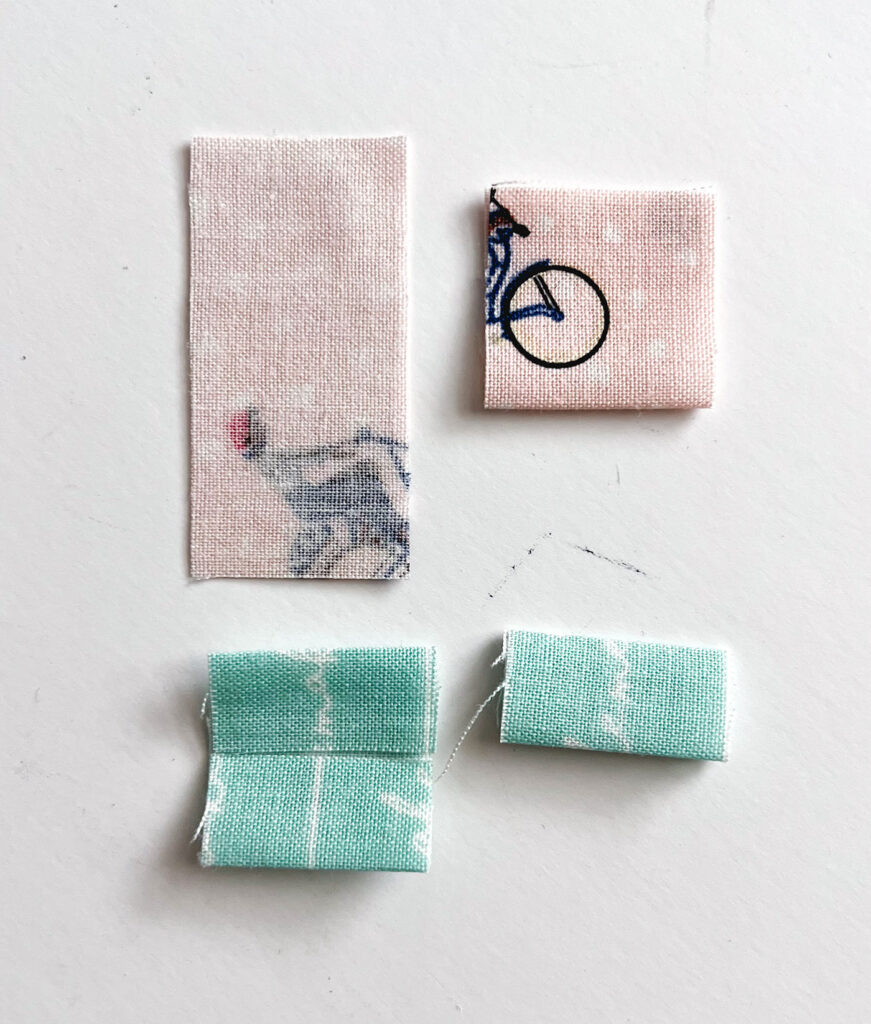
Begin by pressing the zipper tab fabric pieces in half along the 2″ length. Next, open up this fold and bring the two raw ends into the center, lined up with the crease from the previous step. Press. Finally, re-fold the original crease from the first step to enclose the two raw edges inside the folded fabric piece. Press well.
Now, take your zipper and cut off the metal end stop. Slide this cut end of the zipper in between the folded edges of one of the zipper tabs you just pressed. Make sure the edges of the tab are perpendicular to the zipper (you want a straight edge, not a crooked one). Sew across the edge of the zipper tab closest to the zipper using an edge stitch.
Open the Zipper and trim the loose ends of the zipper so they are 7″ from the outer edge of the zipper tab. Bring the two loose ends of the zipper together and slide them inside the second zipper tab. Pin into place and sew together using an edge stitch on the second tab.
Prepare Exterior Fabric for Simple Zipper Pouch
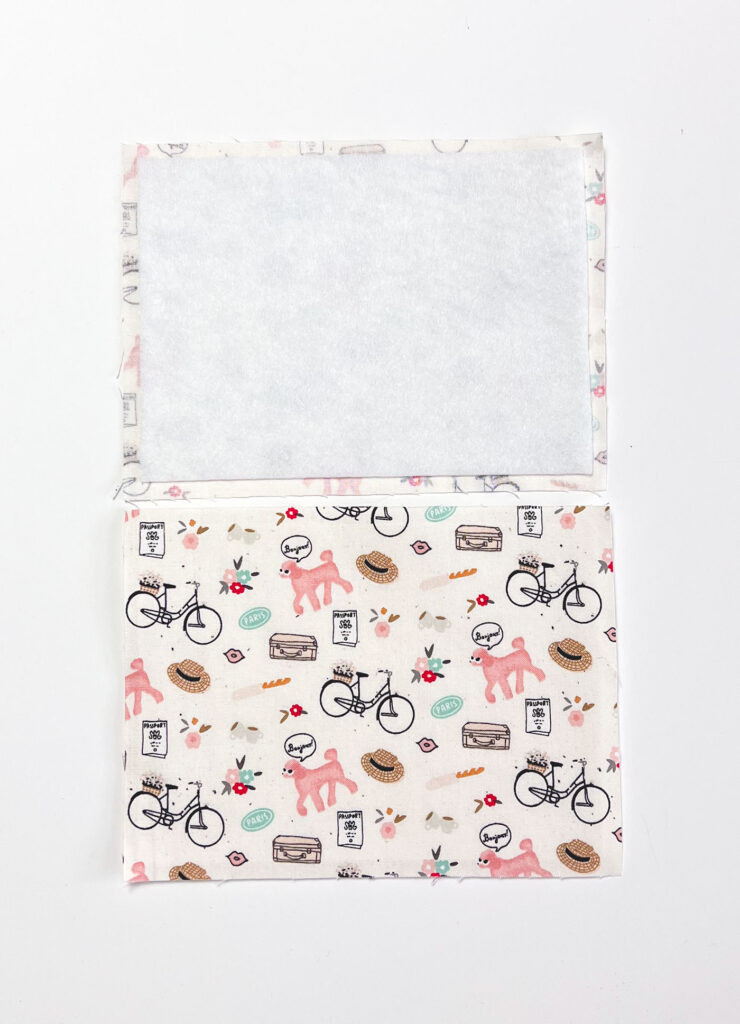
Fuse the fusible fleece to the exterior fabric pieces. There is a rough side to the fusible fleece, this is the side with the glue. The glue side of the fleece should be toward the wrong side of the exterior fabric piece. Center the fleece on the exterior fabric and follow the manufacturers’ instructions to fuse the fleece to the fabric.
If you like you may add some quilting or embellishments to the fabric at this step before assembling the zipper pouch.
Assemble the Simple Zipper Pouch
Add the zipper to the pouch
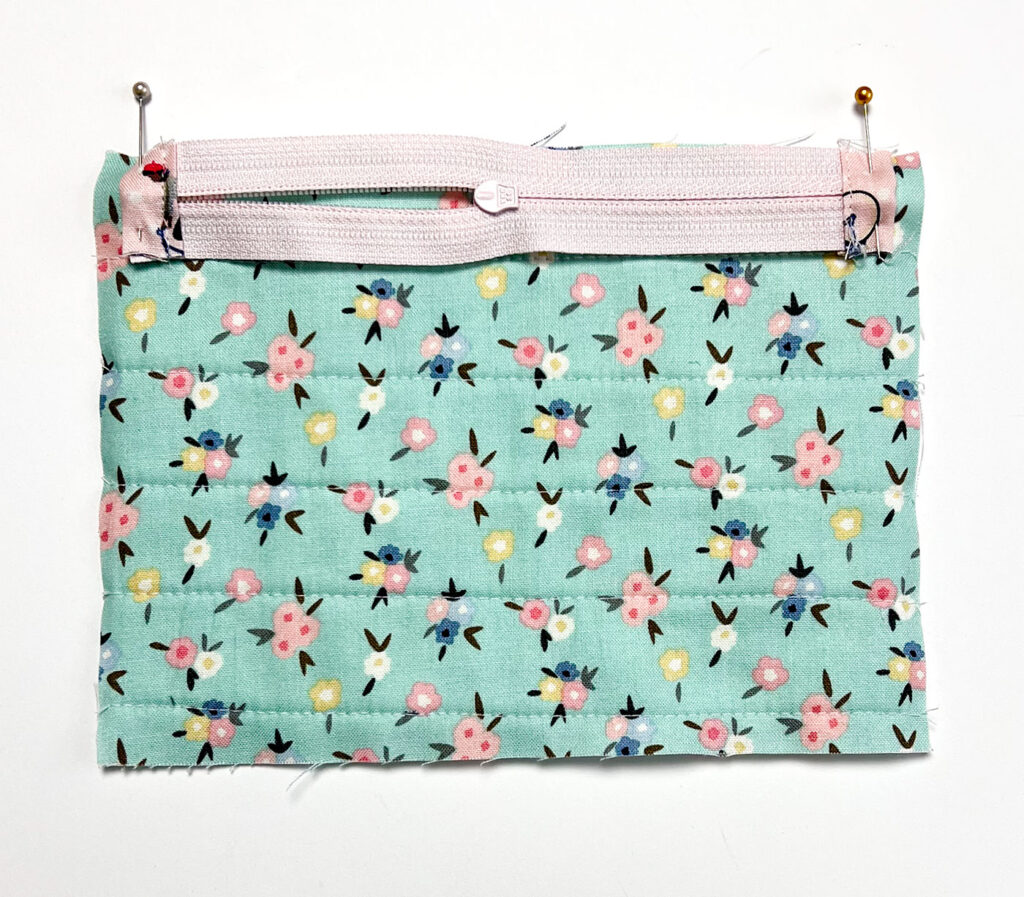
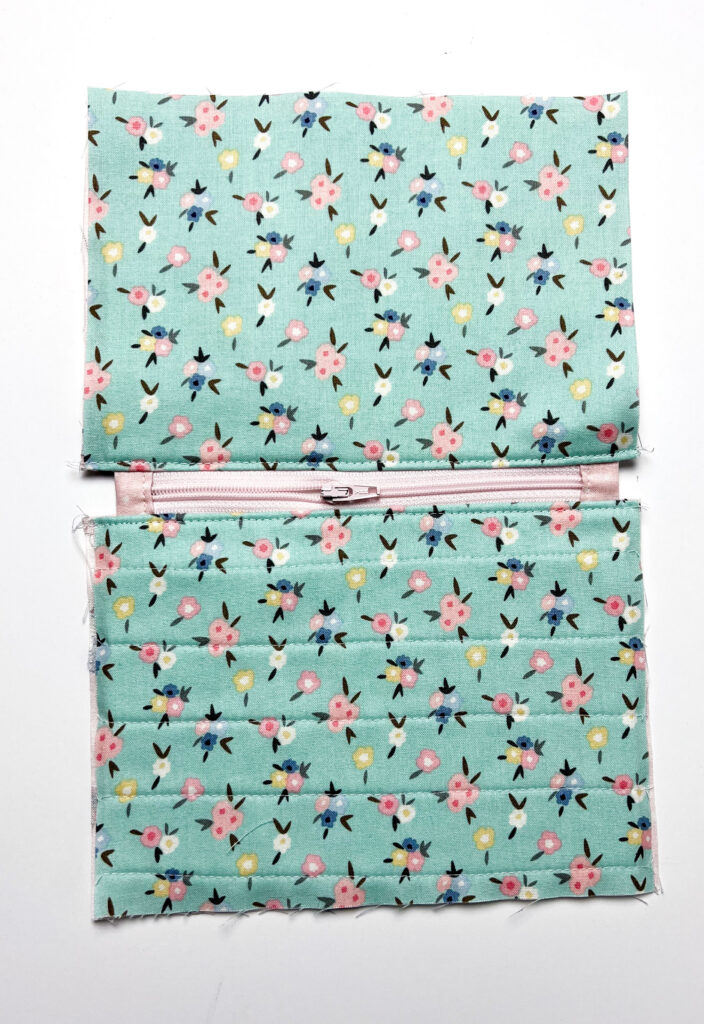
Place the front exterior fabric piece right side up on your work surface. Center the zipper along the top edge of the exterior fabric piece. The zipper pull should be toward the left side of the fabric. Pin the ends into place.

Place one lining fabric piece wrong side up on top of the exterior fabric/zipper piece. Line up the top edges with the exterior fabric and the zipper. Pin across the top edge.
Sew across the top edge using a 1/4″ seam allowance. When you get to the zipper pull, put your needle in the down position, lift up the presser foot and slide the zipper pull past the presser foot so you can finish your sewing.
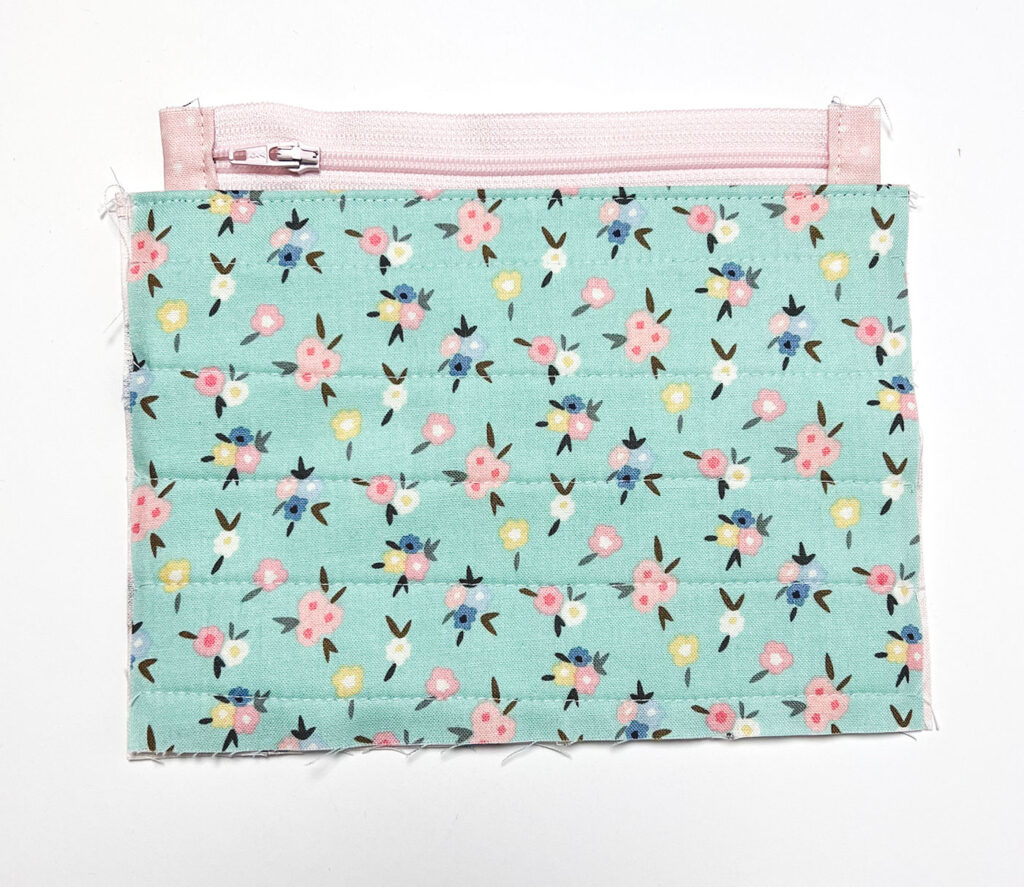
Press the exterior and lining fabrics away from the zipper. Top stitch across the top edge of the fabrics.
Repeat the steps for the second side of the zipper pouch, centering the zipper on the top edge of the back exterior fabric piece, adding the lining, and sewing across the top edge. Press and top stitch the fabric away from the zipper.
Create the body and lining of the pouch
Open the zipper about 3/4 of the way. Bring the two exterior fabric pieces together, right sides together. Line up the raw edges and pin together. Repeat for the two lining pieces. Fold the zipper tabs and seam allowances at the sipper toward the lining fabric. Pin well.
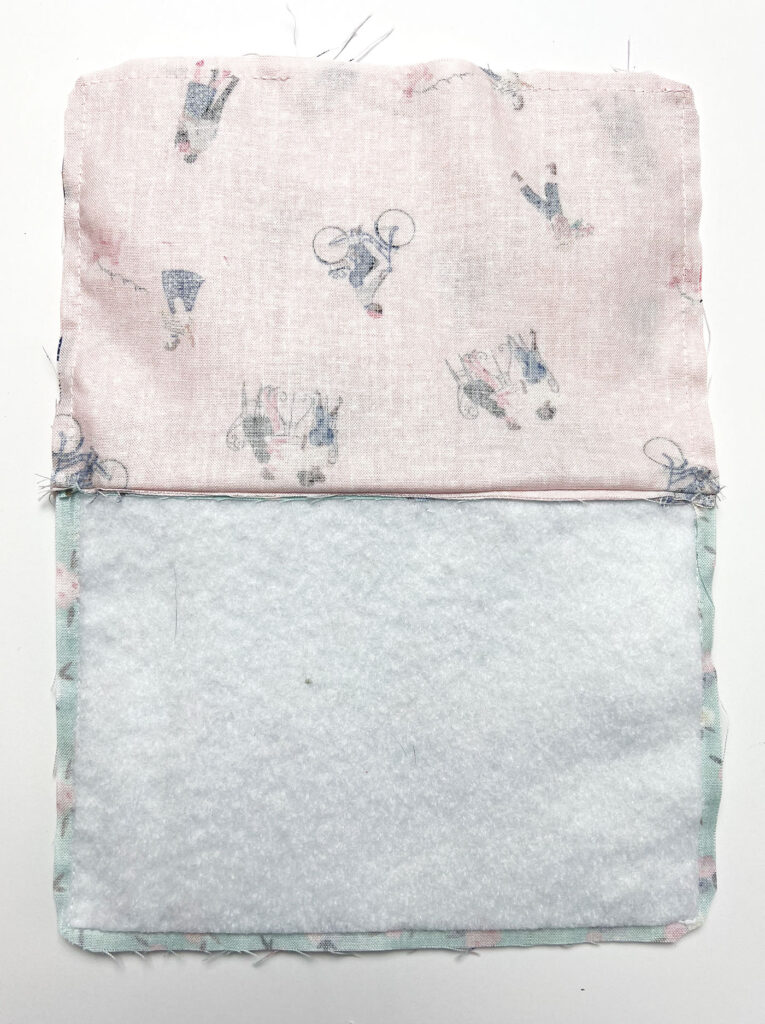
Sew around all four sides of the fabric piece, beginning at the bottom of the lining. Go slowly over the seams where the fabrics join at the zipper and try to keep the fabrics from shifting. Return to the bottom of the lining and end your stitching 3-4 inches away from where you began to leave an opening for turning. Be sure to back stitch at the beginning and ending of your stitching.
Clip the seam allowances at the four corners of your fabric piece.
Finish the Simple Zipper Pouch
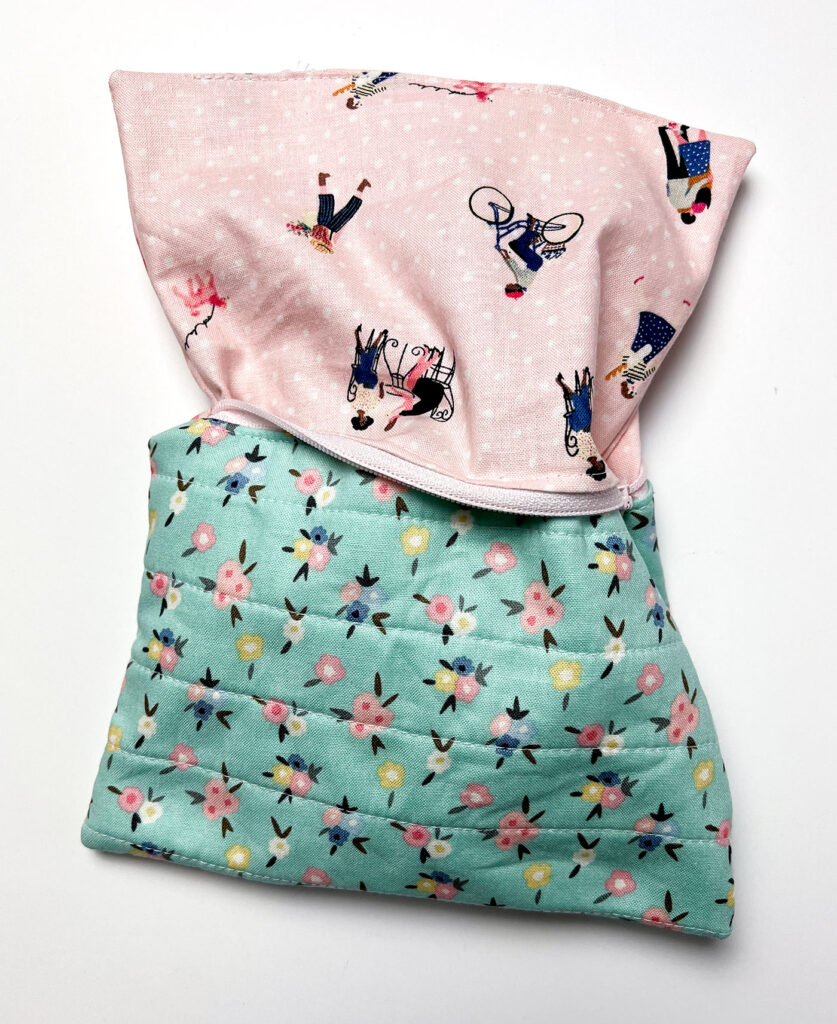
Turn the simple zipper pouch right side out through the opening in the lining. Push out the corners of the exterior of the bag using a blunt turning tool. Also, pay attention to the top seams of the zipper pouch and adjust as needed to give a nice square top to the pouch.
Fold under the seam allowance of the opening in the lining and sew closed using an edge stitch.
Push the lining to the interior of the zipper pouch. Adjust the lining so the corners line up with the corners of the exterior. Press well.
How can I use a simple zipper pouch?
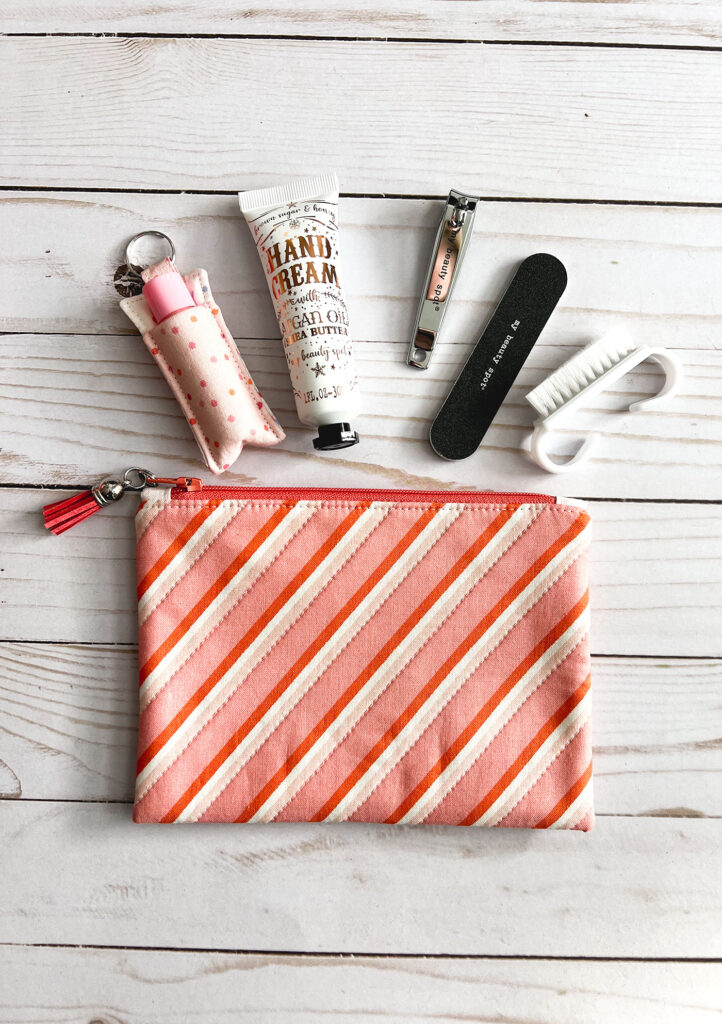
Create a hand care kit with nail care items and hand cream. Make a small first aid kit by including bandages, antibiotic ointment and hand sanitizer. Add some crayons and a small notebook for a boredom buster on the go.
There are so many ways to use them, the only limit is your imagination.
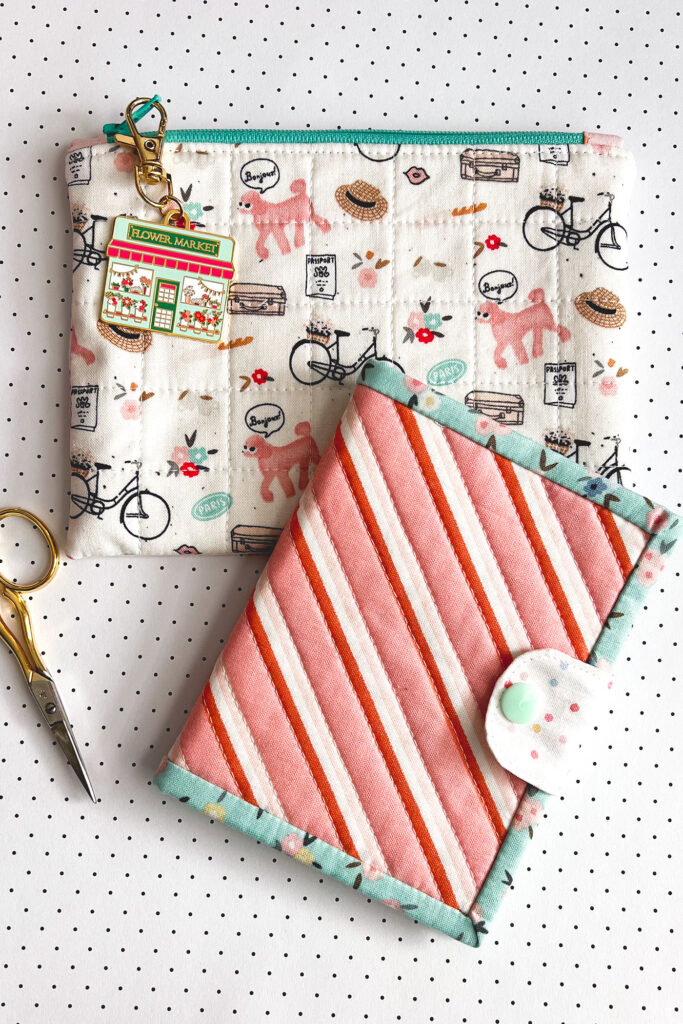
One other way I use them is to organize my hand work. I keep bobbins of embroidery floss in mine so I can keep the colors for a project all together. I create a coordinating needle book and keep them all in an Extra Large zipper pouch along with the stitching project so everything is portable, organized and cute too!
The needle book pattern is a free pattern available only to subscribers of my newsletter. You can sign up using the form below and the pattern will be sent right to you.
Now that you know how to sew a simple zipper pouch, what is the first thing you will organize with your new simple zipper pouches?
Happy Sewing! Amy