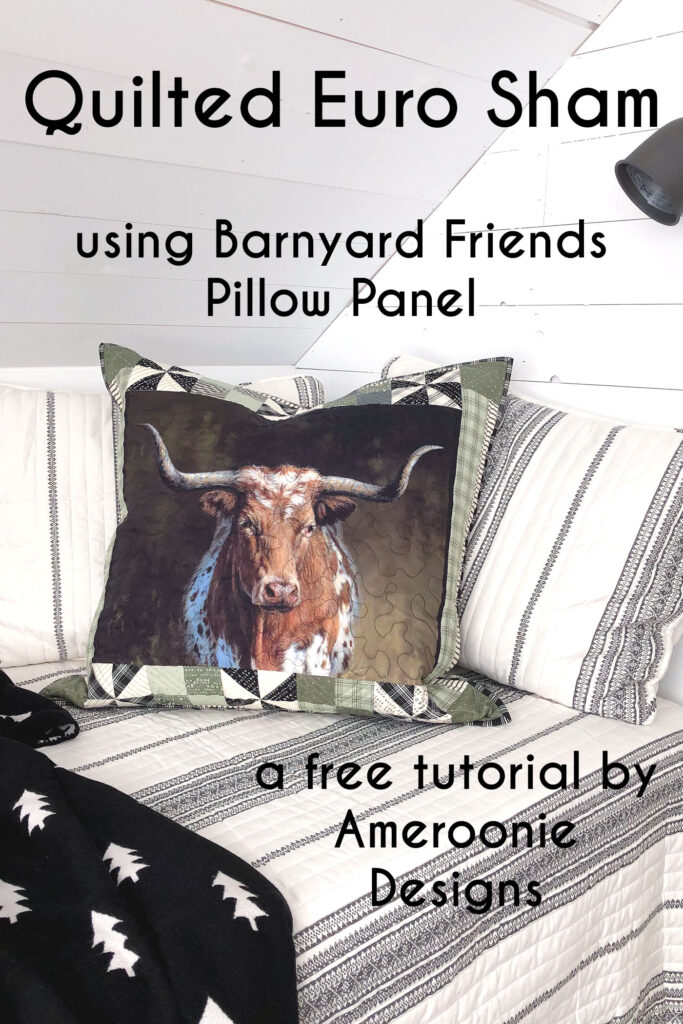
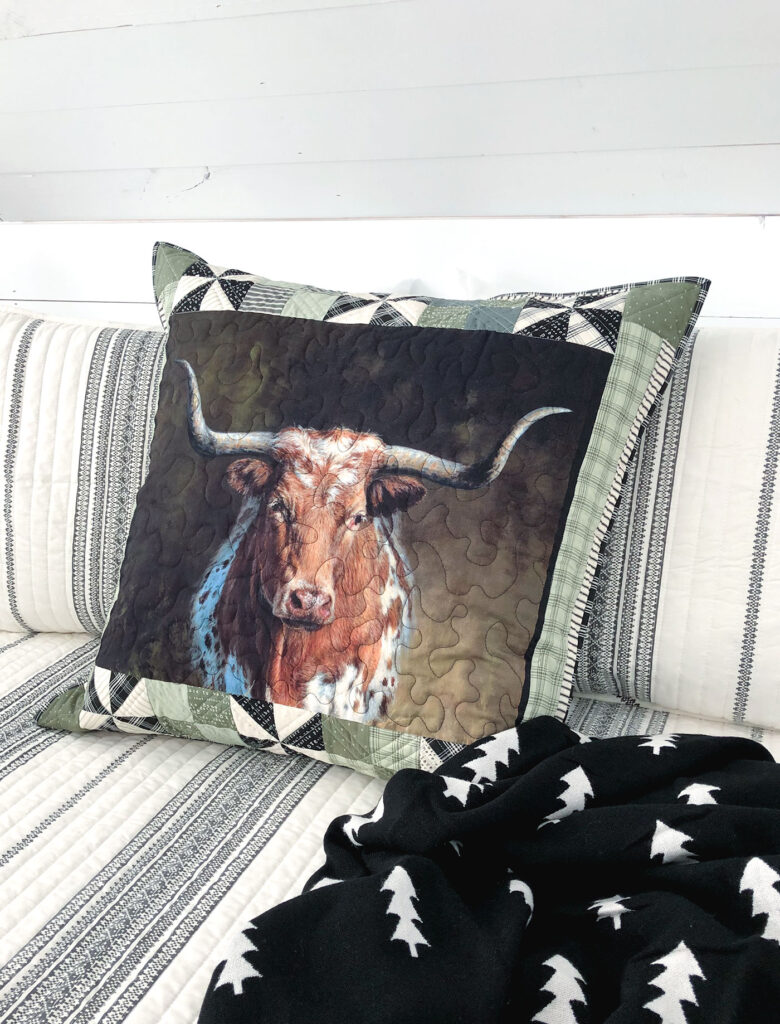
My sister has a barn that she has recently converted to usable living space. Up in the loft she created a darling sleeping space with a queen bed and four amazing twin size cubbies. When I saw this Barnyard Friends pillow panel, I knew it would make a perfect addition to her new Wyoming digs. Adding some traditional quilt blocks to the top and bottom allowed me to size up the 17″ X 20″ panel into a full 26″ X 26″ Euro size sham. I absolutely adore the way this quilted euro sham looks in her lovely new space!
Doesn’t it look absolutely amazing? This Euro sham is a pretty quick make, because the pillow panel does most of the heavy lifting. Isn’t this steer gorgeous? I guess moving to Wyoming is changing me in more ways than I realized. 😉 In fact, you can see my other project from a panel in this Yellowstone Mini Quilt here. I paired the pillow panel with Gingham Farm fabrics and I love how the colors work together. Ready to get sewing?
Tutorial to sew a Quilted Euro Sham
Supplies:
- Barnyard Friends Pillow panel
- a minimum of 4 fat quarters for the patchwork blocks- light green, dark green, cream and black (I used more fabrics for a scrappier look)
- 1/4 yard or fat quarter of medium green for side borders
- 1/4 yard or fat quarter- black and white stripe for outer border
- 1/2- 2/3 yard fabric for pillow back depending on how you finish the pillow
- 1/3 yard black fabric for binding
- 2/3 yard fabric for backing the pillow front (can use any fabric for this)
- 21-26″ zipper
- batting for quilted pillow front (27″ square)
Cutting:
Pinwheel blocks:
- Cut 6- 5″ squares from the cream fabric
- Cut 6- 5″ squares from black fabric
Four Patch blocks:
- cut 8- 2 1/2″ squares from light green
- cut 8- 2 1/2″ squares from Dark green
Additional cutting:
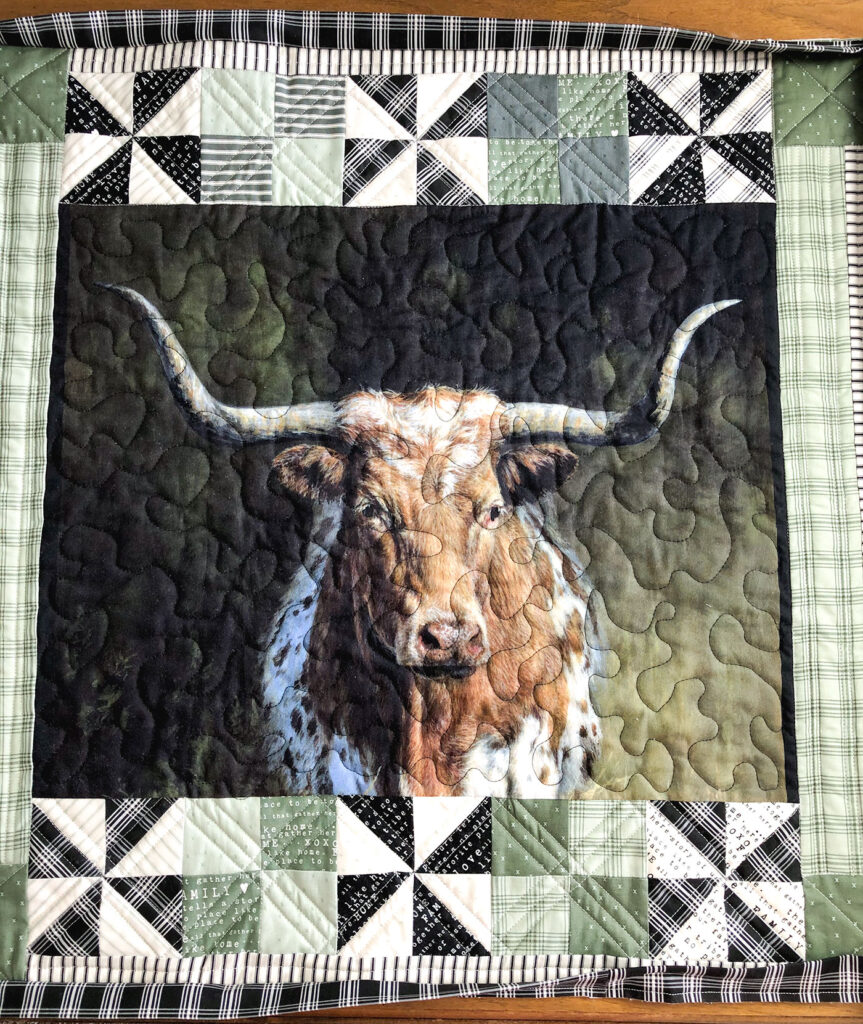
- trim the Barnyard Friends panel to 20 1/2″ wide X 17 1/2″ high
- Cut 4- 1 1/2″ X 20″ strips from the cream and black stripe fabric for the outer borders
- From the dark green fabric for the corner pieces cut 4- 3 1/2″ squares
- Cut 2- 2 1/2″ X 20 1/2″ strips from the medium green fabric for the side borders
- From the fabric for backing the pillow front and from batting you will cut a 27″ square
Sewing the Patchwork blocks
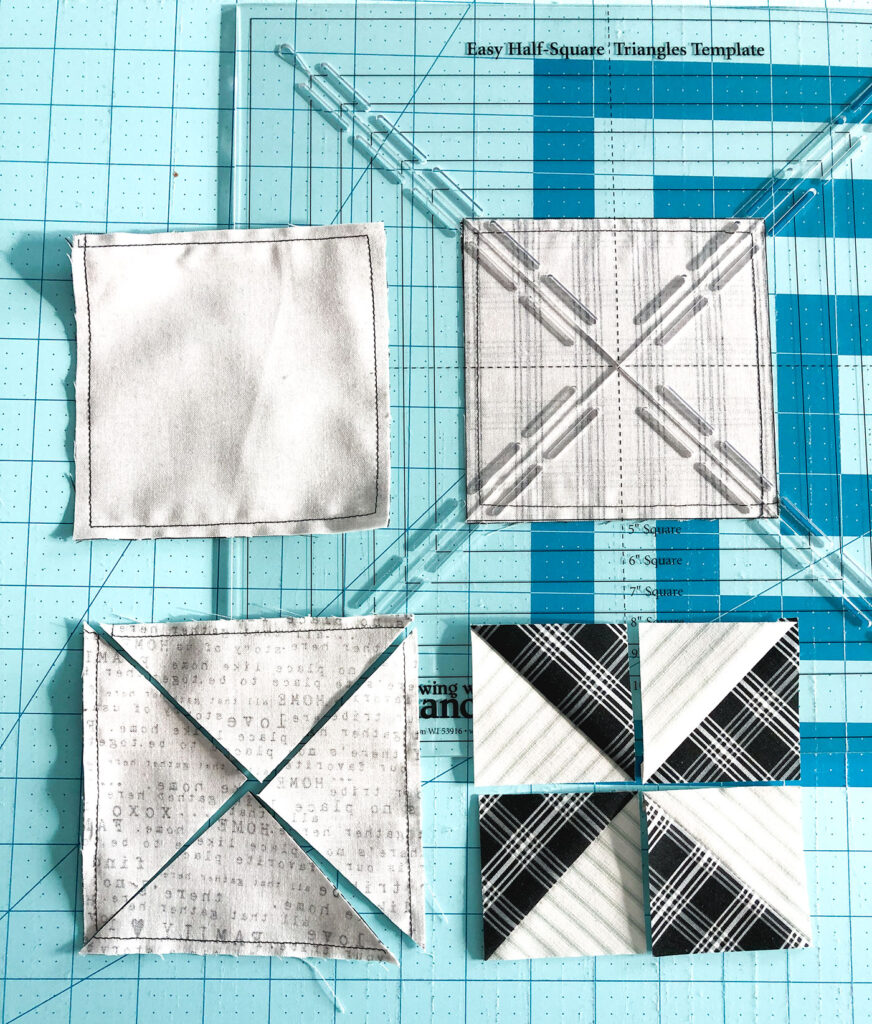
The 4 at a time method is what I used to create the half square triangle blocks for the pinwheels. I find it’s really quick and helps me have more accurate blocks. To start, cut 2- 5″ squares from the cream and black fabrics. Place them right sides together. Next, sew around all four sides of your square. Cut your square apart on the diagonal (as shown in the picture). I am using the Easy Half-Square triangles template from Nancy’s Notions, but you don’t have to. Press open your squares with the seam allowance toward the darker fabric. Finally, trim down your half-square triangles to 2 1/2″ square.
Arrange your squares to form a pinwheel block and sew together.
Next, you will make 4- four patch blocks. Cut 8- 2 1/2″ squares each from the light green and dark green fabrics. Arrange them in pairs, one light and one dark and sew together. Press the seam allowance toward the dark fabric. Last, you will sew your pairs together to create a four-patch block.
Assemble the Euro Sham pillow front
Now, sew your pinwheel blocks and four patch blocks together beginning with a pinwheel block and repeating until you have two rows of five blocks each. Sew these rows to the top and bottom of your pillow panel. If you don’t want to use the pillow panel, you can swap it out for a feature fabric cut to 17 1/2″ high by 20 1/2″ wide. To finish the center panel, sew a top and bottom border of the cream and black stripe that has been cut to 1 1/2″ X 20 1/2″.
Create the side borders by first sewing the medium green and remaining black and cream striped strips together along the 20 1/2″ sides. Sew a dark green 3 1/2″ square to the top and bottom of your combined strip pieces. Add these side borders to either side of your center panel.
Finishing the Quilted Euro Sham
Make a quilt sandwich with the backing fabric, batting and pillow front. Baste and quilt as desired, then trim down to 26″ square. I like to make a pillow back using this Hidden Zipper method, but you can make it any way you like. Once you have your pillow back, place the quilted pillow front and pillow back wrong sides together and finish. I chose to bind mine together like I would a quilt, or you can simply sew around the entire perimeter using a 1/2″ seam allowance and turn right side out through the zipper.
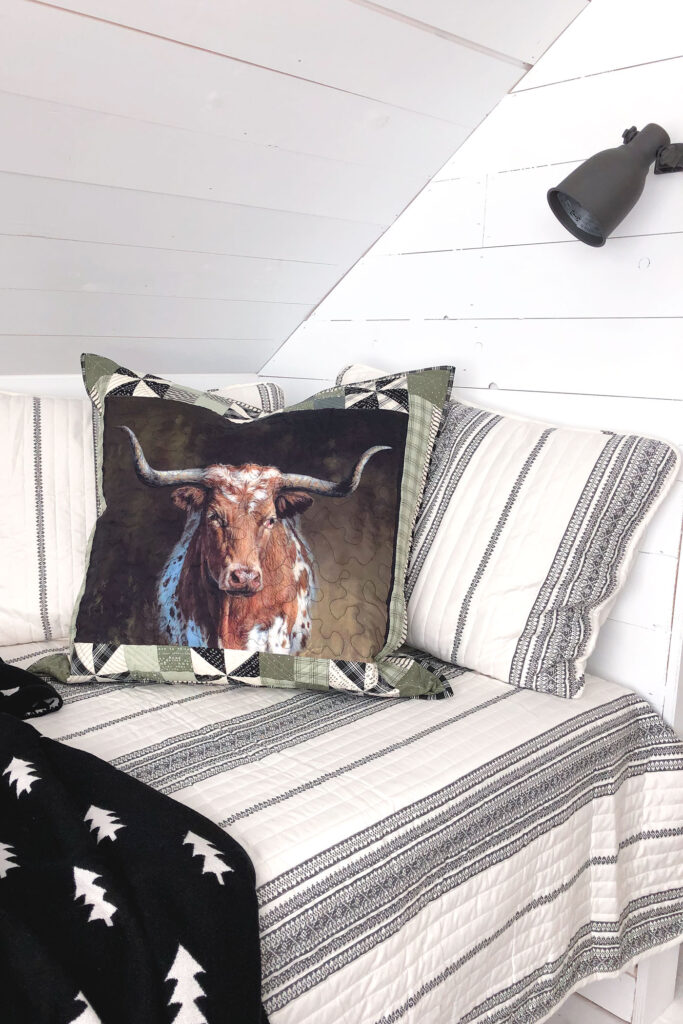
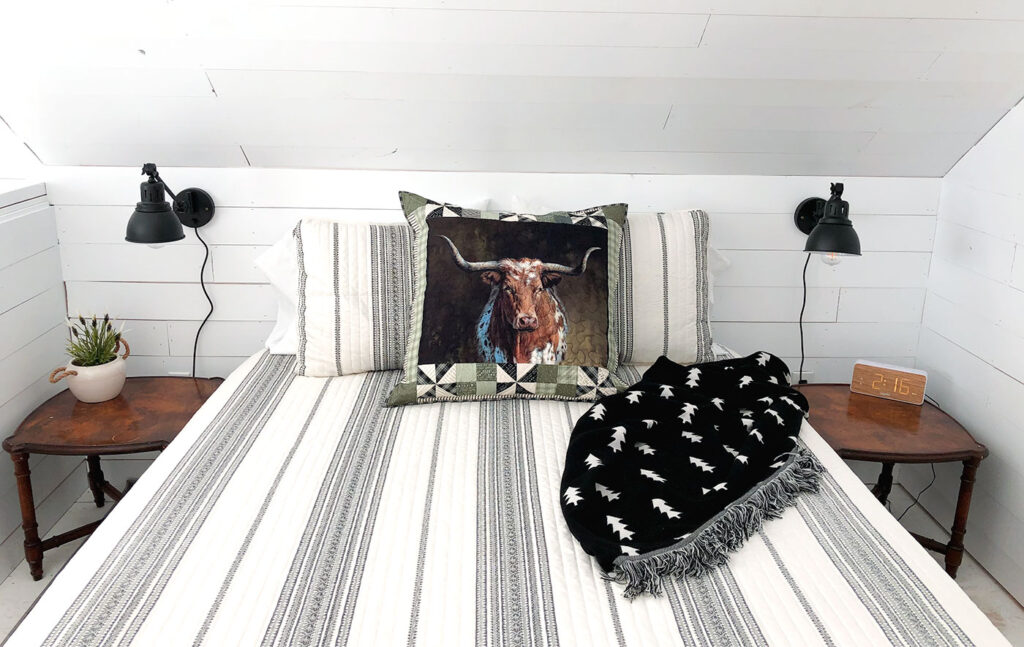
These sleeping cubbies up in the loft are the perfect spot to snuggle up with a good book and read. I love these large pillows for adding support and softness to lean against in bed. I purchase my 26″ down pillow inserts at IKEA and have loved how they hold up to lots of use.
These pillows are also great for throwing down on the floor while watching movies or just hanging out.
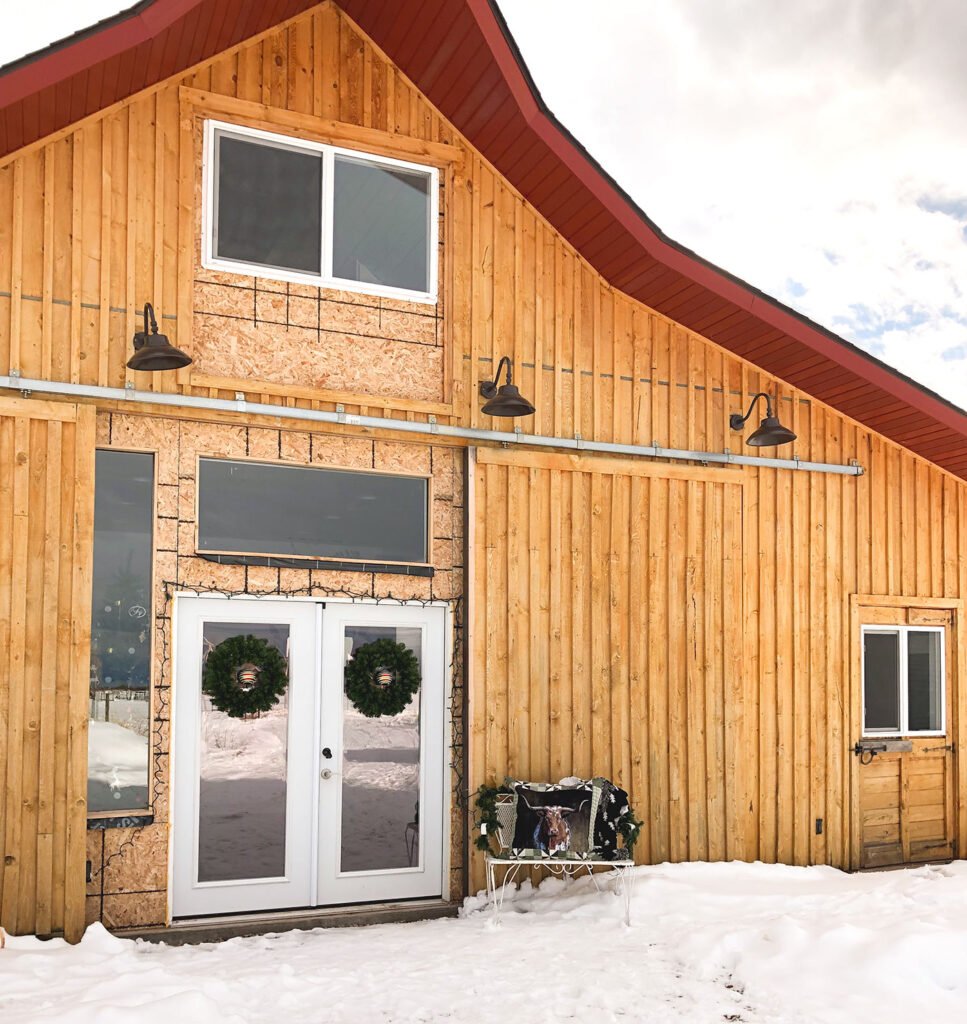
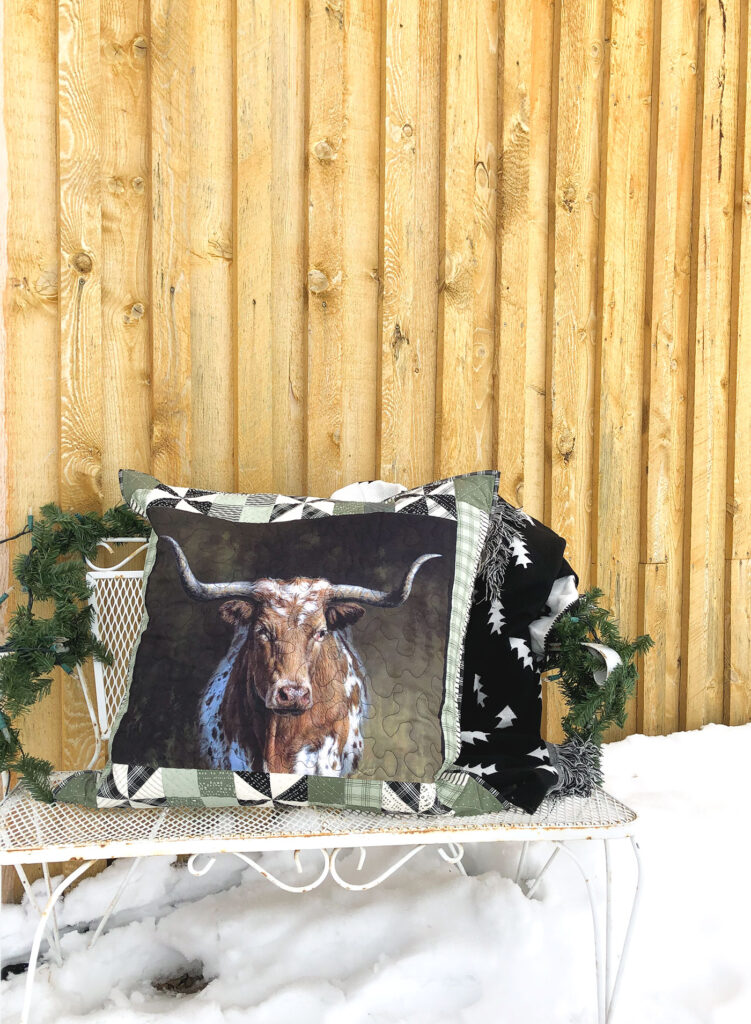
And I just couldn’t resist adding a picture of the whole barn so you can see how charming it all is! Such a fun gathering place for my sister and her family!
If you find yourself inspired to make some of these Euro size shams for yourself, you might like this Jelly Roll Pillow that finishes to the same size and has so much texture, you will LOVE it!
And, if you like texture, but don’t want a pillow that is quite this large, my Wavy Ruffle Pillow is such a fun sew and it looks amazing!


Barnyard Friends & Gingham Farm – Quilted Euro Pillow + Tutorial! – Riley Blake Designs
December 9, 2019 at 4:31 pm[…] Longhorn and the quilting and the Gingham Farm border….all of it! Hop on over to Amy’s BLOG for photos and details, and don’t forget to follow Amy on Instagram @amerooniedesigns for […]