This is a sponsored conversation written by me on behalf of Cricut. The opinions and text are all mine.
This post also contains affiliate links, which means I receive a small commission for sales made through those links at no additional cost to you.
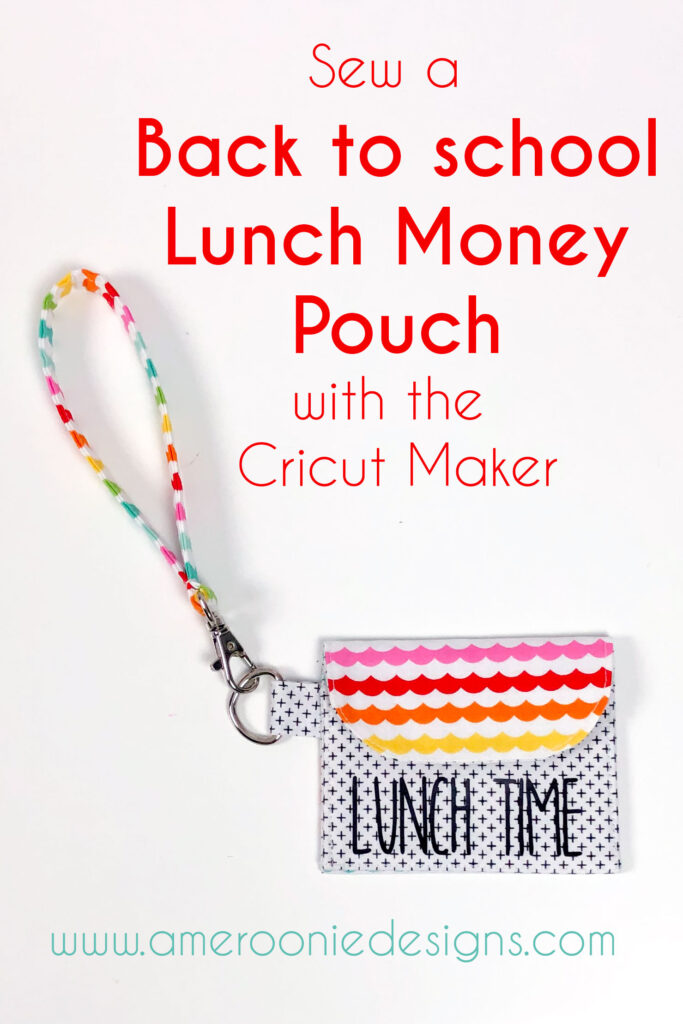
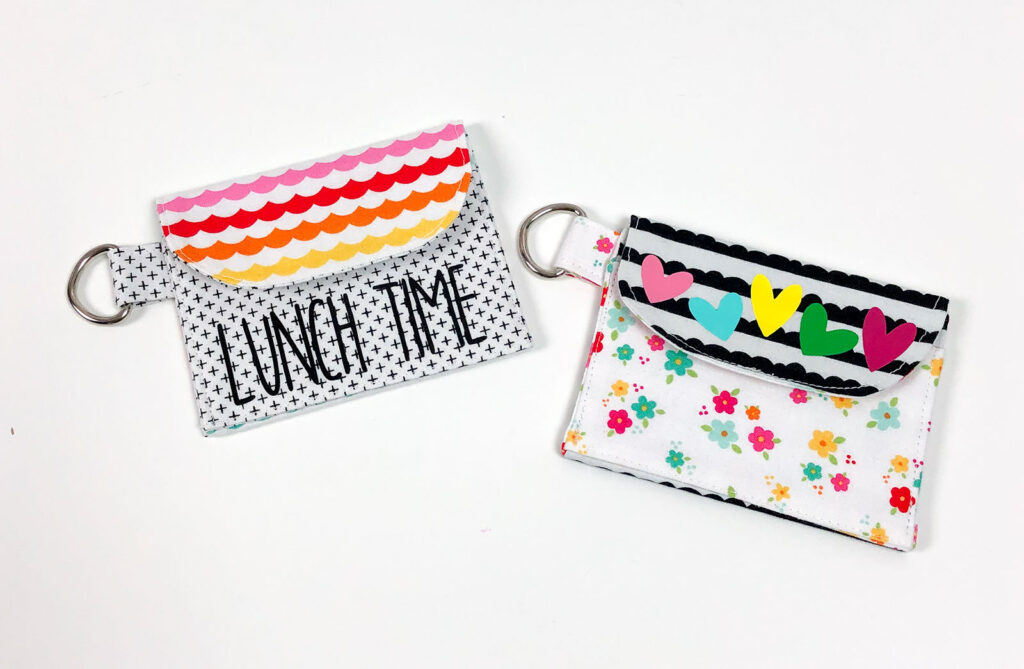
Do you ever send your kids to school with money for lunch hoping it will actually make it where it is meant to go? Keep the money safe and sound by sewing a Back to School Lunch Money Pouch with your Cricut Maker. This sweet and simple pouch is a modified version of one I shared many years ago on my blog here. If you don’t have a Cricut Maker, but still want to make a wallet, I will have an updated version of this tutorial, with a printable version of the pattern pieces soon.
These Lunch Money Pouches can be easily customized by swapping out the fabric, or adding some personalization using Iron-on Vinyl.
Sew a Lunch Money Pouch with the Cricut Maker
If you have a Cricut Maker, you are in luck because it makes cutting out the pieces for this lunch money pouch super simple and easy. You can find the file with the pieces here. The blue piece of fabric is your exterior fabric, the yellow is the lining/pocket fabric and the fabric for the d-ring strap. The darker yellow indicated that the lining fabric is fused with medium weight interfacing.
Supplies
First you will need fabric, I like to use 2 different prints, but you can use more or less if you like. Next, you will need some medium weight interfacing- this will give your project a nice crisp finish. Finally, you will need a 1″ d-ring and a 2-3″ strip of hook and loop tape. And of course you will need your Cricut Maker, sewing machine and other basic supplies such as scissors.
Cutting the Fabric
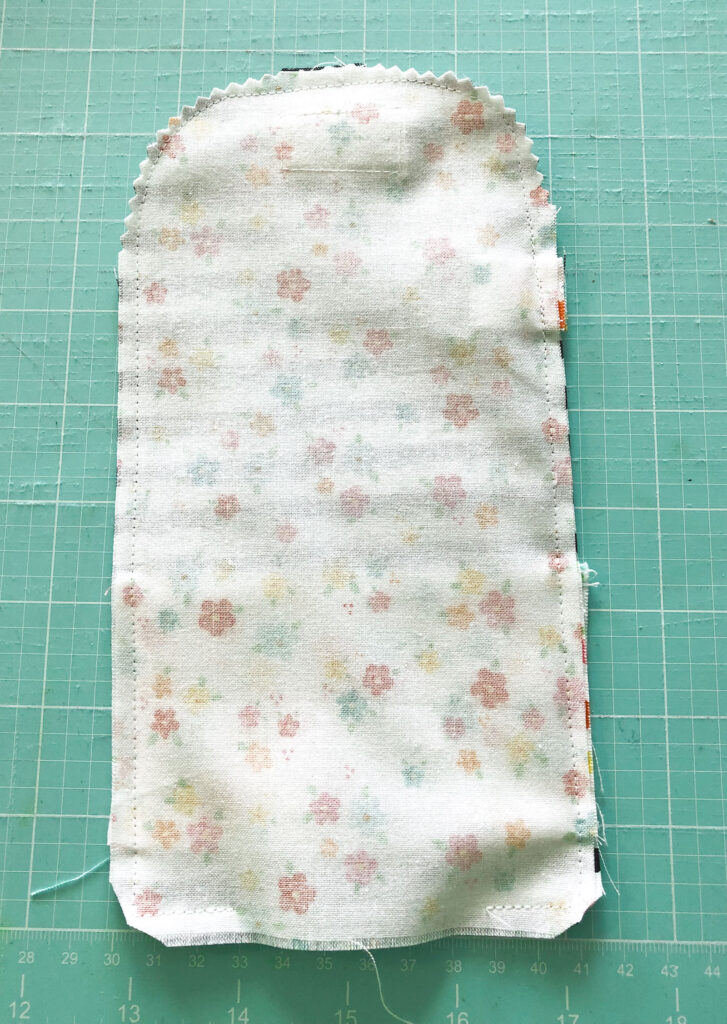
- From Exterior Fabric: Cut 1 piece 5 1/2″ X 10″
- Lining Fabric: cut 1 piece 4″ X 5 1/2″
- Lining Fabric: cut 1 piece 5 1/2″ X 15″ *note: you can alter this by changing the configuration of the pieces on your cutting mat- you may need to detach the pieces in design space before moving them on the cutting mat to have them fit the piece of fabric you are using.
- Medium weight interfacing: cut 1 piece 5 1/4″ X 9 3/4″
- Medium weight interfacing: cut 1 piece 3 3/4″ X 5 1/4″
Fuse the interfacing to the wrong side of your exterior fabric and your 4″ X 5 1/2″ piece of lining fabric. Head to your Cricut Maker and cut the pattern pieces according to the mats in design space. *NOTE: use Bonded Cotton as your material setting for the fabric with interfacing. Place it fabric side down on your pink mat. You DO NOT need to mirror the images because they are symmetrical, but on future projects, you may need to mirror the image before cutting.
Assemble Your Lunch Money Pouch
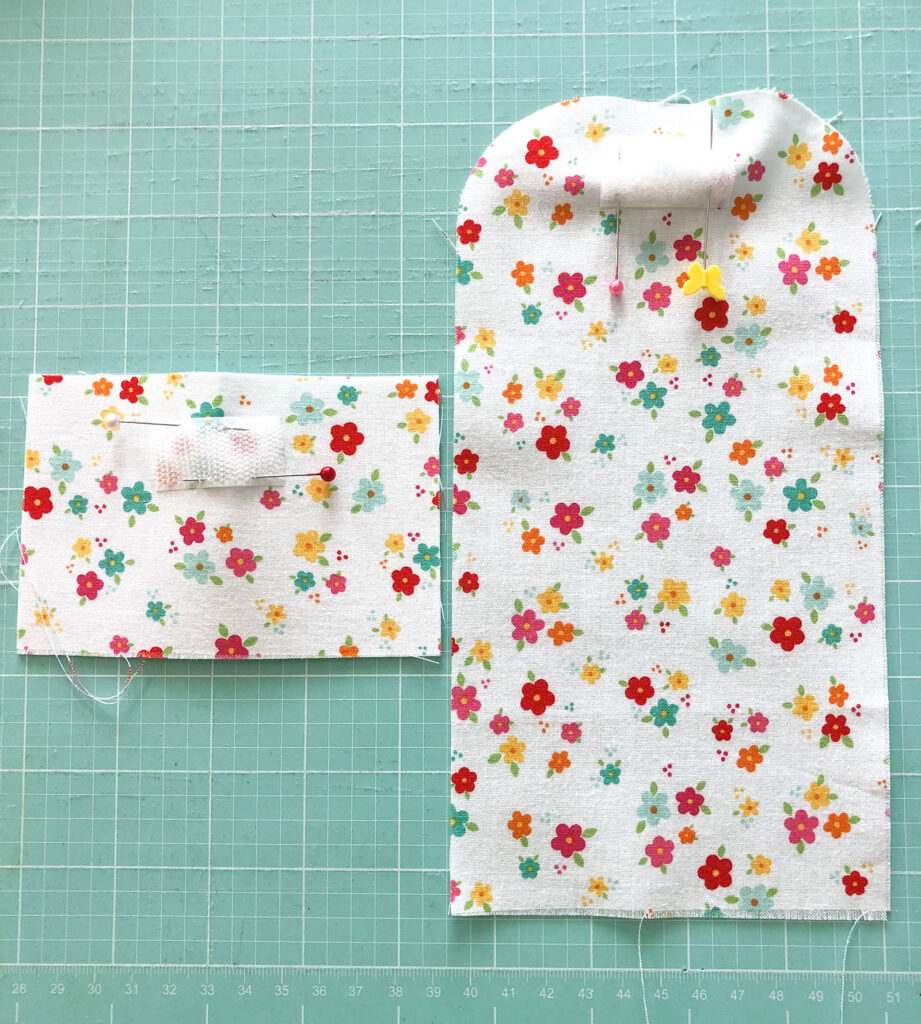
Position one side of the hook and loop tape in the center of the 3″ X 4 1/2″ rectangle WITH interfacing, 1/2″ from the top. For the other piece of hook and loop tape, center it 1/2″ down from the rounded edge on the lining fabric (no interfacing).
Sew around both pieces of hook and loop tape.
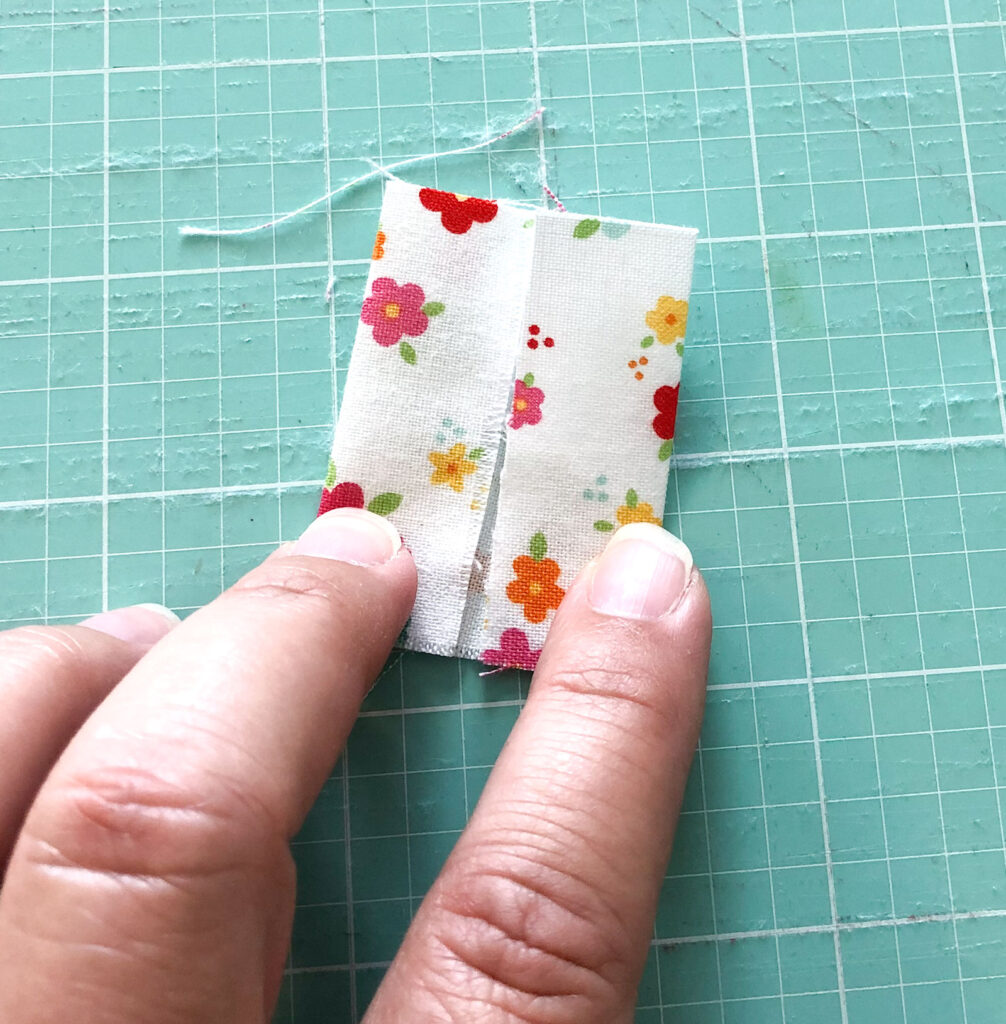
Take the 2″X3″ rectangle of fabric to your ironing board. Press in half on the 3″ side (rectangle is now 2″ X 1 1/2″). Next, open up your rectangle, and bring the outside edges into the crease you just pressed. Press both sides. Last, re-fold your original crease to enclose both raw edges into your strap piece.
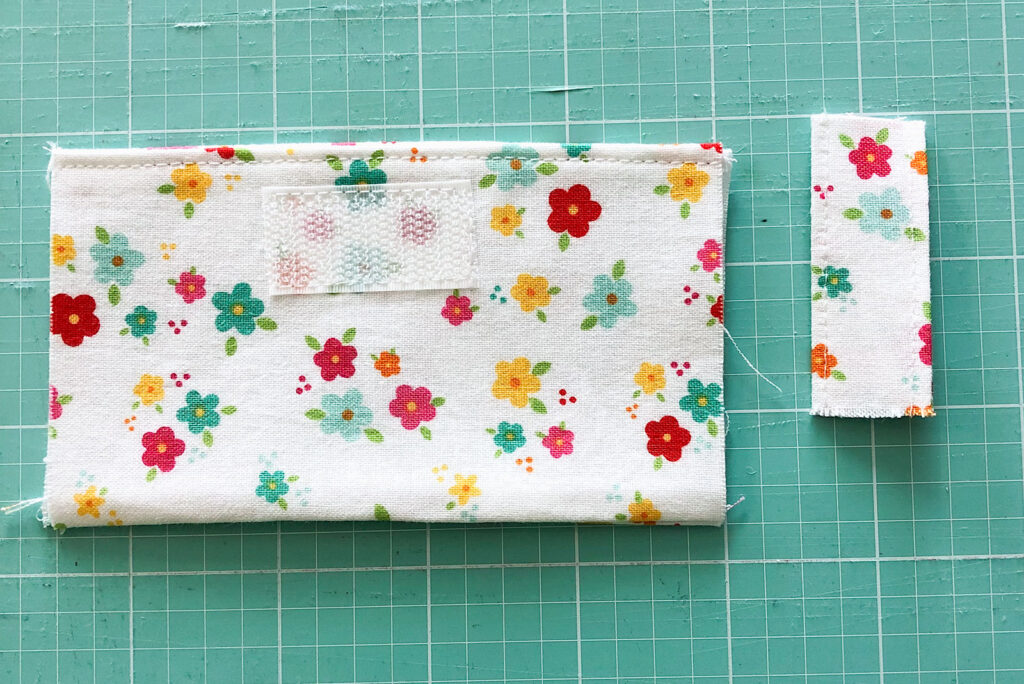
- Take the two 3″ X 4 1/2″ rectangles and place them right sides together.
- Next, sew along both 4 1/2″ long sides (top and bottom) using a 1/4″ seam allowance.
- Turn the piece right side out and press out all of the seams.
- Top stitch along the edge closest to the hook and loop tape.
- Finally, take your d-ring strap and top stitch along both folded edges of the strap.
Final Assembly
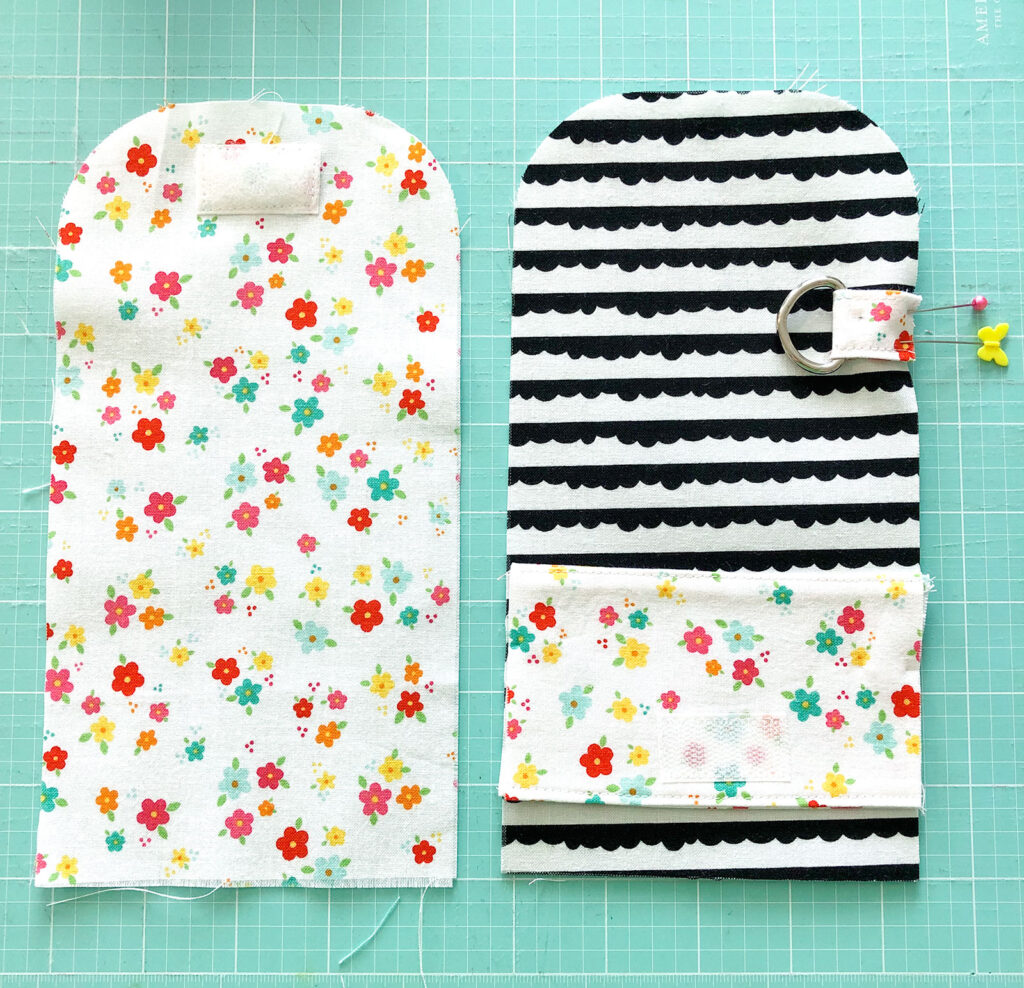
First, prepare your exterior piece by placing the pocket 3/4″ up from the straight edge. The hook and loop tape should be closest to the straight edge. Stitch along the side of the pocket opposite the hook and loop tape to hold in place.
Next, fold the d-ring strap in half and slide the d-ring into the fold. Place the d-ring 5 1/4″ up from the straight edge with the d-ring in the middle of the fabric as shown. Pin in place.
Finally, place your lining fabric right sides together on the exterior piece. Line up all edges and pin in place. Sew around the entire pouch, leaving a 3″ opening on the short straight side for turning, using a 1/4″ seam allowance.
Clip the corners and cut notches into the rounded edges of your lunch money pouch. *note: I like to use pinking shears to do the notches, but if you don’t, regular scissors are just fine. Be careful to not cut the stitches as you go.
Turn the pouch right side out and press well. Turn under the opening on the bottom seam, press and stitch shut.
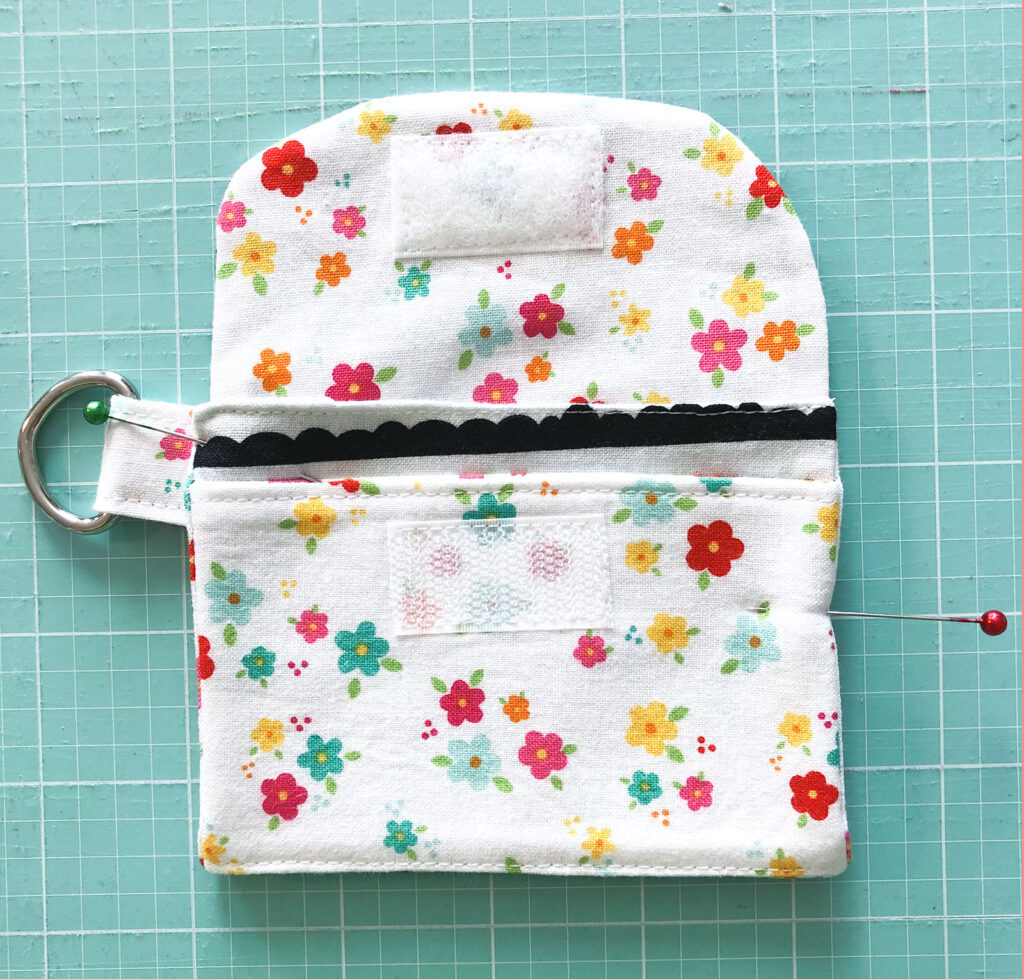
Fold up the bottom of the pouch so the bottom of the pocket piece is at the fold. Pin in place. Sew around the pouch from the bottom of the pocket, around the rounded flap and down to the other side of the pocket.
The final step is to fold over the flap, making sure the hook and loop tape is lined up, and press the fold well to crease the flap in place.

Customize your Lunch Money Pouch with Iron-on Vinyl
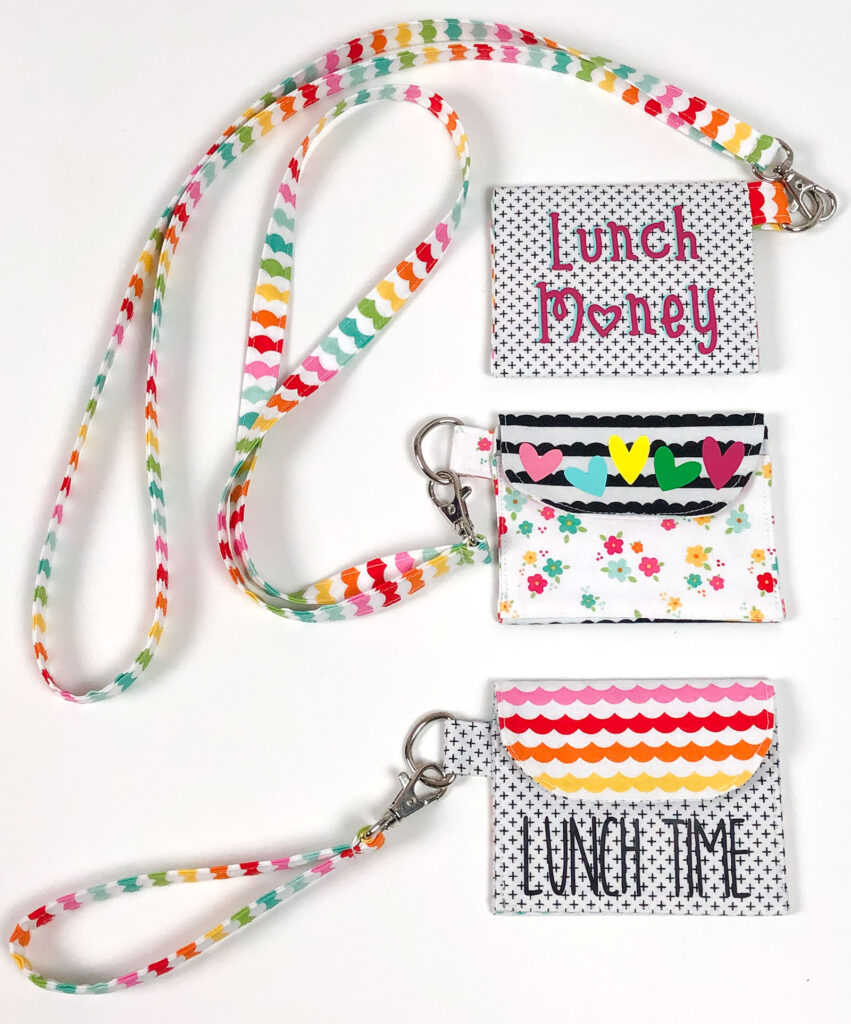
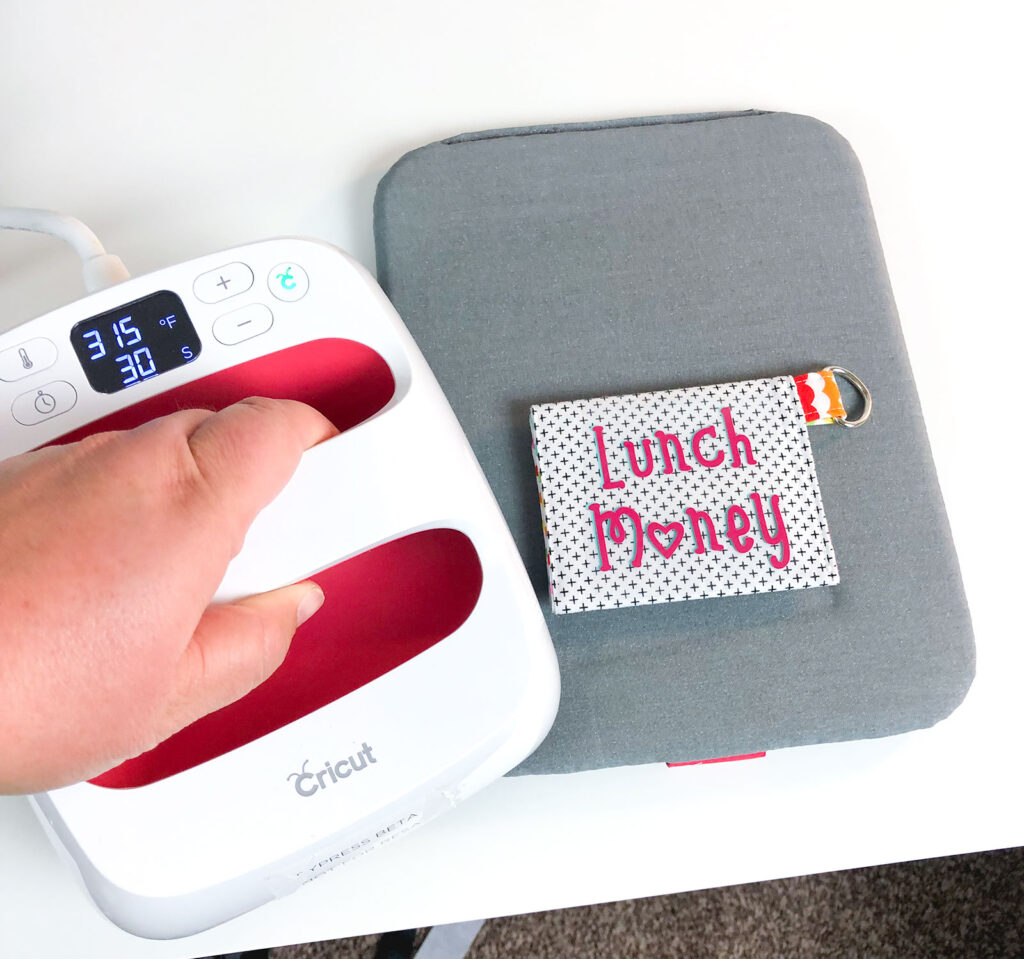
Here is where the fun really begins! Use Iron-on Vinyl– in these examples I used Everyday Iron On, to customize your Back To School lunch money pouch. I stated the obvious with the addition of text on mine, but you could add your child’s name or let your child select an image from design space. Adding some custom vinyl personalizes these fun pouches and makes them uniquely yours.
Some tips for adding the vinyl:
- Make sure the image or text will fit on the area of the pouch you are personalizing.
- Mirror the image to ensure the text and images are the correct direction when fusing.
- Use the heat guide for the Easy Press 2 to make sure you set the time and temperature to the correct setting for the type of fabric and vinyl you are using.
If you would like to make a wrist strap for your lunch money pouch, I have a great tutorial on my blog. I do not have a tutorial for the lanyards because if I really wanted to have a lanyard for my child- especially an elementary aged one, I would want to have a break-away clasp on the back. Because I don’t have any safety clasps on hand, I will have to wait to do that tutorial.
I hope you enjoy making your Back to School Lunch Money Pouch! If you do sew one up, I would love to see your share on social media- tag me on Instagram or Facebook @amerooniedesigns!
Looking for another pouch to stitch up? This mini coin pouch is a fun, tiny zippered pouch that is super fun to sew. And this Pencil Pouch with color blocking is gorgeous and useful at the same time!
Happy sewing! xoxo, Amy