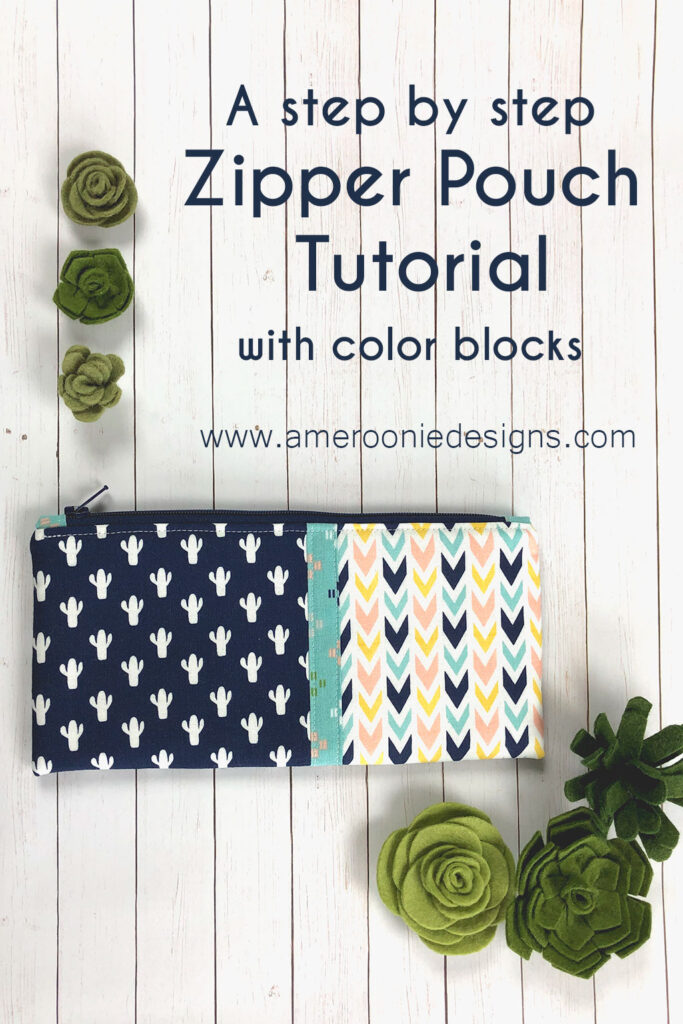
Zipper pouches are always handy for organizing, carrying and sorting all kinds of things. If you can make them cute, even better! This Color Block Zipper Pouch Tutorial will walk you through the steps of making a color blocked Zipper pouch. The pouch finishes at 4″ X 8 1/2″; so it is perfect for holding pencils or markers or whatever else you might want. The Color Block design allows you to show off your favorite fabric prints.
For another fantastic Zipper Pouch Pattern, you can find my Travel Zipper Pouch nesting set tutorial here.
Sew a Color Block Zipper Pouch
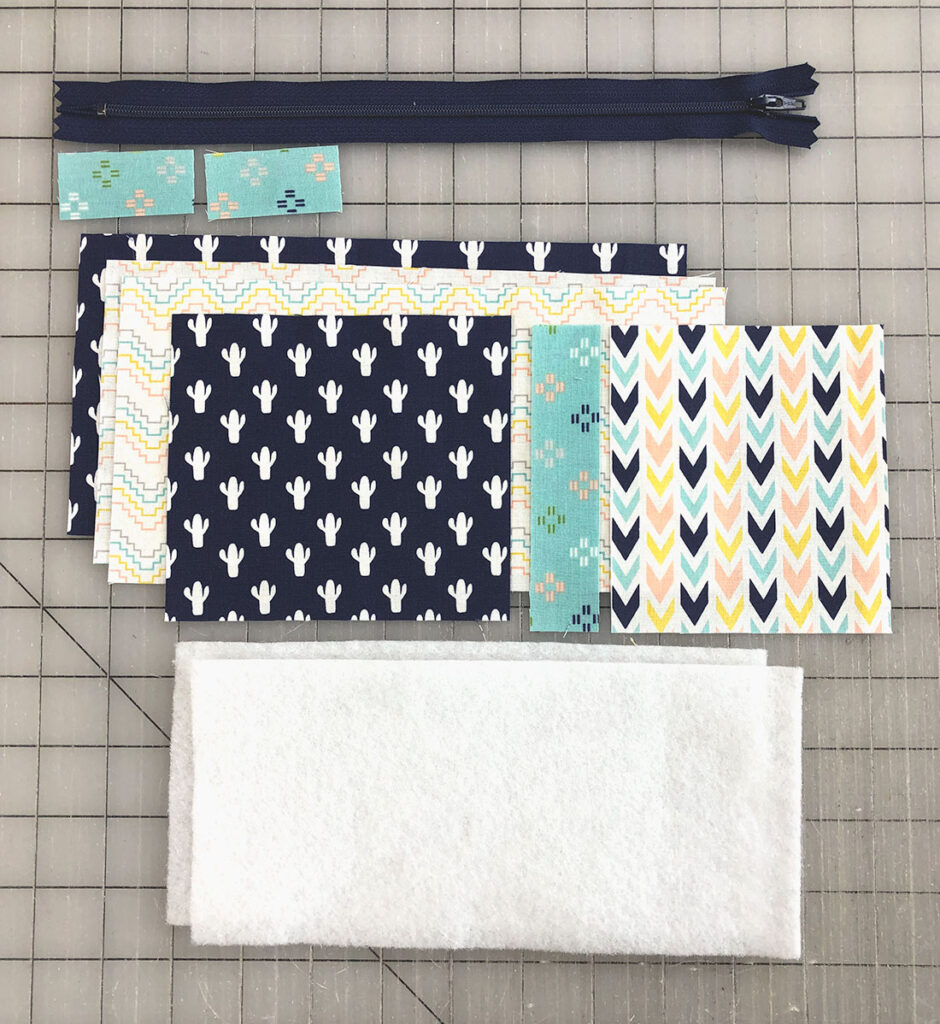
Supplies:
- Fabric: a minimum of 3 prints, fat quarters or large scraps are plenty (I am using 4 prints in this example)
- Zipper- 9″ or longer
- optional: Fusible Fleece- 2 pieces cut at 4″ X 8 1/2″
Cutting:
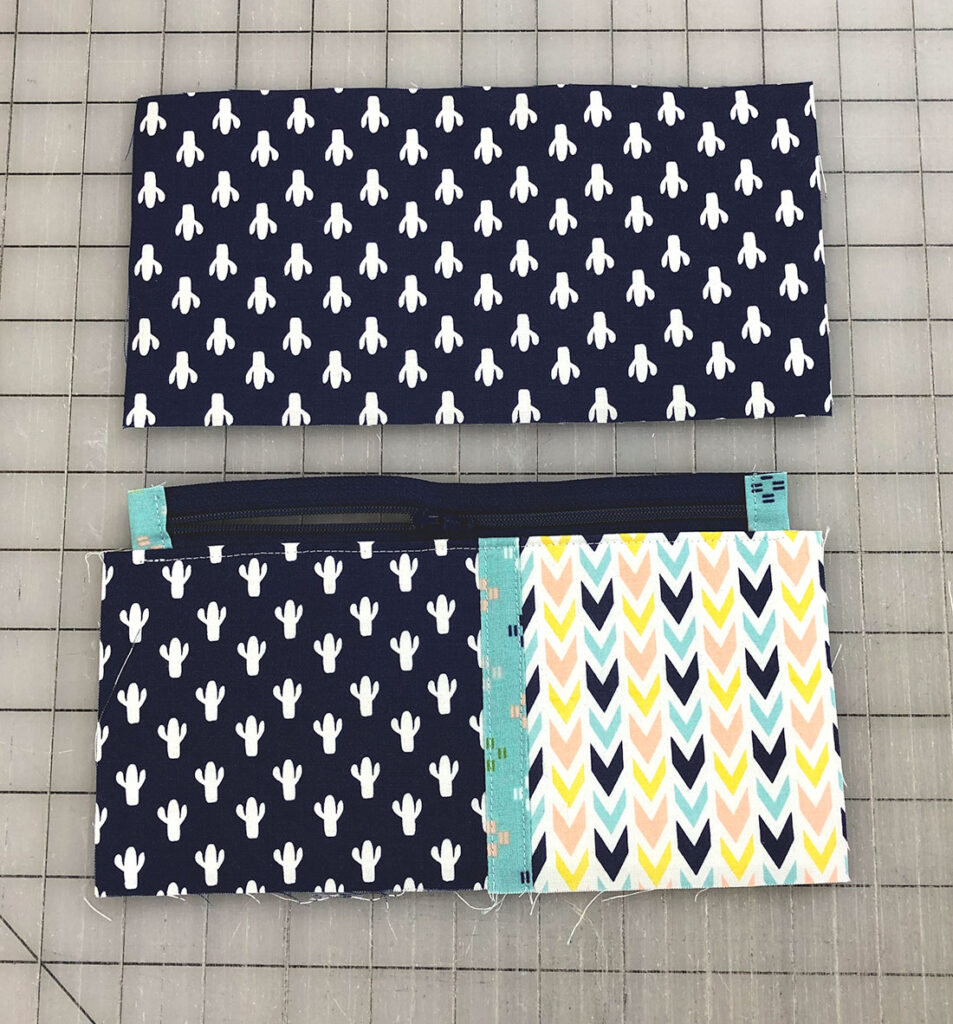
- Large color block and back (cactus fabric): 1- 5″ X 4 1/2″ (the 4 1/2″ is the height); 1- 9″ X 4 1/2″
- Accent Strip and zipper tabs (aqua fabric): 1- 1″ X 4 1/2″; 2- 1″ X 2″
- Small color block (arrow fabric): 1- 4″ X 4 1/2″
- Lining (white zig zag fabric): 2- 9″ X 4 1/2″

Prepare Outside of Pouch:
- First, sew together the blocks for the front of the zipper pouch. From left to right: 5″ piece, 1″ strip, 4″ piece- Use a 1/4″ seam allowance.
- Second, you will press the seam allowances toward the 1″ strip
- Next, fuse the fleece to the wrong sides of your assembled front piece and back piece. *This step is optional, however I find that adding fusible fleece gives the pouch a really nice structure.
- Top stitch along both sides of the accent strip
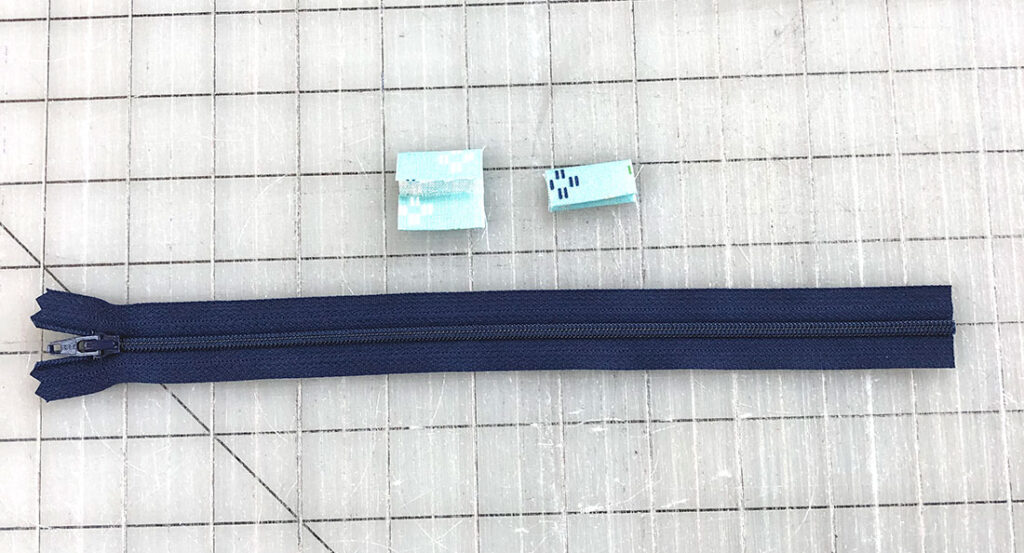
Prepare Zipper
- Take your two Zipper tab strips (1″ X 2″ pieces), press in half on the 2″ side to create a 1″ square
- Fold the two raw edges in to the crease and press to create a 1″ X 1/2″ rectangle
- Cut your zipper just inside of the metal tab
- Slide the folded zipper tab over the cut end of the zipper so the edge of the zipper is lined up with the center fold. Then, pin in place
- Sew an edge stitch along the zipper tab
- Open up the zipper and measure 8 1/4″ from the outside edge of the zipper tab. Next, cut off the extra zipper tape, but DO NOT cut off the zipper pull. (If however, you do end up cutting the pull off, you can put it back on the zipper tape.)
- Slide the two ends of the zipper tape into the second zipper tab. Make sure the teeth of the zipper are next to each other and lined up evenly. Pin in place.
- Sew an edge stitch along the second zipper tab
Add Zipper to Pouch:
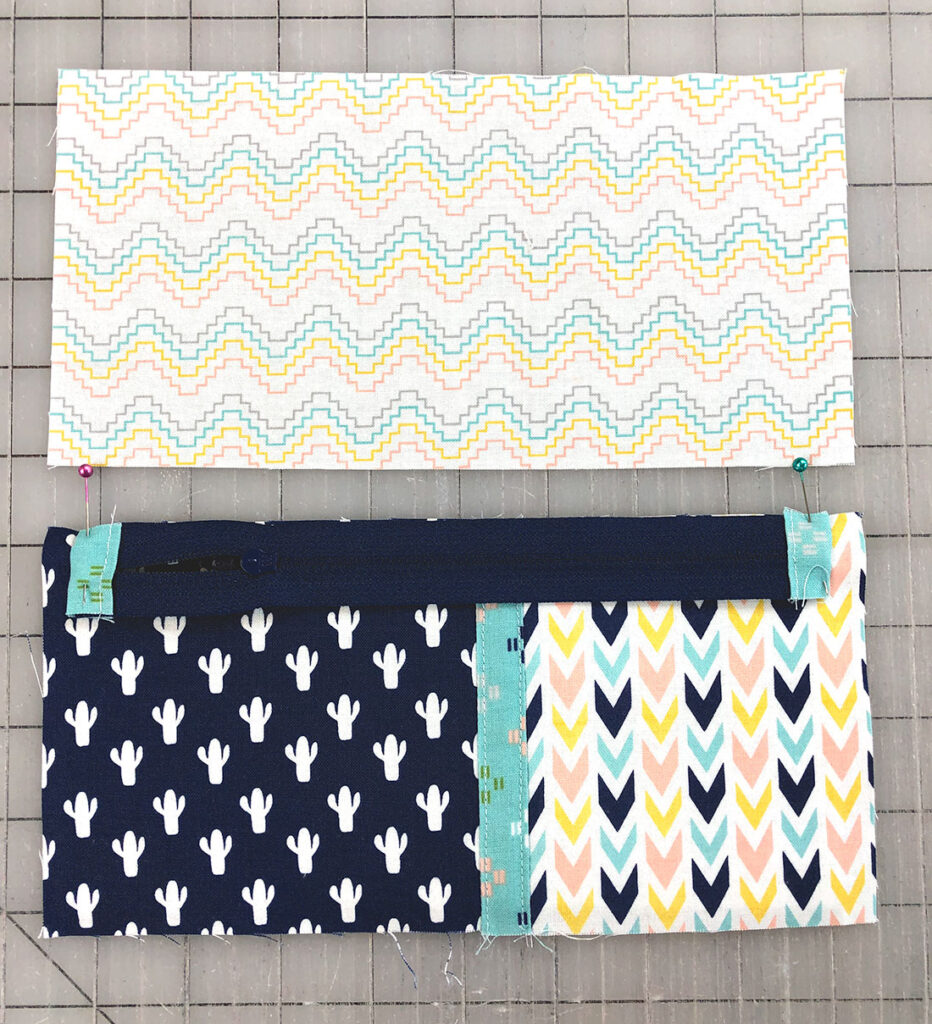
- Place pouch front piece right side up.
- Center the zipper, pull side down, on the top edge of the front piece. Then, line it up with the top edge of the front.
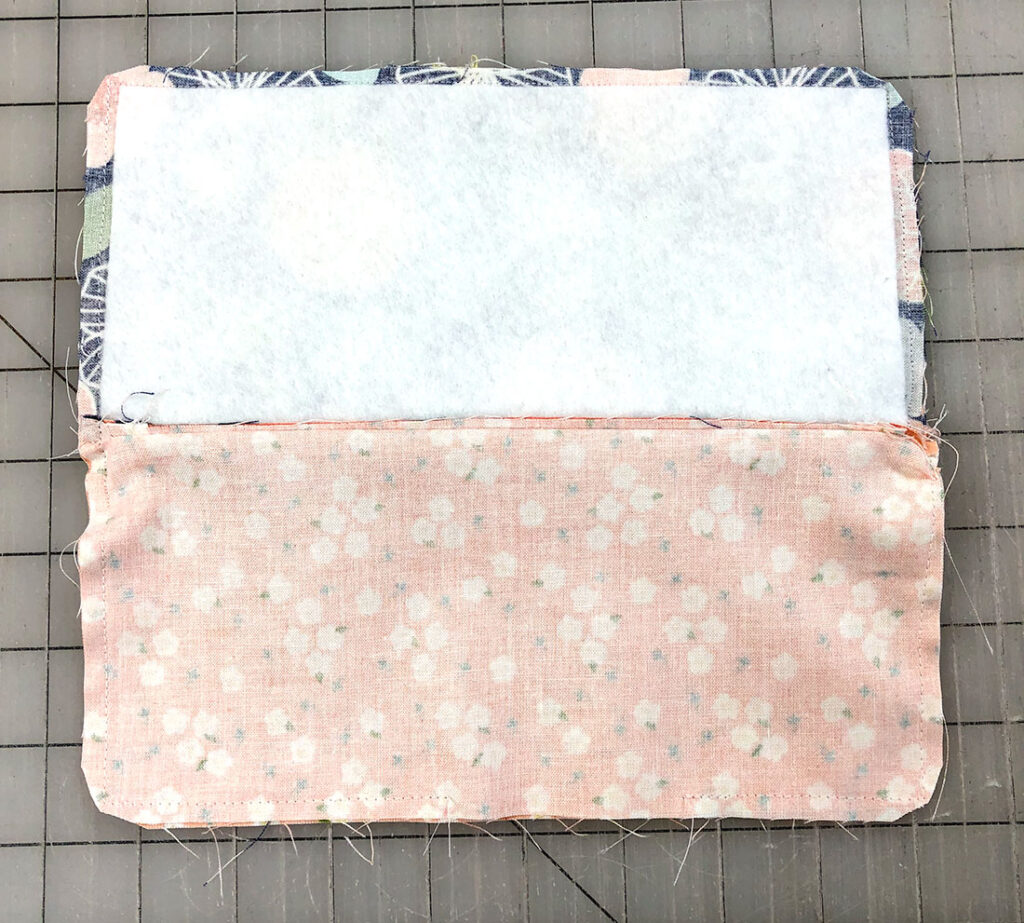
- Place lining fabric, right side down on top of zipper. Line up the top edges and pin all three layers well.
- Sew along this seam using a 1/4″ seam allowance. *TIP: you may find it helpful to switch to a zipper foot for this. You WILL have to move the zipper pull out of your way as you sew this seam, just put the needle in the down position, lift up your presser foot and slide the zipper pull out of your way. Put down the presser foot and continue sewing.
- Press the front and lining fabrics away from the zipper
- Top Stitch along this seam from the inside edge of one zipper tab to the other. DO NOT top stitch all the way to the ends of the pouch front
- Repeat steps 1-6 with the back of the fabric. Use the front of the pouch to line up the edges of the back fabric and then line up the top edge with the zipper. *If using a directional fabric make sure you are lining up the TOP of the fabric with the edge of the zipper.
Final Assembly:
- First, open your zipper just over half way.
- Next, pull the two exterior fabrics together and the two lining fabric pieces together.
- Line up the edges around the zipper pouch and pin well. *TIP: When pinning the seam where the zipper is attached, first, fold the zipper tabs toward the exterior of the bag and then push the seam allowances to fold toward the lining. However, depending on how close to the edge of the pouch you sewed your top stitching lines, this may be a bit tricky. Just do the best you can.
- Sew around all four sides of the pouch, leaving a 3-4″ opening in the lining for turning the pouch right side out. Back stitch at the beginning and ending of your stitching.
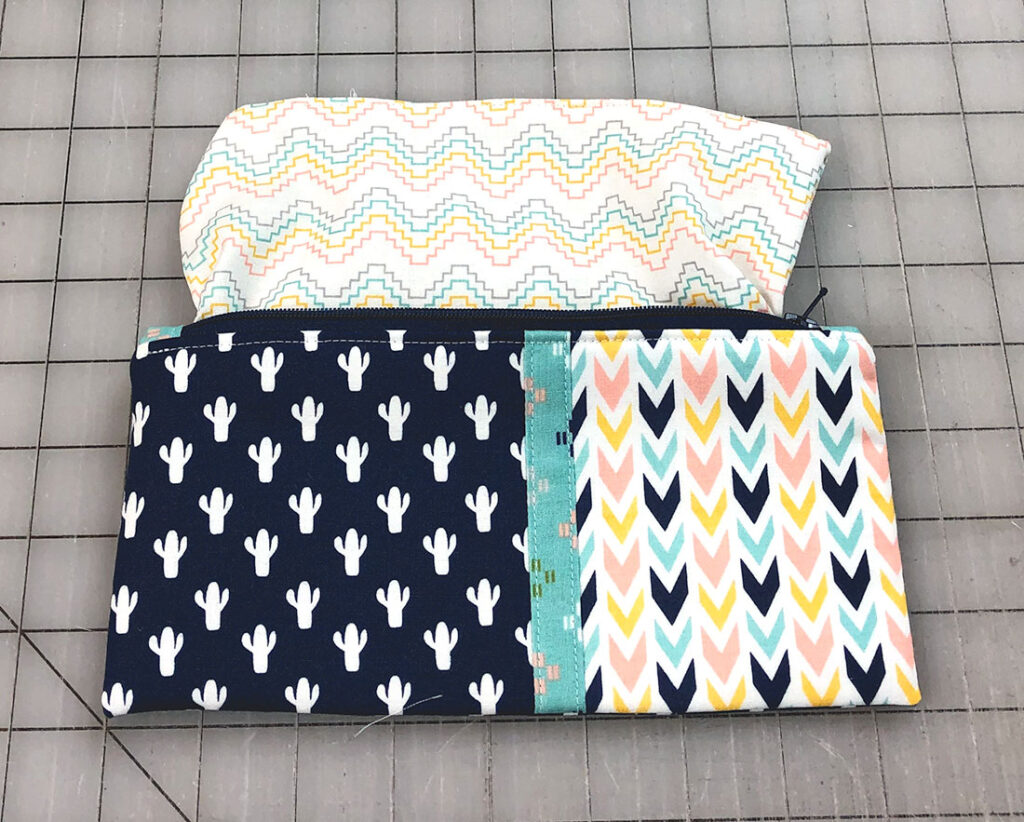
- Clip the fabric at each corner. Turn the pouch right side out, push out the corners and seams and press the outside of the pouch well.
- Fold under the seam allowance for the opening of the lining and sew it closed.
- Push the lining back into the pouch, press again and enjoy!
I have SO MANY zipper pouch patterns and tutorials but one of my favorites is:
My Pleated Ruffle Mini Pouch Pattern which can be found in my Etsy shop, for more information, you can go to my blog post all about it.
I hope you have fun sewing up this Color Block Zipper Pouch- if you make some, please tag me on Facebook or Instagram at @amerooniedesigns!
Happy Sewing!
Amy


Color Block Zipper Pouch in Midnight Rose Fabric | amerooniedesigns.com
July 11, 2019 at 5:11 am[…] I love when a pattern allows me to show off gorgeous fabrics. This Color Block Zipper Pouch is the perfect way to let these amazing prints from the Midnight Rose Fabric line shine. As part of my participation in the blog tour, Riley Blake Designs sent me the fabric to sew with. The designs and opinions are all mine. This Color Block Zipper Pouch is a free tutorial you can find on my blog here. […]
Back to School Lunch Money Pouch with Cricut | amerooniedesigns.com
July 31, 2019 at 8:15 am[…] to stitch up? This mini coin pouch is a fun, tiny zippered pouch that is super fun to sew. And this Pencil Pouch with color blocking is gorgeous and useful at the same […]