I am a 2022 Husqvarna Viking Sewing Ambassador. Mentions of my Opal 690Q sewing machine are part of that partnership. All opinions and projects are my own honest thoughts.
Small projects are the perfect canvas for trying out new techniques, learning new things and just having a bit of fun! Here are five, quick and easy tips for quilting small projects. Improve your quilting skills and enjoy the process at the same time.
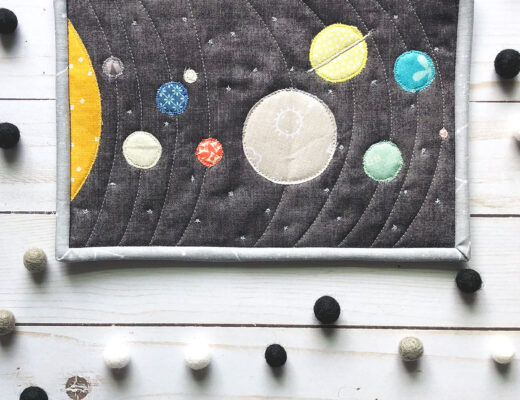
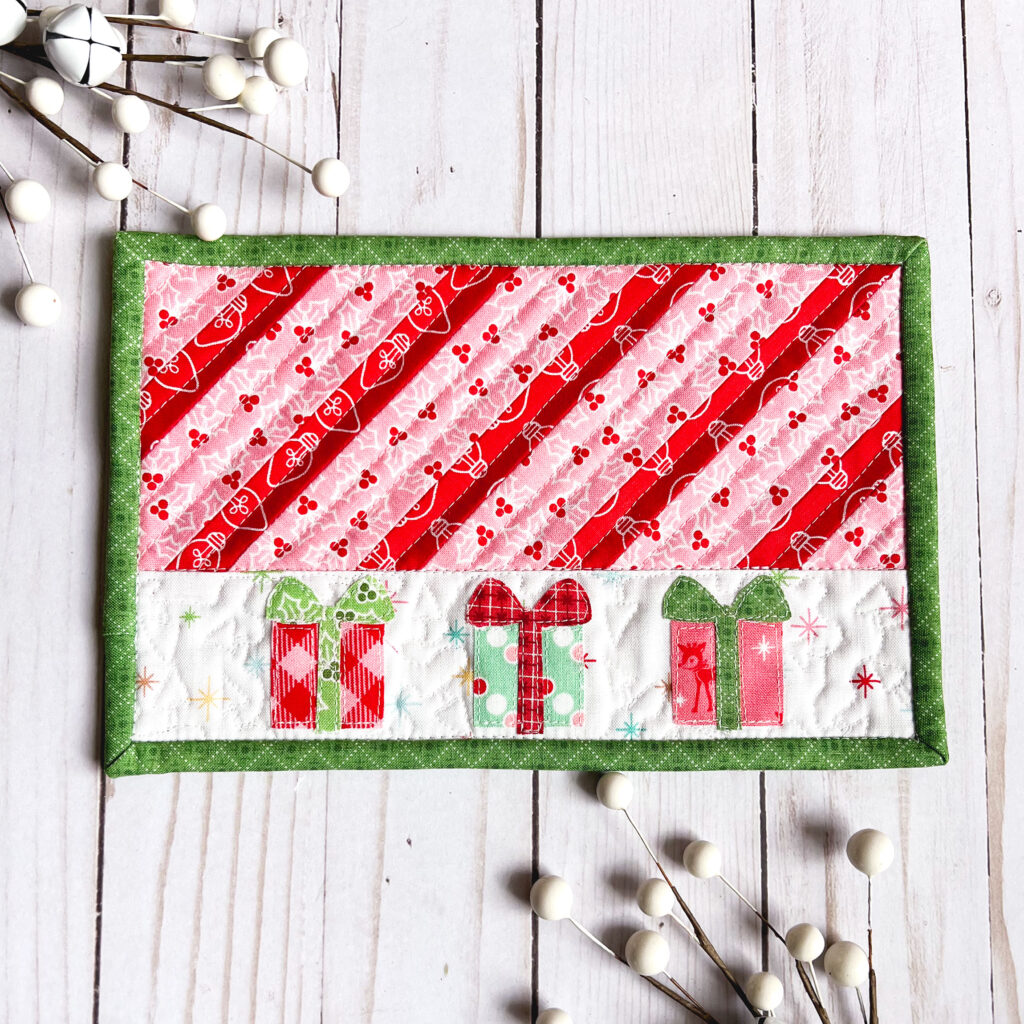
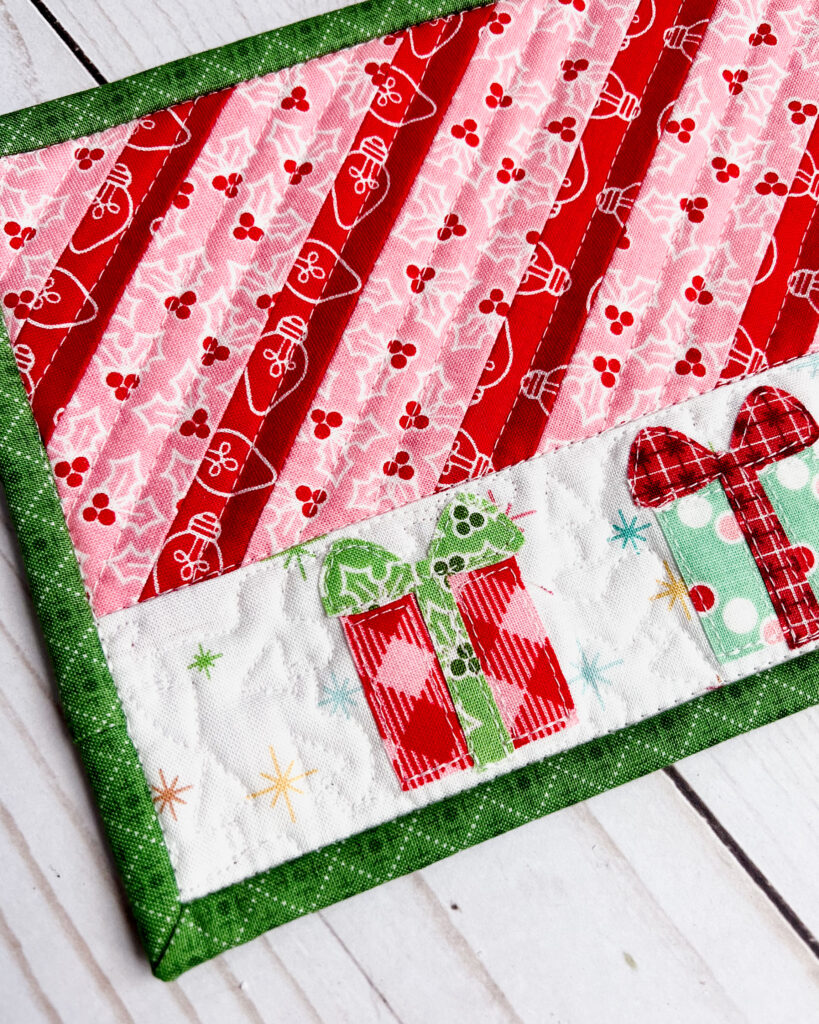
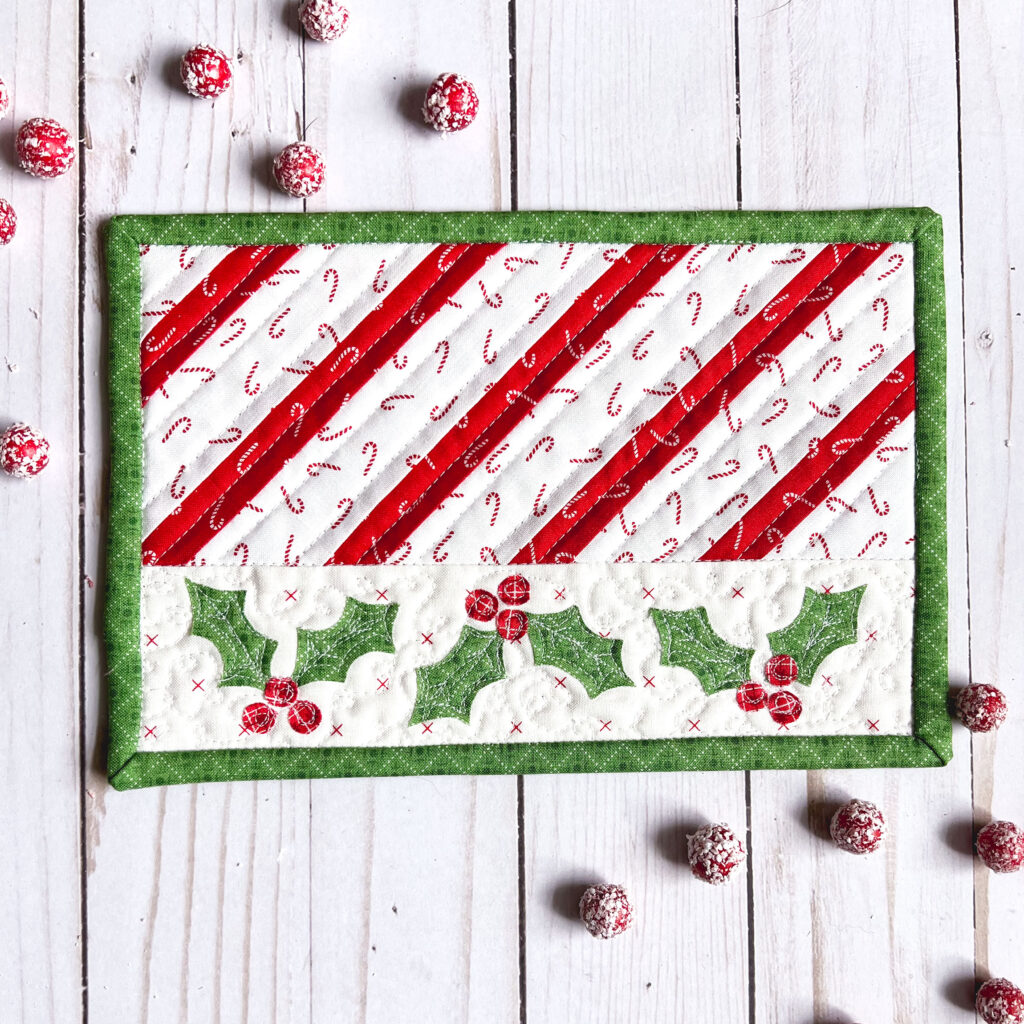
The mug rugs in this post are made using my brand new Christmas Mug Rug pattern! With THREE different styles, and FIVE applique patterns it’s a fun way to use scraps and make some holiday magic with fabric.

Quilting Tip #1: Plan it Out
Whether you are doing free motion quilting or straight lines, look at your project and come up with a plan. Here are some things to consider when quilting your small project:
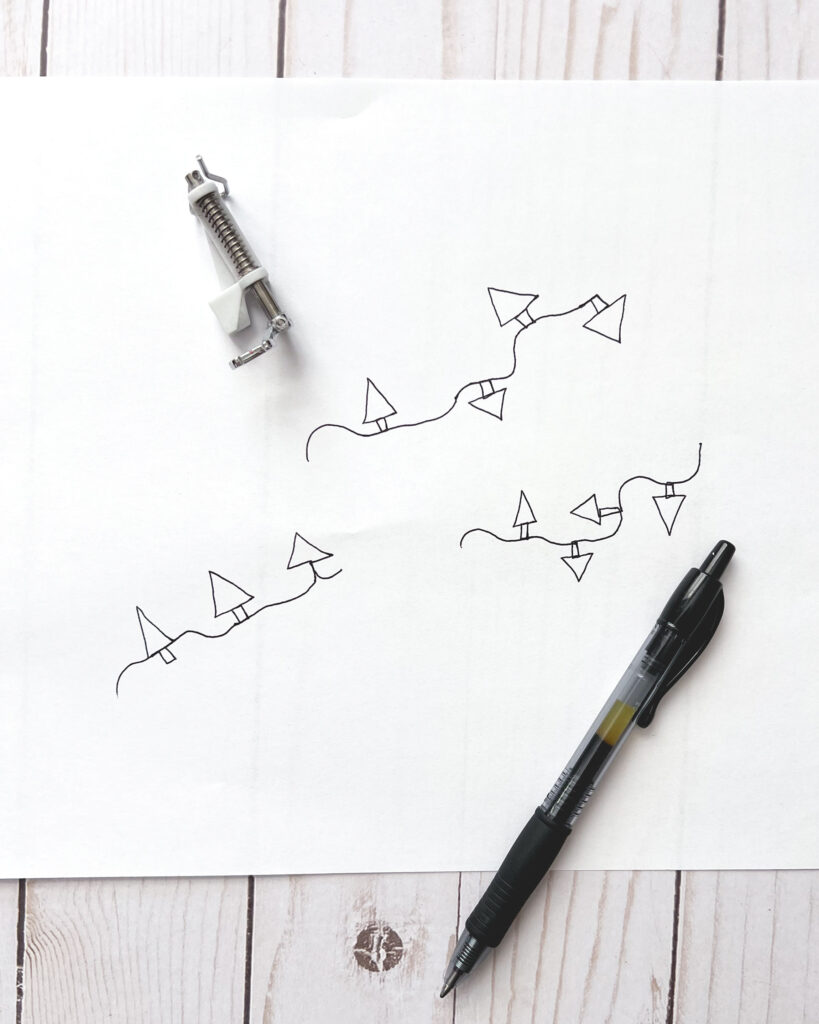
- Are there areas big enough for free motion quilting? It can be tricky to keep your quilting in a small area. If you are new to free motion quilting, it’s especially helpful to have a bit more area to play. If you are adding free motion quilting, I strongly recommend practicing your quilting path with a pen and paper before sitting down at your machine. It really helps to dial in on the look you want and how you will have to move your project around to achieve it.
- Some small projects with areas perfect for free motion quilting:
- Free Table Topper Pattern (replace the middle block with a feature fabric and go to town quilting.
- This Mini Quilt pattern is free for newsletter subscribers.
- Some small projects with areas perfect for free motion quilting:
- Do I want to echo the lines of the patchwork, or create new dimension in my project? Sometimes it’s a very simple answer to just follow the lines of the patchwork either right on the seams. Or create texture by going in completely different directions.
- Where do I want to start and stop my quilting? Does it make sense to start at one place and continue to the next so I don’t have to keep starting and stopping my stitching? *SEE ALSO Tip #4
Small Project quilting Tip #2: Use Basting Spray
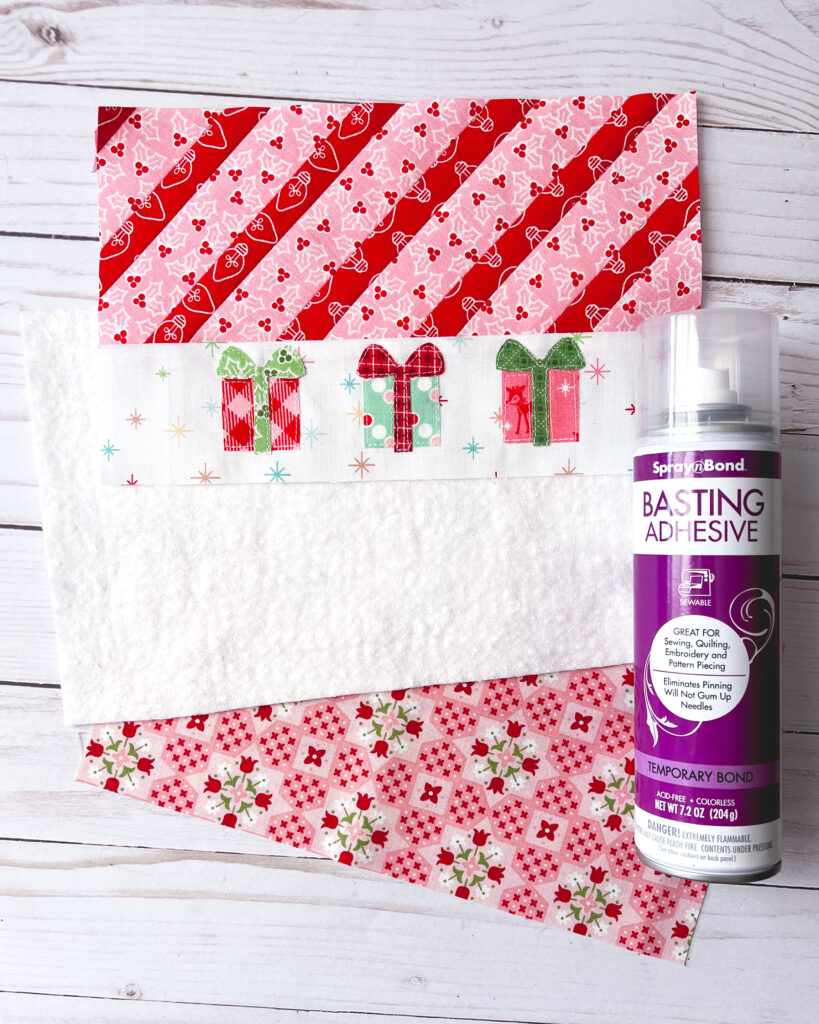
Small projects don’t have a lot of surface area, so pin basting is super fast. However, starting and stopping all the time to remove those pins, especially when the project isn’t that big to begin with gets annoying quickly. Spray Basting is easy and covers the whole surface of your quilt project so you can just get started, and keep going with your quilting. I like to save packaging paper or bits of wrapping paper to cover my work surface before spray basting to protect my space from overspray.
Tip #3: Know your Presser Feet
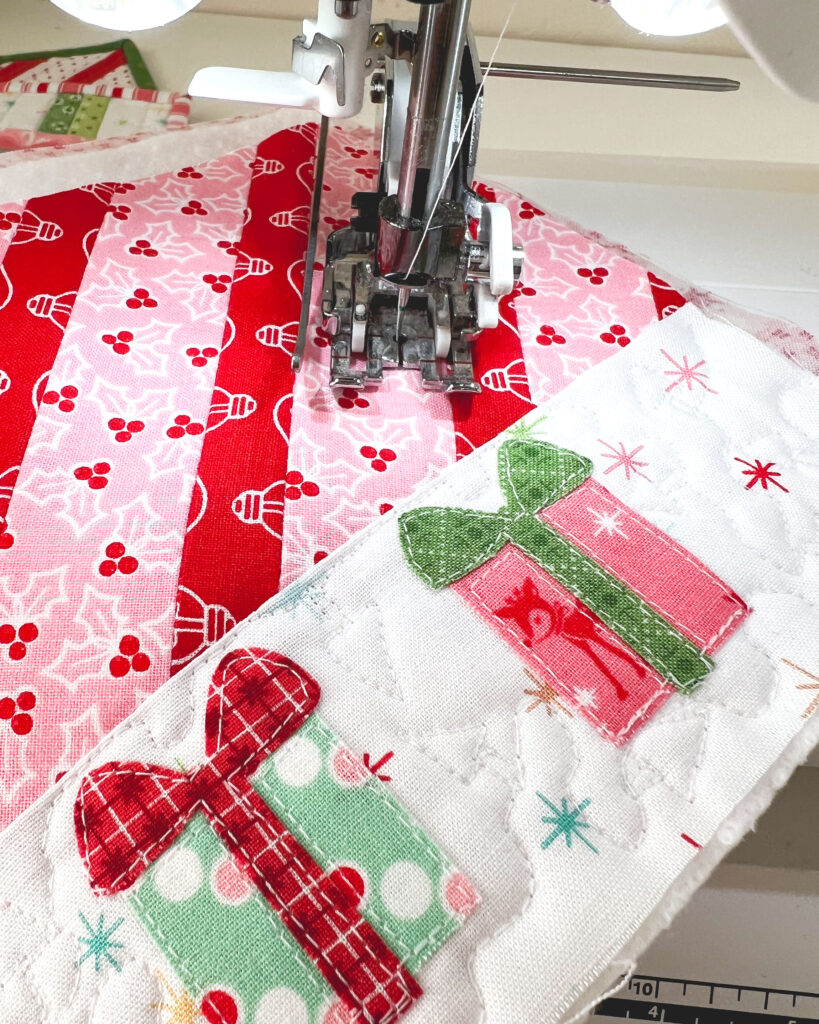
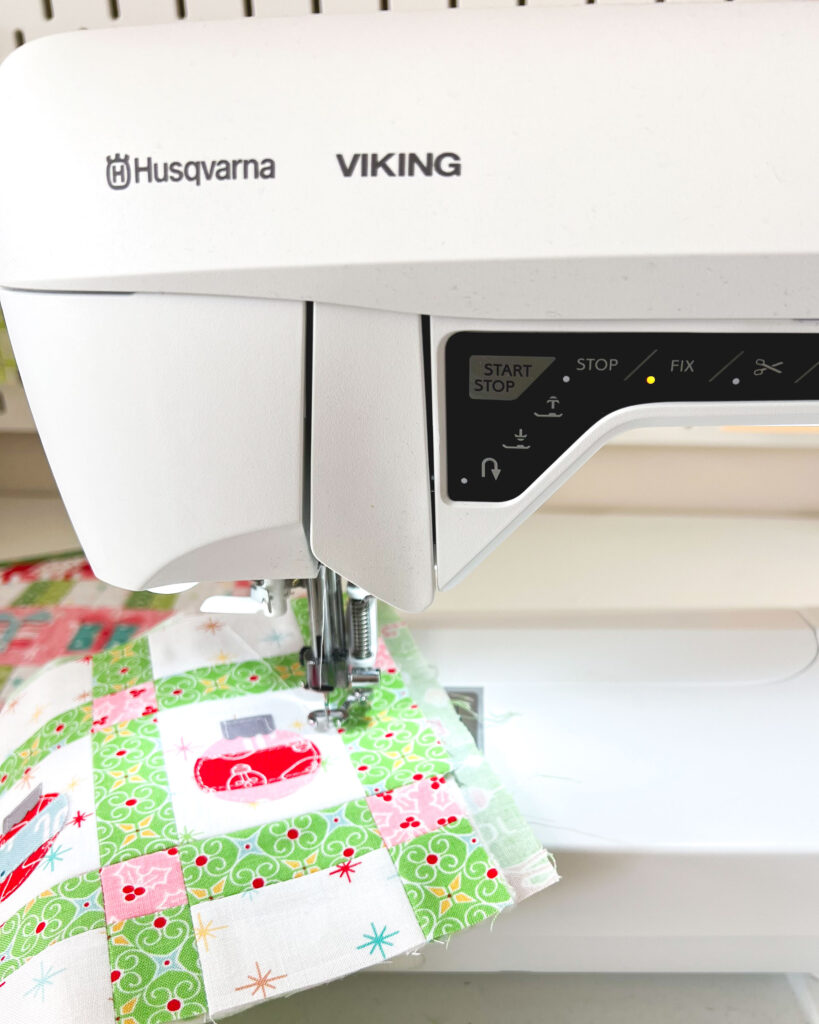
My Opal 690Q has two feet that I love for quilting. The Walking Foot makes straight line quilting a breeze. It has the bonus of guide arms that fit in the back to adjust the width of my stitch lines super easily. The open toe free motion spring foot is perfect for free motion quilting.
If you are new to your machine, or using your quilting feet, make a quilt sandwich with scraps and test out your machine. If there are tension, eyelashing (where the bobbin thread pulls too tightly when stitching curves with free motion quilting) or skipped stitch issues, it might require some troubleshooting. Adjusting tension (I do this every time I free motion quilt) or stitch length are two easy things to try when working out the settings best for your machine.
Small project quilting Tip #4: Secure the Stitching
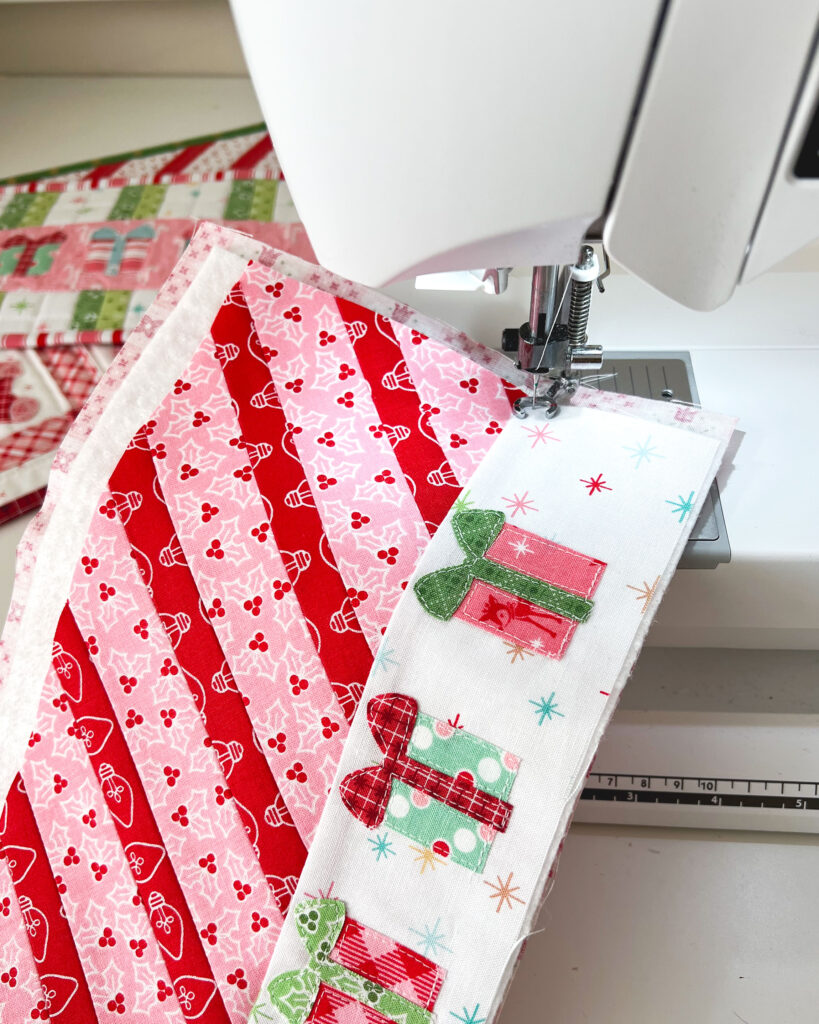
After doing all the work of quilting your lovely project, it would be a shame to have all the stitching fall out. Make sure all of your stitch lines are secure by doing one or the other of these steps. Try to start your stitching at the edge of your project, this will secure the stitching in the binding seam, keeping the threads from unraveling.
If the stitching must start or stop in the middle of the project, be sure to add a knot. Hold the top thread and bring the needle down and up one time. Pull the top thread and it will bring the bobbin thread up to the top of the project. Stitch one or two short stitches in one place to create a stay stitch and then proceed with your quilting. After quilting, go to the threads, tie a knot and bury the threads. Alternatively, if your machine has a FIX feature (like mine does) use that to secure the threads at the beginning of your quilting and then simply bury the threads after quilting.
Quick and Easy Tip for small projects #5: Have Fun!
Let yourself be bad at it. You just might end up having fun! Small projects are perfect for playing with quilting because there’s not a lot of fabric or time invested in it. Relax, enjoy the process and see how much better you get each time you do it.
So get out there and get quilting!