I am proud to be a HUSQVARNA VIKING Ambassador for 2022. This post and mentions of my Opal 690Q sewing machine are part of that partnership. All opinions and projects are my own.
I have been sewing with laminated fabric for over a decade and I have learned all the tricks for how to be successful when sewing with laminated fabric. Today I’m going to share all the things I have learned so you can have fun sewing with this versatile material.
What is Laminated Fabric?
Fabric coated with some type of plastic substrate is called Laminated fabric. Purchase it already coated, or coat your own. Fabric laminated by the manufacturer tends to be more flexible and “tacky” to sew with. Fabric laminated using Iron on Vinyl tends to be stiffer and more “crunchy”.
Laminated fabric is stain and water resistant and it also adds structure and sheen to your projects. I love using it for projects that will be handled a lot and ones that may need to be wiped down. Please note though that laminated fabrics are not water or stain PROOF, so keep your expectations realistic.
ThermOWeb has a couple of different products for making your own laminated fabric. Iron on vinyl or liquid vinyl. There are other products out there, but these are the main ones I have personally worked with. Laminating fabric allows for coordinating prints even if the manufacturer doesn’t sell it pre-laminated.
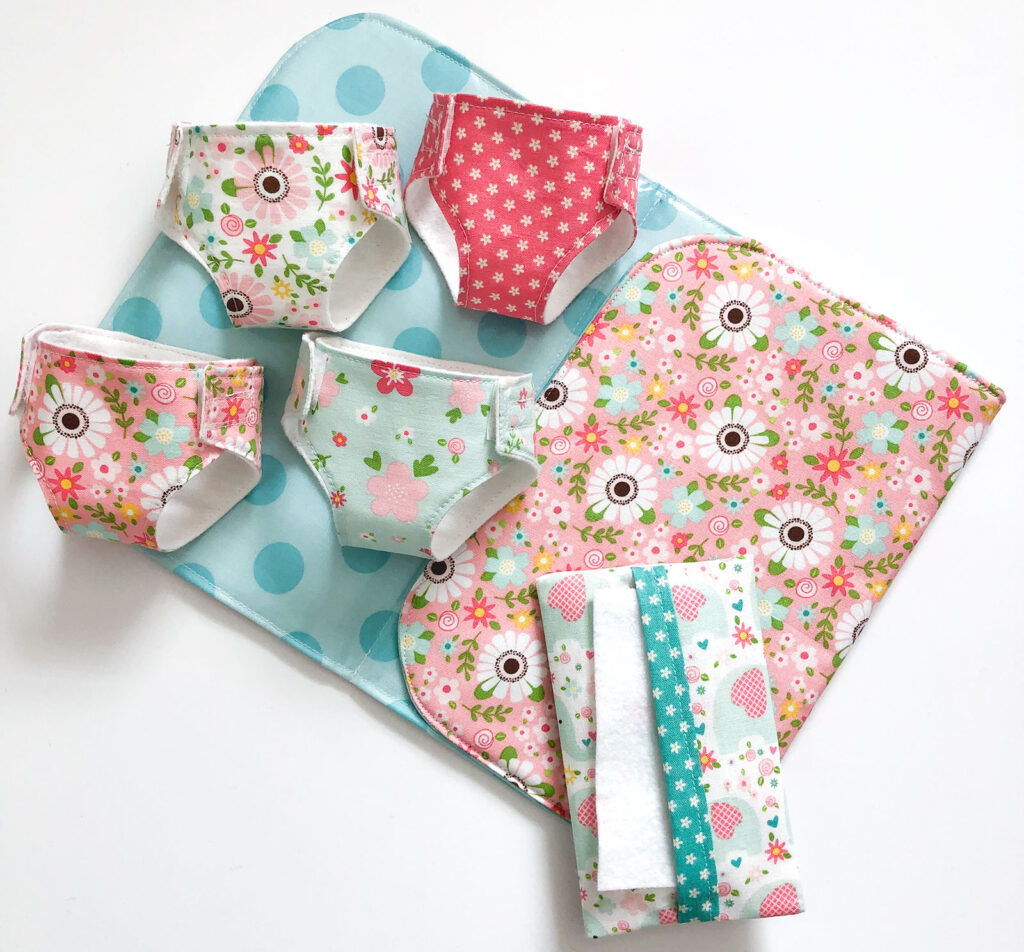
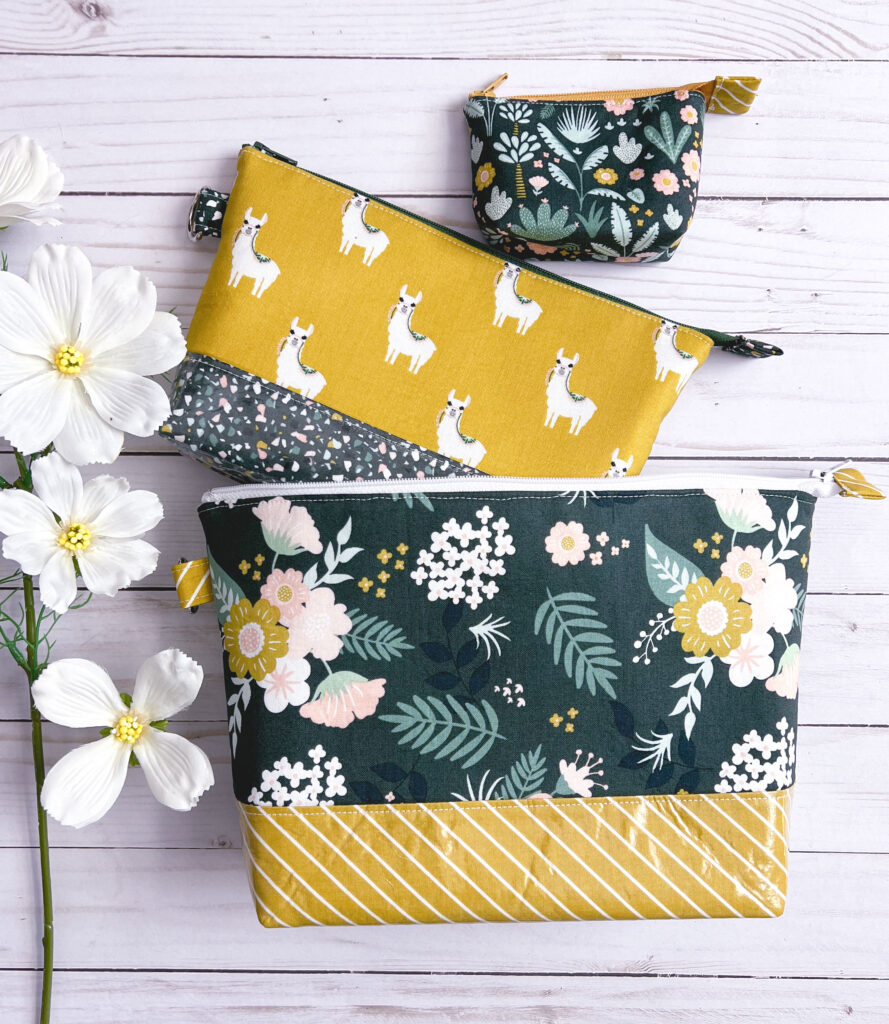
Toddler Diaper Bag accessories are so fun with a “changing” pad you can wipe down.
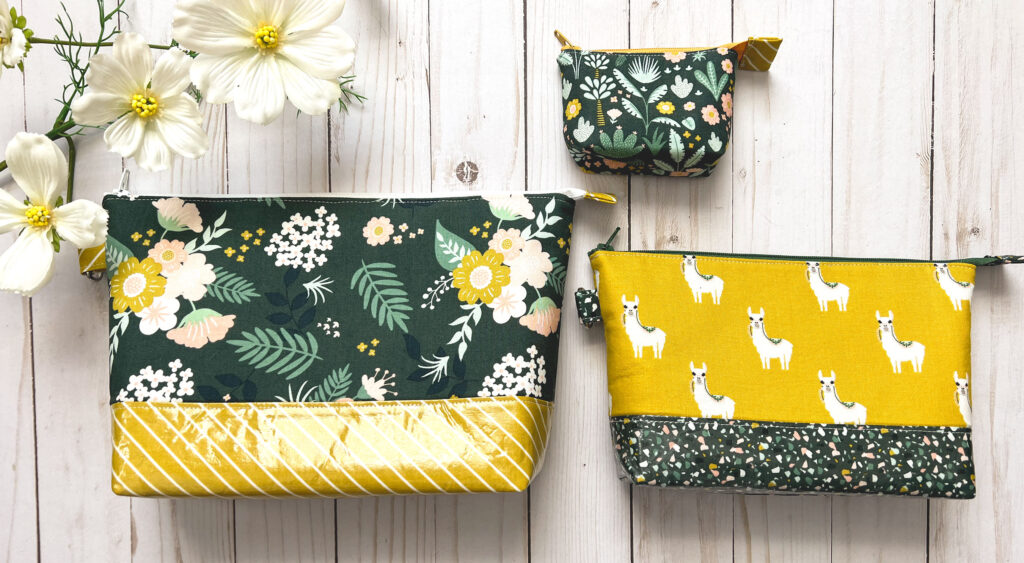
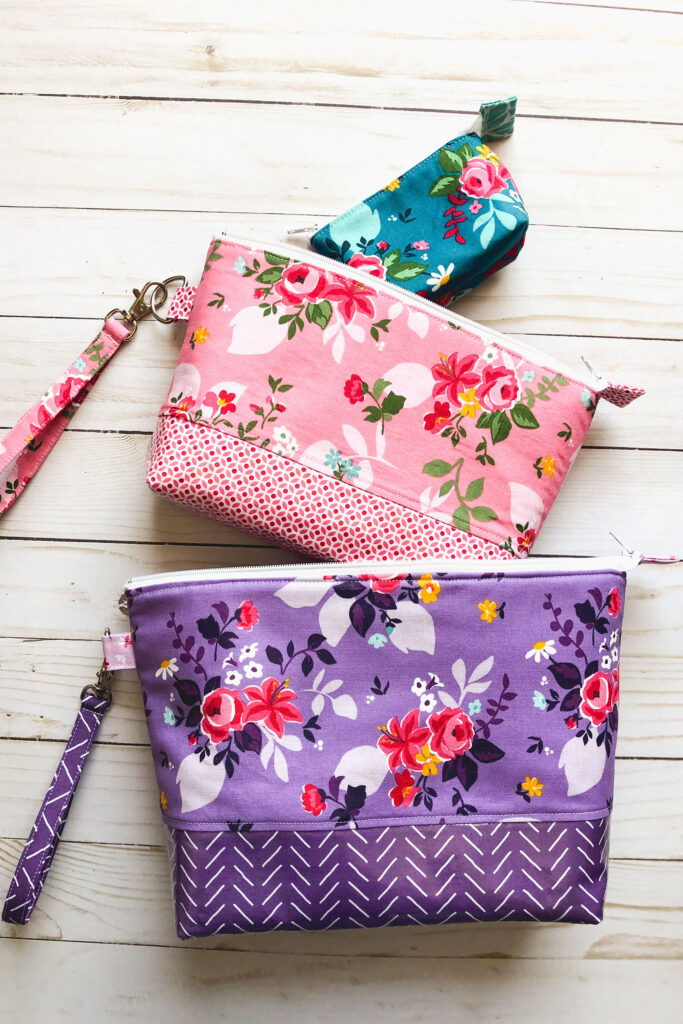
A nesting travel set will make your journeys organized and beautiful. The wallets were a product I made and sold for years. I am working on a pattern, but it will be a while- it’s definitely an advanced pattern.
Pressing Issues- things to watch for when Ironing Laminated Fabrics
The magic of shrinky dinks never ceases to amaze me. Add some heat to a plastic shape and it curls and swirls into a miniature version of itself. Well, adding heat to your laminated fabric, isn’t nearly that magical- or fun. In fact, it can lead to disaster and is the main source of laminated fabric fails in my experience. From laminating the fabric yourself, to a wayward touch of the iron- warm plastic is tricky and sticky and there are some definite things to watch out for to be successful when sewing with laminated fabrics.
Stick to it
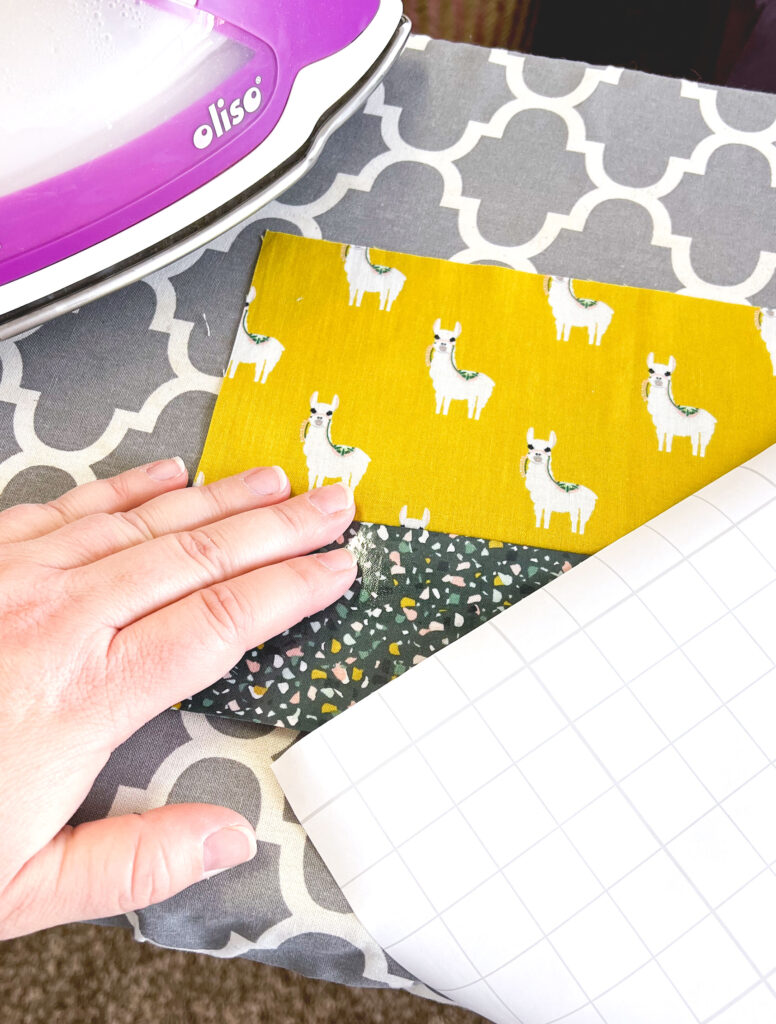
Warm plastic is impressionable. Just like the mind of a toddler, it soaks up everything. Lint, creases, imprints of the surface you are pressing on. Whether you are adding the iron on vinyl or just pressing it after a step in sewing, it is critical that you keep your pressing surface clear of lint and strings. It is helpful to keep a lint roller on hand to swipe up those wayward bits you don’t want to permanently enshrine in your laminated project.
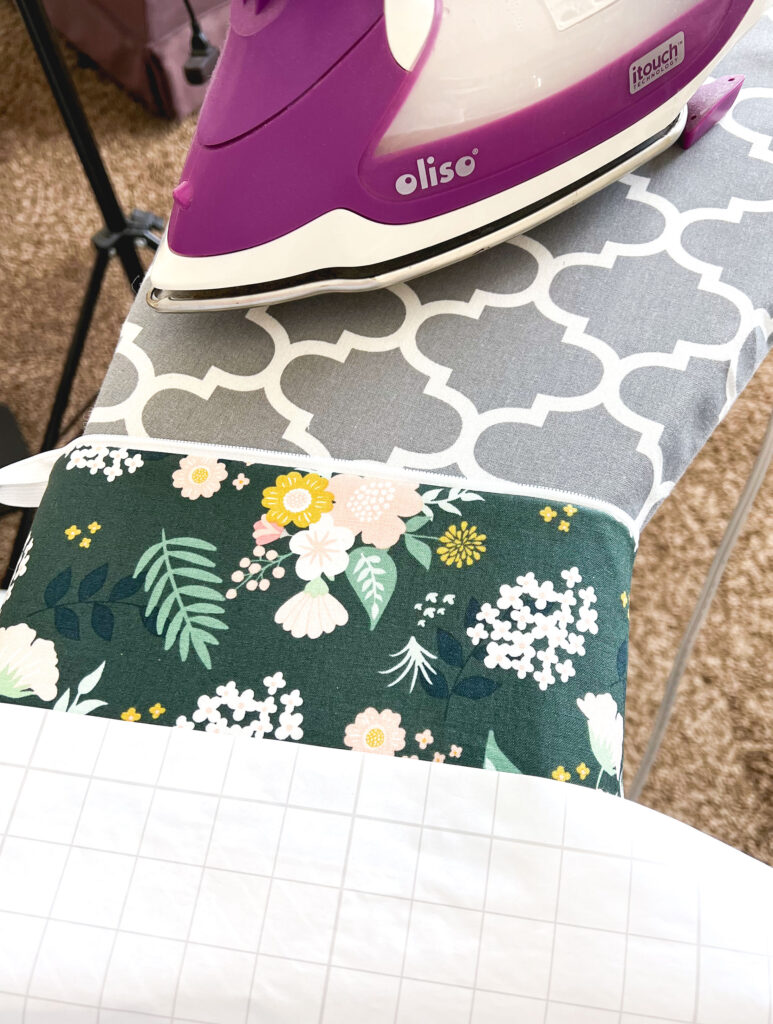
Laminated fabrics also stick together. Literally. If you have two laminated surfaces facing each other, such as the lining fabric inside my zipper pouches, make sure they are not touching each other when pressing. Either slide some backing or pressing paper or a bit of press cloth to keep them from melding together, never to be torn asunder. I typically use the narrow end of my ironing board to help with this situation. Slide the pouch over the end so you are only pressing one side at a time. Also, be careful when handling your warm laminated fabric so that it doesn’t fold over and create contact with the two laminated sides- as even minimal contact can create a big mess. One more thing you may notice in the above picture- the backing sheet from the vinyl, because-
It Burns!! It Burns!!
Or rather, it melts. The iron will melt the vinyl, making a mess of both your project AND your iron. Protect it at all costs. But, remember the last thing we talked about? Impressions! If you use a press cloth, make sure there are no creases in it, or lint on it as they can transfer to your laminated fabric. Parchment paper, or the backing paper from the iron on vinyl itself are some of my favorite ways to protect my project and iron as they are flat and don’t attract stray strings during the process.
Pressing your seams
When sewing, we are always told to press the seams. It makes for a much better finished product. How can we do it with laminated fabrics then? Finger press. At least at first. One of the things that makes laminated fabric tricky is that it holds creases. Use that to your advantage! Finger press the seam well first. Then, cover the seam with your protective surface and press over the top with your iron. Allow the seam to cool before moving it for an even better finish.
Moving it Along- Tips for helping your Machine work best with Laminated Fabrics
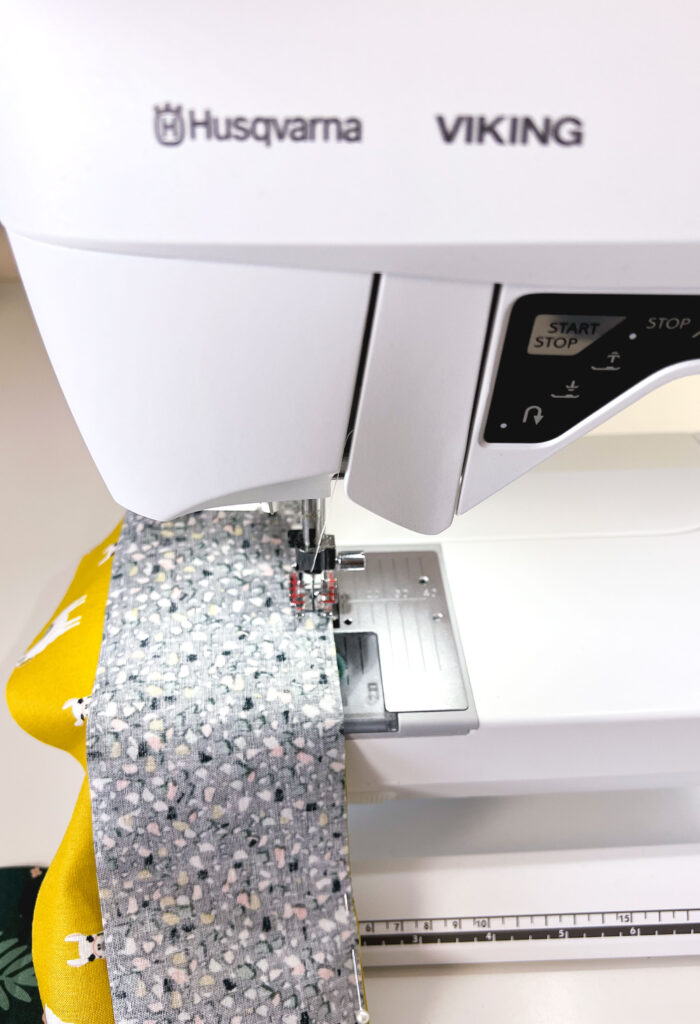
Laminated fabric can be a bit sticky when it comes to your machine. The plastic doesn’t slide through the presser foot the same way regular fabric does. If you find you are having trouble getting your laminated fabric to feed into your machine properly, here are a couple of things you can try to be successful when sewing with laminated fabrics:
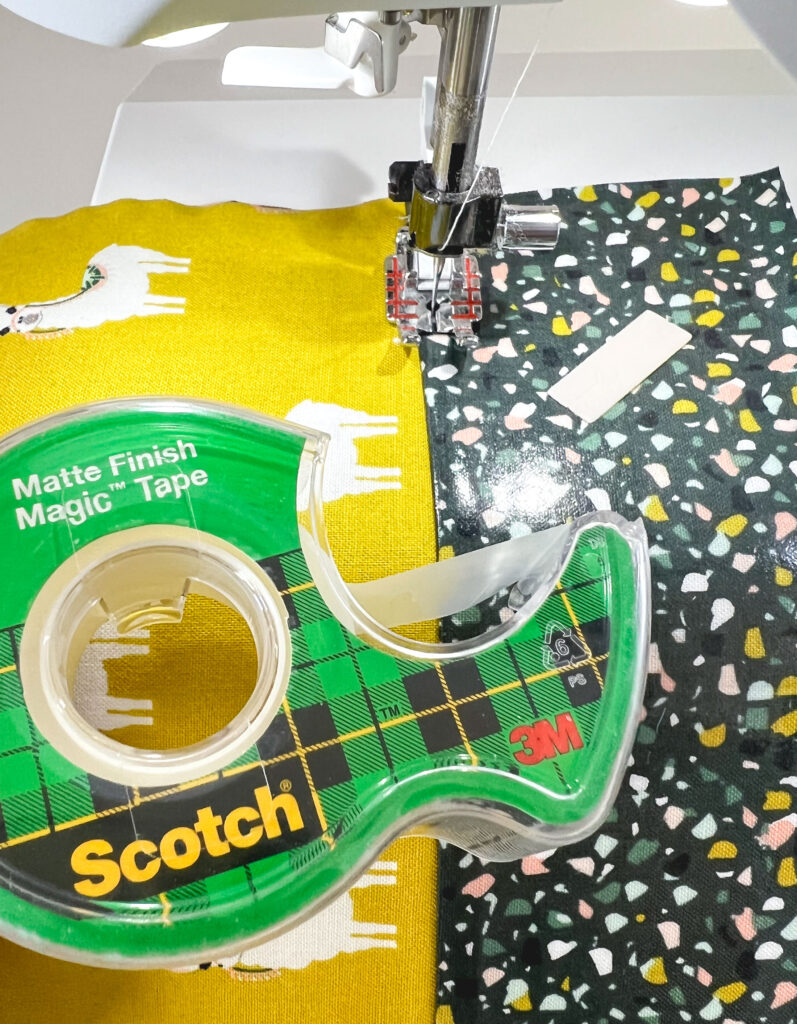
Obviously if you have a Teflon foot for your machine- your sewing will be dreamy. (At least I assume it will be dreamy, I have never owned a Teflon foot- yet) The coating on the foot is meant to eliminate the sticky factor and things will flow smoothly. If you don’t have one- your machine, like my Opal 690Q may have come with some feed glides (the little rectangle you see in this picture sitting on the fabric). They are self adhesive and stick to the bottom of your presser foot, acting in the same way a Teflon foot would. And finally, if all else fails (and the trick and tool I used most often with great success) use matte scotch tape on the bottom of your foot. I use a pin to poke out the area where the needle goes through and it works like a dream. Just pull it off when you are done and enjoy your beautifully sewn laminated project.
On Pins and Needles
One last tip when it comes to optimizing your machine for working with laminated fabrics- get a new needle! Holes in laminated fabrics don’t heal as well as regular fabric, so getting small, sharp holes with a good needle will go a long way toward a finished project you will love!
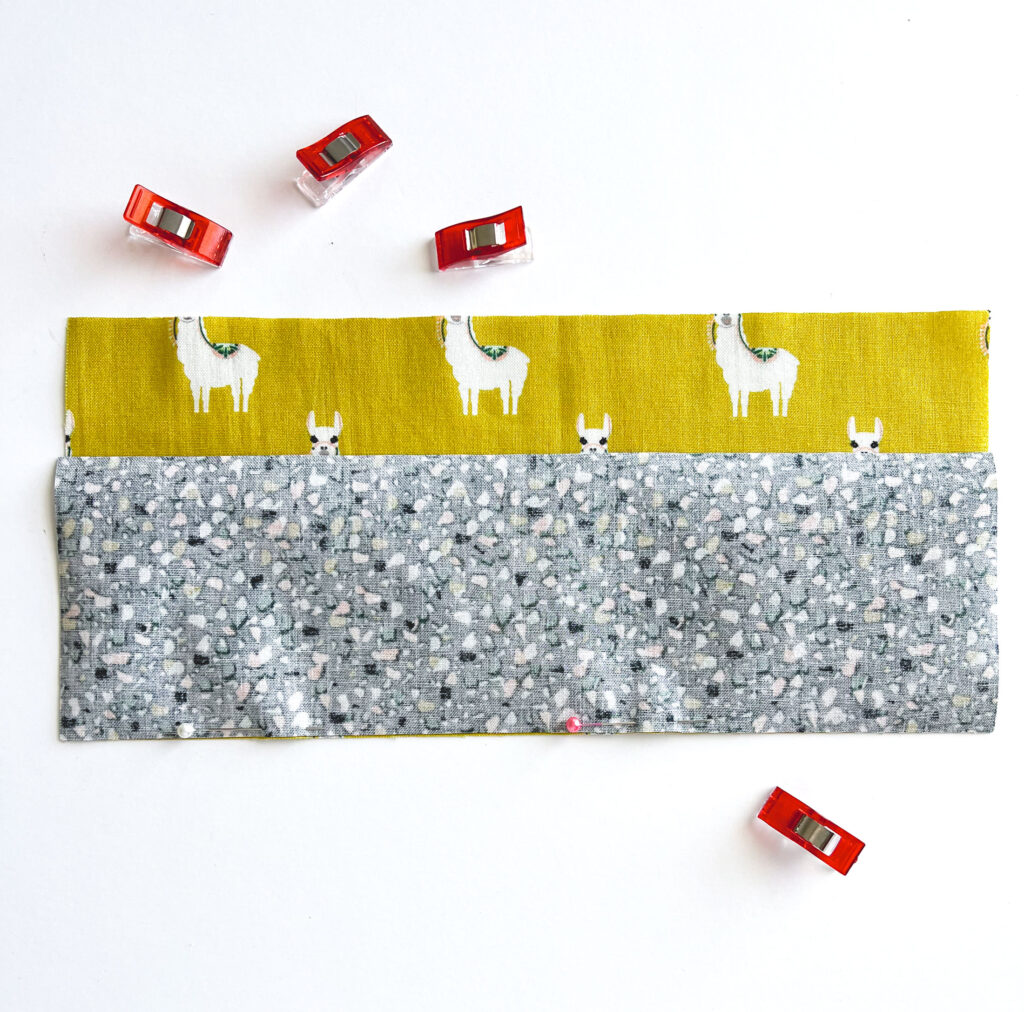
Pinning is the next place that can punch a hole in your project. 😉 As mentioned, the holes in the laminated fabric don’t heal as well as you are used to, so try to minimize the amount you make. You can use binding clips if you like, but I find them a bit bulky to work with at times. My preference is to pin within the seam allowance of the project, so you get the holding power of pins, without having to worry about holes that won’t heal.
Slip sliding Away- How to handle stretchy laminated fabrics
Laminated fabrics, especially ones laminated by the manufacturer can be extra stretchy. This can make for some tricky sewing when working on projects. The first tip to be successful when sewing with laminated fabric is to pin well, using the tips above. The next tip, try putting the laminated fabric on top of the non coated fabric when you feed it into your machine. This will keep it from being pulled more quickly by the feed dogs. Alternatively, if that doesn’t work, turn it over the other way and see if that feeds better with your machine.
Laminated fabrics can add function and fun to your sewing projects. With these tips and by paying attention to the tricky parts, I hope you will always be successful when sewing with laminated fabric. It’s worth the extra steps when you end up with durable and beautiful projects.


Travel Zipper Pouch Pattern | Sewing Tutorials | Ameroonie Designs
April 13, 2022 at 5:11 pm[…] you are new to working with laminated cotton, I have some tips and tricks for you in this blog post. Be sure to read them so you don’t end up making the same mistakes I did. […]