The fabric for this post was provided by Riley Blake Designs for participation in the Beauty and the Beast blog tour. The project and opinions are all mine.
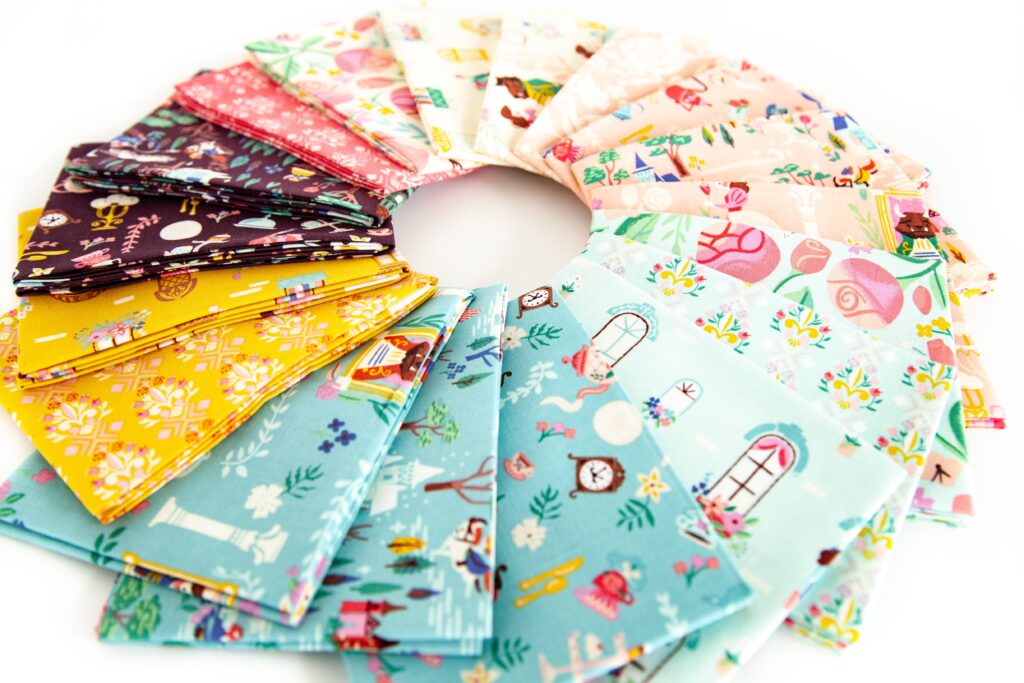
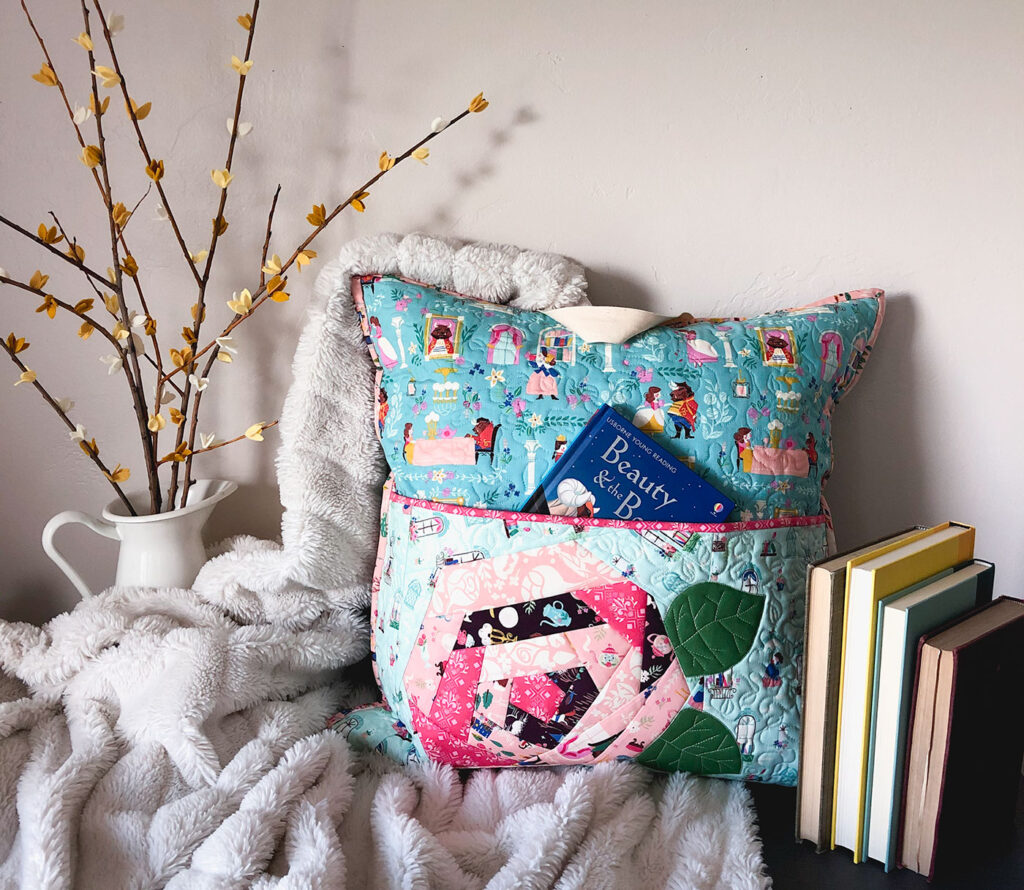
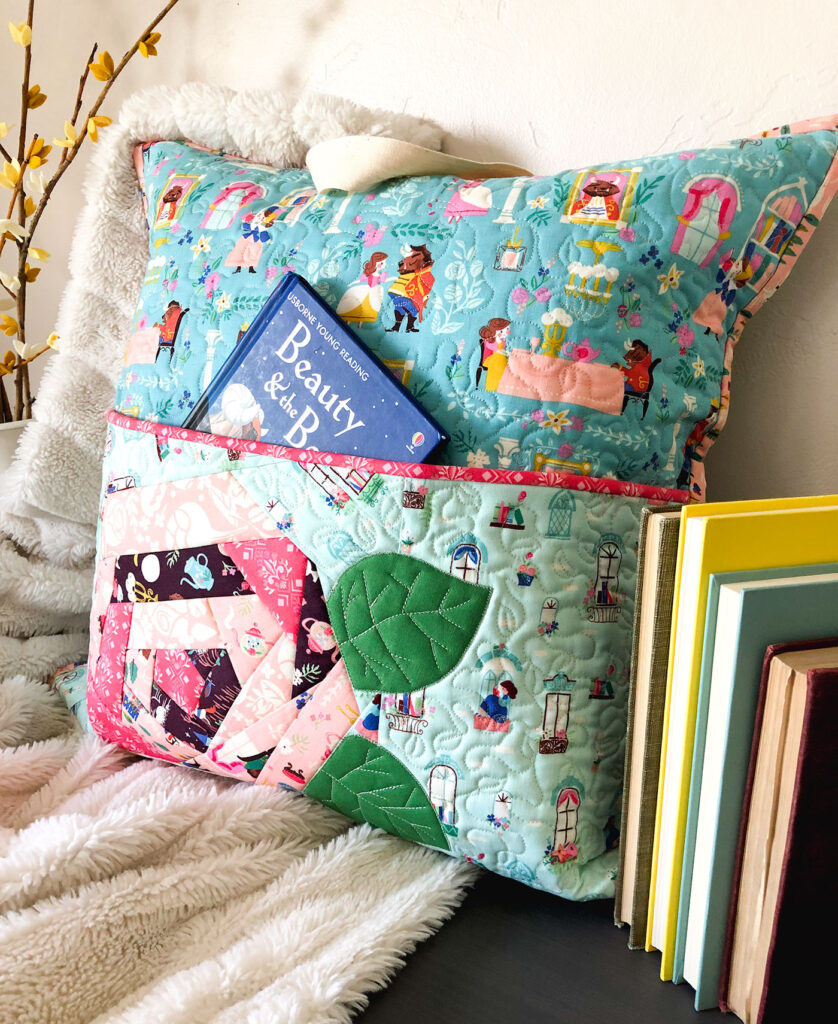
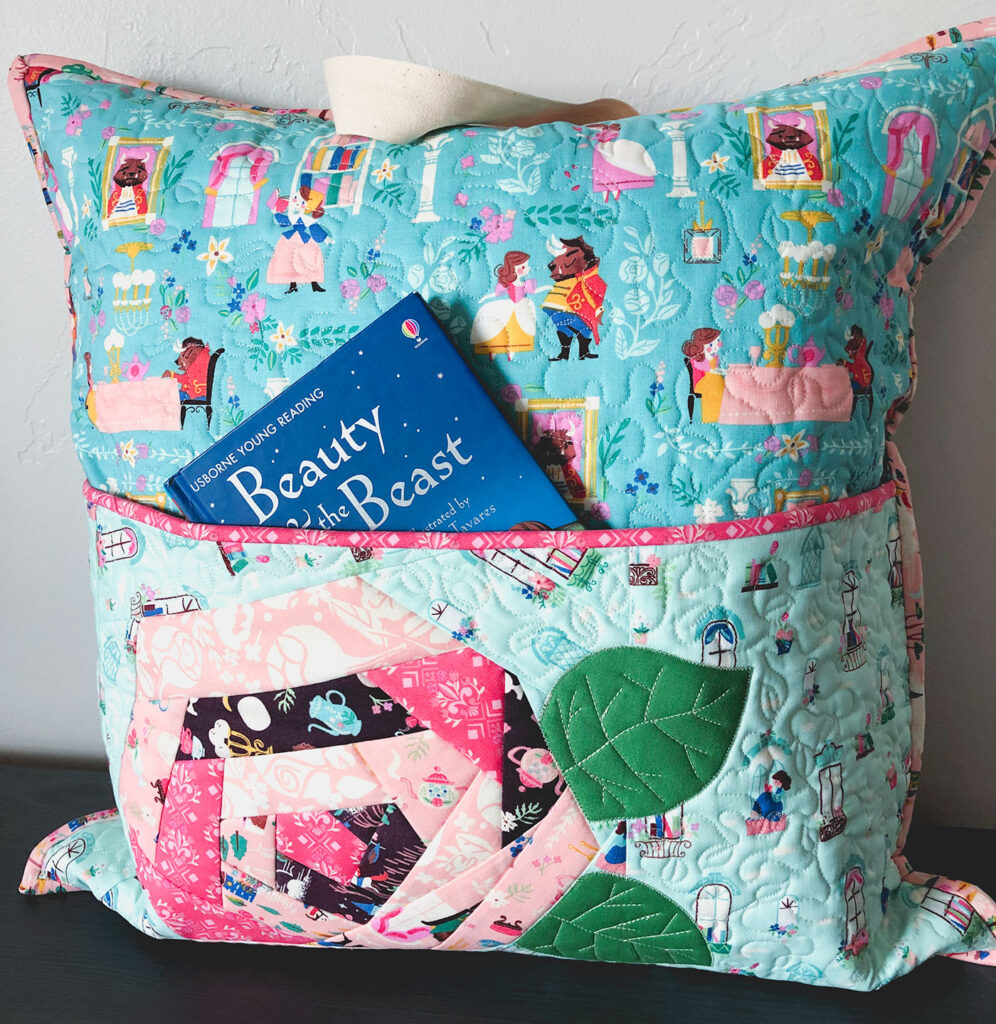
Reflecting on Belle’s love of reading and books, and noticing all the books in various prints of this darling line, it seemed only natural to sew up a QAYG Rose Reading Pillow for my stop on the Beauty and the Beast fabric tour. This line from Jill Howarth for Riley Blake Designs has such rich colors, fantastic illustrations and great blender prints.
And if you’re looking for another Book Worthy project, my Ruffle Top Drawstring backpack would be a fun way to carry library books or pack your things for adventures on the go.
QAYG Rose Reading Pillow
Supplies:
- 20″ pillow form
- 2/3 yard fabric for front and back of pillow- Cut one 21″ square for front and use the remaining fabric for the back.
- 2/3 yard of batting- Sub cut into one 21″ square and one 13″ X 21″ rectangle
- 18″ zipper
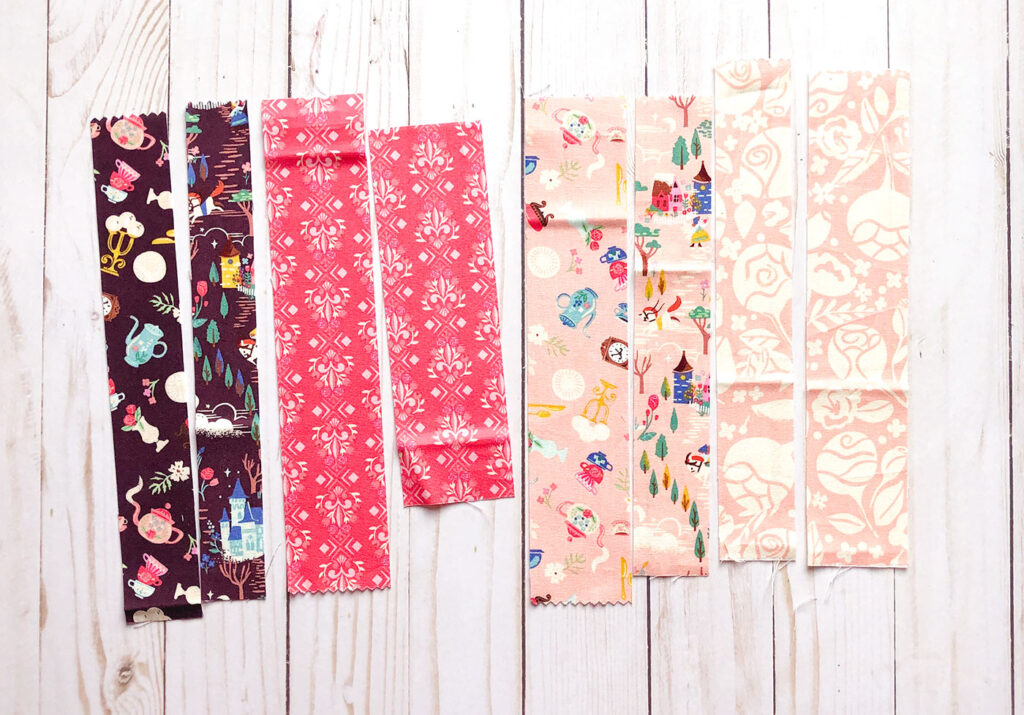
- strips of 2-3 pink/purple prints for rose- Cut into various widths ranging from 1 1/4″ to 2 1/2″.
- generous 1/3 yard of background fabric for pocket- Cut one 13″ X 21″ rectangle for back of pocket and rest will be used to finish the front.
- scrap of green fabric for leaves
- fusible adhesive such as Heat n Bond for leaves
- 1/4 yard fabric for binding- cut 1- 2″ X WOF fabric strip for binding of pocket, and 2- 2 1/2″ X WOF strips for binding pillow
- 12″ piece of cotton webbing or ribbon for the pillow handle.
Quilt as You Go Rose:
- Baste the 13″ X 21″ rectangle of fabric for backing the pocket onto the back of the 13″ X 21″ rectangle of quilt batting.
- Cut a small square of pink fabric for the center of the rose, approx 2 1/2″.
- Place your Rose center on the front of the quilt batting- Position it to the left and above center.
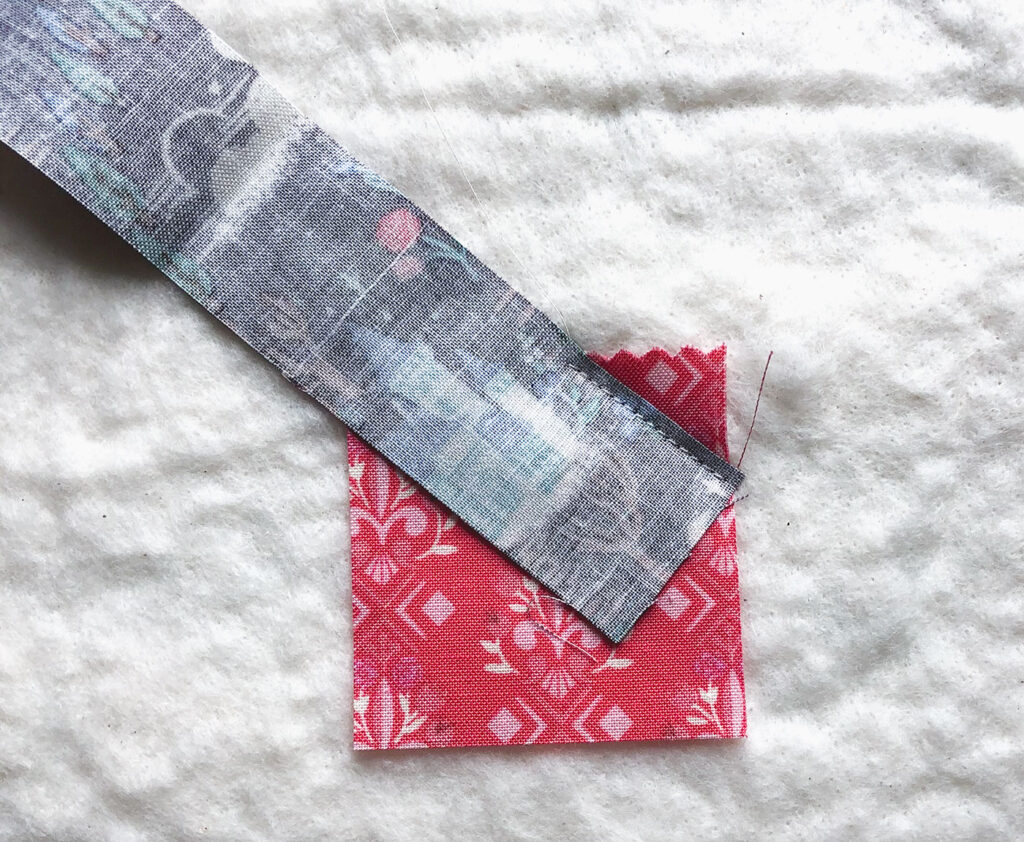
- Next, take a strip of fabric to create the first petal of the rose.
- Position the fabric so it is at an angle to the square.
- Sew down the two pieces of fabric where they overlap, using a 1/8″ seam allowance.
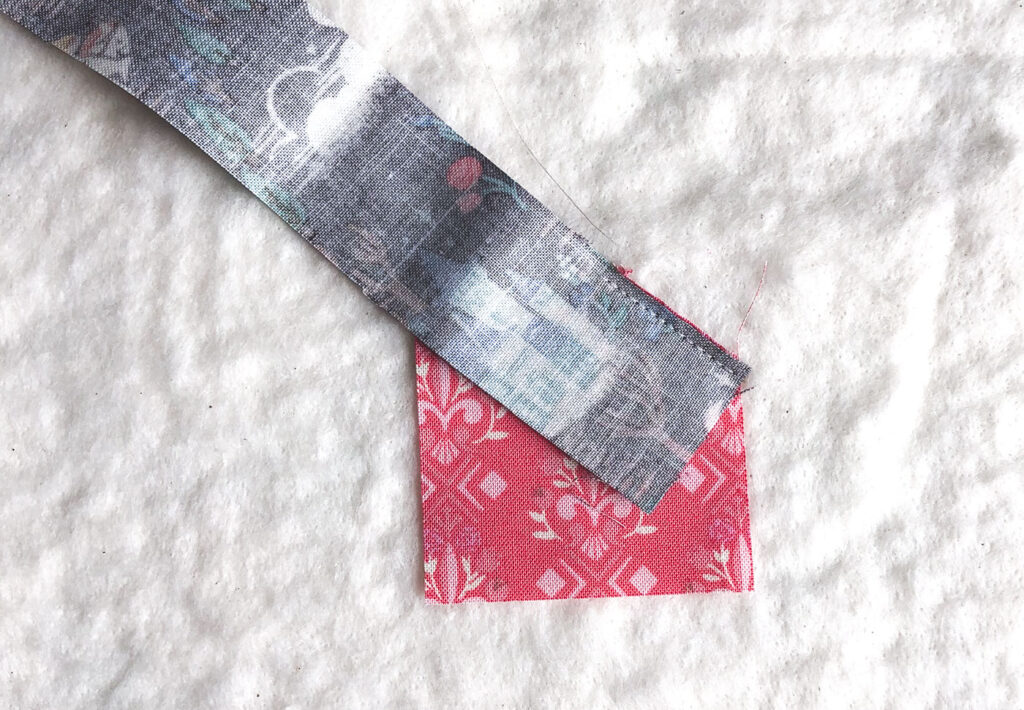
- Trim away the rose center fabric that extends beyond the seam allowance.
- Finally, press the petal fabric away from the center fabric.
- Trim the strip of petal fabric that is not sewn down.
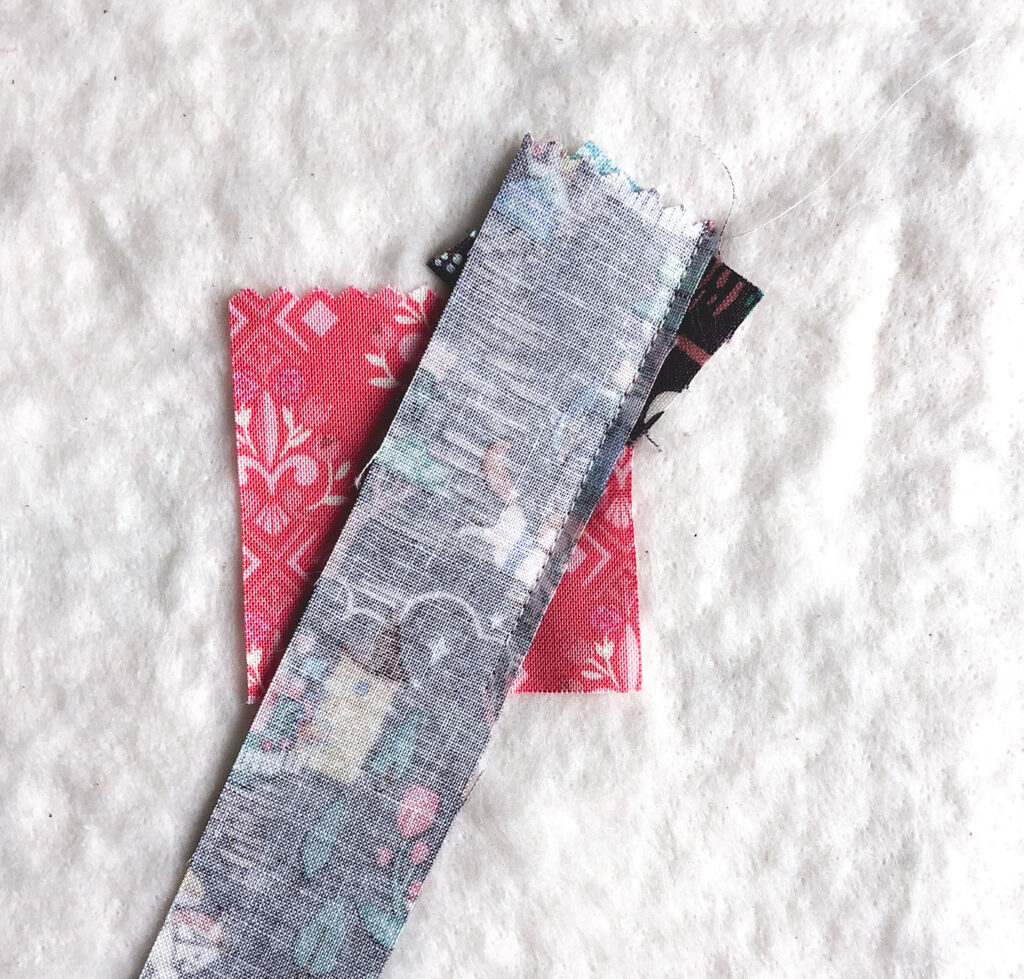
- Take another fabric strip, it can be the same fabric as the first petal or different.
- Line up this strip of fabric so it covers the raw end of the first petal AND overlaps the rose center.
- Sew along the strip where it crosses the two previous fabric pieces.
- Cut away the fabric extending beyond the new petal.
- Press the fabric away from the rose center.
- Trim the petal fabric strip.
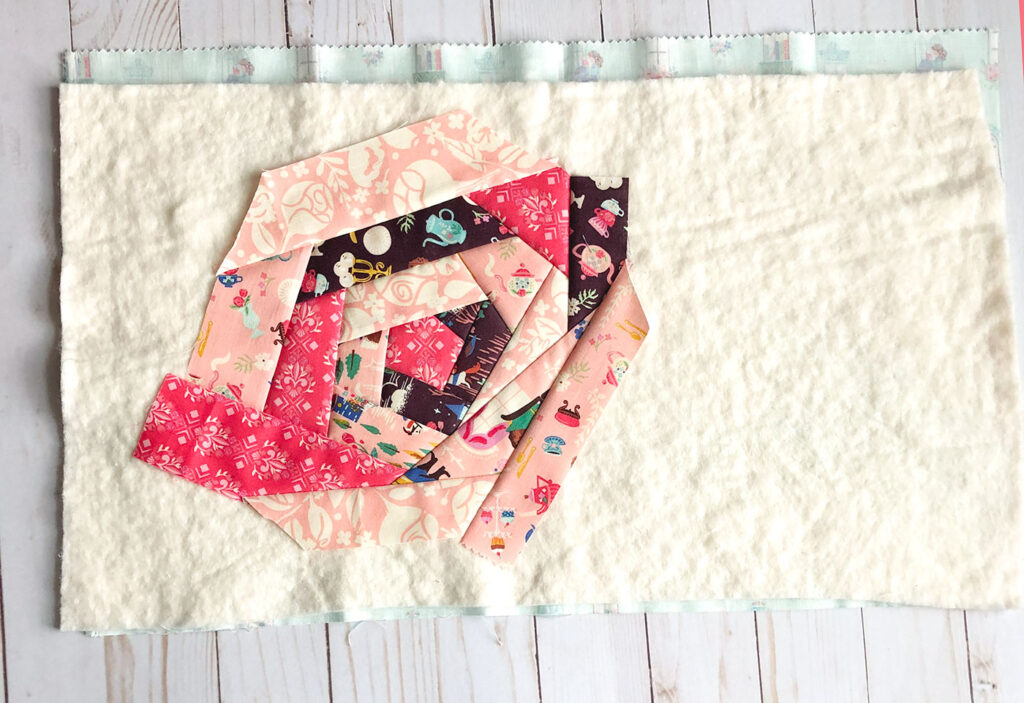
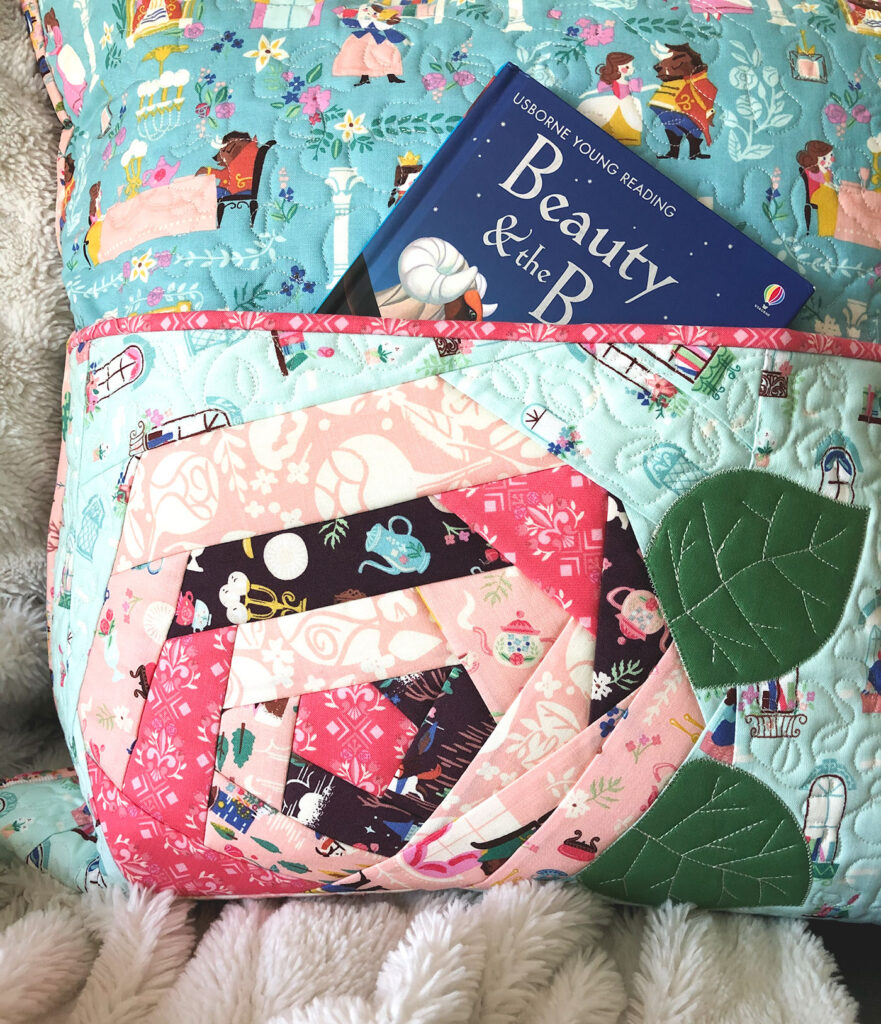
- Continue adding petals to your rose, varying the color and width of the fabric strips as you go.
- Your rose is finished when you are happy with the shape and have about 1 1/2″ of batting on top and 3″ of batting on bottom not yet covered with fabric.
Finish the Pocket Panel
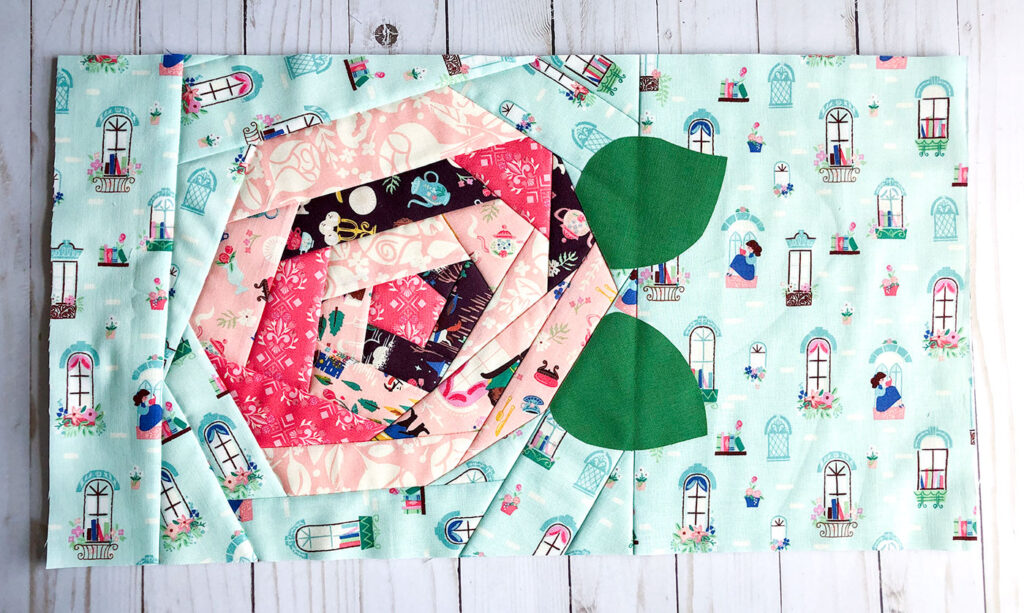
- Cut 2-3 strips of the pocket background fabric and finish shaping your rose.
- Cut larger fabric pieces that are 13″ tall to finish the sides of the rose pocket panel.
- Fuse the fusible adhesive to the wrong side of your green leaf fabric.
- Cut out two leaves that measure approx 2 1/2″ in length.
- Fuse the leaves to the background fabric.
- Stitch down the leaves using a narrow zig zag stitch around the outside.
- If desired, add veins to the leaves using a straight stitch.
- Next, add quilting to the background fabric on the pocket.
- Trim the Pocket to 12 1/2″ X 20″.
- Finally, add your 2″ wide binding to the top of the pocket panel.
Prepare Main Pillow Pieces:
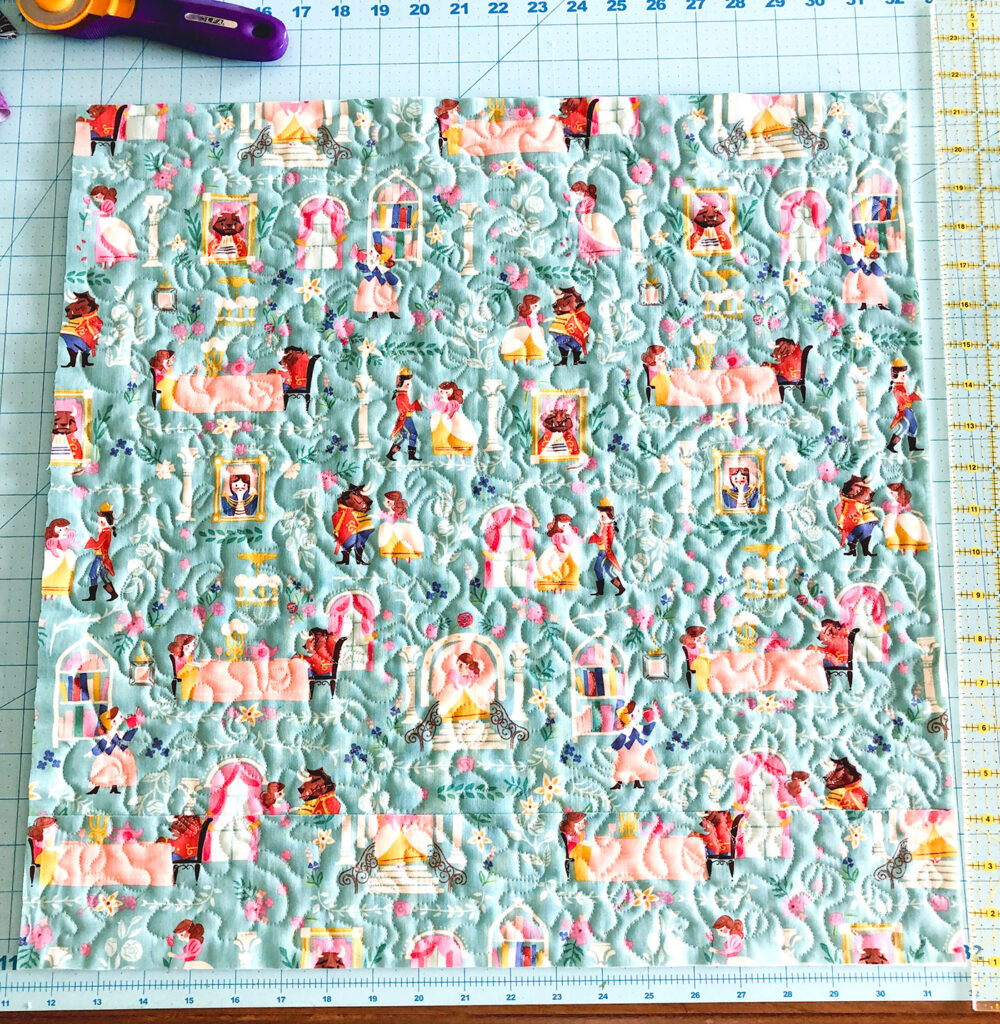
- Place the Pillow front fabric on top of the 21″ square of batting. Baste in place. If desired, back the quilt sandwich with a piece of muslin or solid fabric.
- Add quilting to the pillow front.
- Square up the pillow front to 20″ X 20″
- Create your pillow back using your preferred method. I use this hidden zipper pillow back method.
Assemble QAYG Rose Reading Pillow
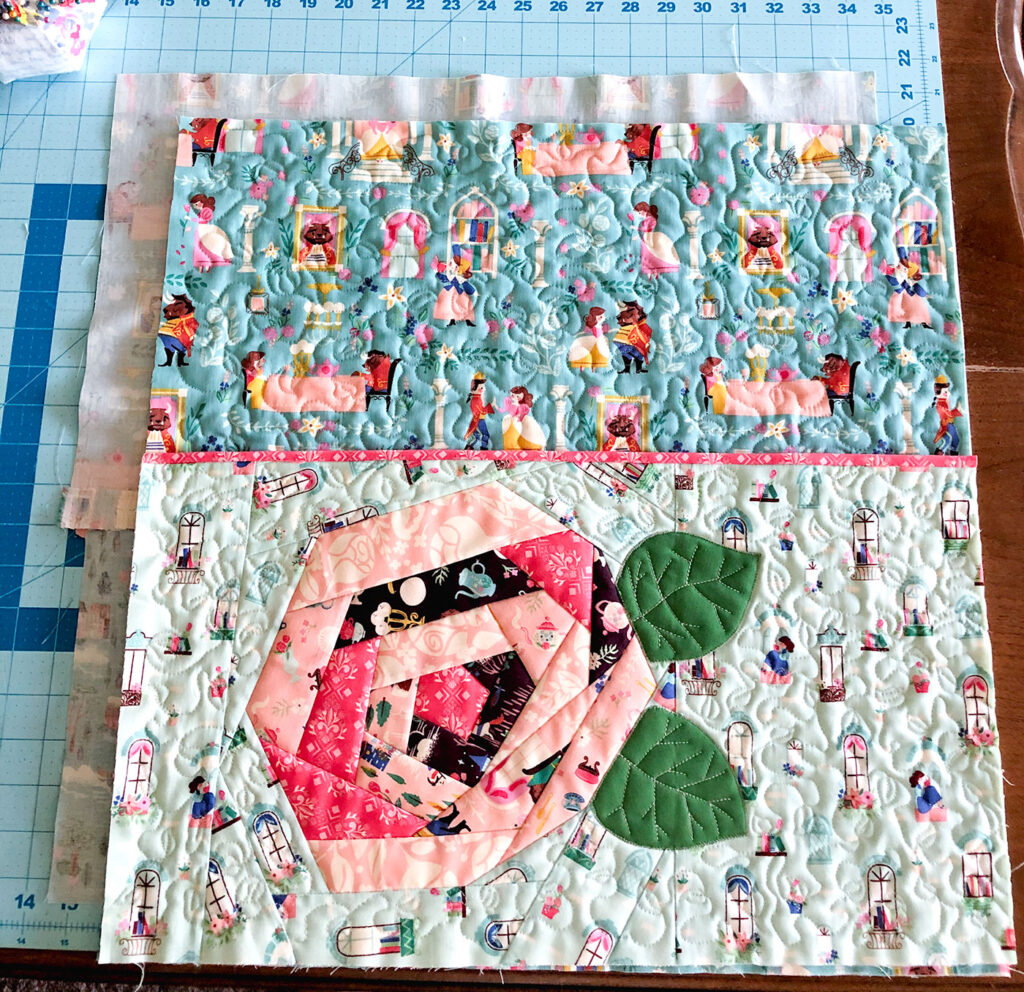
- Place the pillow back wrong side up on your work surface.
- Next, layer the pillow front, right side up on top of the pillow back. (they are offset in the picture to show the layers, but they should all be lined up.
- Finally, place the pocket panel on top of the pillow front, lining it up with the bottom and sides of the pillow.
- Baste all the layers in place using a scant 1/4″ seam allowance.
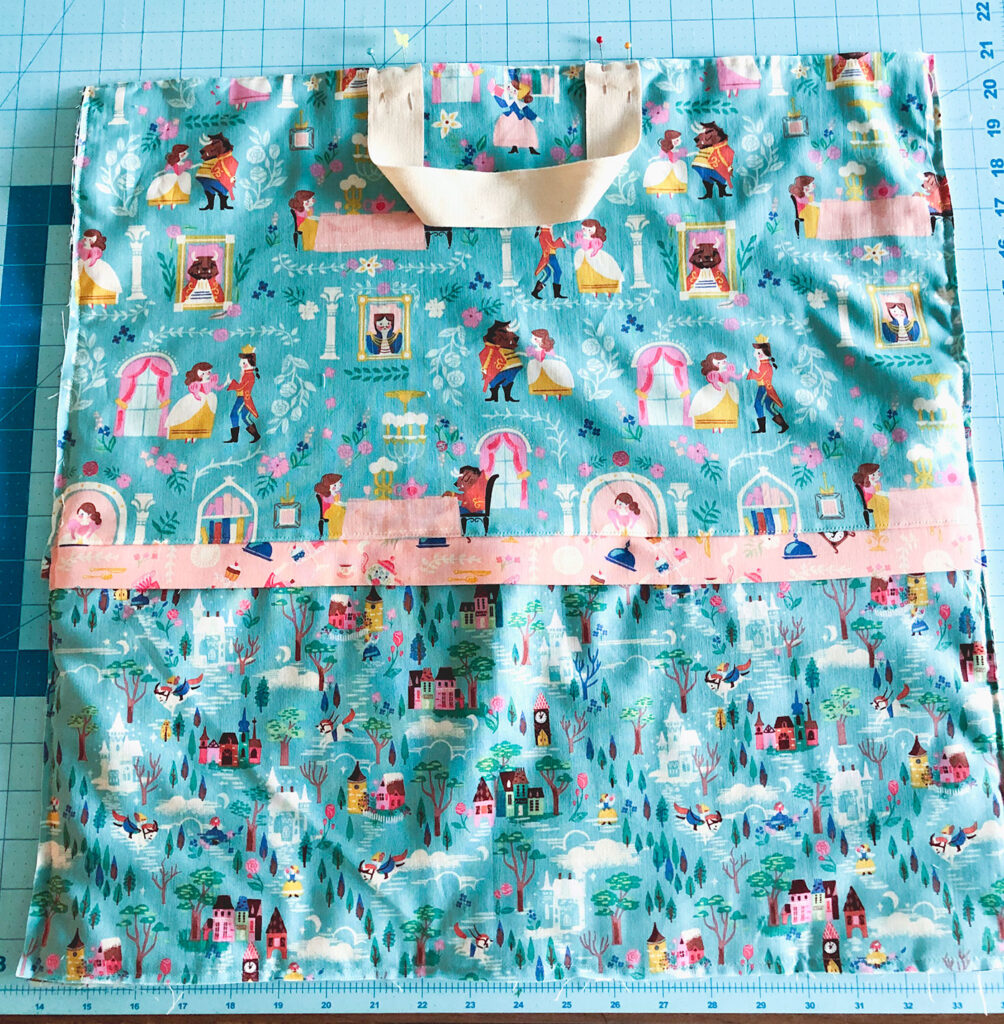
- Center the ribbon for the handle on the back, top side of the pillow, pin or baste in place.
- Bind around the pillow, using the 2 1/2″ strips cut for binding.
- Add your pillow form, and enjoy!
Looking for even more pillows to sew? This Jelly Roll Pillow using 2 1/2″ precut strips is a gorgeous textured pillow. And these patriotic pillows are quick to sew using fabric panels.
Happy Sewing my Friends! xoxo, Amy



Beauty and the Beast – Quilt-as-You-Go Rose Reading Pillow + Tutorial! – Riley Blake Designs
June 10, 2020 at 9:33 am[…] Beauty and the Beast Project Tour begins today with a visit to AMEROONIE DESIGNS, where Amy is sharing a Free Tutorial for this fabulous Reading Pillow, featuring the brand new […]