Welcome Friends! I’m so excited to share with you this fun fabric today- oh, and a cute pillowcase dress made out of it as well, as part of the blog hop celebrating Wonderland Fabric by Melissa Mortensen for Riley Blake Designs!

My sweet friend Melissa from the blog Polka Dot Chair is a relatively new designer for Riley Blake Designs, in fact, this is only her second line of fabric- which I’m sure would surprise you when you get a look at how beautiful and fun it is! Her line of Wonderland fabric is full of bunnies, flowers and get this- sparkle! The gold in the flowers and on a couple of other fabrics is metallic with the most beautiful sheen! As soon as I saw it, I knew it would make the perfect Easter dresses for my three littlest girls.
Today I am here to share with you the first of the dresses – this Tiered Pillowcase dress. It’s a pretty simple sew, but has a fancy look and a perfectly twirly flow to it.

Tiered Pillowcase Dress Tutorial
It just so happened that Melissa had a similar idea and posted a simple pillowcase dress tutorial yesterday– so if you don’t want to deal with the gathering, or if you are looking for different sizing- head over to her blog for more information!
Supplies for your Pillowcase Dress (size 3/4 T):
- 1/2 yard dark pink geometric fabric
- 1/4 yard flower fabric
- 1/4 yard bunny fabric
- single fold bias tape
- ribbon (optional- can also use fabric and turning tool to create straps)
- sewing supplies (including turning tool if available)
Pillowcase Dress Cutting Instructions:
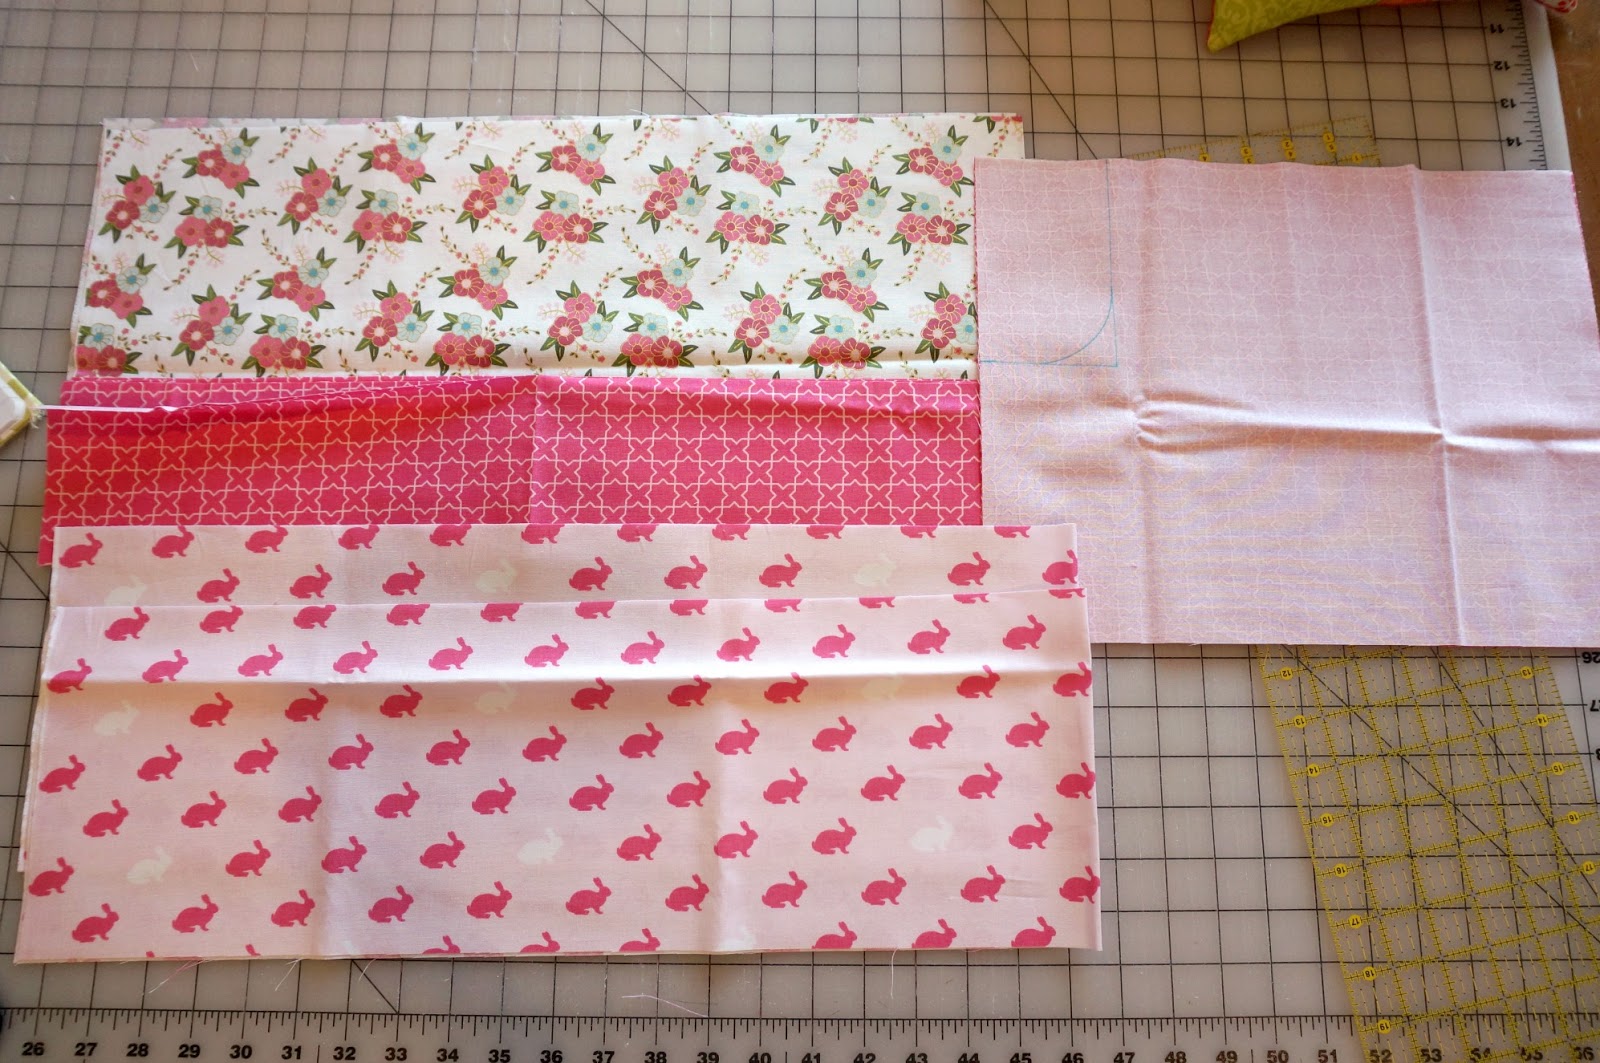
- Cut two rectangles from the dark pink geometric fabric 14″ X 8″
- Cut two strips from the dark pink geometric fabric 4″ X 30″
- Cut the flower fabric to 8″ X WOF, then cut in half.
- Cut two strips pink bunny fabric 7″ X 41″
Pillowcase Dress Sewing Instructions (all seams are 1/2″) :

Prep the Bodice for your Pillowcase Dress:
The width of the bodice is 14″ and the length is 8″- position the pieces so they are facing you in that direction. Fold in half so you have one piece that is 7″ X 8″ and 4 layers thick. Pin.
1. Mark a rectangle on the top corner that is 5″ long and 3″ deep- this will create the arm hole, but we don’t want it square, so use a round object (I used a lid) to round the corner.
2. Cut out this “J” shaped armhole.
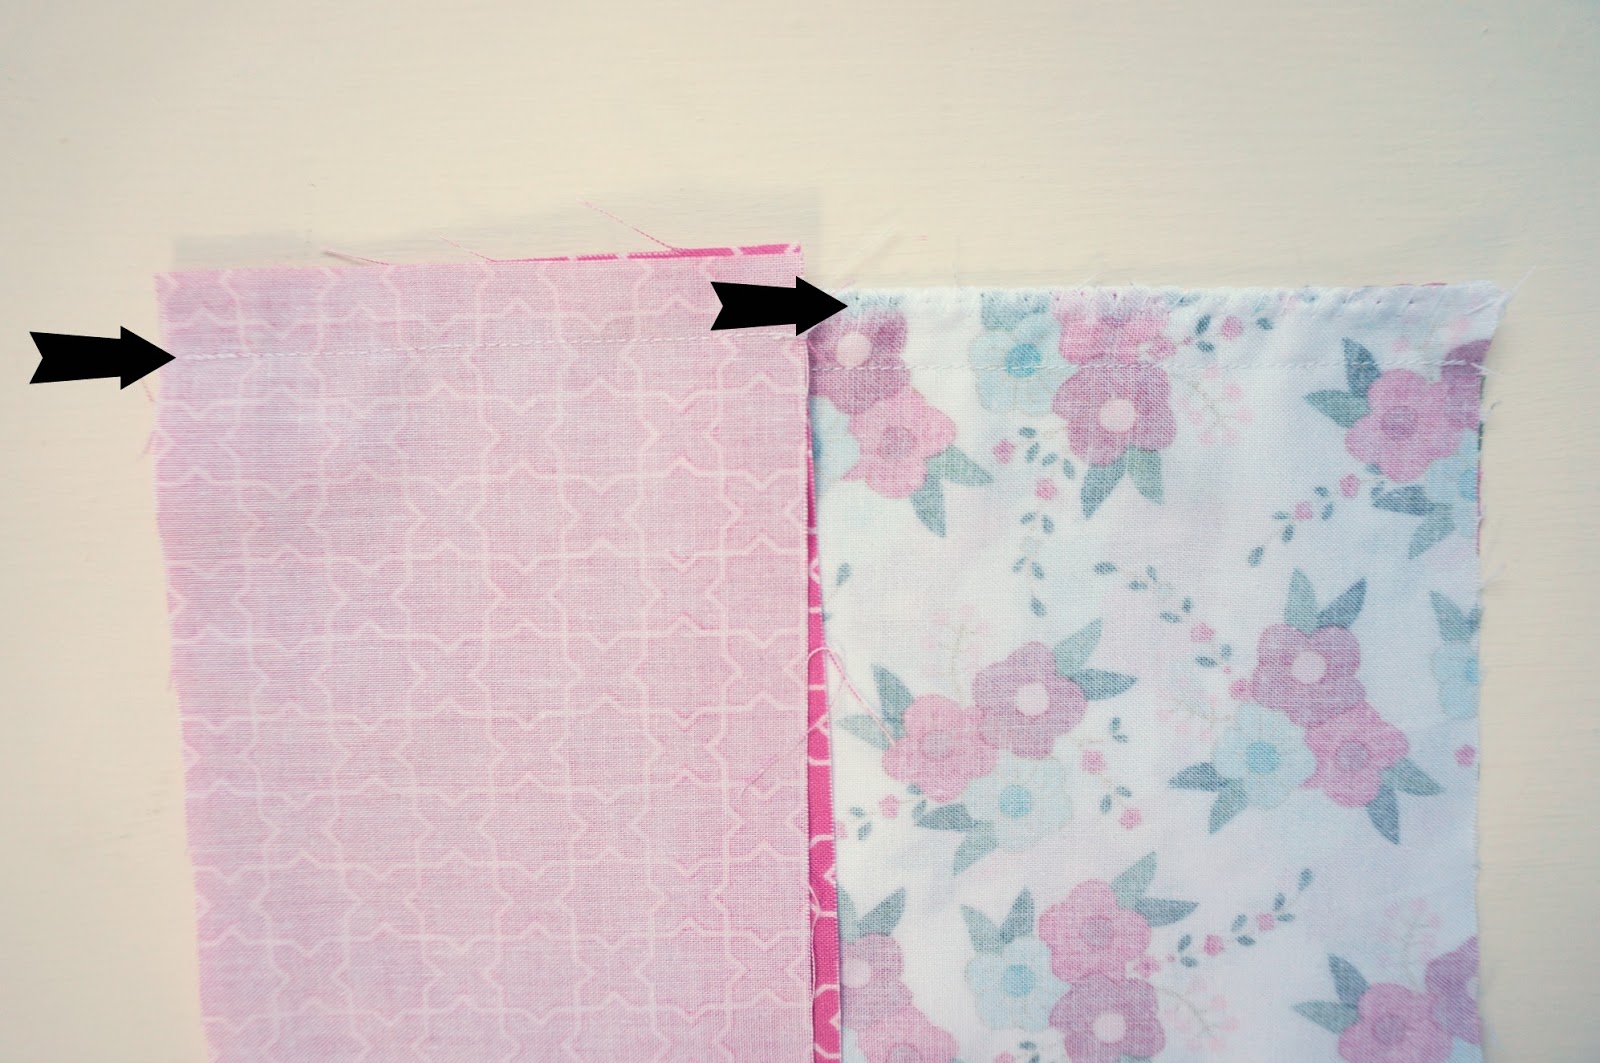
3. Lay out your two bodice pieces and position them so they are on top of each other right sides together. Sew down the two straight sides. ** I do not own a serger- if you are lucky enough to own one, surge all the seams as you go- if you, like me aren’t so fortunate- a fairly tight and wide zig zag stitch will accomplish the same thing.
4. (I profusely apologize for the lack of pictures for this part- I am not a garment sewer and worried about doing things wrong. If you aren’t sure how to use bias tape- there are many good tutorials online) Use single fold bias tape to finish the arm holes.
5. Use a zig zag stitch, or serge the two top straight edges.
6. Create a channel to hold the ribbon or sash- On each of your top edges- fold down the fabric 1/4″ and press, then fold down another 3/4″ and press. Sew as close to the fold as you can (just shy of 3/4″).
Prepare the Tiers for your Tiered Pillowcase Dress:
1. Take each of your tier layers and sew the short sides together.
2. Make sure you finish the edges of the seams.
3. On your bottom layer (the bunny fabric) create a hem. Fold the bottom of the layer up 1/4″ and press. Then fold it up another 1″ and press. Sew down as close to the top of the fold as possible. (sorry about the lack of picture for that)
4. On the top of each layer extend your stitch length as long as you can and sew a stitch all the way around (use a 1/4″ s.a.) *Tip- I like to start and stop my gathering stitch at both sides of the layer- it makes it much easier to gather one side at a time if you can pull from both ends of the side. Also, make sure you leave a length of thread each time you start and stop.
Assembling your Tiered Pillowcase Dress:
Start with the bottom layer and the middle layer (the bunnies and the dark pink layer) right sides together, with the top of the bunny layer at the bottom of the pink layer, and gather the bunny fabric so it is the same length as the straight edge of the pink layer. This will take some time and patience- just keep working with it until the gathers are evenly spaced and the fabric is the right length. **Tip- I find it easiest to pin the two side seams together and then gather the front side of the layer- pin it in place, then work on gathering the back side of the layer. Once they are ready- sew together (1/2″ s.a.) and finish the seam. Press the bunny layer down with the seam toward the pink layer and top stitch the seam down. Repeat for each remaining layer, gathering and sewing and finishing the seams with a zig zag stitch and top stitch.

Once you have all the layers sewn in, you are finished with your tiered pillowcase dress!
If you want, you can use ribbon to create the “sleeves” to hold the pillowcase dress on. I used the bunny fabric to create a tie. Cut a 2″ by WOF strip of fabric and sew the long sides right sides together, turn right side out (I wish I had a turning tool for this) and press. Finish the ends by tucking under the raw edges and stitch down. I actually like to top stitch around all four sides of the tie. Use a safety pin to thread the tie through both the front and back channels. If you like, you can secure the tie in the tiered pillowcase dress by sewing a couple of stitches through the channel and tie on the back of the dress.

Now you’re ready for egg hunting, Sunday Worship Services and everything else this wonderful holiday brings!
Have a very Happy day!
XOXO,
Amy


Sheila Perl
March 16, 2016 at 9:39 pmI really like your tiered pillowcase dress because it uses even more of the gorgeous "Wonderland" fabric!!
Thank you for the tutorial!
Sandie @ crazy'boutquilts
March 17, 2016 at 10:39 pmI love this! Thank you!!
Tina Wemyss
April 4, 2016 at 9:59 pmSo sweet but my wee granddaughter hates dresses, always in T shirts and shorts and when photos are to be taken it is a heck of a time trying a dress on her! Trouble is she looks like a little angel, long blond hair and gorgeous big brown eyes, and likes girl things but not dresses, drat!!
Julie Cefalu
April 4, 2016 at 9:59 pmIt's nice to see a tiered version of the pillowcase dress. Thank you for sharing the tutorial. It's so cute! [email protected]
Unknown
February 2, 2019 at 4:06 amHow would you adapt this to make a size 4T-5T please?
J Ted and Linda Simpson
April 28, 2019 at 3:18 pmMake a shorter version of the dress so it is a top rather than a dress. Make matching shorts, add some cool pockets either on the top itself or on the shorts, and maybe you will be lucky & she will wear it.