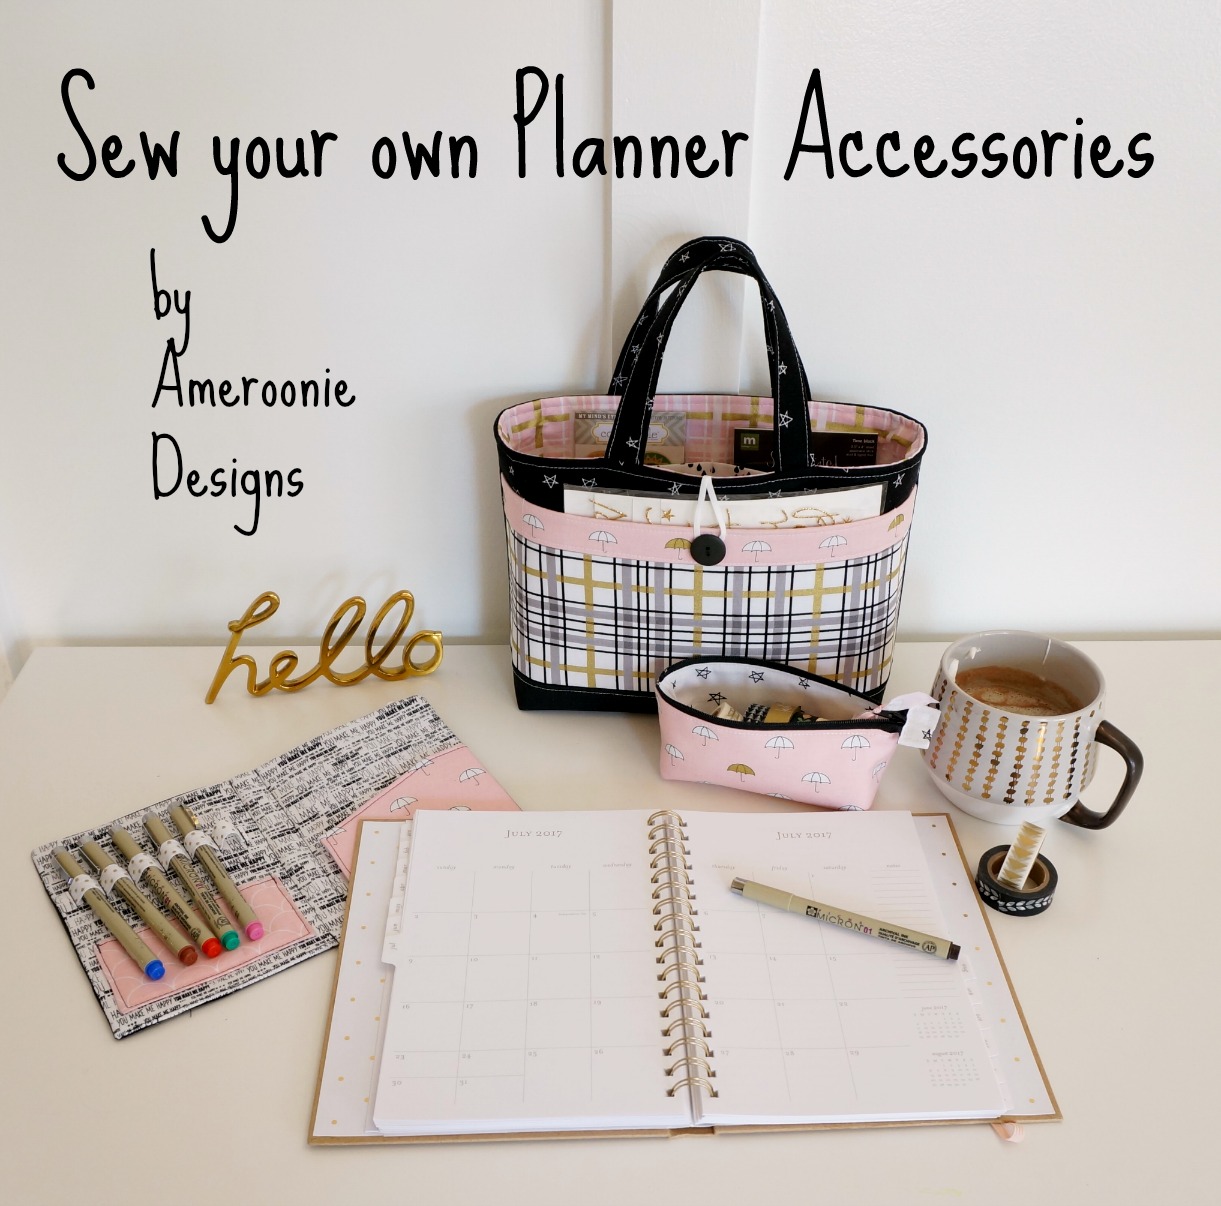
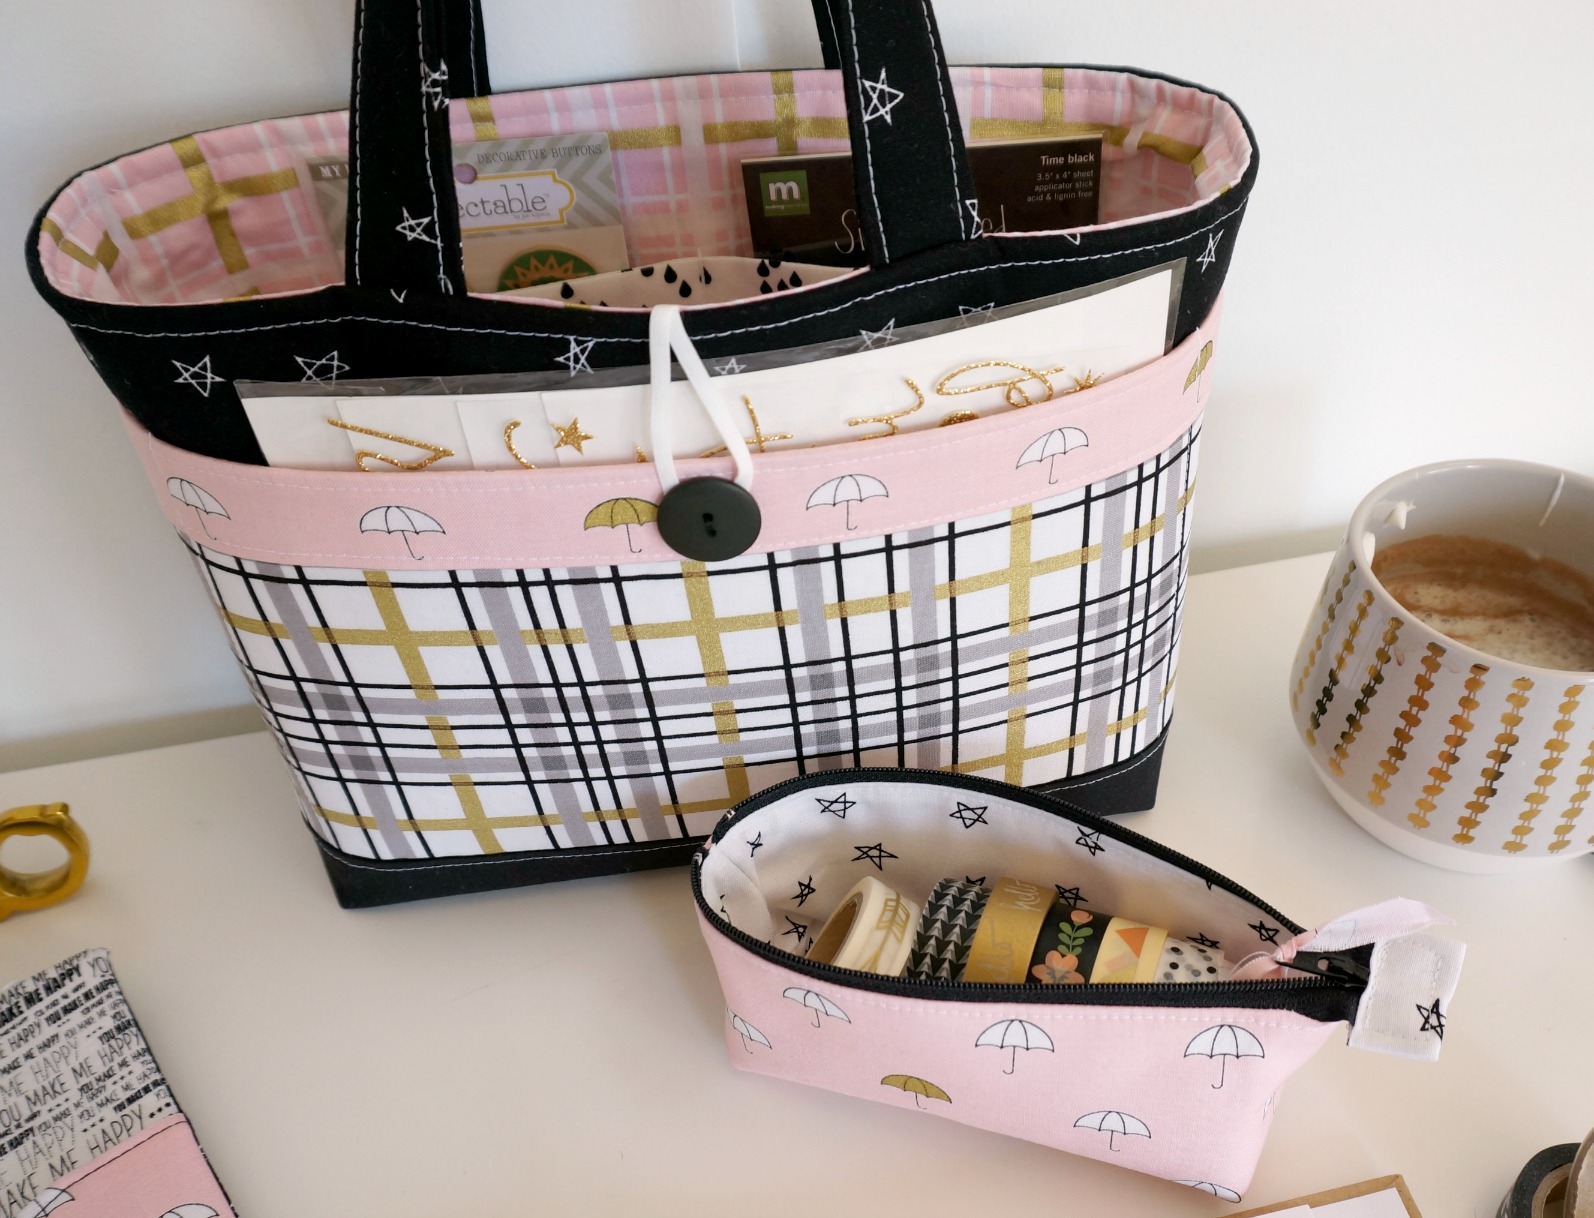
Once I got started sewing things for my planner, I knew a must have would be a pouch for my washi tape. Now, I realize that you can throw washi tape into any zipper pouch and it would be just fine. I just didn’t want to have to dig through the pouch, or pull out all the washi to see what I have. I also realize that for most planner addicts out there, eight rolls of washi is a ridiculous amount of washi- it doesn’t even scratch the surface- but humor me here and pretend you are on a washi diet. 😉 Or traveling with it, perhaps and don’t want to carry the entire mother load.
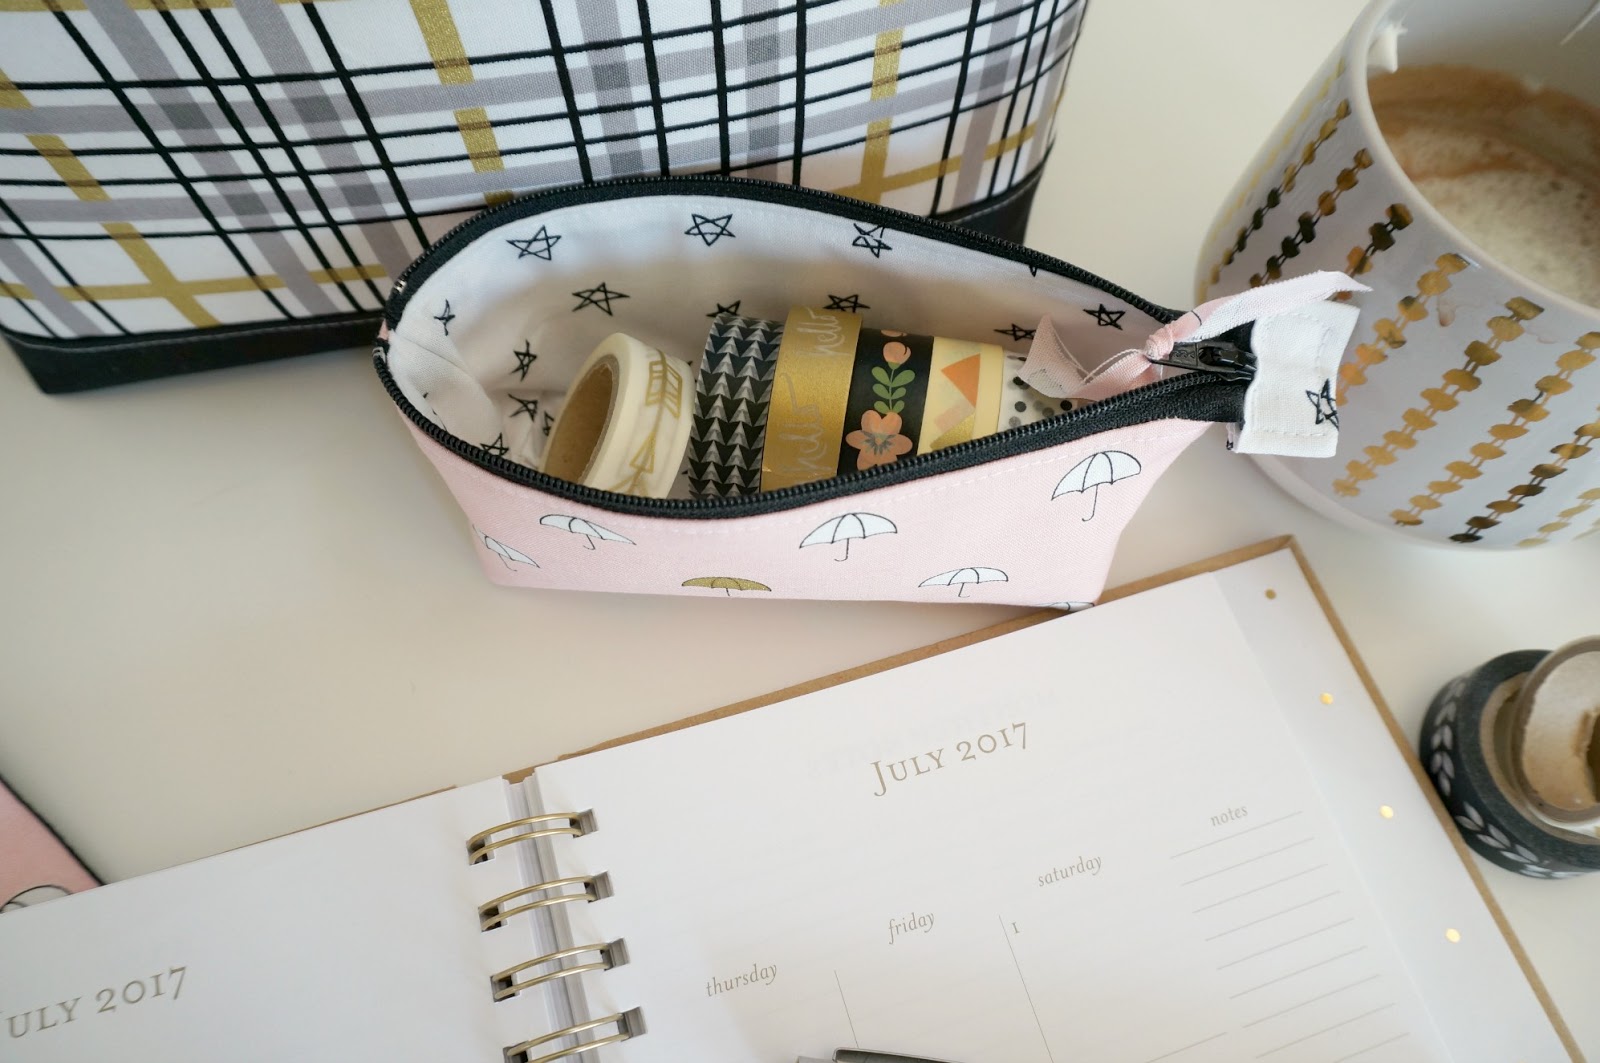
What I came up with is a perfectly petite pouch that is just wide enough to hold your washi upright and just tall enough to keep it snug without being so deep you can’t see inside. Plus, it opens nice and big thanks to the method I learned from Noodlehead so you can see what’s in it all at once.

It uses very little fabric, so scraps will do nicely for this project, which is always a plus!

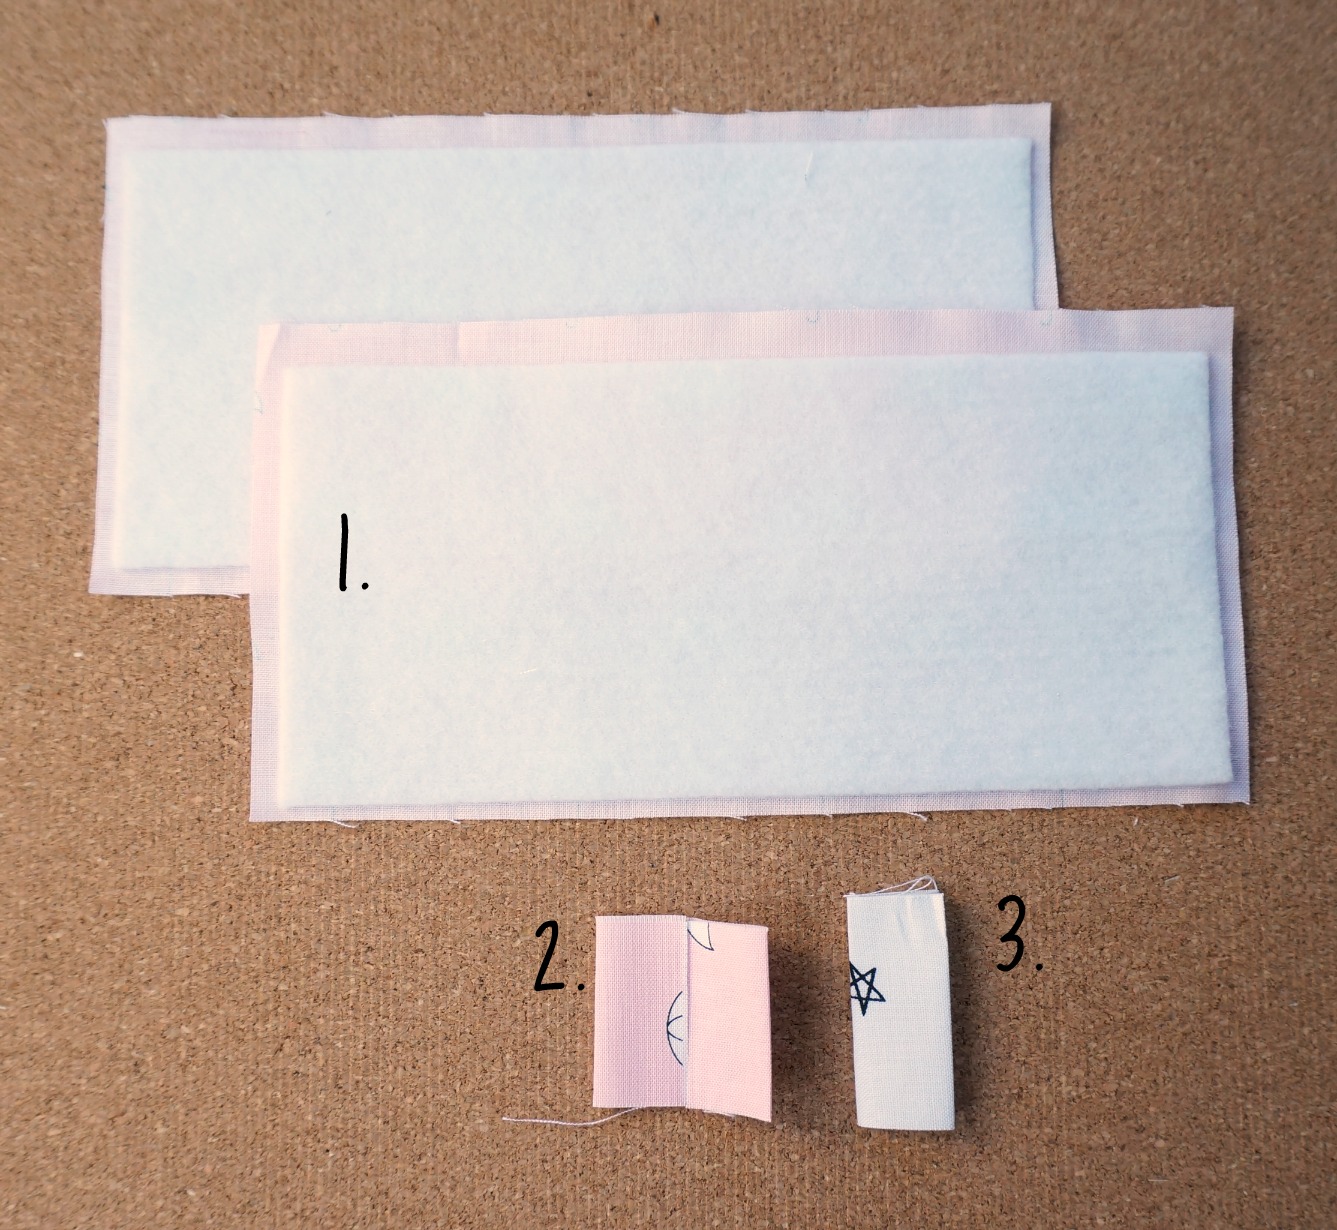
- To prep the fabric, follow manufacturers instructions and fuse the fleece to the wrong side of the exterior fabric pieces.
- Take your 1 3/4″ X 3″ piece and fold in half along the 3″ side, press. Open up the piece and bring the two edges into the center pressed line, press.
- Fold the piece back together and press one final time. Set aside.

To begin, take one of your exterior fabric pieces and lay it down right side up. Place your zipper right side down and line it up along the top edge of the fabric. *Tip: I find it helpful to unzip the zipper while I install it. Slide the zipper over so that there is just over 1/4″ from the edge of the fabric to the metal stop on the zipper. Be a bit generous here, you don’t want to hit that metal bit with your needle! Fold the end of the zipper after the metal stop up and away from the fabric, pin in place. Line up the rest of the zipper with the top of the fabric piece and put a pin in the opposite end 1″ away from the edge of the fabric. Lay the interior fabric on top and line up the top edge. Pin in place. Start at the end where the zipper is folded up and sew down the zipper using a 1/4″ seam allowance. I do not use a zipper foot, but if you like yours, feel free to do it! STOP sewing when you reach the pin that is 1″ from the end. Put your needle in the down position, lift up your presser foot and pull the zipper out of the seam allowance and down between the two fabric layers. Hold the zipper out of the way and lower the presser foot, then continue sewing the rest of the way down the fabric.
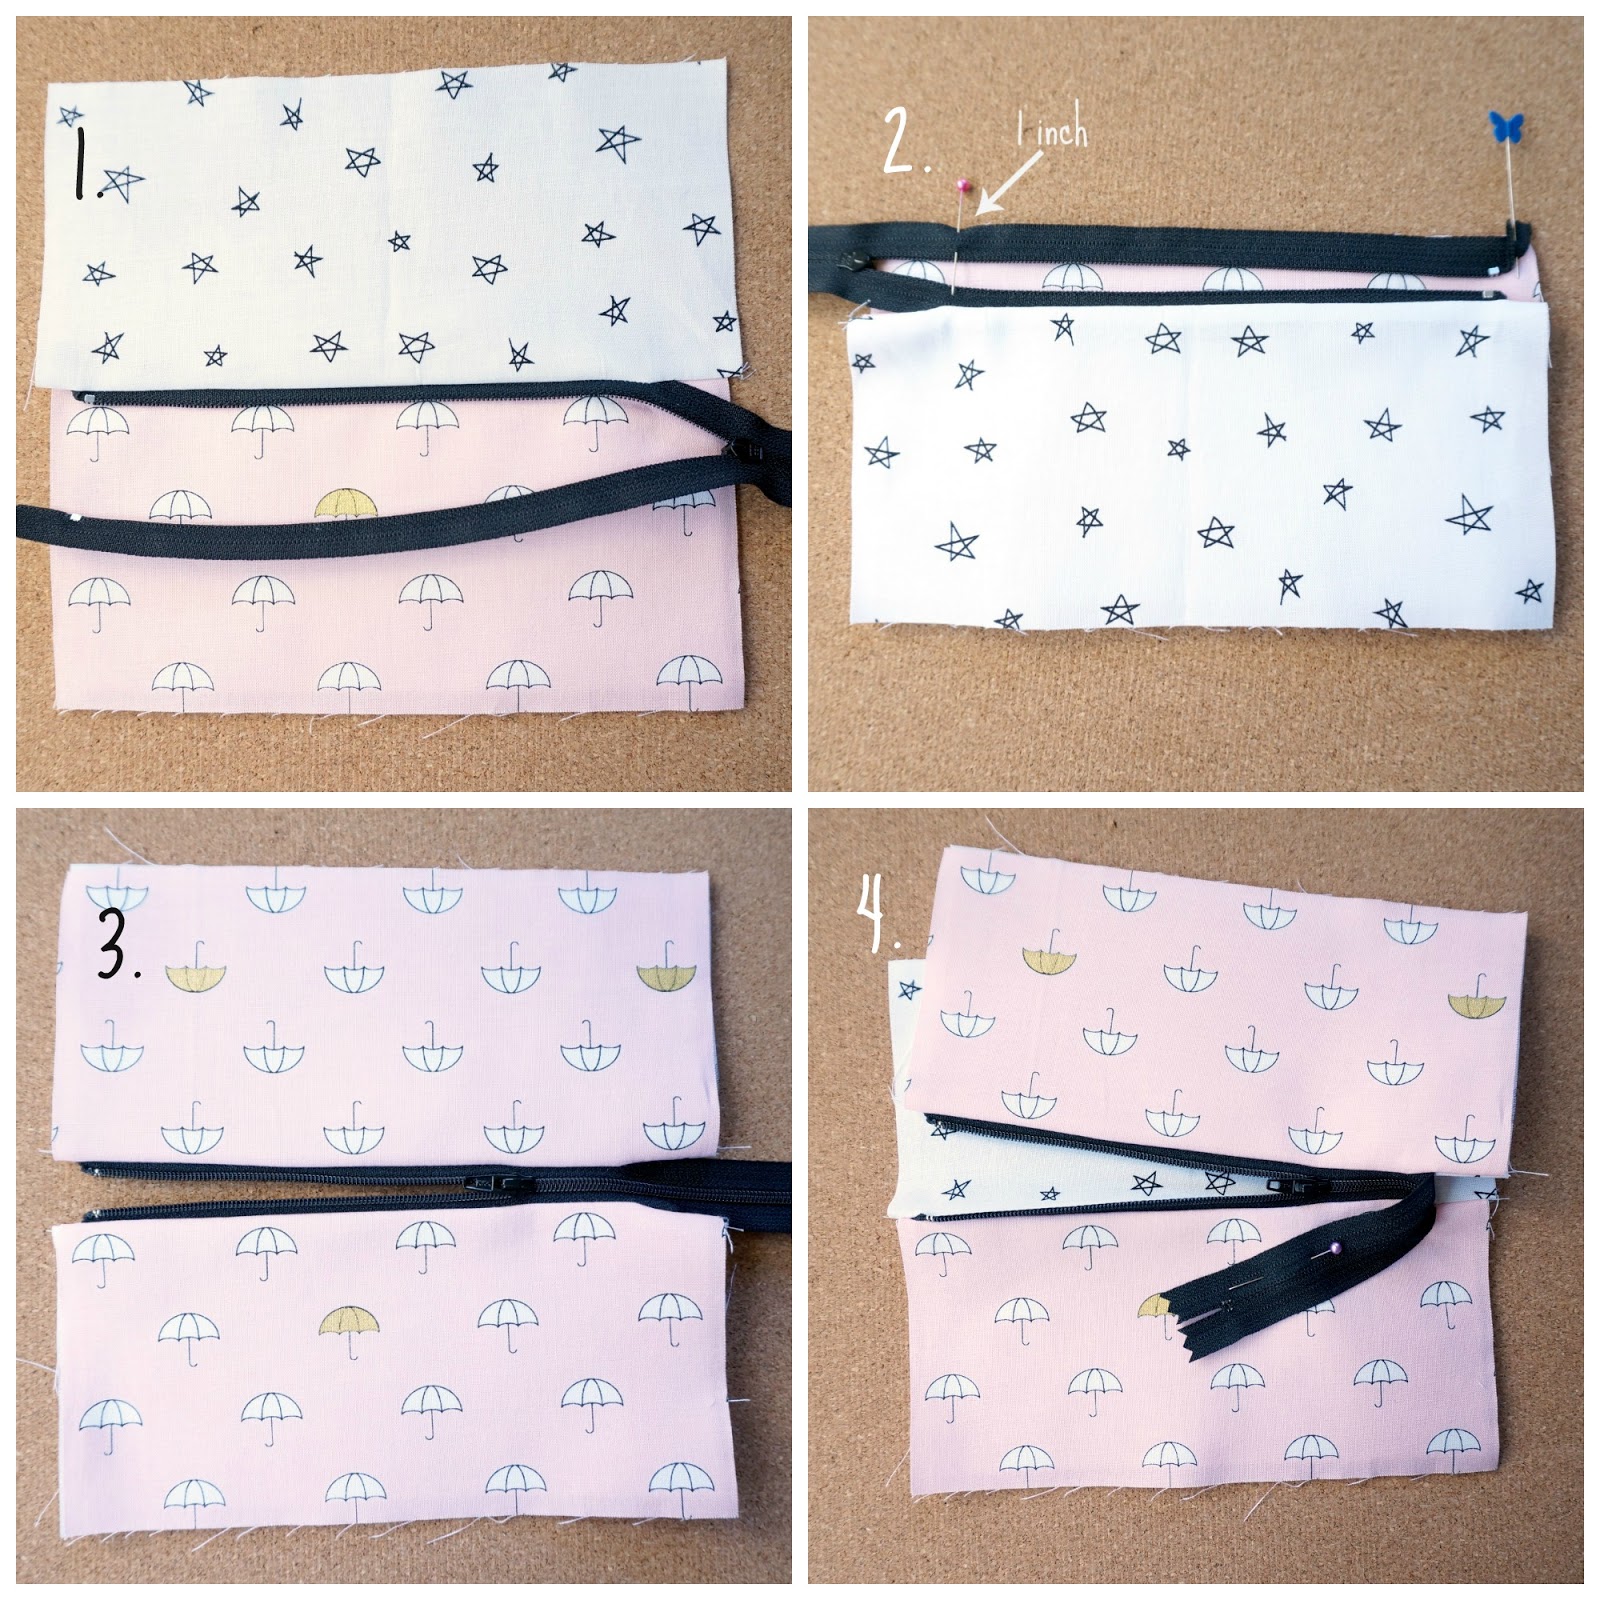
- Press the interior fabric away from the zipper, then press the exterior fabric away from the zipper also.
- Place the second piece of exterior fabric face up on your table. Line up the metal stops of the zipper and line the edge of the zipper up with top of the fabric, pin in place. Fold up the zipper past the stop and pin out of the way. Repeat the rest of the steps from the first side, making sure to mark a point 1″ away from the end of the front fabric piece, stop sewing at that pin and pull the zipper out of the way when sewing. It makes much more sense once you do it.
- Once you’ve pressed both sides of fabric away from the zipper, close the zipper part way.
- Move the interior fabric out of the way and pin the extra zipper to the front piece of the bag to keep it from getting sewn into the seams.
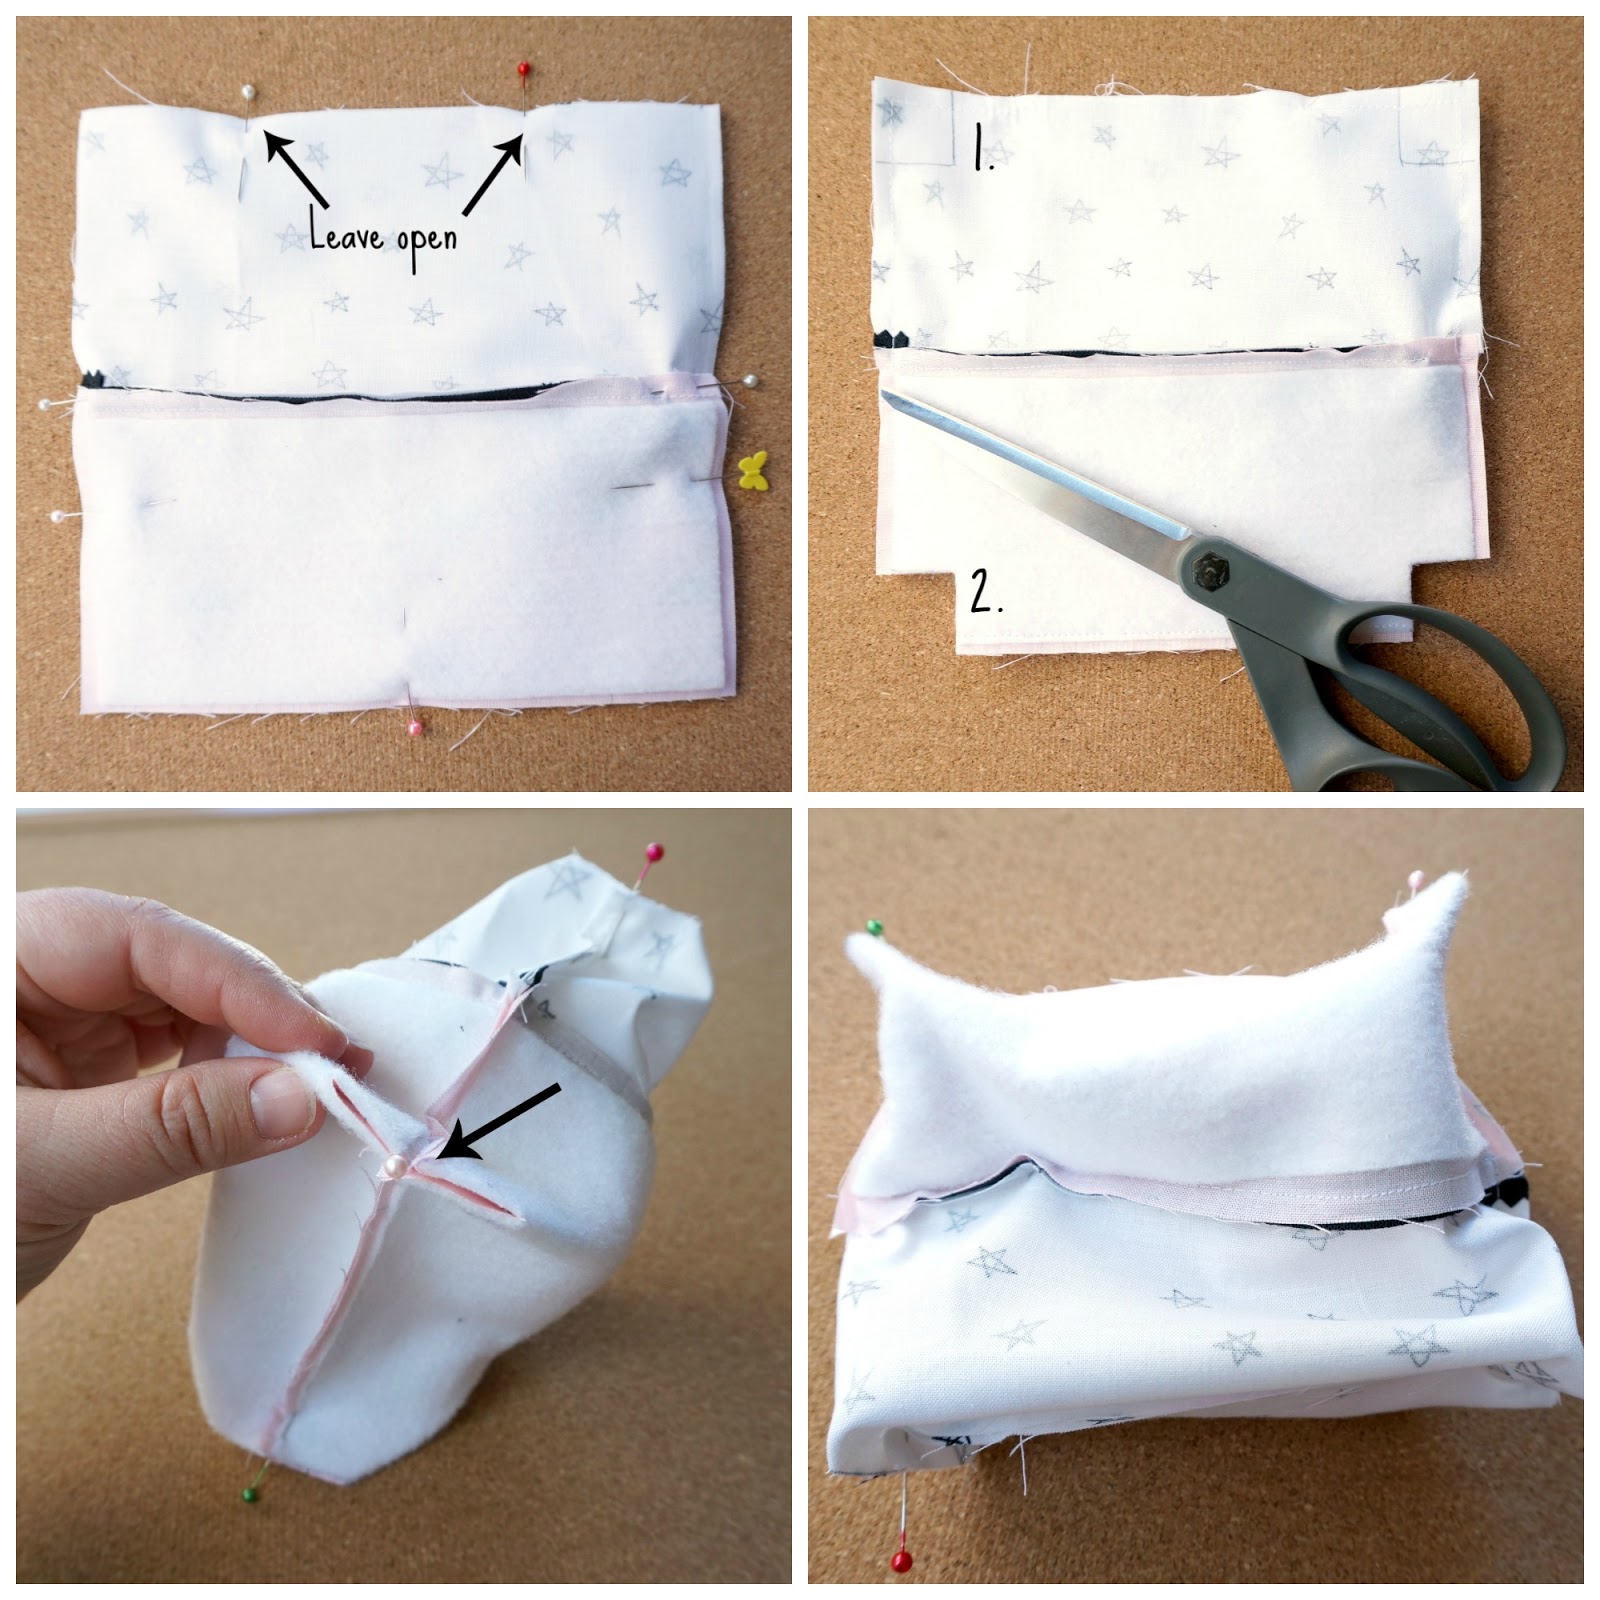
- Line up the exterior pieces of the bag right sides together and pin into place, then line up the lining. Fold the seam allowances at the zipper toward the lining side of the bag. Mark an opening 4″-5″ in the bottom of the lining to allow for turning the pouch.
- Sew around all four sides of the bag, except for your opening in the lining using a 1/4″ seam allowance. Mark 1″ squares out of each corner and cut them out.
- Pull open each corner and line up the seams to create a straight line. Pin.
- You will end up with a wonky looking creature. 🙂 Sew each corner with a 1/4″ seam allowance.
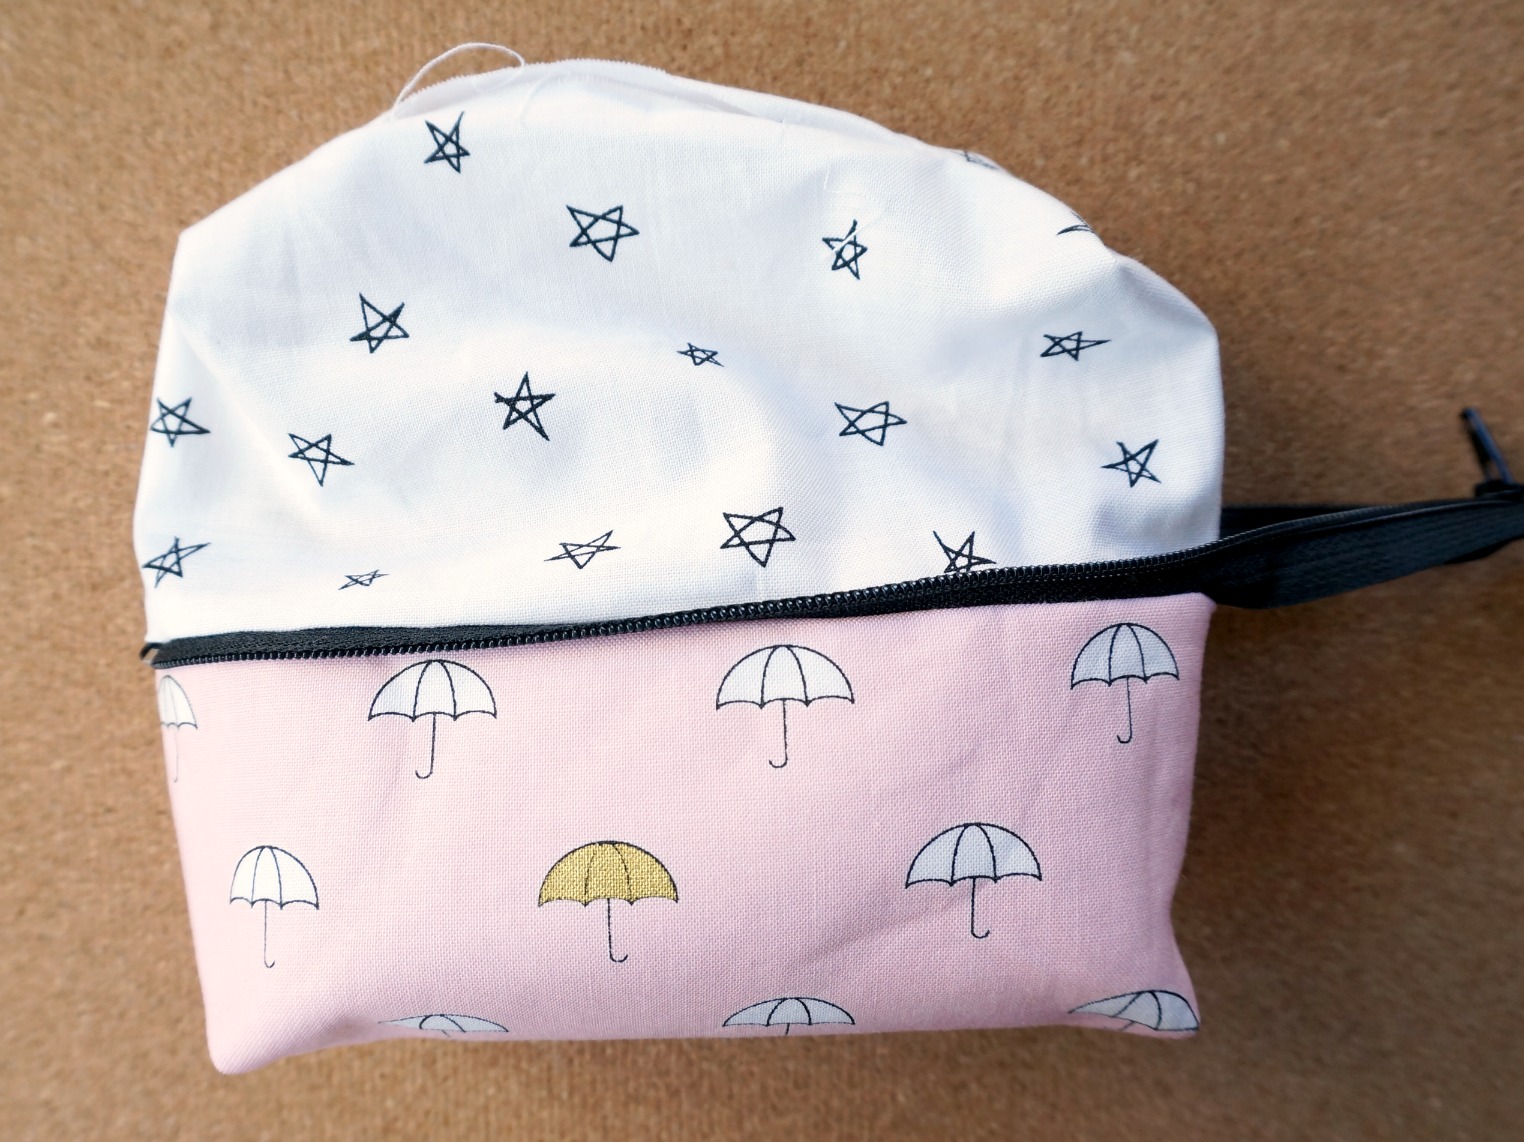
Pull the bag right side out through the opening in the lining. **Watch out for the pin holding the zipper!! You know I have stabbed myself more than once doing this step, right? Push out all of the corners and then sew the opening in the lining shut. You can hand stitch this, but I like to just fold in the seam allowance and stitch close to the edge to close it. Push the lining into the bag and press the fabrics away from the zipper again. Top stitch around the entire bag. We are almost there friends!

Remember our little 1 3/4″ X 3″ friend we pressed and then forgot about? It’s time to let him get to work. Unfold the center fold and then refold it the opposite direction. Now your raw edges aren’t tucked into the center- they are on the outsides of the piece. Sew down both short sides using a 1/4″ seam allowance. Back stitch at the beginning and ending of both sides. Trim away the corners of the raw edges, not the folded edges. Turn the piece right side out with the seam allowances on the inside. You now have a little pocket to slide your zipper into. Before I do that, however, I like to trim up my zipper so it’s not too long. I use the tab as a measuring stick and line it up with the edge of the pouch and then snip on the far side of it. I’d rather my zipper be on the long side so the pouch opens up better. Once you’ve trimmed your zipper, slide the tab on and sew around all four sides of it to hold the zipper firmly.
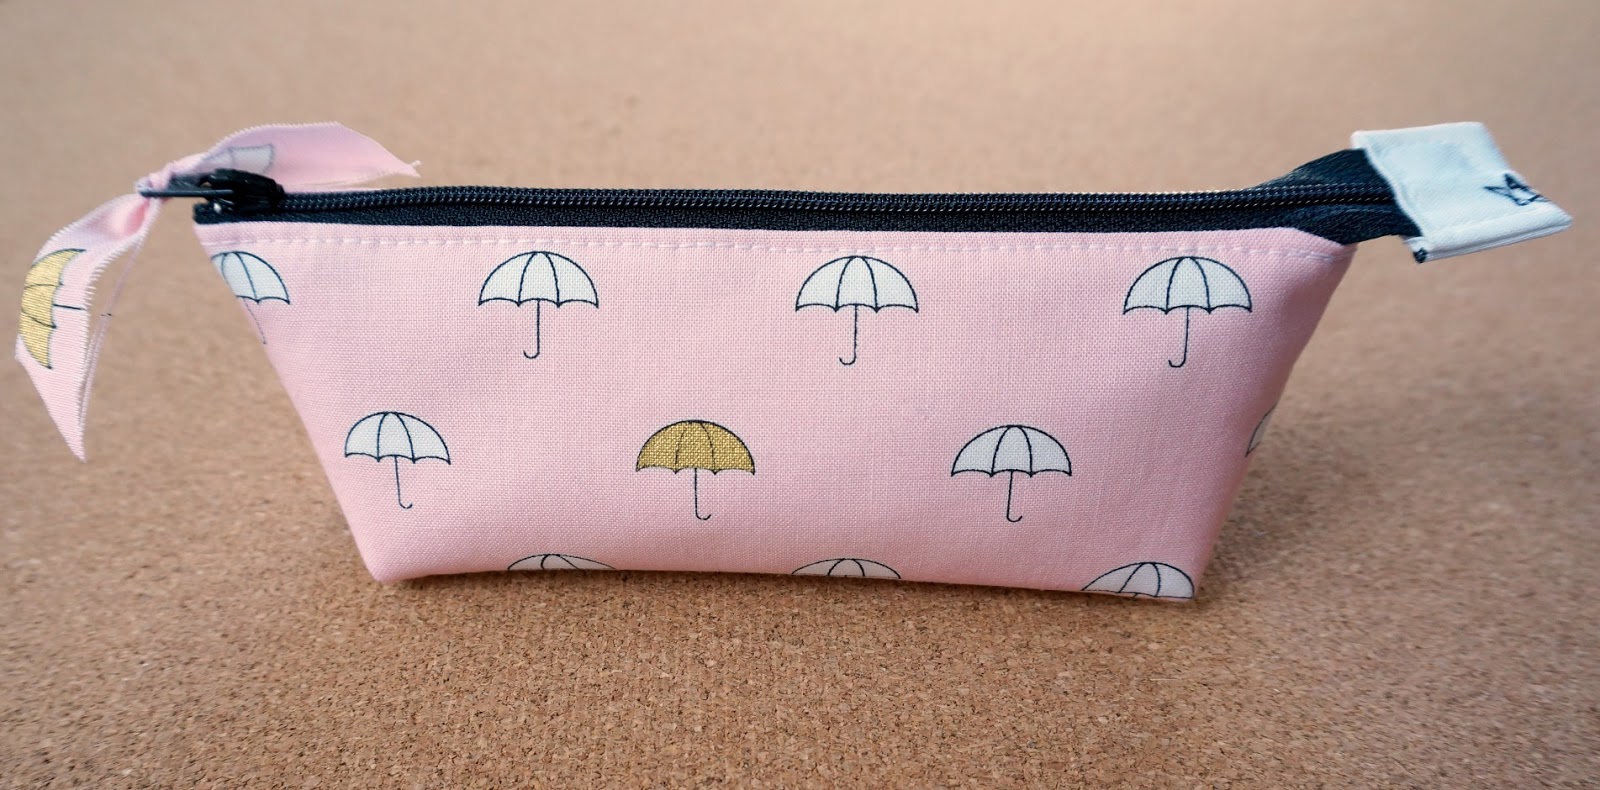
Take your 1/2″ wide strip and tie it to the zipper pull. You’re finished!
Now get out there and plan your life!

And you’ll look fabulous doing it!!
Let me know if there are any questions! And please share pictures if you make one- I’d love to see! Tag me on Instagram at AmeroonieDesigns if you do end up using my patterns. It’s so thrilling to see when they’re used.
xoxo,
Amy


cghundley
January 19, 2017 at 4:27 pmToo cute and
so useful! Love
it and thanks
for the instructions.
Carla from Utah
Kristie
January 19, 2017 at 9:38 pmSuch a cute little pouch. Perfect for washi tape…or the tsum tsums my kiddos collect.
I totally want to know how you made that pen case, with the pocket. I don't like to carry a big planner around, but I do like a few pens and a printed weekly planner page to carry. It's the only way I can stay organized in a week. And something cute to carry it in might help me from carrying too many pens!
Mara
January 20, 2017 at 9:31 amI Will be making lots of these so cute and great for gift giving as well to all of my washi loving friends.
Ronda Batchelor
August 4, 2018 at 4:52 pmSo cute!! As always!!