The fabric for these projects was provided by Riley Blake designs for use in this Idyllic fabric blog tour. The project and opinions are my own.
The other day my sweet 5 year old asked her dad, “Dad, are there masks in heaven?”. He laughed and said, “No, I don’t think there are.” “Good!” she replied, “Because I think I would really like to go there one day.” Whatever your feelings about face masks, it looks like they are going to be around for a while. So, why not make them beautiful with gorgeous fabric and accessorize your face mask with these quick and easy to sew projects?
This Idyllic fabric is absolutely stunning. From the gorgeous sketched prints and florals to the lovely blender fabrics, there is so much color and richness to this fabric line. I am thrilled to be able to use it for this project as part of the Idyllic fabric blog tour.

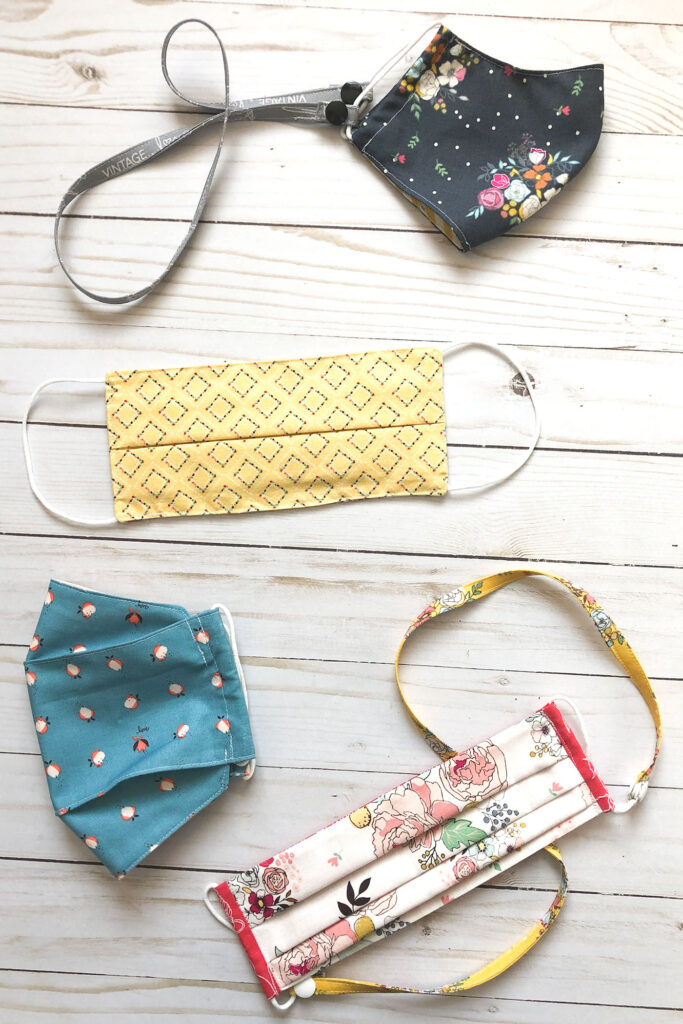
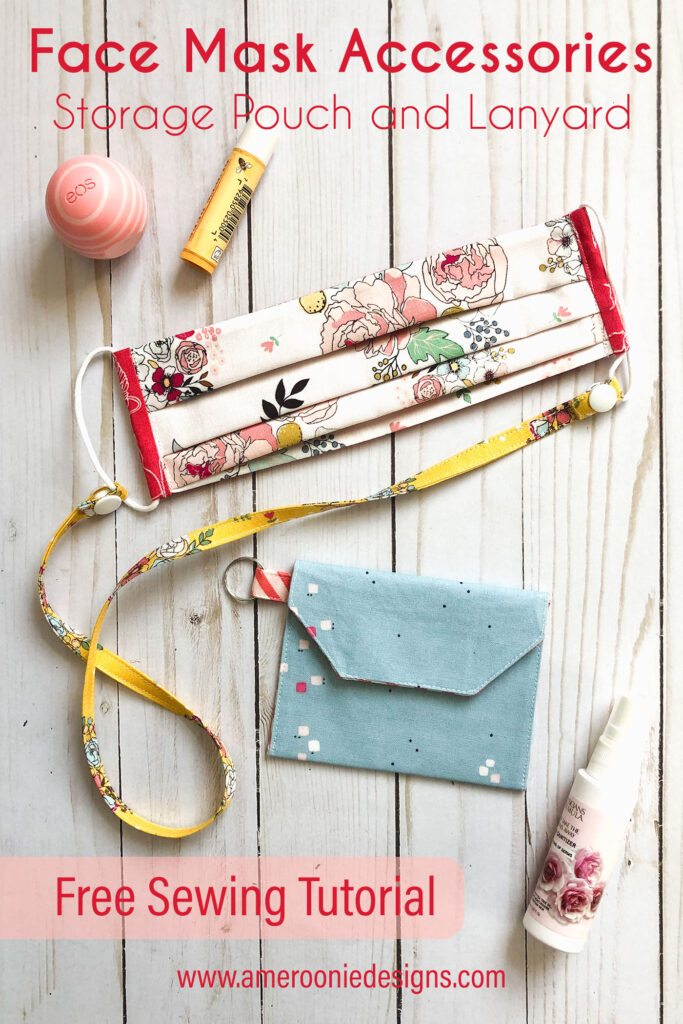
Two of my daughters were given straps to hold their face masks by friends. One used ribbon and the other used cording and some clasps. My youngest daughter wanted something for her mask, so I decided to come up with this tutorial for a simple mask strap. And, I wanted to have a simple pouch I could use to keep my mask clean in my purse so I could always be sure to have one on hand, but not have to worry about it floating around in my bag. This is where the quick pouch comes in. These accessories are sure to make your mask wearing experience simpler and if you use this lovely fabric- prettier too!
Tutorials to accessorize your face mask
Mask Strap tutorial:
I will have a highlight on my Instagram page sharing the different mask patterns I have tried and my opinions on them.
These mask straps are quick to sew and can be adjusted in length to fit the needs of the wearer. My daughters like them so they can keep track of their masks at school without having to take the masks all the way off.
Supplies:
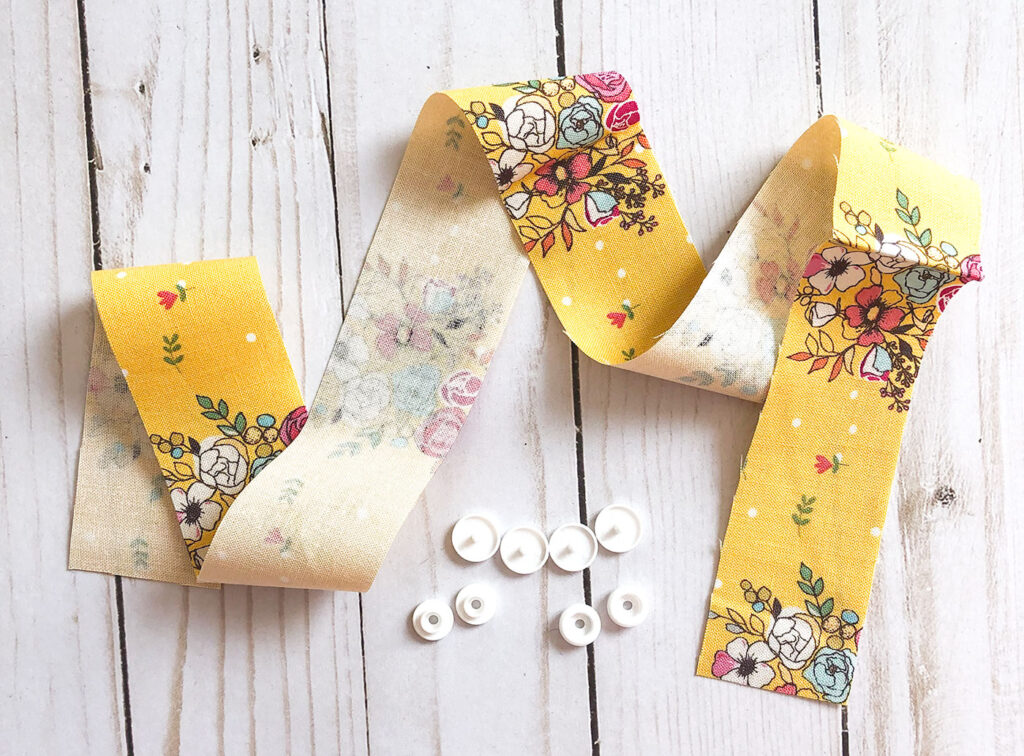
- Fabric- Use a strip of fabric 1 1/2″ wide X 22″-26″ long. (I like the shorter length for my kindergartener)
- Kam Snaps or other type of snap.
Prepare Fabric for mask strap:
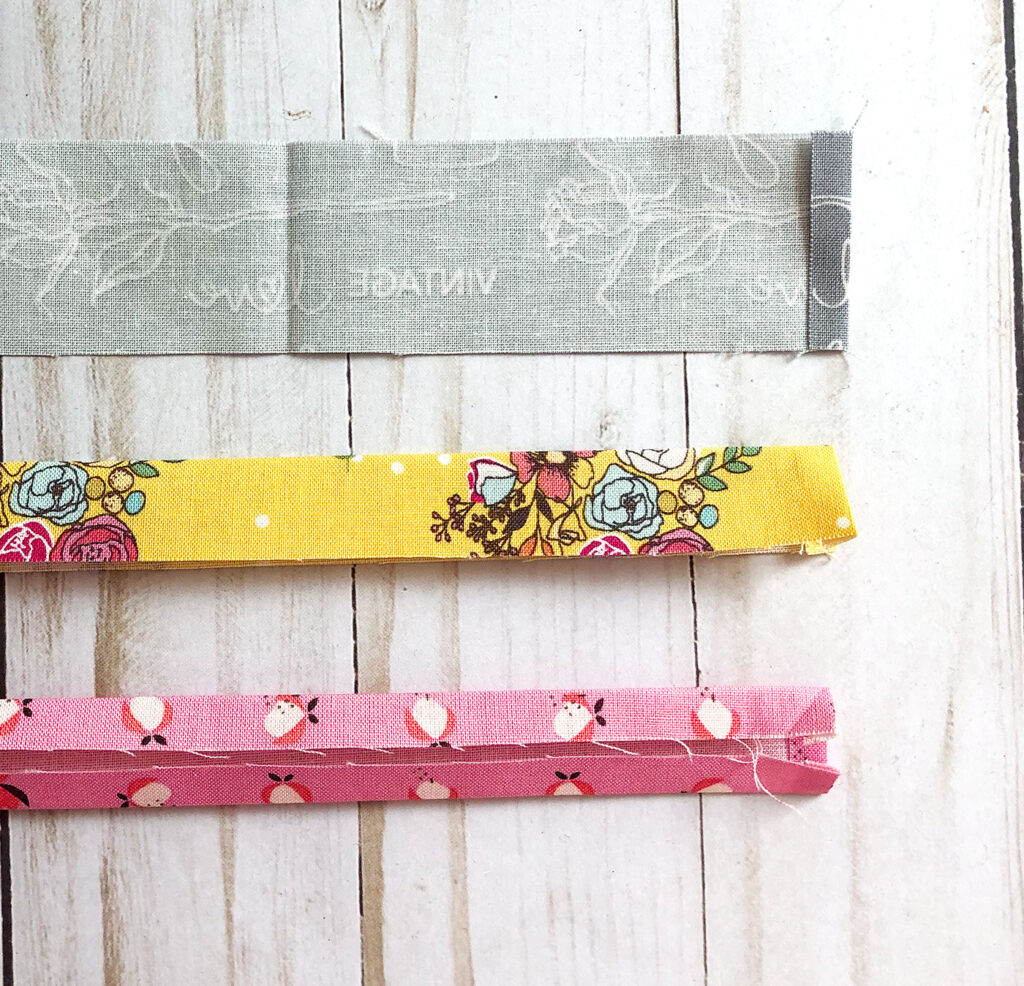
- Begin by pressing the short ends of the fabric strip over 1/4″.
- Next, you will press the strip in half along the length.
- Open up the fabric strip and bring the long edges in toward the center crease, press.
- Re-fold the first crease, with the raw edges of the fabric in the middle, and press again.
Finish your first mask accessory- the Mask Strap:
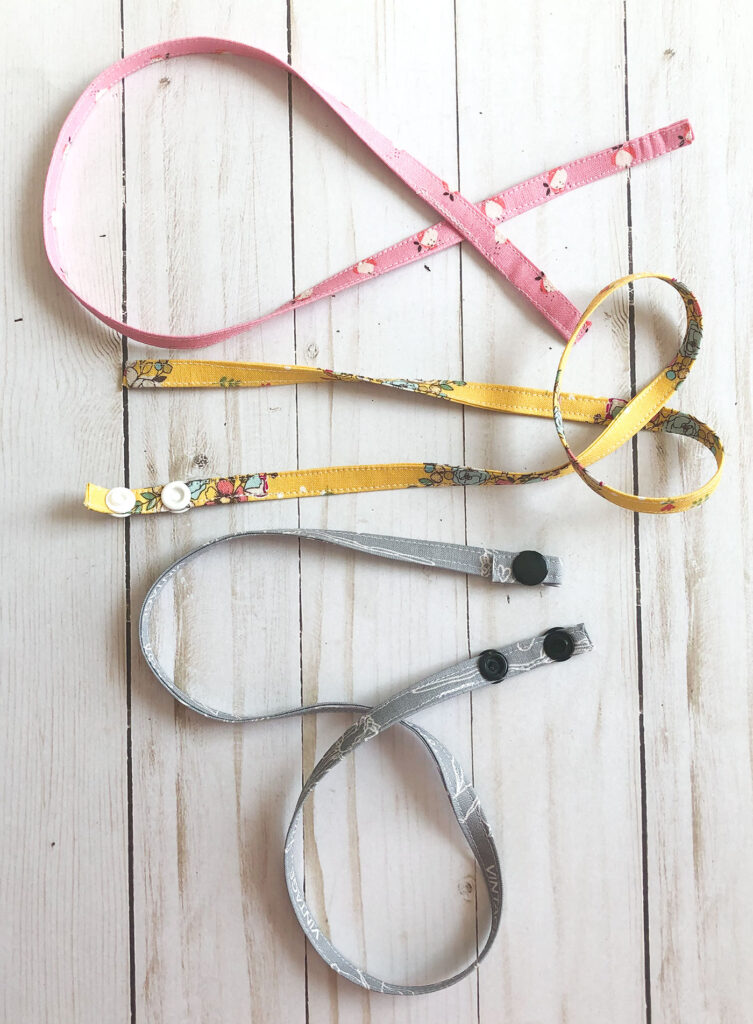
- Now, sew around all four sides of your mask strap, be sure to back stitch at the end of your sewing.
- Finally, use your setting tools for your Kam Snaps, or follow the package instructions for your snap to add snaps to the ends of your strap.
- Position the snap so the edge of your snap will be 1/4″ from the edge of the fabric strip. This will avoid the bulk from the seam allowance as well as give you a tab to pull to separate the snap easily.
- Be sure to position the male and female sides of the snap on the SAME side of the fabric strip.
- Place the second half of the snap just far enough away to easily snap the sides together.
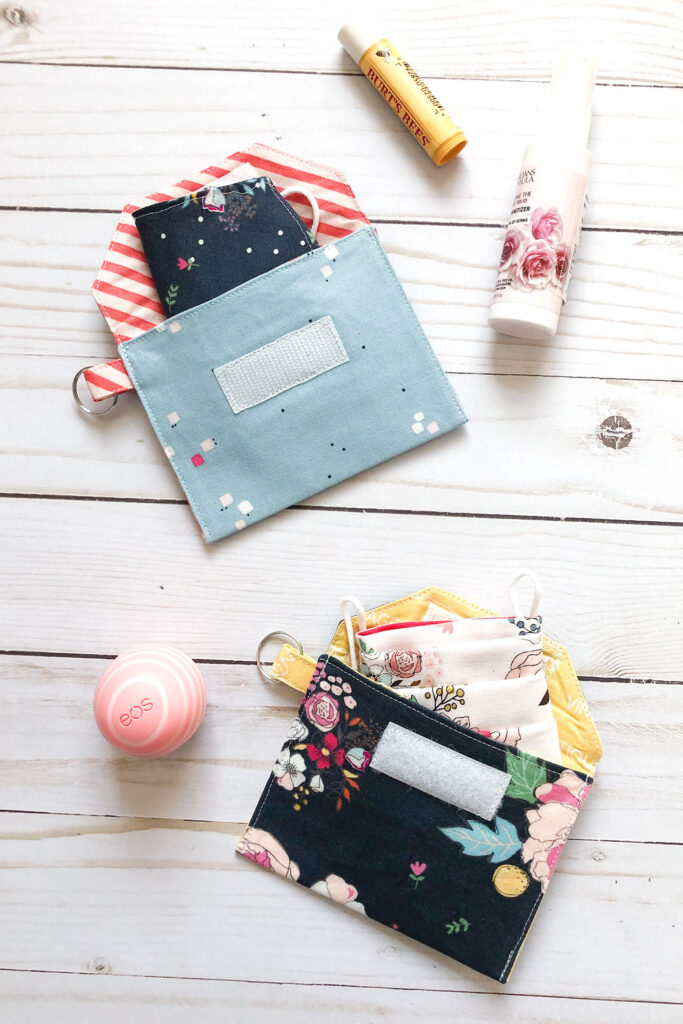
Face mask storage pouch tutorial
I designed these pouches to be easily sewn, use few materials and be washable. The addition of a split ring allows you to either attach a wrist strap or secure the pouch itself to a zipper on a backpack or purse for easy access.
Supplies:
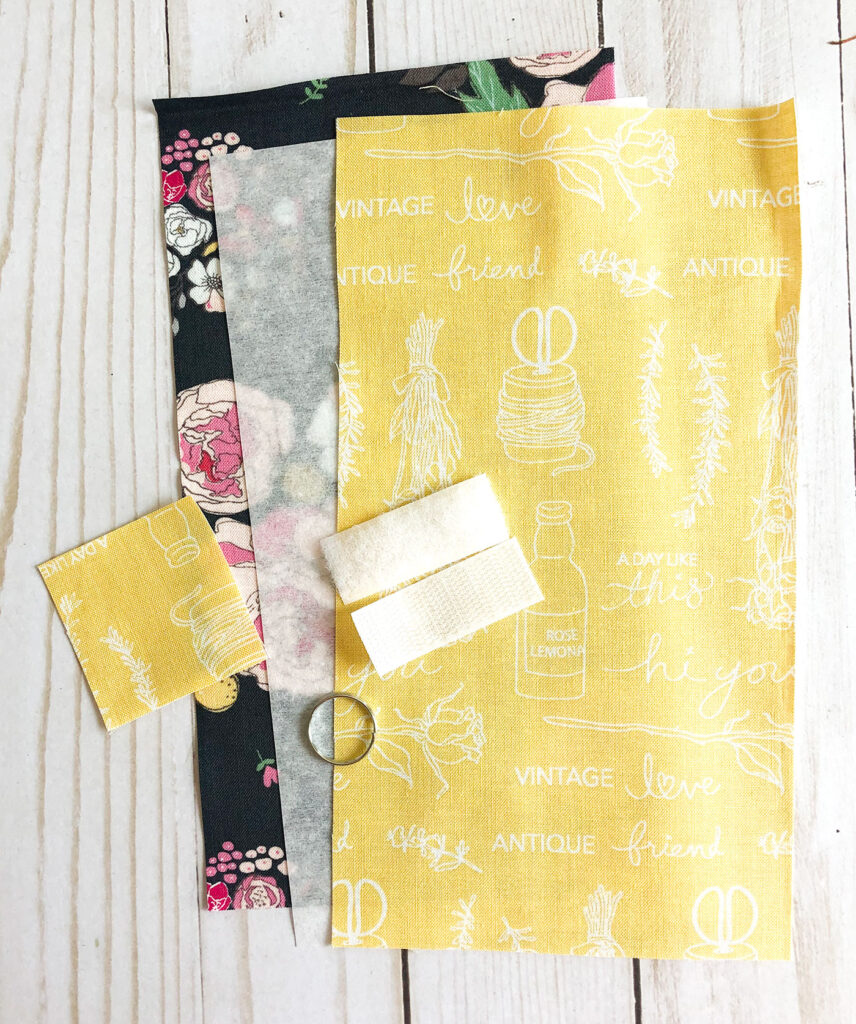
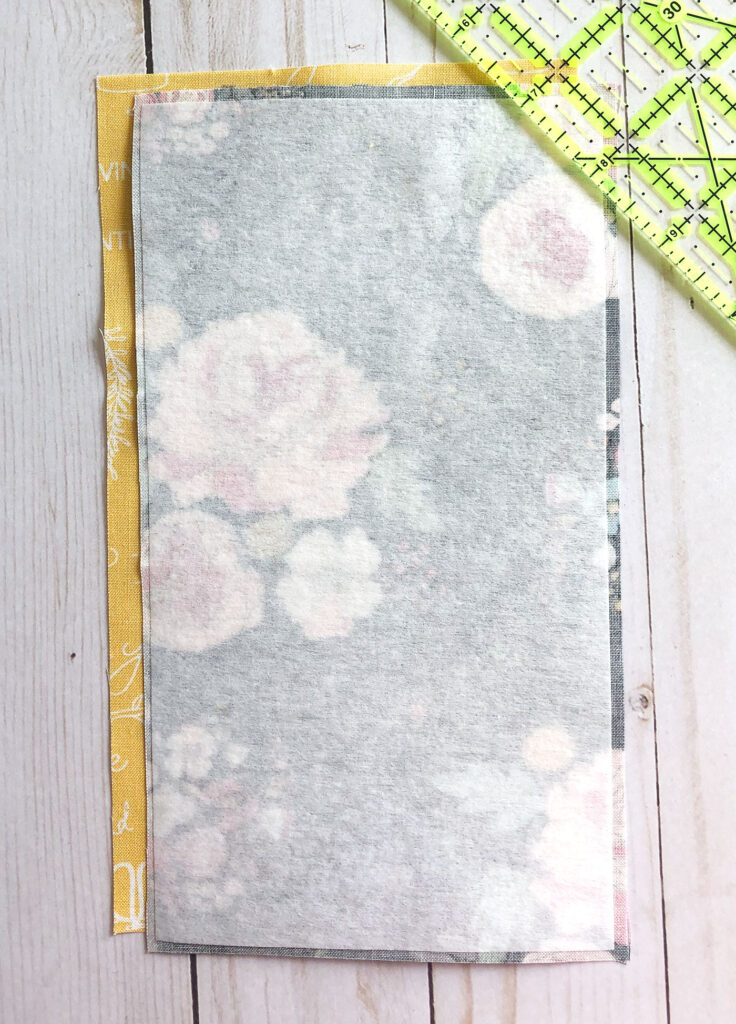
- Cut your fabric into two rectangles measuring 5″ wide X 9 1/2″ long. Non-directional fabric is best, especially for the outside fabric.
- In addition cut a small 2″ x 2″ square of fabric for adding the split ring.
- Medium weight interfacing adds some structure to the pouch. Cut one piece to 4 3/4″ wide by 9 1/4″ long if using fusible interfacing, which I prefer. Otherwise cut to the same size as the fabric.
- Hook and Loop tape makes an inexpensive closure- you will need a 2″ piece.
- One split ring.
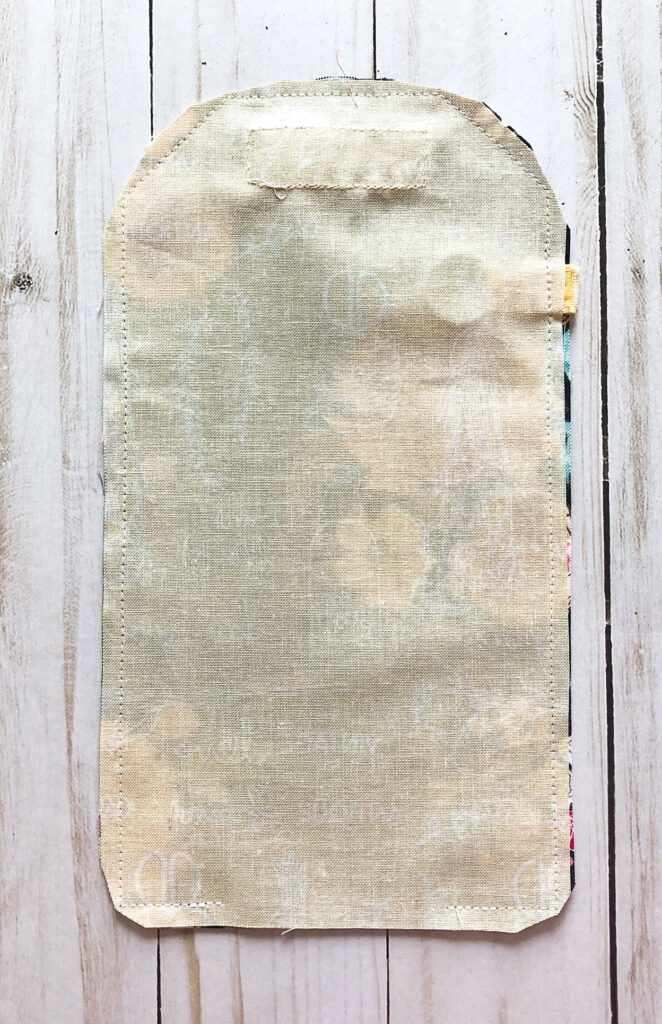
Prepare fabric for face mask pouch:
- Fuse the medium weight interfacing to the wrong side of the exterior fabric.
- Place the exterior fabric right side together with the lining fabric.
- Measure 1 1/4″ in from the top corners of the fabric, and 1 1/4″ down from the top corners. Connect these marks and cut off the corners to create an angled flap.
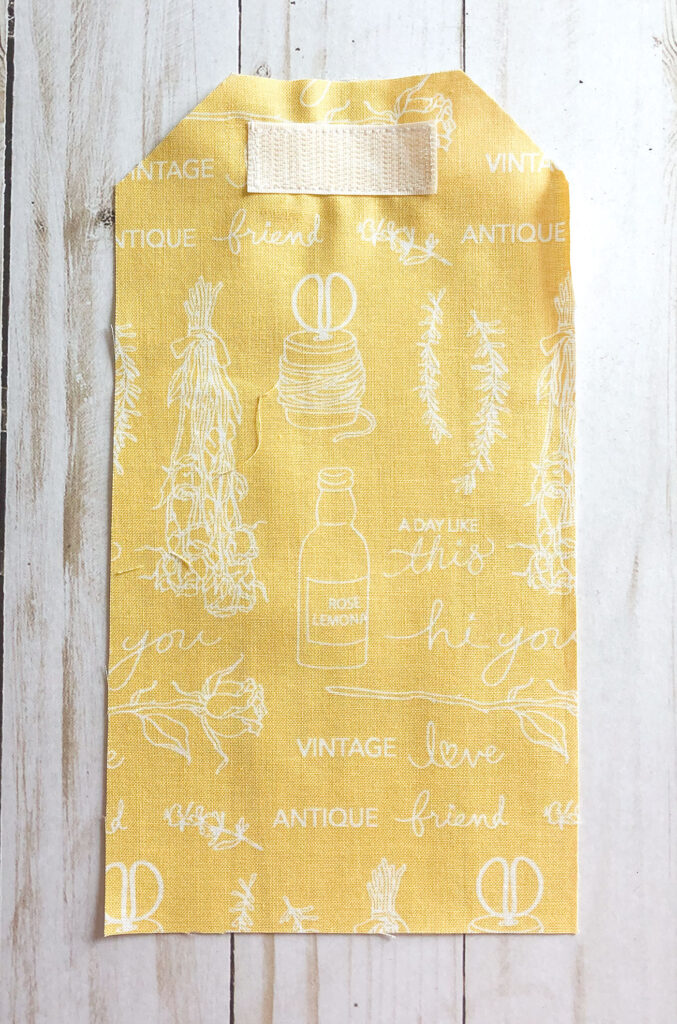
- Measure down 1/2″ from the straight edge of your cut flap on your lining fabric. Center one piece of your hook and loop tape.
- Sew around the entire piece of hook and loop tape twice to secure in place.
- Now, set aside the lining and exterior pouch fabric pieces.
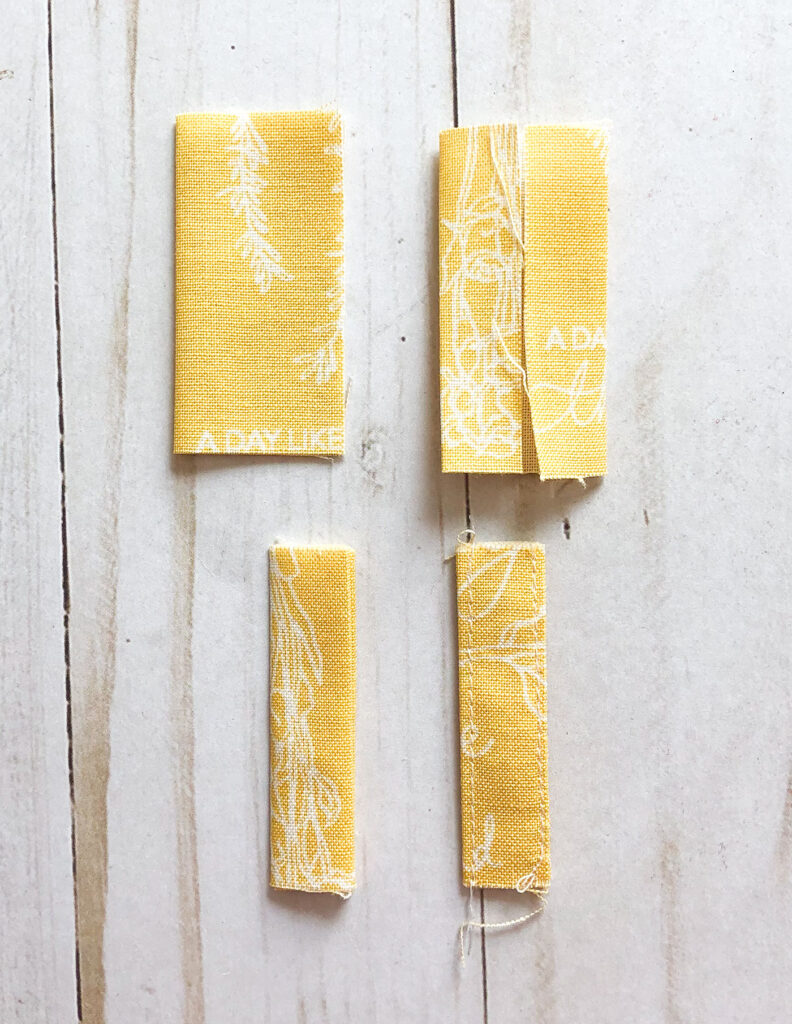
- Press the 2″ square of fabric for the split ring in half.
- Next, open up the fold and bring the two edges in to the creased line. Press.
- Re-fold the first crease and press.
- Finally, sew down both sides of the folded fabric strip with an edge stitch.
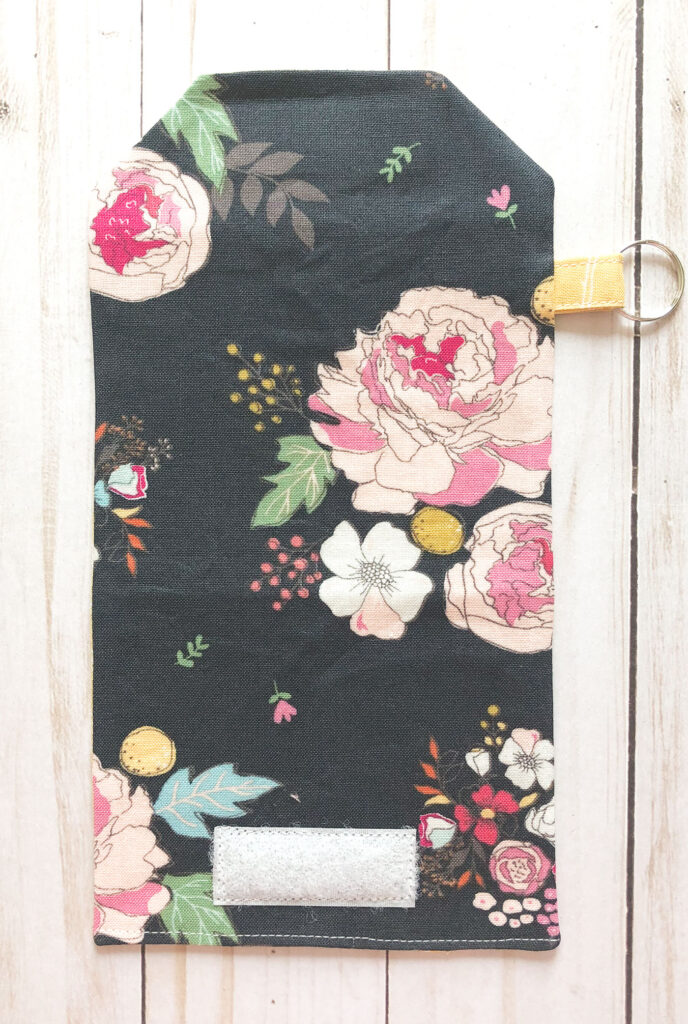
Assemble mask pouch:
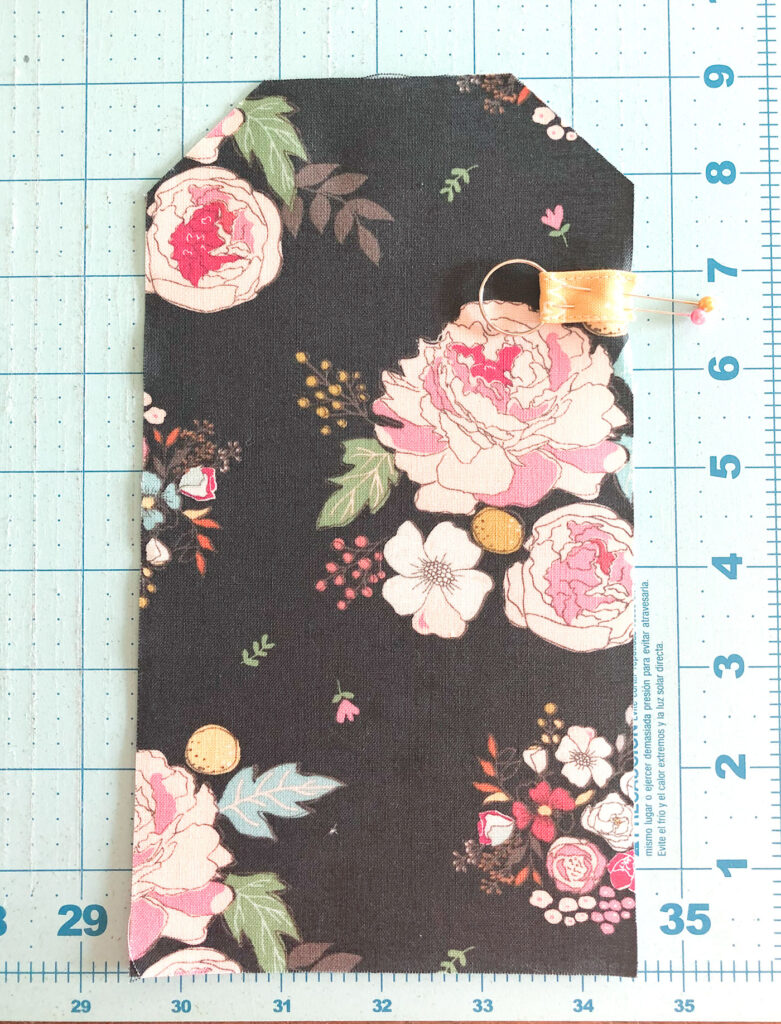
- Begin to assemble your face mask pouch by laying the outside fabric piece right side up on your work surface.
- Loop the fabric strip for the split ring through the center of the ring and line up the two raw edges on top of each other 7″ up from the bottom of the outside fabric as shown. Pin in place.
- Lay the lining fabric right side down on top of the outside fabric. Pin.
- Sew around all sides of the mask pouch leaving a 2-3″ opening for turning on the short bottom side.
- Next, clip the seam allowance at all of the corners.
- Turn the pouch right side out.
Finish Face Mask Pouch:
- Press your pouch well, pushing out all the seam allowances and turning under the seam allowance at the opening.
- Next, sew across the bottom of the pouch using an edge stitch to close the opening for turning.
- Then, measure 1″ away from the edge you just sewed and center the second piece of hook and loop tape.
- Now, pin in place and sew around two times to secure.

- Next, measure up 3 1/2″ from the bottom of the pouch.
- Continue by folding on this line, bringing the bottom toward the top flap, with the lining on the inside.
- Press this crease well and pin.
- Starting on one side, sew up and around the flap and down the second side to create the pouch.
- I like to back stitch when I start sewing, at the top of the pocket on both sides and as I finish sewing to secure the pouch.
- Finally, fold over the flap and press to crease.
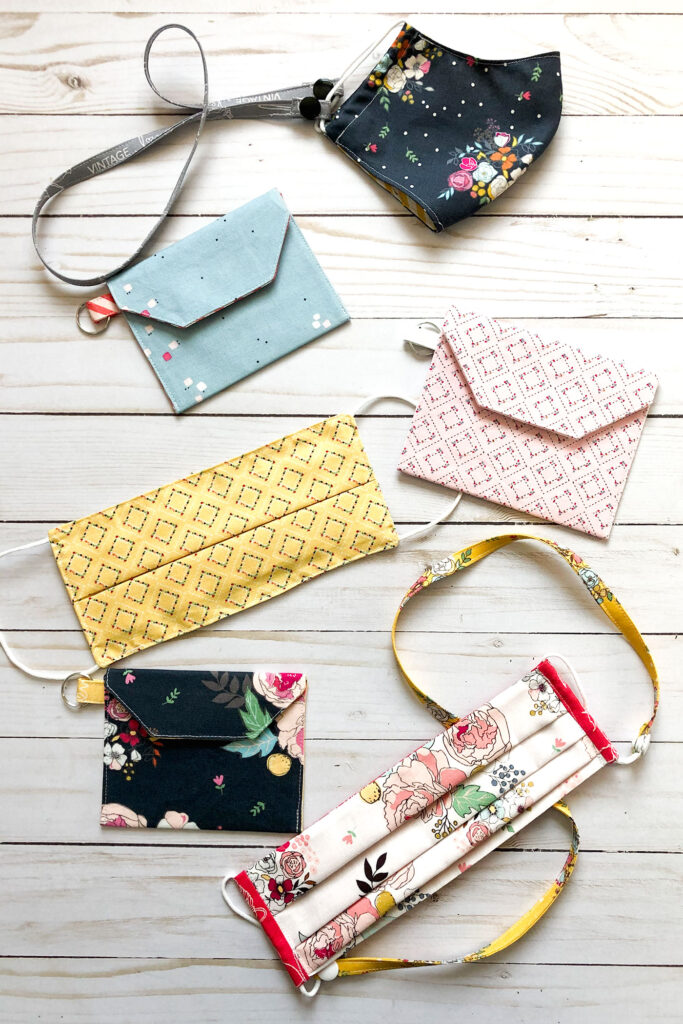
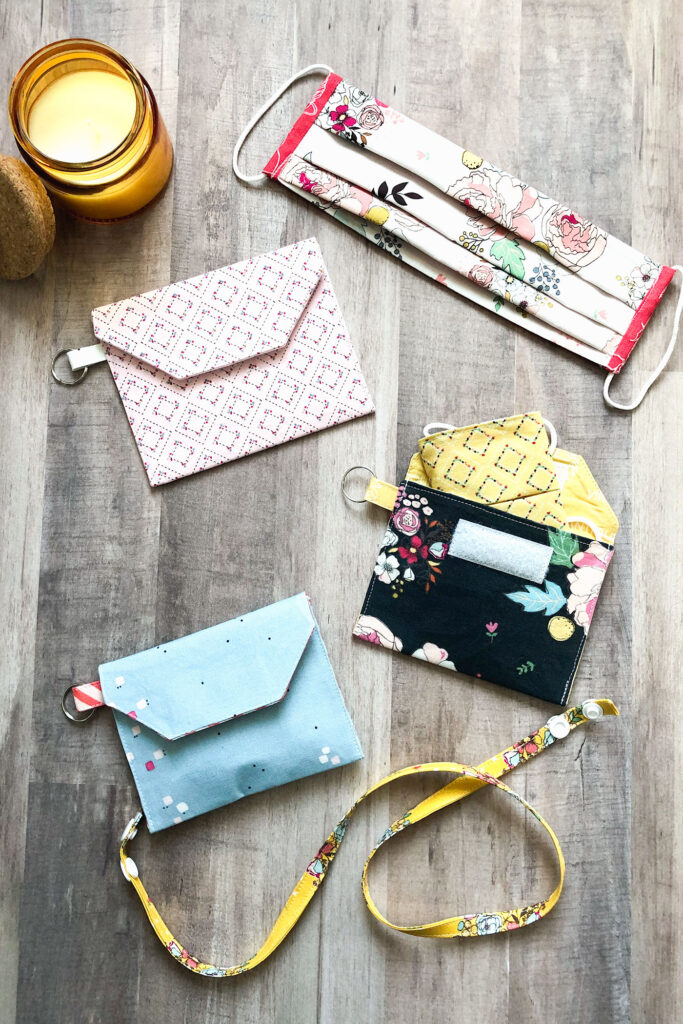
These pouches and straps are the perfect way to accessorize your face mask so you can always have them on hand and ready to use. Quick and easy to sew, you are sure to get a lot of use out of both!
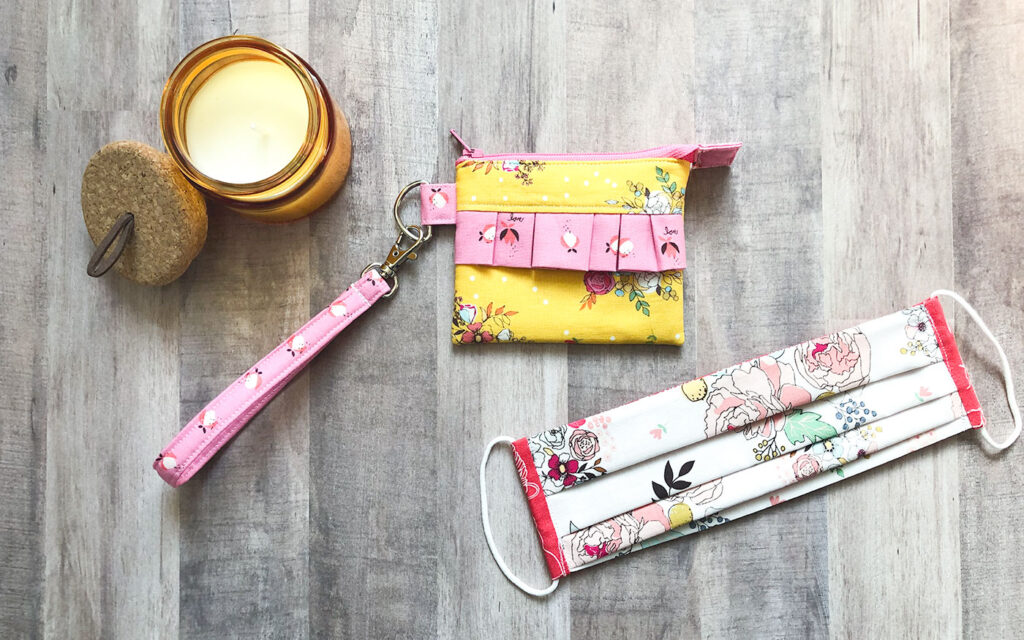
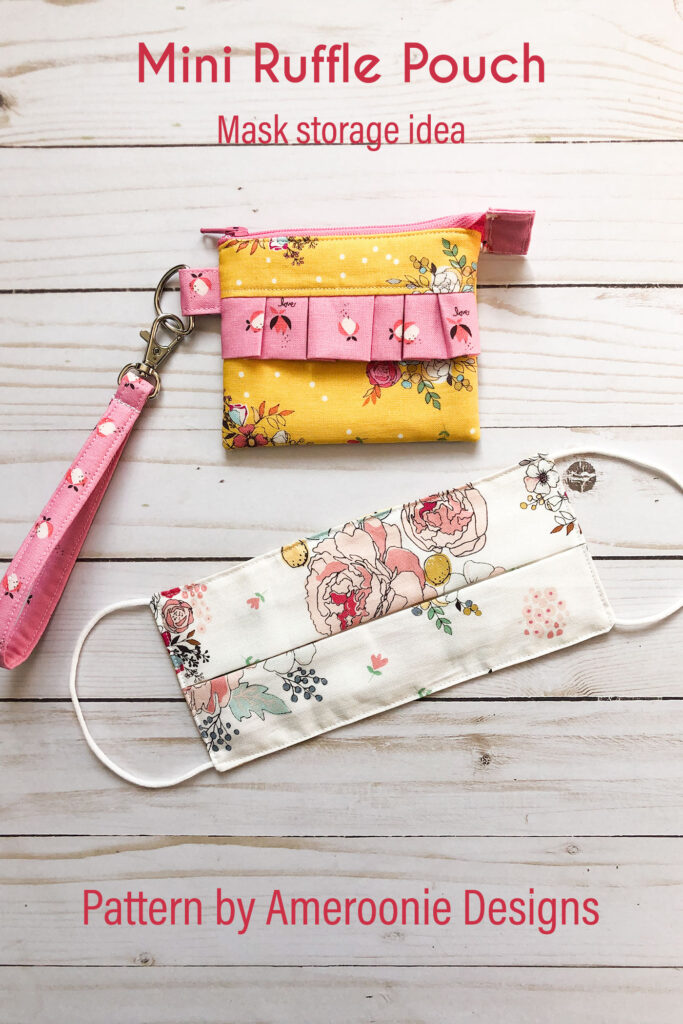
If you want a bit of a fancier pouch for your mask, my Mini Ruffle pouch is the perfect size and looks lovely too! And if you want to sew up a coordinating wrist strap for either style of pouch, you can find the full tutorial here.


Idyllic – Face Mask Strap and Pouch Tutorial – Riley Blake Designs
October 6, 2020 at 3:55 pm[…] we’re visiting AMEROONIE DESIGNS, where Amy is sharing fun and very functional Face Mask Strap and Pouch […]