
Looking for a fun and quick scrap busting project? Look no further than this easy and free Tasseled Fabric Bookmark Tutorial. Great for beginning sewists or as a fun summer afternoon sew. All you need is a bit of fabric and some fusible interfacing. You can spice it up with a tassel made with yarn, embellish with applique or patchwork together your own work of art. The options to add personality and fun to your fabric bookmarks are endless!

This post is part of my summer sewing series- five weeks of fun, quick and easy sewing projects meant to build your sewing skills, or just keep the creative juices flowing. Each week free PDF patterns are emailed to your inbox to help spark your creativity. Fill out the form below, join the newsletter and get the summer series too! Just be sure to confirm your subscription or you will miss all the fun!

Tasseled Fabric Bookmark Tutorial
Supplies:
- Fabric- 2 pieces cut to 2″ (w) X 6 1/2″ (h)
- Medium Weight fusible interfacing 1 piece cut to 1 1/2″ (w) X 6″ (h)
- yarn for tassel- I am using Chunky Thread by Lori Holt.
Optional supplies:
- fusible adhesive such as Heat n Bond Lite- I prefer a sewable kind, but just make sure to check which kind you are using and DO NOT sew an adhesive that is not meant for sewing machines.
- ribbon- as an alternative to the yarn tassel- it is much quicker to finish.
Prepare the Tasseled Fabric Bookmark
- Begin by cutting out your fabric and interfacing.
- Next, fuse the interfacing in the center of the wrong side of the front bookmark fabric piece.
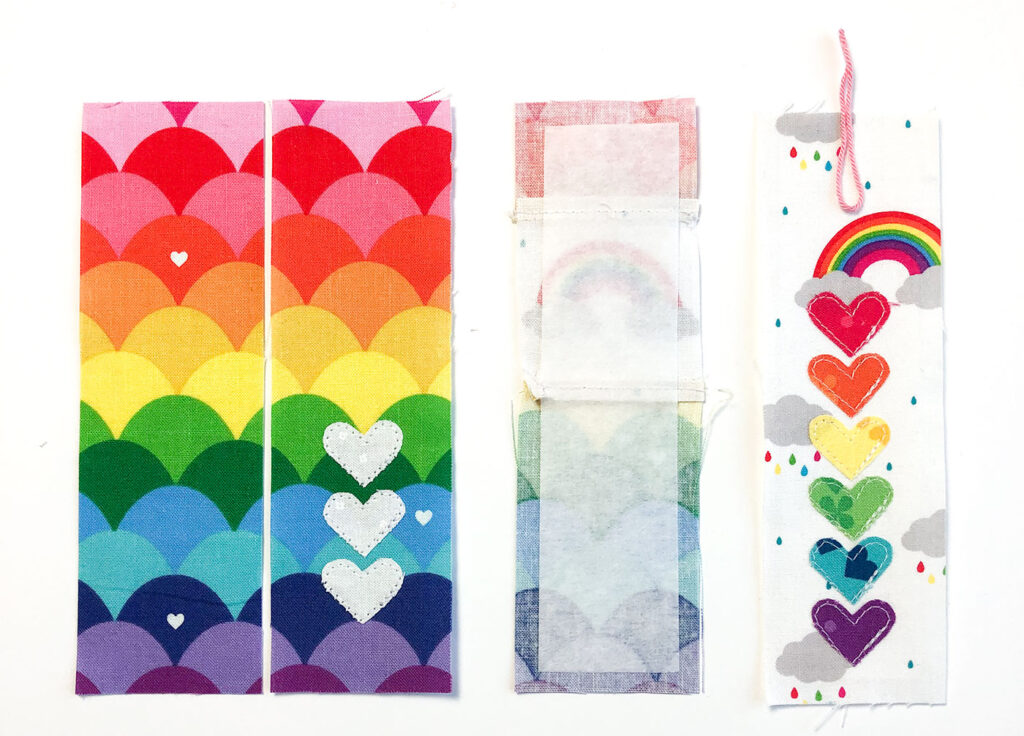
- Add any raw edge applique if desired. If you are new to raw edge applique, I have a video tutorial you may find helpful here.
- Cut a piece of yarn 2-3″ long, fold in half and center at the top of the front bookmark fabric piece. Be sure the loop is toward the center of the bookmark.
Finish sewing your bookmark
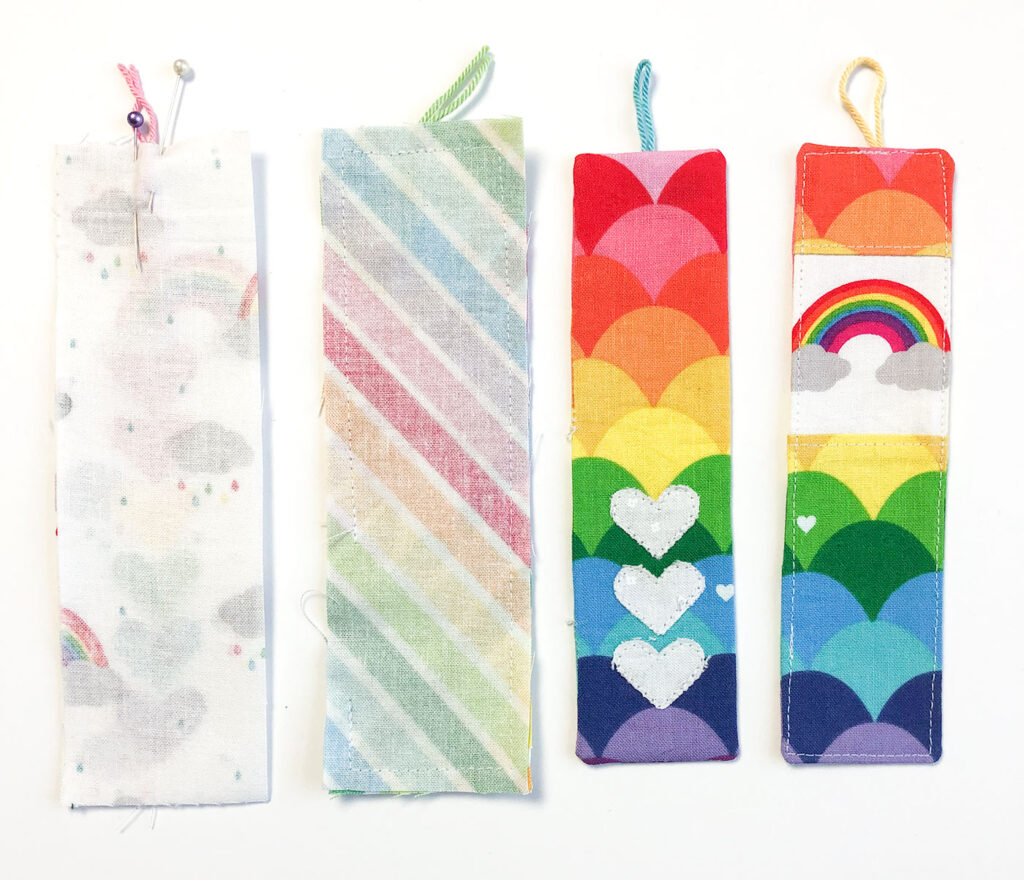
- Place the back fabric piece for the bookmark right sides together with the front fabric piece.
- Next, sew around the bookmark using a 1/4″ seam allowance. Back stitch at the beginning and ending of your sewing AS WELL AS across the yarn loop at the top of the bookmark.
- Leave a 2-3″ opening for turning the bookmark right side out on one long side of the bookmark.
- Turn the bookmark right side out, push out the corners and sides and press well. Pay attention to the seam allowance of the opening for turning and make sure it is lined up with the sides well.
- Finally, top stitch around the entire bookmark, closing the opening for turning.
Create Yarn Tassel
Make the Tassel body
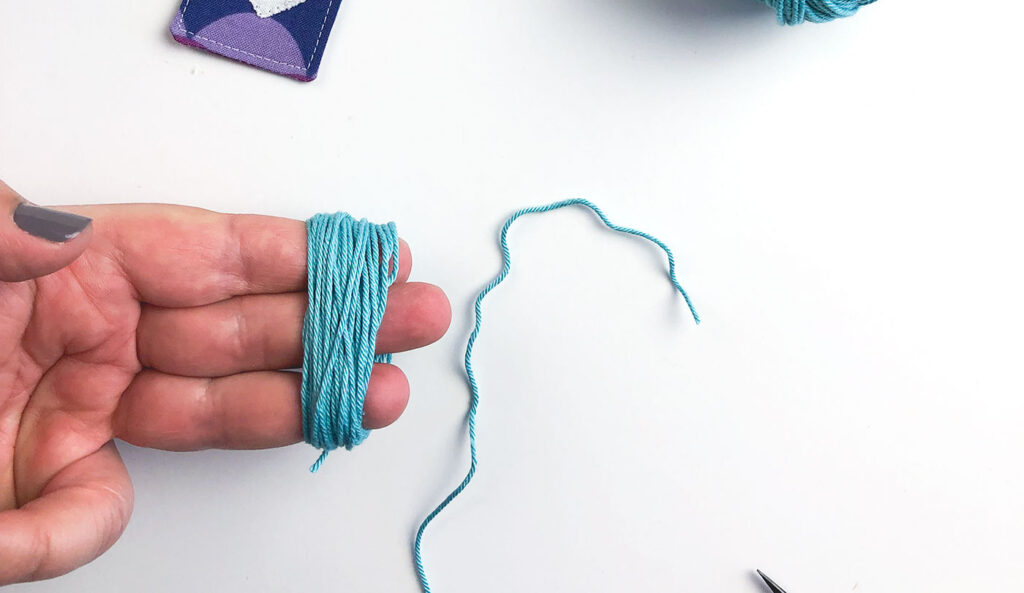
- First, take the yarn you are using for your tassel and wrap it around your fingers approx. 30 times. *note: The number of fingers you wrap around as well as the number of loops you wrap is a matter of personal preference. More fingers will give you a longer tassel, and more loops will give you a thicker one.
Create the Tassel “head” and “neck”
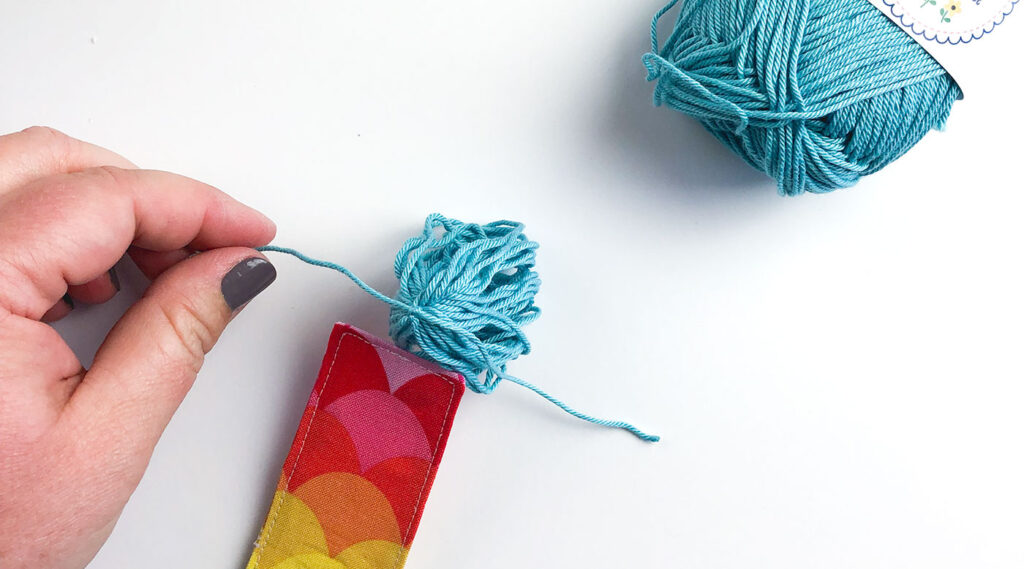
- Next, cut a piece of yarn that is more than double the length of your loops- mine was about 5-6″ long.
- Slide the yarn through the center of all of your loops and tie a single knot at the top.
- Now, bring one side of the knot you just made through the loop at the top of your bookmark, tie a double knot.
- Pull the strings from the knot on either side of your tassel and incorporate them into the loops.
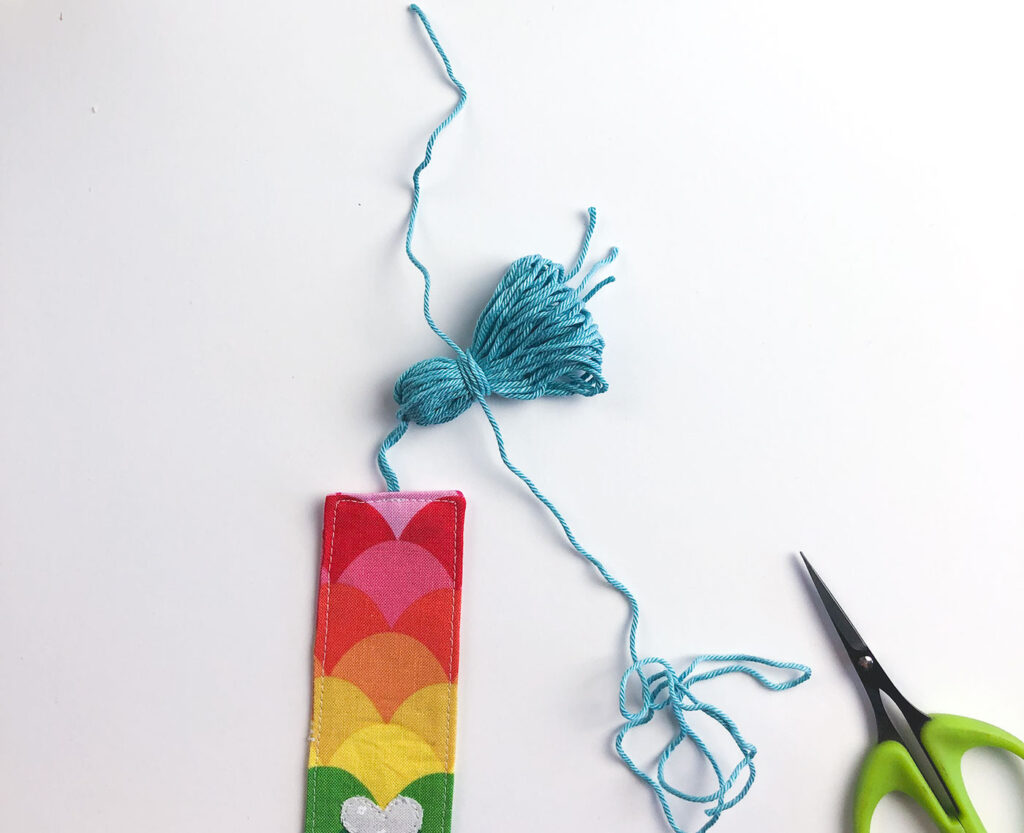
- Now you will cut a long- (10-12″) piece of your yarn.
- Decide how long you want the “head” of the tassel to be and start wrapping the yarn around all of your loops to create the “neck”. Be sure to leave a long enough piece of yarn to tie a knot at the end and will still be as long as your tassel.
- Wrap the neck 5-10 times as desired, pulling tightly to secure the loops.
- Finally, tie a knot and either bury it under the neck, or tie it at the bottom of the neck and pull a few loops down to hide the knot.
Finish your Tassel
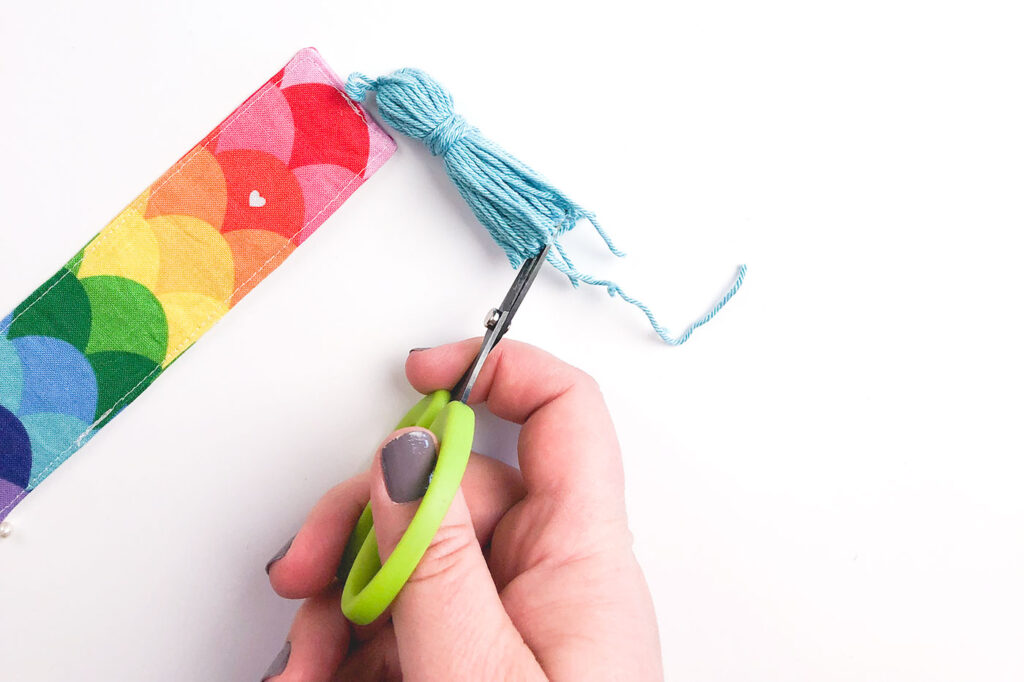
- To finish, use a sharp pair of scissors to cut through the bottom of all of your loops.
- Straighten the strands of yarn so they lay nicely and then trim up all of the long or uneven ends of your tassel.
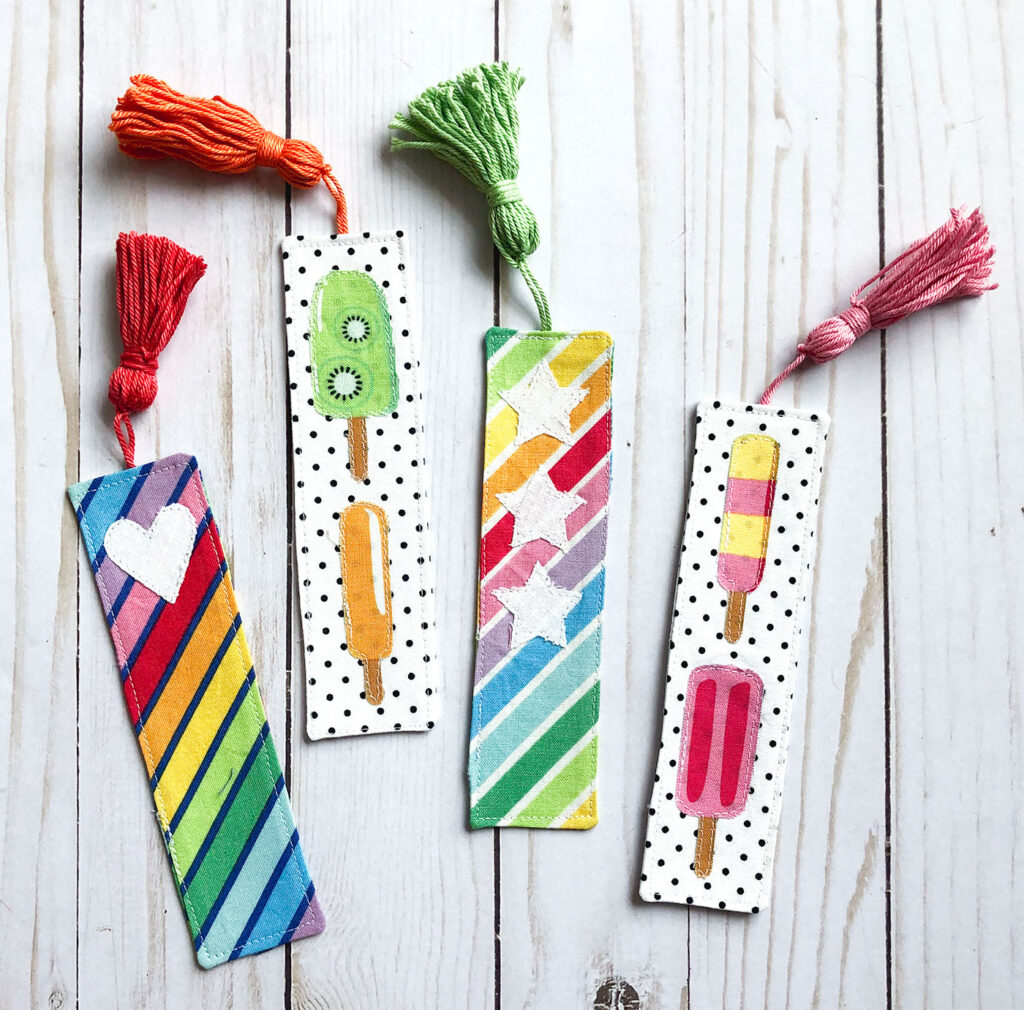
There are so many ways to customize your bookmark:
- Fussy cut images from fabric to create unique applique pieces.
- Sew together small scraps to create a patchwork bookmark.
- Add a monogram or image using adhesive vinyl.
Sewing is such a fun creative outlet- I hope you have been inspired to get busy making! If you like what you’ve read- please consider signing up for my newsletter where you will be kept up to date on all my new projects, pattern releases and more fun tips and tricks.
If you want more information about the summer sewing series, you can preview some of the projects we will be making in this blog post.
Happy Sewing! Amy


Sew a Fabric cover for a mini notebook | free tutorial | Ameroonie Designs
June 17, 2021 at 12:49 pm[…] And for these quick and easy tasseled fabric bookmarks! […]
Join the free Let's SEW Summer sewing series and boost your creativity
July 1, 2021 at 4:00 pm[…] 2- Fabric Bookmarks. Use applique to decorate fabric scraps, turning them into colorful and fun fabric […]
7 simple sewing projects to make this weekend | Ameroonie Designs
July 9, 2021 at 6:56 pm[…] Tasseled Fabric Bookmarks: So easy to sew and so fun to use! Inspire your kids to read with these fabric bookmarks. Perfect for using up scraps! Watch the video here. (summer sewing series) […]