The fabric for this Personalized Zipper Pouch Tutorial was provided by Riley Blake Designs as part of the Serenity fabric blog tour. The projects and opinions are mine. This post may also contain affiliate links.
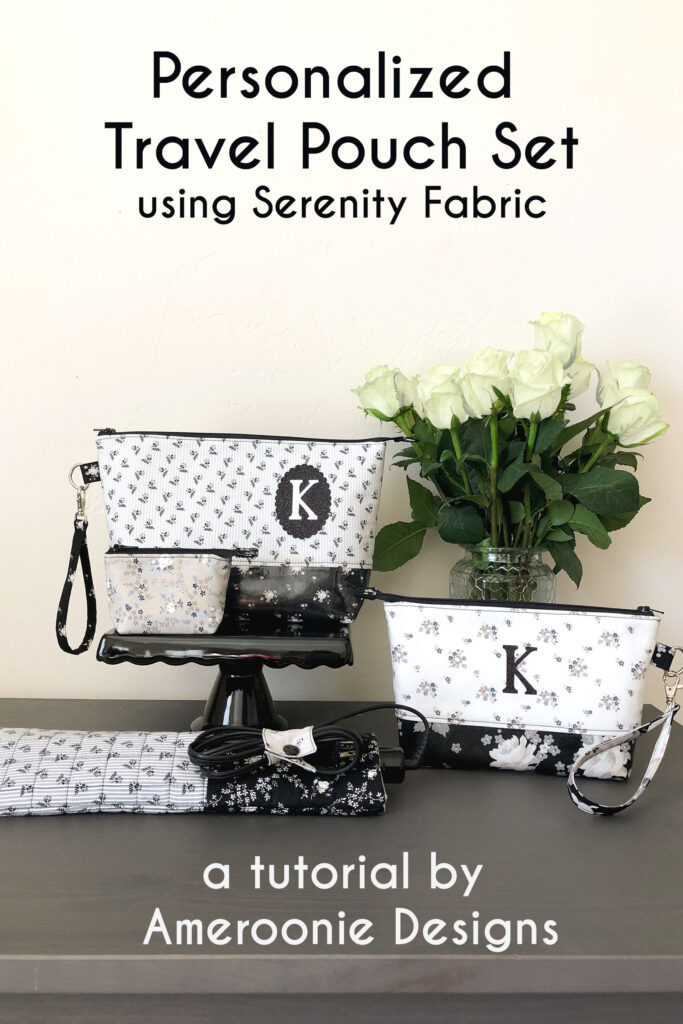
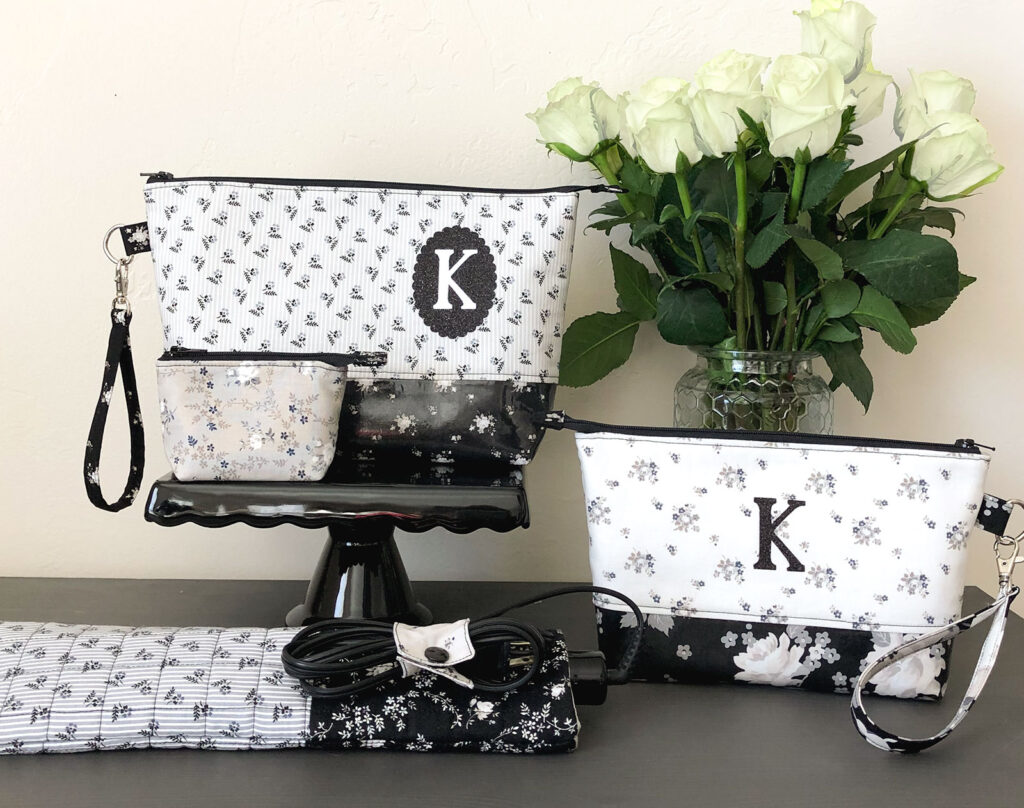
What is better than a personalized gift for someone? And, if you can make that gift yourself, and have it be something useful- then you are winning on all fronts. Use this personalized zipper pouch tutorial to create a bag for your favorite adventurer with some Glitter Iron-on Vinyl and your Cricut EasyPress Mini. You can use a purchased pouch, but why not customize the gift even further by sewing up a whole travel set using this nesting pouch pattern and if you want, you could even throw in a curling iron sleeve from this tutorial.
Personalized Zipper Pouch tutorial featuring Serenity Fabric
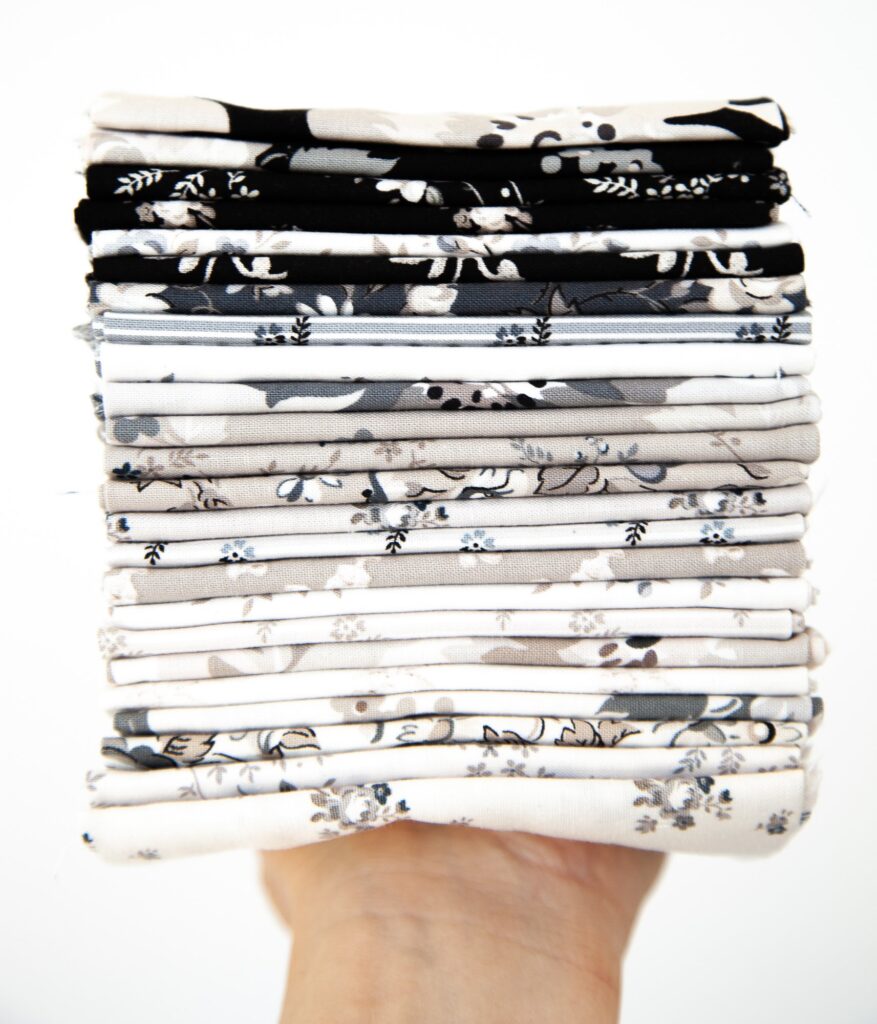
Can we talk just a minute about the fabric I sewed these pouches with? I am totally a color girl, the brighter the better. But, I have a very neutral loving sister and when I saw these fabrics in the Serenity line, I just knew she would love them! The florals, neutral colors and lovely prints make this line a dream to sew with!
Personalized Zipper Pouch Tutorial Supplies
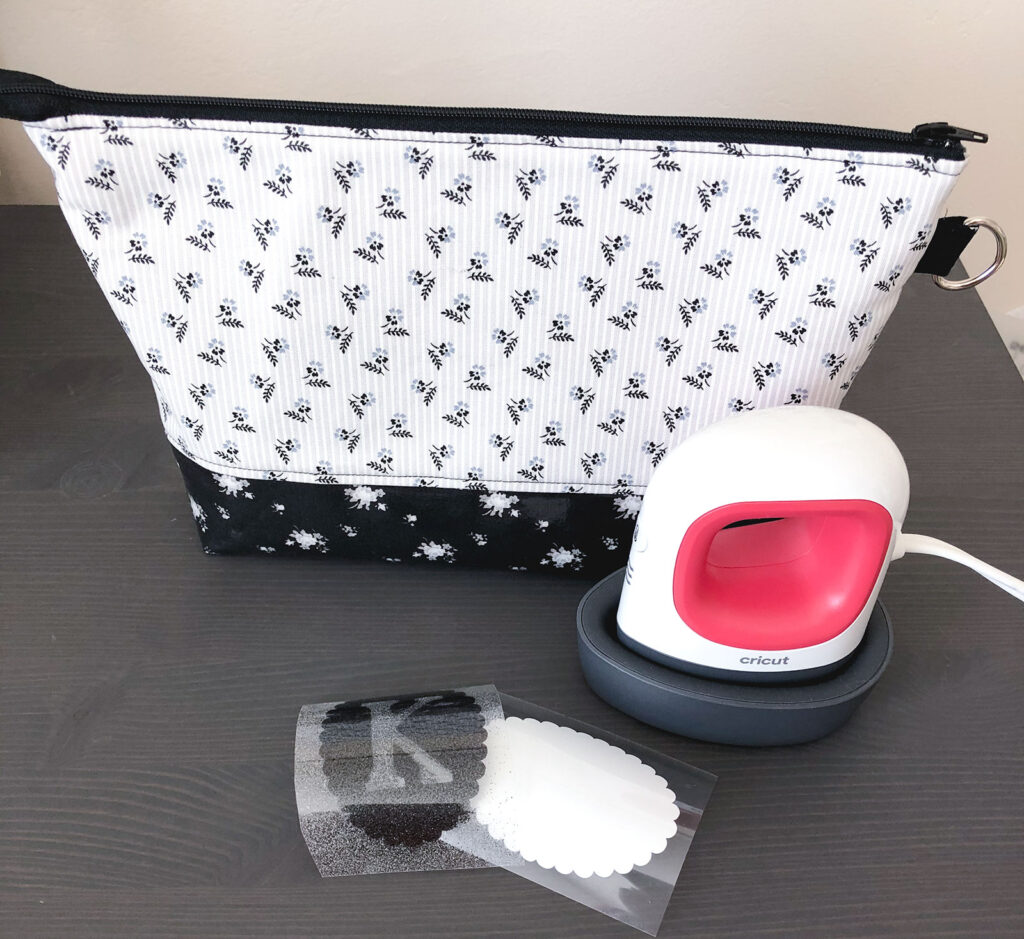
- Zipper Pouch- this is the Toiletry sized pouch in my Travel Zipper Pouch set.
- Monogram cut out of Glitter and Everyday Iron On vinyl. You can find the image I used in Design Space here.
- Iron- I really recommend the Cricut EasyPress Mini for this project because the small size lets you be in control of where your heat goes, which is important on this pouch with the vinyl bottom and lining inside.
Adding your monogram

Before you add the monogram to your pouch, especially if you have used my tutorial for your pouches and have a laminated lining in your pouch, place a piece of paper backing from your clear Iron On vinyl saved from creating the pouches, or use parchment paper or some other means of protecting the vinyl inside your pouch.
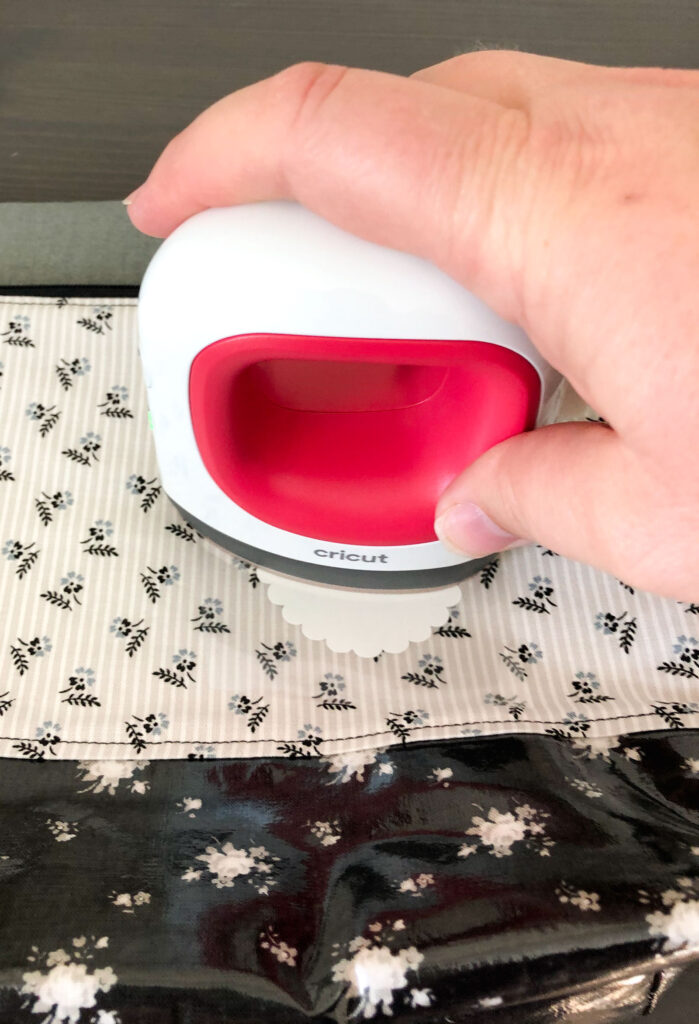
Position the bottom layer of your monogram where you want it on your pouch. Use your EasyPress Mini to fuse it into place. Peel off the protective backing. Next, add your second layer of the monogram and repeat the fusing steps. Note that Glitter Iron On Vinyl must always be the top layer when layering vinyl.
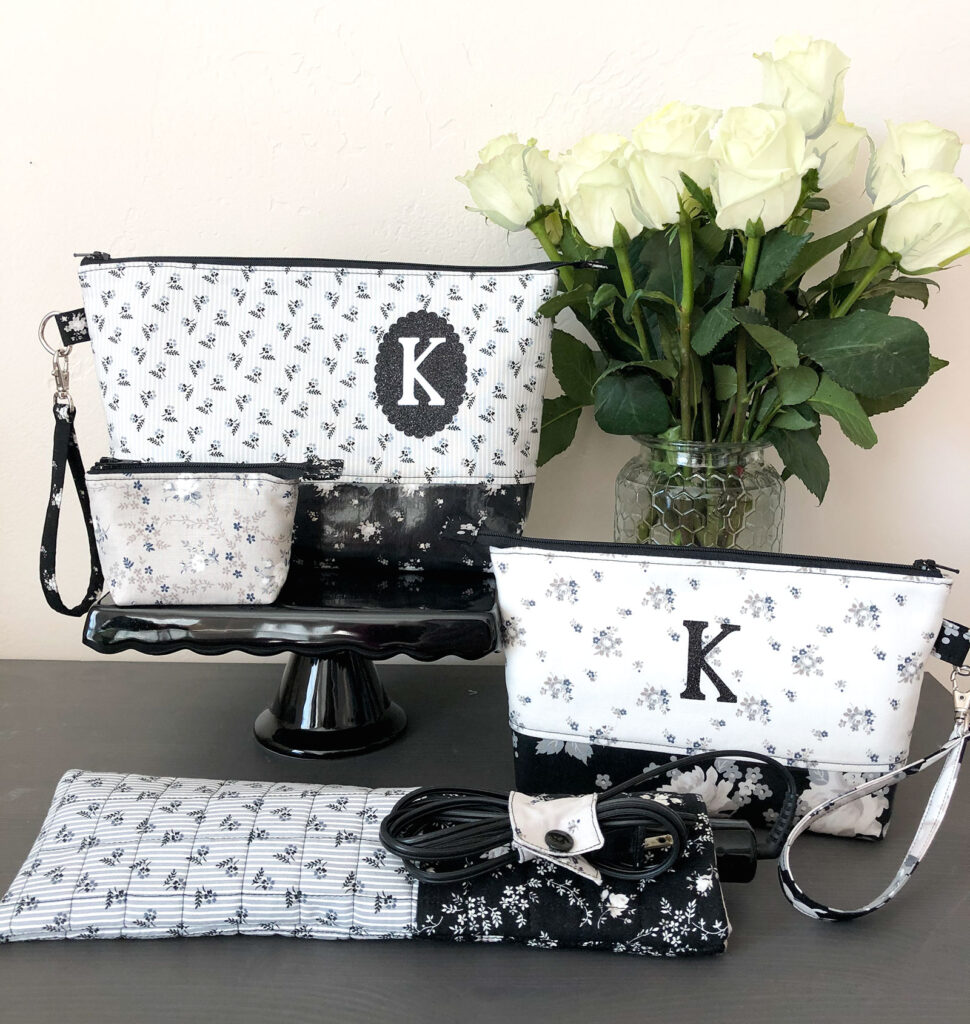
When I weeded out the letter from the large monogram, I was very careful with the vinyl and was able to use it for the monogram on the smaller pouch. Just use the backing from the first monogram to protect the vinyl as you fuse the letter if you use this method.


Serenity – Personalized Zipper Pouch Tutorial – Riley Blake Designs
November 8, 2019 at 4:02 pm[…] stop on the Serenity Project Tour takes us to AMEROONIE DESIGNS, where Amy is sharing her Personalized Zipper Pouch Tutorial, featuring these gorgeous bags made […]