I am a 2022 Husqvarna Viking Sewing Ambassador. Mentions of my Opal 690Q sewing machine are a reflection of this relationship. All project ideas and opinions are my own. This post may also contain affiliate links which help support this site. For more information see the full disclosure in my footer
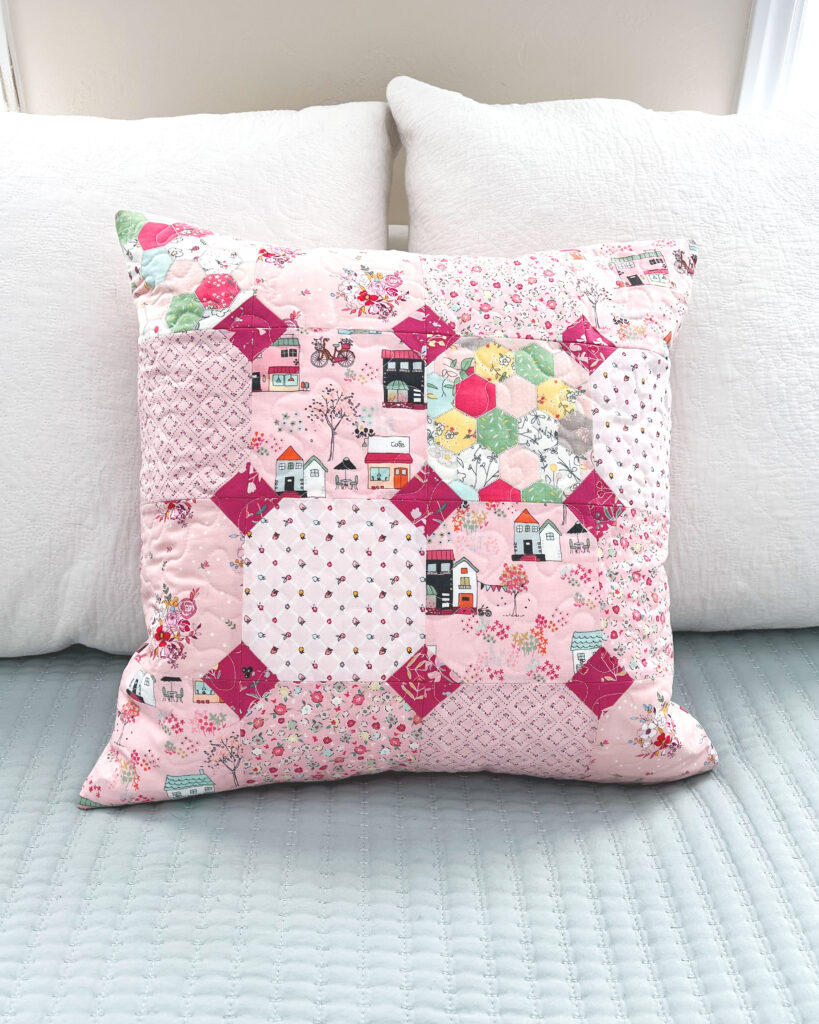
Want to give your home decor a facelift? Need a simple sewing project that packs a punch? Today I am going to show you how to sew a pretty patchwork pillow with pizzazz. This quick and fun project is scrap friendly, easy to sew and fast. It can be finished in just one or two sewing sessions. Ready to sew? Let’s GO!
Pretty Patchwork Pillow Cutting Instructions
Note: the instructions are for a 20″ pillow.
Pillow Front- cut the following:
- 16- 5 1/2″ X 5 1/2″ squares- in this case I am using 5-6 pink fabrics
- 36- 1 1/2″ X 1 1/2″ squares- from accent fabric *TIP: starch your fabric before cutting out the squares- it will help with accuracy in cutting and piecing. (for more tips on sewing with small pieces check out this post here.)
- 1- 21″ X 21″ square of batting
- 1- 22″ X 22″ piece of backing fabric- I like to use a muslin or solid fabric here as it will be hidden inside of the pillow
Pillow Back:
I am using my hidden zipper pillow back method, if you are using a different closure method you will need to adjust the cutting for your pillow back. You can find the YouTube video for how I sew this style of pillow back here.
- Cut 2- 10 1/4″ (h) X 20 1/2″ (w) from pillow back fabric
- 1- 2 1/2″ (h) X 20 1/2″ (w) accent strip
- 2- 1″ (h) X 3″ (w) for zipper ends (can be from back or accent fabric)
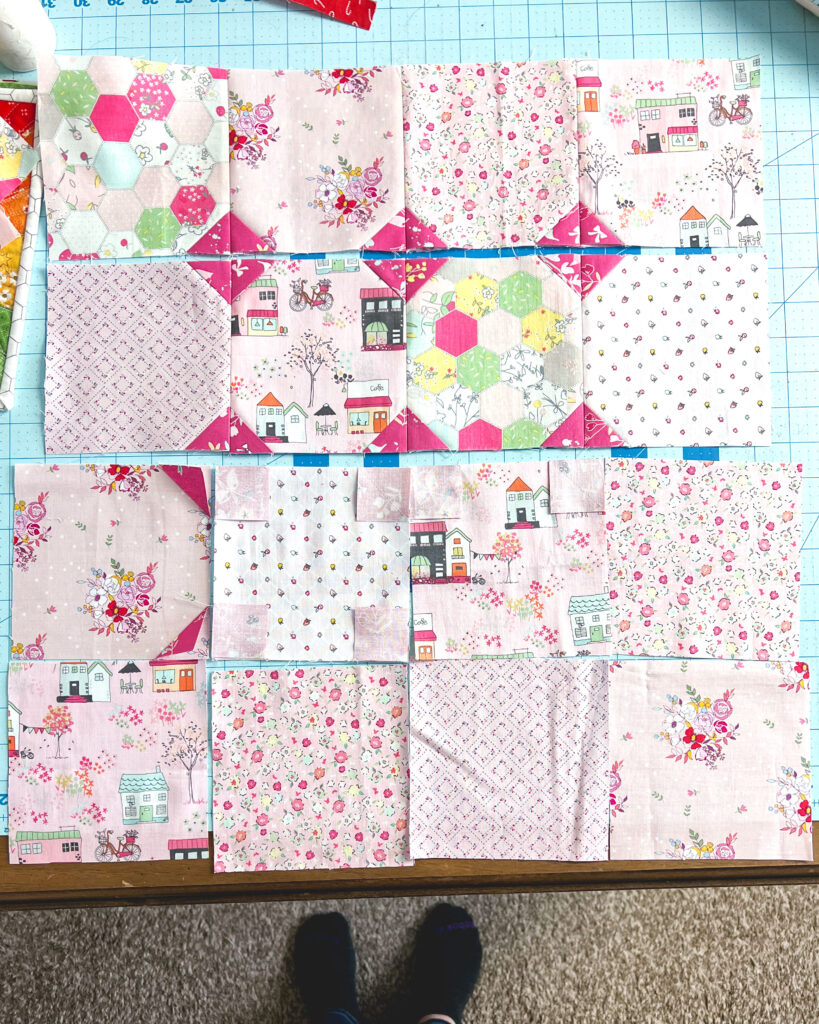
Arrange Patchwork squares for your Pretty Pillow
- Arrange the 5 1/2″ squares as desired into a 4 X 4 grid (4 squares across and 4 squares down).
- Draw a diagonal line on the back of all 1 1/2″ squares. *you can skip this step and use a guide on your machine as shown in the sewing instructions.
- Position the accent squares as follows- beginning at the top left corner which will be Row 1 Square 1: *NOTE: the accent square should be placed Right Sides Together (RST) and the drawn diagonal should connect the two sides of the patchwork square.
- On Row 1 Square 1- place one 1 1/2″ square on the bottom right corner
- Row 1 Squares 2 and 3- place two 1 1/2″ squares on the two bottom corners
- Row 1 Square 4- place one 1 1/2″ square on the bottom left corner
- For Rows 2 and 3 Square 1- place two 1 1/2″ squares on the two right corners
- Rows 2 and 3 Squares 2 and 3- place four 1 1/2″ squares on ALL corners
- Rows 2 and 3 Square 4- place two 1 1/2″ squares on the two left corners
- Lastly, Row 4 Square 1- place one 1 1/2″ square on the top right corner
- Row 4 Squares 2 and 3- place two 1 1/2″ squares on the two top corners
- Row 4 Square 4- place one 1 1/2″ square on the top left corner
- Position the accent squares as follows- beginning at the top left corner which will be Row 1 Square 1: *NOTE: the accent square should be placed Right Sides Together (RST) and the drawn diagonal should connect the two sides of the patchwork square.
Sew the accent corners to add the Pizzazz to your Pretty Patchwork Pillow
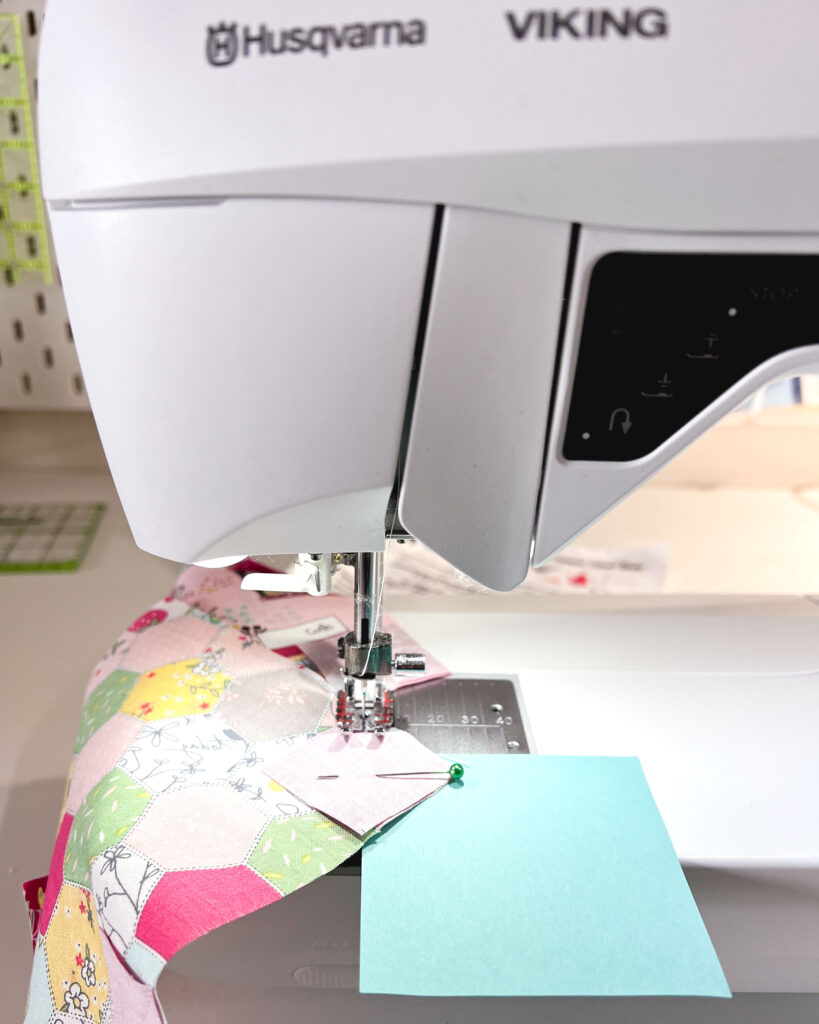
Sew along the diagonal lines of all of the accent squares. If you wanted to skip drawing the lines, use a post-it note, a piece of tape or even a marker to make a line on your machine that is lined up with your needle. Line the corners of the accent square up with your needle and this line to make a guide for sewing your diagonals.
Trim the corner of the accent square a scant 1/4″ from the sewn line (toward the outside of the sewn line). To help with more accurate seams in the next step, I do not cut the corner of the 5 1/2″ patchwork square, but if you are more comfortable, go ahead and trim it.
Press the accent fabric away from the patchwork square.
Assemble the Patchwork Pillow front
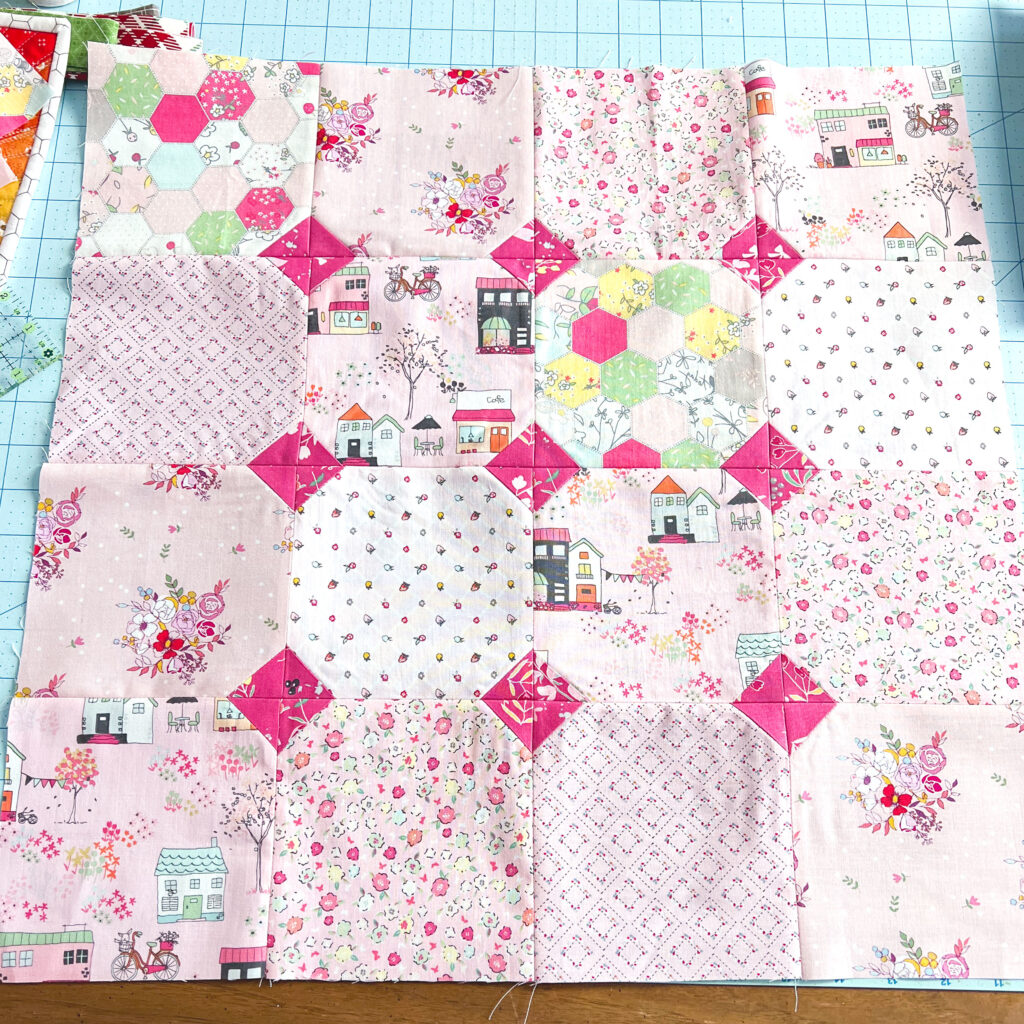
Sew the rows together using a 1/4″ seam allowance. Be sure to line up the accent squares. Press the seam allowances open.
Then, line up the seam allowances on the rows and sew the rows to each other, again using a 1/4″ seam allowance. Press well, with seam allowances open.
Finish your pillow cover
Baste the pillow front, batting and backing fabric together. Basting spray (affiliate) is awesome for small projects like this.
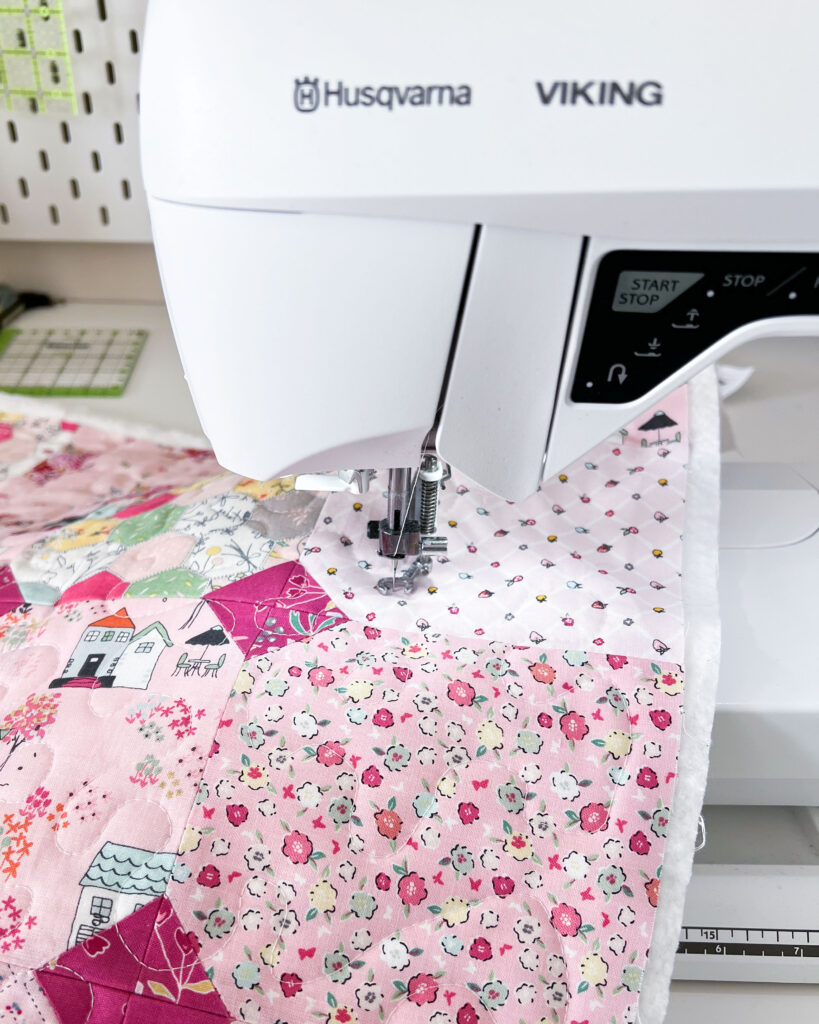
Next, quilt the pillow front as desired. On my Opal 690Q I used the Open Toe Free Motion foot. Be sure to change the sewing setting and drop your feed dogs for best results. You may also need to adjust the tension just a bit to get the perfect stitches. If you want to quilt straight lines, you may find it easier to use a walking foot instead.
Now, sew the back of your pillow. Follow the directions in the post or video linked above, or use your method of choice.
Open the zipper half way. Place the pillow front and pillow back right sides together. Sew around all four sides of the pillow cover using a 3/8″ to 1/2″ seam allowance. Use this technique or clip the corners of your pillow cover and turn right side out. Push out the corners and seam allowances well. Lightly press the pillow cover if desired. Open zipper the rest of the way and insert your pillow form.
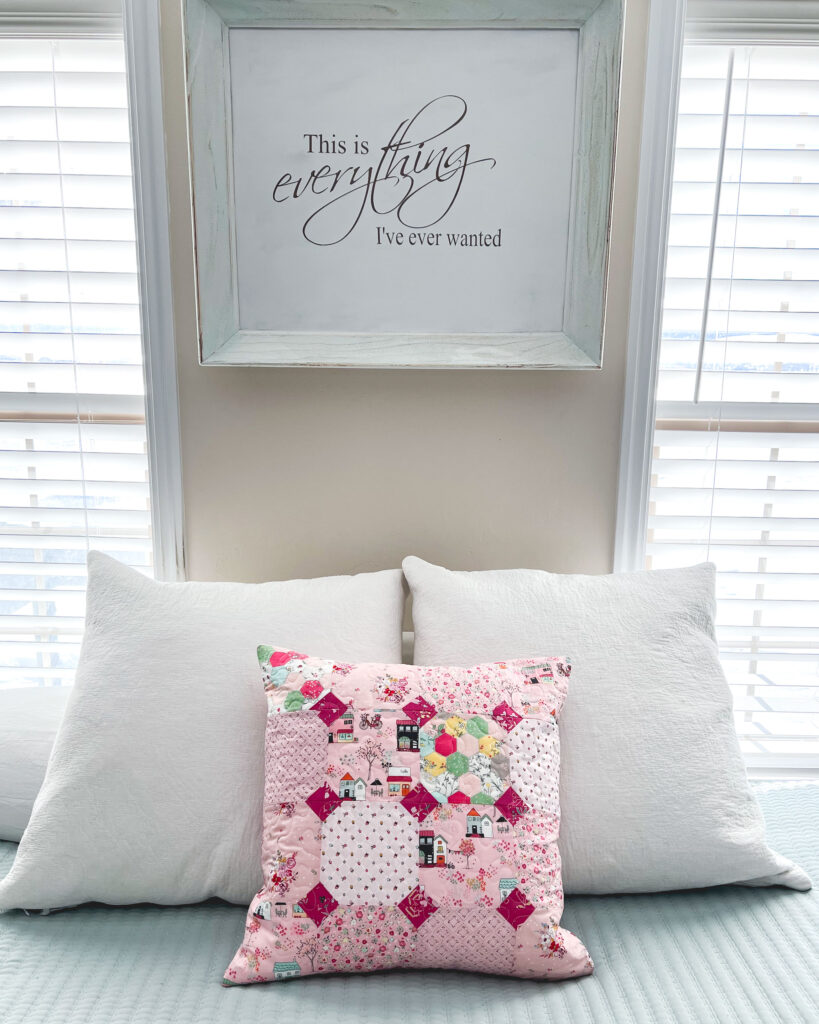
Finally, fluff your pillow and enjoy!
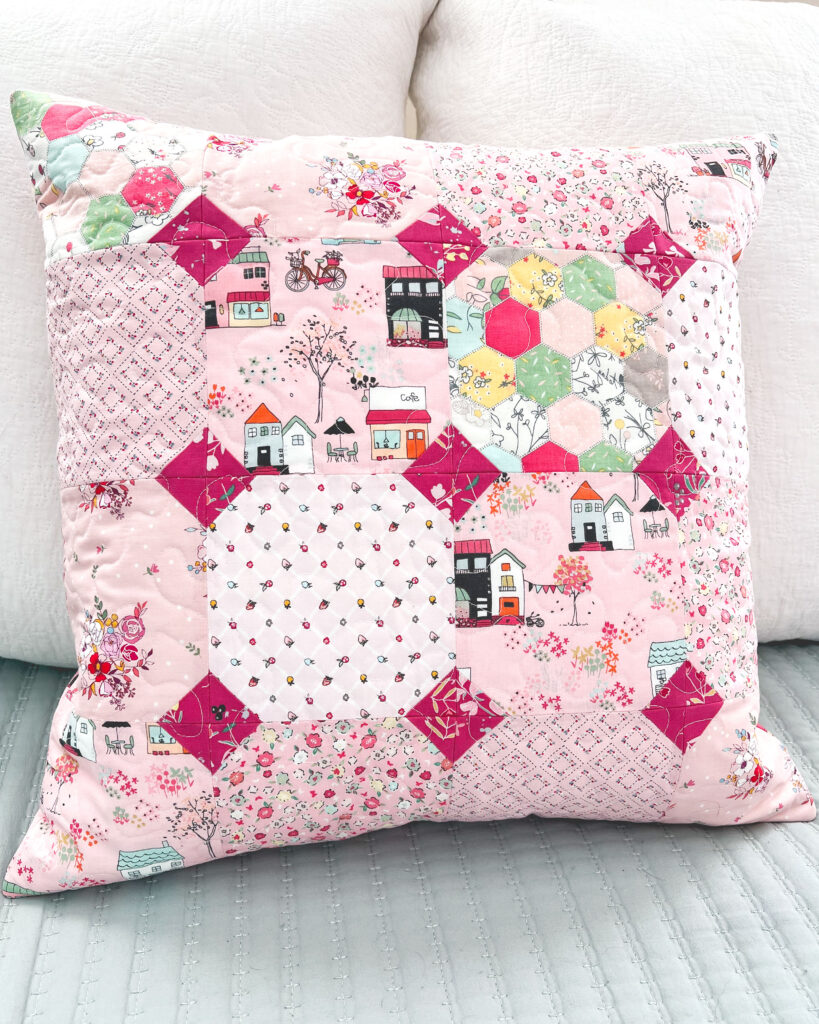
Perfect for a bed or a couch. Use solids or prints. Make it scrappy or more modern. There are so many ways to make this pillow your own!
Happy Sewing Friends! Amy