The fabric for this post was provided by Riley Blake Designs for participation in the Golden Aster blog tour. The project and opinions are mine.
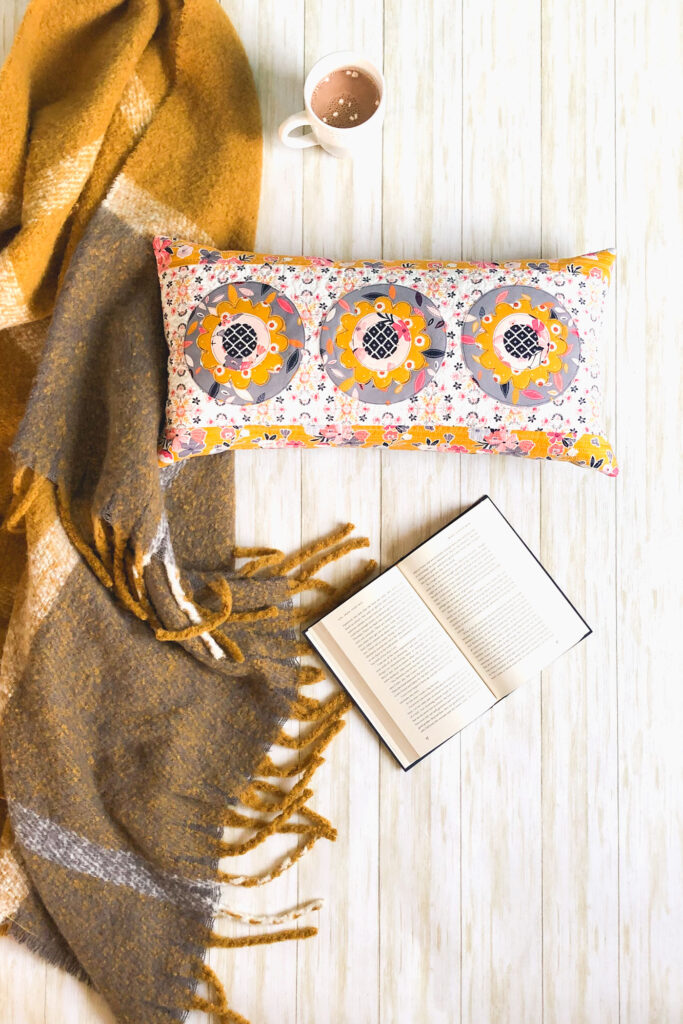
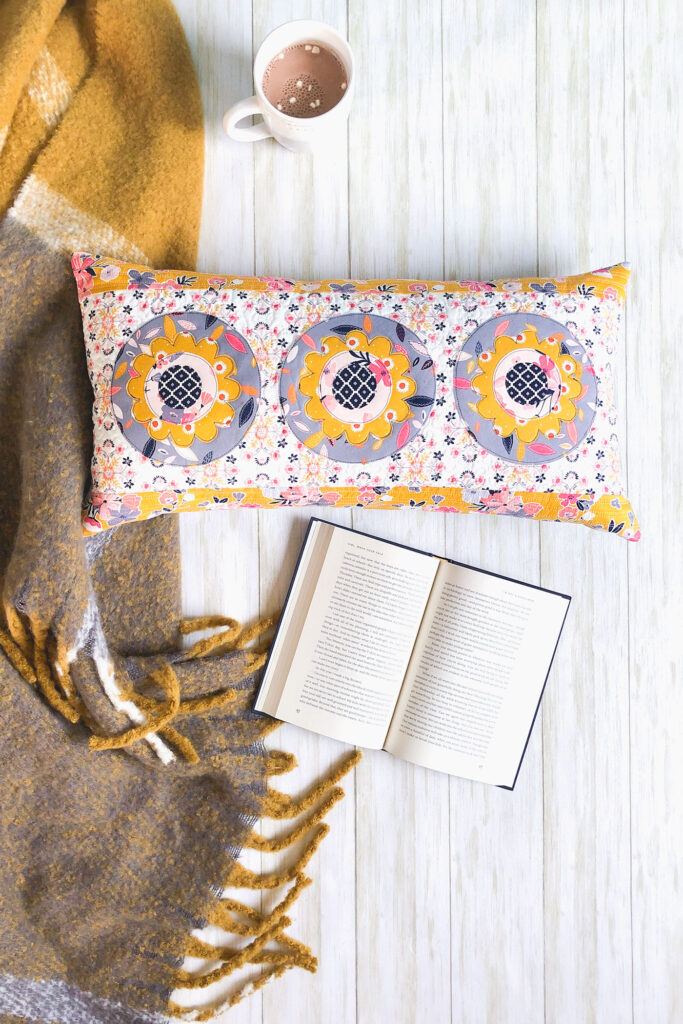
With fall on the way I was feeling an urge to redecorate my bedroom. New comforters, blankets and of course, pillows. I decided to create a raw-edge applique flower pattern inspired by the geometric flower print in this absolutely lovely Golden Aster fabric. This lumbar pillow is one of my favorite shapes with it’s long narrow form and I thought it would be a perfect fit for this design.
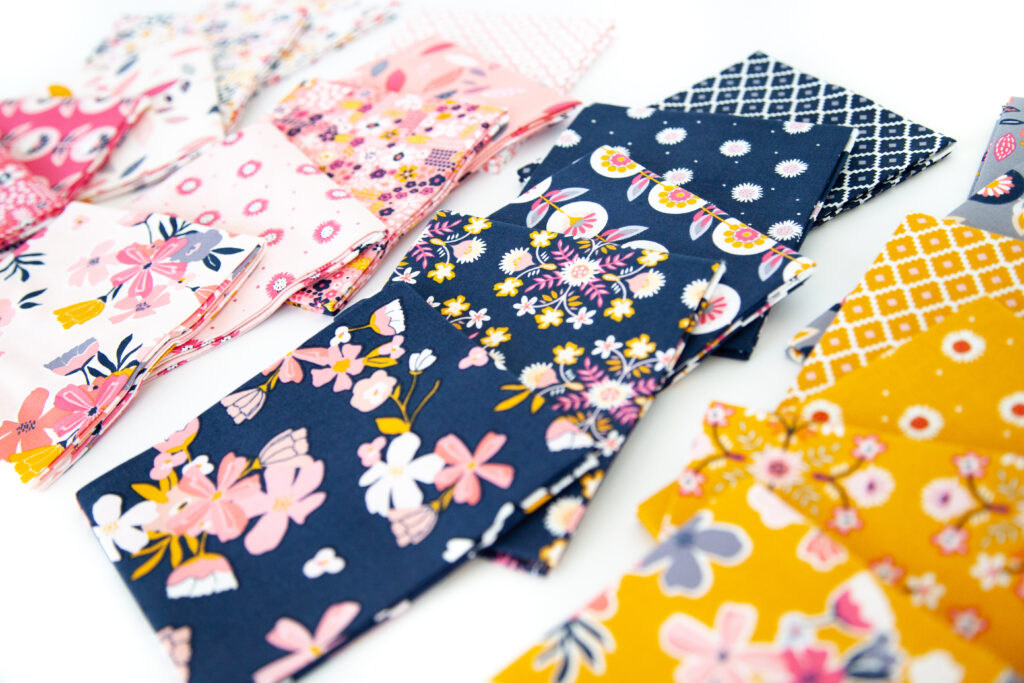
I knew I wanted to focus on the stunning golden yellow prints, while also using some of the gray with a hint of navy. The floral prints are all gorgeous, but the more geometric flower prints are probably my very favorite!
The raw-edge applique turned out just how I hoped and I love it! If you are smitten with this fabric and want to make your own Golden Aster lumbar pillow, I have the full pattern and tutorial for you below!
And if you want to make a different, larger format, pillow with this stunning fabric, you might like this Banded Pillow tutorial, I think it would be amazing with this fabric.
Raw-edge Applique Pillow Tutorial
Supplies:
- 12″ X 24″ lumbar pillow form
- 20-22″ zipper (if using zippered pillow closure)
- 8 1/2″ (h) X 24 1/2″ (w) background fabric for applique
- 2- 2 1/2″ (h) X 24 1/2″ (w) border fabric for pillow front
- Fabric for flower applique- 4 different prints relatively small amounts are needed- fat quarters are more than enough fabric.
- *optional: Batting and backing for pillow front if a quilted look is desired.
- Fabric for pillow back following requirements for desired pillow back method.
- HeatnBond Lite or Featherlite in printable sheets, or on a roll, or other sewable fusible adhesive.
- Pattern for applique flowers
Assemble Pillow front:
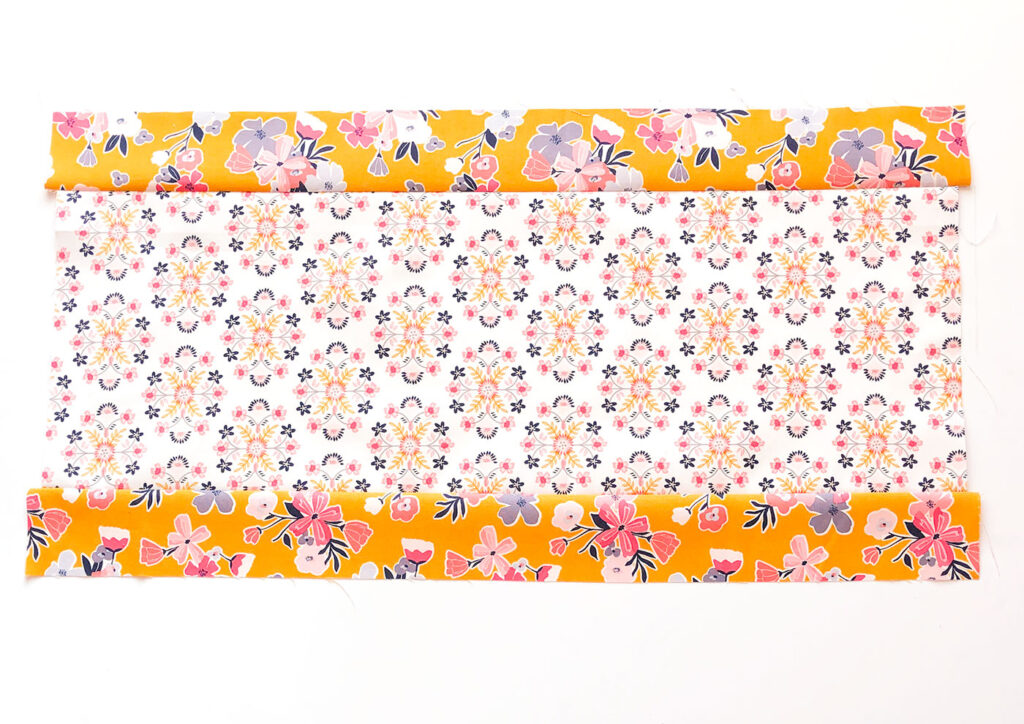
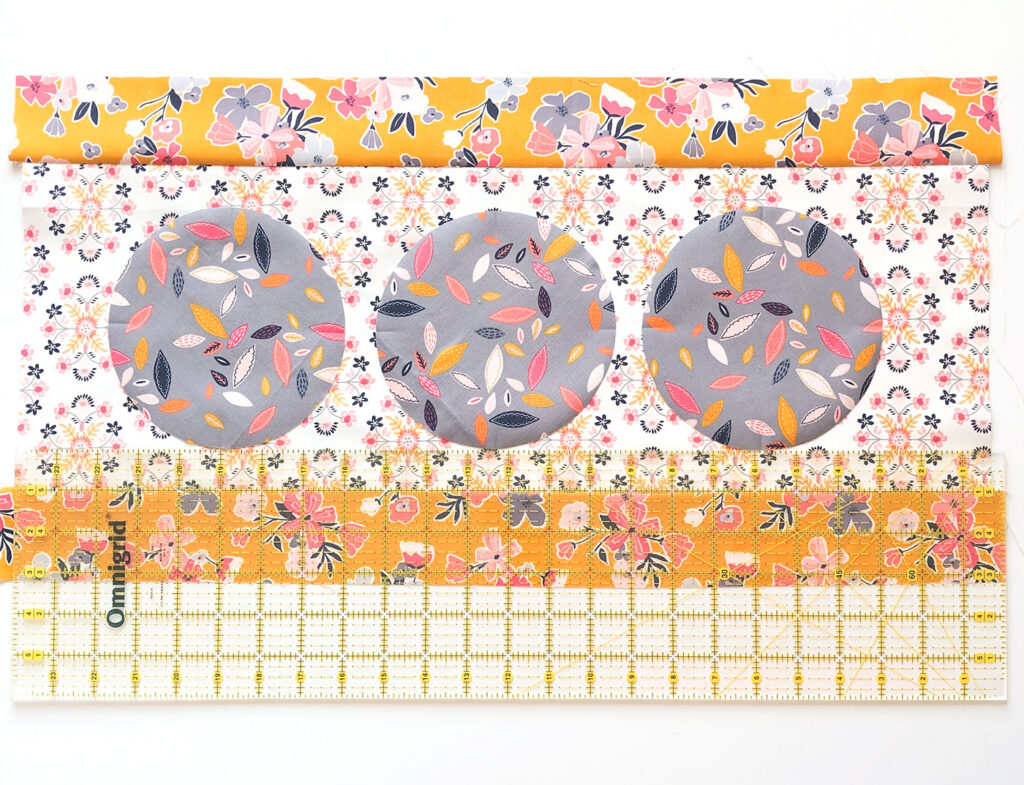
Begin by sewing the top and bottom borders on both long sides of your background fabric. Use a 1/4″ seam allowance. Next, press the borders away from the background fabric.
Create raw-edge applique pieces
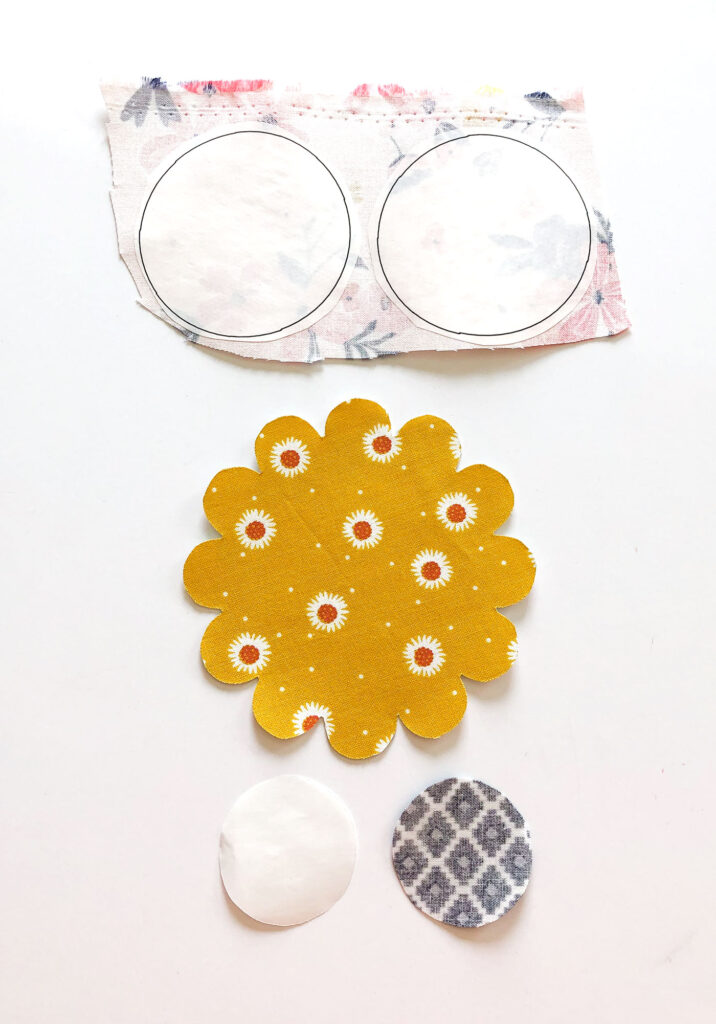
Prepare your applique pieces by printing (if using printable HeatnBond sheets) or tracing each of the flower pattern pieces three times onto the paper side of your fusible adhesive. Next, cut out around each pattern piece (or group of pieces if making all three the same) leaving a slight margin of HeatnBond around each printed or traced line. Third, follow the manufacturers instructions to fuse the adhesive to the wrong side of the fabric for the flowers. Cut out each flower piece along the drawn or printed line. Finally, remove the paper backing from the applique piece, exposing the adhesive on the back side of the fabric.
Position your applique pieces on the pillow front by centering the first piece of the flower applique on the background. Then, you will evenly space the other two flower pieces on either side of the center flower. I find it easiest to do this on my ironing surface so I don’t have to move the pillow before fusing the pieces.
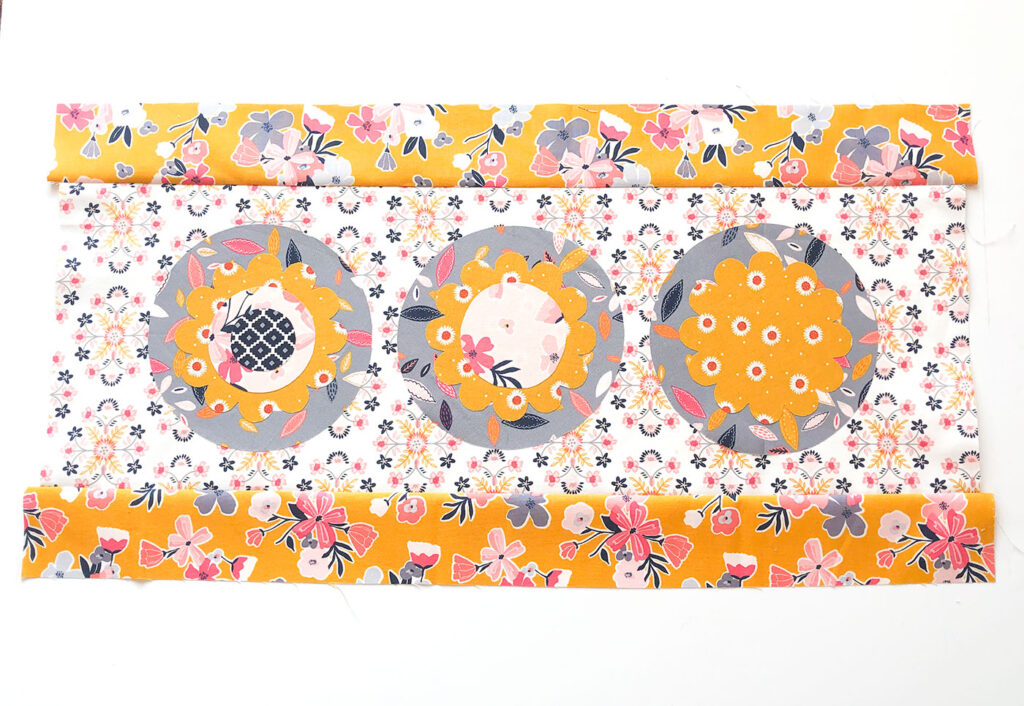
Fuse one layer at a time, following the instructions for your adhesive.
Finish Pillow front
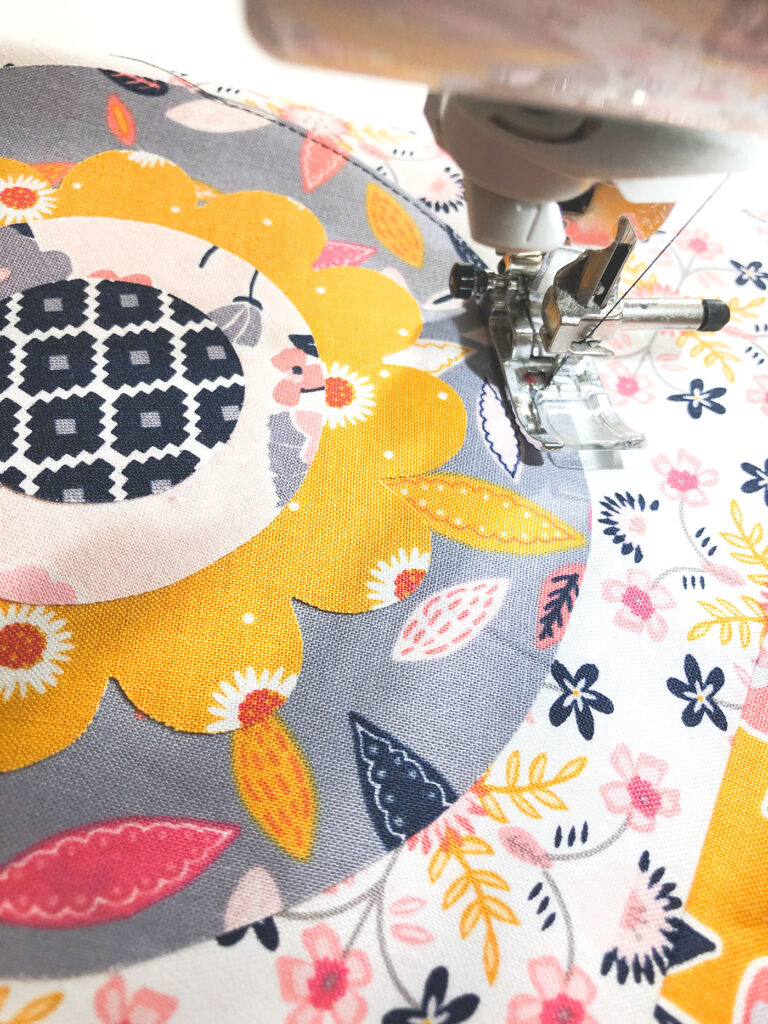
Now we will stitch down the applique. You may either use a contrasting thread, or a coordinating thread, depending on the look you would like to achieve. I used a contrasting navy thread to sew down my applique. Another way to add interest and dimension to your applique is to sew some of the applique after adding the batting, this will give your applique some lift and texture. I alternated the layers of my flower applique, sewing down the background circle, as well as the inner pink circle before adding the batting, and then sewing around the yellow petals and navy flower center after the batting had been added. I recommend using either a straight stitch or a narrow zig zag stitch to sew around each of the applique pieces.
Once you have sewn around all the applique, create a quilt sandwich (if desired) using your batting and backing fabric. Quilt the pillow front as desired.
Assemble the final pillow
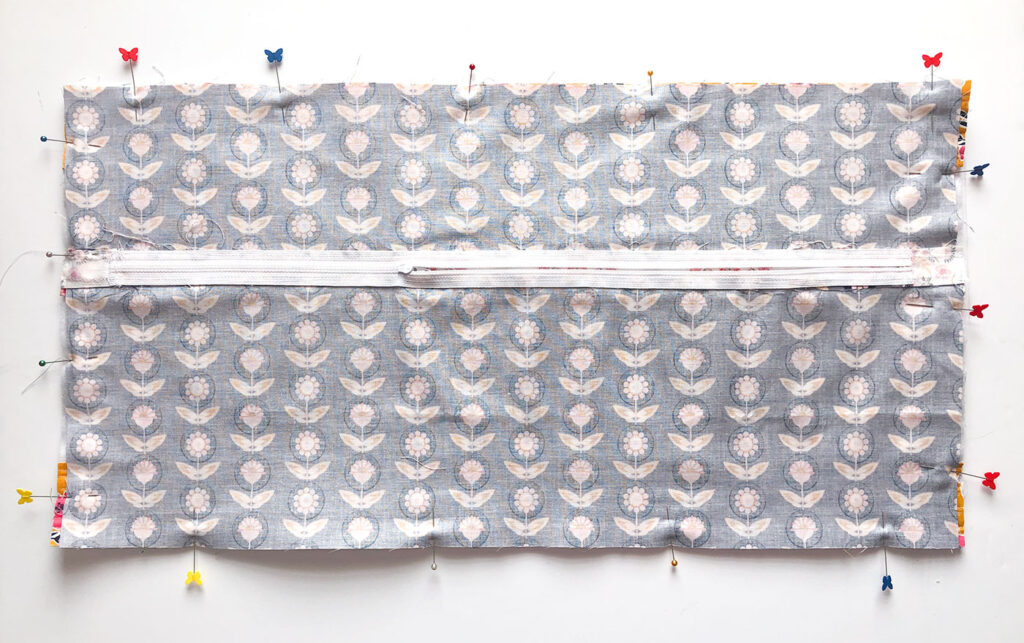
First, you will need to create your pillow back. I am using my hidden zipper method for mine. I also have a method showing how to insert a zipper into the bottom seam of the pillow. After preparing your pillow back, trim your pillow front to 12 1/4″ X 24 1/4″ if necessary. Next, place your pillow back on the pillow front right sides together. Sew your pillow back to the pillow front using a 1/4″ seam allowance. *NOTE: if using the same zipper method as I did, be sure to open your zipper at least half way before sewing the two sides of the pillow together. Finally, turn your pillow cover right side out and press the side seams well.
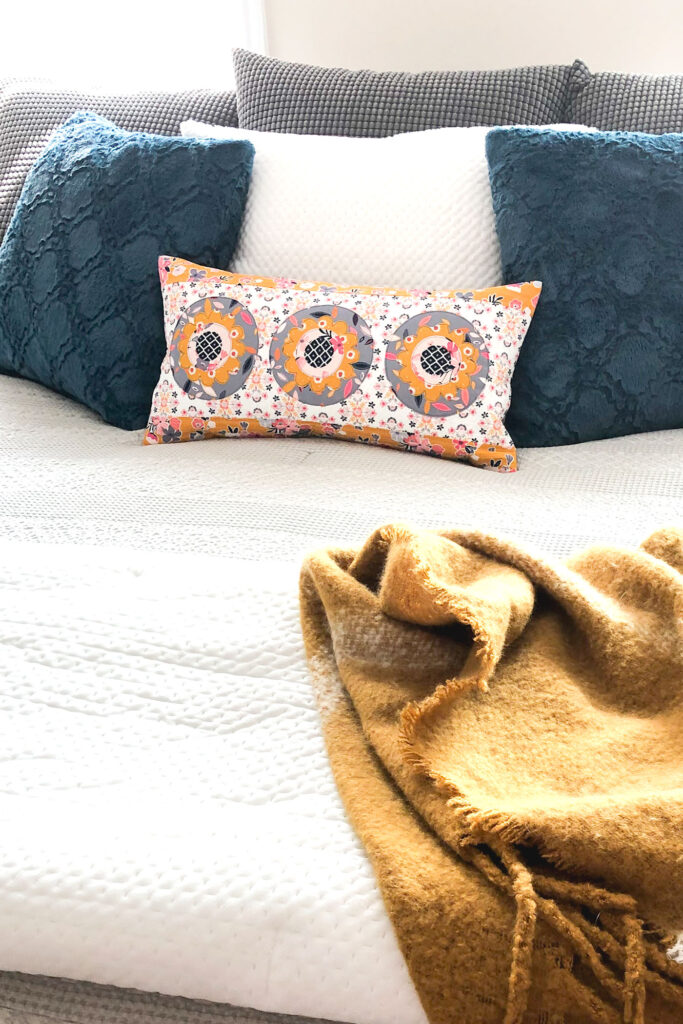
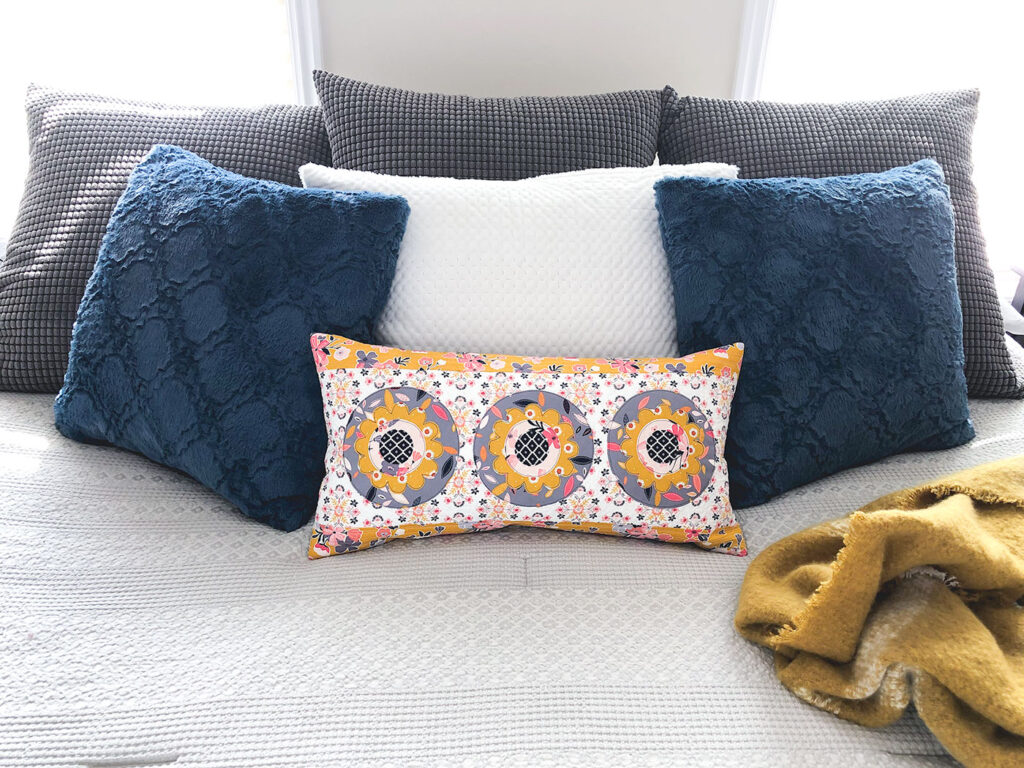
It is absolutely lovely on my bed. I couldn’t be more pleased!
If you love the look of this lumbar pillow, you may want to check out the other covers I have sewn for it:
This bloom cover also uses raw-edge applique and is a simple and pretty make.
This tassel pillow cover has so much fun texture. Change out the colors to match your decor or holiday.


Golden Aster – Raw Edge Applique Lumbar Pillow + Tutorial! – Riley Blake Designs
September 16, 2020 at 3:17 pm[…] stop on our Golden Aster Project Tour takes us to AMEROONIE DESIGNS, where Amy is sharing her beautiful Raw Edge Applique Lumbar Pillow featuring fabric from the brand […]